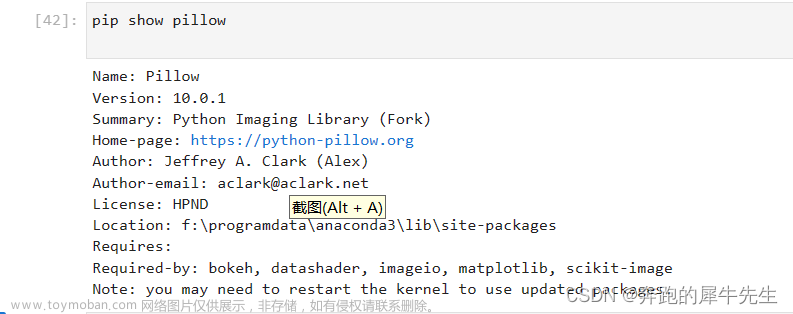
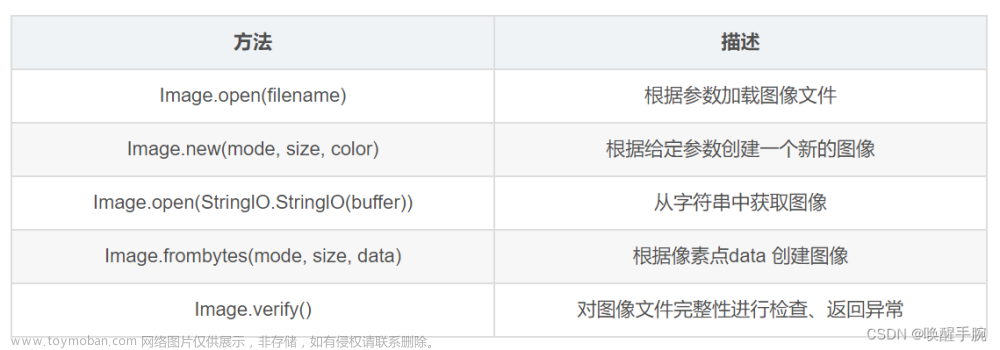
Python中的PIL(Python Imaging Library,已更名为Pillow)是一个功能强大的图像处理库。以下是一些常用的PIL功能及相应的代码示例:
1. 打开和保存图像:
from PIL import Image

# 打开图像
image = Image.open("example.jpg")

# 保存图像
image.save("example_saved.jpg")
2. 显示图像:
from PIL import Image

image = Image.open("example.jpg")
image.show()

文章来源:https://www.toymoban.com/news/detail-758461.html
3. 图像尺寸调整(resize):
from PIL import Image

image = Image.open("example.jpg")

# 修改图像尺寸
new_size = (width, height)
resized_image = image.resize(new_size)
resized_image.save("example_resized.jpg")
4. 图像旋转:
from PIL import Image

image = Image.open("example.jpg")

# 旋转图像
rotated_image = image.rotate(45)  # 旋转45度
rotated_image.save("example_rotated.jpg")
5. 图像裁剪:
from PIL import Image

image = Image.open("example.jpg")

# 裁剪图像
crop_box = (left, upper, right, lower)
cropped_image = image.crop(crop_box)
cropped_image.save("example_cropped.jpg")
6. 图像格式转换:
from PIL import Image

image = Image.open("example.jpg")

# 转换为PNG格式
image.save("example_converted.png", "PNG")
7. 为图像添加文字:
from PIL import Image, ImageDraw, ImageFont

image = Image.open("example.jpg")
draw = ImageDraw.Draw(image)

# 设置字体和大小
font = ImageFont.truetype("arial.ttf", 30)

# 在图像上添加文字
position = (50, 50)
text = "Hello, PIL!"
draw.text(position, text, font=font, fill=(255, 255, 255))

image.save("example_text.jpg")
8. 合并图像:
from PIL import Image

image1 = Image.open("example1.jpg")
image2 = Image.open("example2.jpg")

# 合并图像
merged_image = Image.blend(image1, image2, alpha=0.5)
merged_image.save("example_merged.jpg")
9. 调整图像亮度:
from PIL import Image, ImageEnhance

image = Image.open("example.jpg")

# 调整亮度
enhancer = ImageEnhance.Brightness(image)
brightness_factor = 1.5  # 增加亮度
brighter_image = enhancer.enhance(brightness_factor)
brighter_image.save("example_brightness.jpg")

10. 转换图像为黑白:
from PIL import Image

image = Image.open("example.jpg")

# 转换为黑白
black_and_white_image = image.convert("L")
black_and_white_image.save("example_black_and_white.jpg")

11. 图像水平翻转:
from PIL import Image

image = Image.open("example.jpg")

# 水平翻转
flipped_image = image.transpose(Image.FLIP_LEFT_RIGHT)
flipped_image.save("example_flipped.jpg")

12. 图像滤镜(模糊):
from PIL import Image, ImageFilter

image = Image.open("example.jpg")

# 应用模糊滤镜
blurred_image = image.filter(ImageFilter.BLUR)
blurred_image.save("example_blurred.jpg")

13. 组合多张图像成拼图:
from PIL import Image

image1 = Image.open("example1.jpg")
image2 = Image.open("example2.jpg")
image3 = Image.open("example3.jpg")
image4 = Image.open("example4.jpg")

# 创建一个新的空白图像,用于存放拼图
output_image = Image.new("RGB", (image1.width * 2, image1.height * 2))

# 将四张图像拼接到新图像中
output_image.paste(image1, (0, 0))
output_image.paste(image2, (image1.width, 0))
output_image.paste(image3, (0, image1.height))
output_image.paste(image4, (image1.width, image1.height))

output_image.save("example_collage.jpg")
14. 生成缩略图:
from PIL import Image

image = Image.open("example.jpg")

# 生成缩略图
thumbnail_size = (100, 100)
image.thumbnail(thumbnail_size)

image.save("example_thumbnail.jpg")

15.获取并修改像素值:
from PIL import Image

image = Image.open("example.jpg")

# 获取像素值
x, y = 10, 10
pixel_value = image.getpixel((x, y))
print(f"Pixel value at ({x}, {y}): {pixel_value}")

# 修改像素值
new_pixel_value = (255, 0, 0)  # 设置为红色
image.putpixel((x, y), new_pixel_value)

image.save("example_modified.jpg")
16. 图像色彩通道分离和合并:
from PIL import Image

image = Image.open("example.jpg")

# 分离色彩通道
red_channel, green_channel, blue_channel = image.split()

# 合并色彩通道
merged_image = Image.merge("RGB", (blue_channel, green_channel, red_channel))

merged_image.save("example_swapped_channels.jpg")

17. 图像透明度调整:
from PIL import Image, ImageEnhance

image = Image.open("example.png").convert("RGBA")

# 调整透明度
enhancer = ImageEnhance.Brightness(image.split()[3])
alpha_factor = 0.5  # 减少透明度
alpha_channel = enhancer.enhance(alpha_factor)
image.putalpha(alpha_channel)

image.save("example_transparency.png")
18. 图像加框:
from PIL import Image, ImageOps

image = Image.open("example.jpg")

# 为图像添加边框
border_color = (255, 0, 255)  # 紫色
border_width = 10
bordered_image = ImageOps.expand(image, border=border_width, fill=border_color)

bordered_image.save("example_bordered.jpg")

19. 圆形头像裁剪:
from PIL import Image, ImageDraw

image = Image.open("example.jpg")
output_size = (200, 200)

# 调整图片大小
image.thumbnail(output_size)

# 创建圆形遮罩层
mask = Image.new("L", output_size, 0)
draw = ImageDraw.Draw(mask)
draw.ellipse((0, 0, output_size[0], output_size[1]), fill=255)

# 应用圆形遮罩层
circle_avatar = Image.new("RGBA", output_size, (0, 0, 0, 0))
circle_avatar.paste(image, (0, 0), mask)

circle_avatar.save("example_circle_avatar.png")

20. 图像直方图:
from PIL import Image

image = Image.open("example.jpg")

# 计算图像直方图
histogram = image.histogram()

# 输出RGB通道的直方图
red_hist = histogram[0:256]
green_hist = histogram[256:512]
blue_hist = histogram[512:768]

print("Red channel histogram:", red_hist)
print("Green channel histogram:", green_hist)
print("Blue channel histogram:", blue_hist)
21. 图像的灰度直方图均衡化:
from PIL import Image, ImageOps

image = Image.open("example.jpg")

# 灰度直方图均衡化
equalized_image = ImageOps.equalize(image.convert("L"))

equalized_image.save("example_equalized.jpg")

22. 图像反相处理:
from PIL import Image, ImageOps

image = Image.open("example.jpg")

# 反相处理
inverted_image = ImageOps.invert(image)

inverted_image.save("example_inverted.jpg")

23. 图像像素化:
from PIL import Image

image = Image.open("example.jpg")

# 设置像素化程度
pixel_size = 10

# 调整图像大小以实现像素化
small_image = image.resize((image.width // pixel_size, image.height // pixel_size), Image.NEAREST)
pixelated_image = small_image.resize(image.size, Image.NEAREST)

pixelated_image.save("example_pixelated.jpg")

24. 图像的高斯模糊:
from PIL import Image, ImageFilter

image = Image.open("example.jpg")

# 应用高斯模糊滤镜
radius = 5
gaussian_blurred_image = image.filter(ImageFilter.GaussianBlur(radius))

gaussian_blurred_image.save("example_gaussian_blur.jpg")

25. 图像锐化:
from PIL import Image, ImageFilter

image = Image.open("example.jpg")

# 应用锐化滤镜
sharpened_image = image.filter(ImageFilter.SHARPEN)

sharpened_image.save("example_sharpened.jpg")

以上是 PIL 库的一些常用方法。文章来源地址https://www.toymoban.com/news/detail-758461.html
到了这里,关于Python中PIL库的常用用法示例的文章就介绍完了。如果您还想了解更多内容,请在右上角搜索TOY模板网以前的文章或继续浏览下面的相关文章,希望大家以后多多支持TOY模板网!


