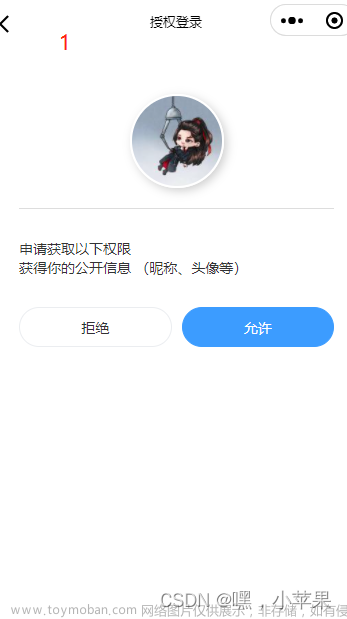
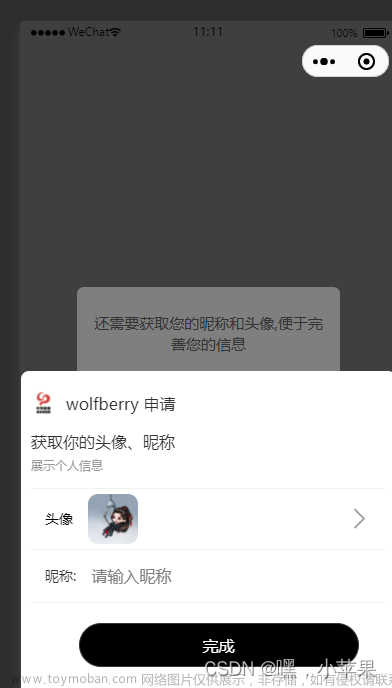
实现效果如下:


首先使用uni.login获取用户登录凭证code:
官方代码:
uni.login({
  provider: 'weixin', //使用微信登录
  success: function (loginRes) {
    console.log(loginRes.authResult);
  }
});
success返回参数如下:

头像选择:
需要将 button 组件 open-type 的值设置为 chooseAvatar,当用户选择需要使用的头像之后,可以通过 bindchooseavatar 事件回调获取到头像信息的临时路径。
从基础库2.24.4版本起,若用户上传的图片未通过安全监测,不触发bindchooseavatar 事件。
昵称填写:
需要将 input 组件 type 的值设置为 nickname,当用户在此input进行输入时,键盘上方会展示微信昵称。
从基础库2.24.4版本起,在onBlur 事件触发时,微信将异步对用户输入的内容进行安全监测,若未通过安全监测,微信将清空用户输入的内容,建议开发者通过 form 中form-type 为submit 的button 组件收集用户输入的内容。
官方代码如下:文章来源:https://www.toymoban.com/news/detail-759475.html
<button class="avatar-wrapper" open-type="chooseAvatar" bind:chooseavatar="onChooseAvatar">
  <image class="avatar" src="{{avatarUrl}}"></image>
</button>
<input type="nickname" class="weui-input" placeholder="请输入昵称"/>


const defaultAvatarUrl = 'https://mmbiz.qpic.cn/mmbiz/icTdbqWNOwNRna42FI242Lcia07jQodd2FJGIYQfG0LAJGFxM4FbnQP6yfMxBgJ0F3YRqJCJ1aPAK2dQagdusBZg/0'

Page({
  data: {
    avatarUrl: defaultAvatarUrl,
  },
  onChooseAvatar(e) {
    const { avatarUrl } = e.detail
    this.setData({
      avatarUrl,
    })
  }
})附上我的login页面完整代码:文章来源地址https://www.toymoban.com/news/detail-759475.html
<template>
  <view class="container">
    <button class="avatar-wrapper" open-type="chooseAvatar" @chooseavatar="onChooseAvatar">
      <image class="avatar" :src="avatarUrl"></image>
    </button>
    <view class="petName">
      <view class="petName_name">昵称</view>
      <input type="nickname" v-model="nickname" class="weui-input" placeholder="请输入昵称" @input="onInputNickname" />
    </view>
    <button class="loginBtn" form-type="submit" @tap="toIndex">登 录</button>
  </view>
</template>

<script>
  import {
    apiBaseUrl
  } from '../../main.js';
  // 引入自定义的动态tabBar
  import {
    publicBar,
    selfBar
  } from '@/utils/tabBar.js'
  export default {
    data() {
      return {
        code: '',
        nickname: '',
        avatarUrl: '',
      };
    },
    onReady() {
      const defaultAvatarUrl =
        'https://mmbiz.qpic.cn/mmbiz/icTdbqWNOwNRna42FI242Lcia07jQodd2FJGIYQfG0LAJGFxM4FbnQP6yfMxBgJ0F3YRqJCJ1aPAK2dQagdusBZg/0'
      this.avatarUrl = defaultAvatarUrl
    },
    methods: {
      // 选择头像
      onChooseAvatar(e) {
        const {
          avatarUrl
        } = e.detail;
        this.avatarUrl = avatarUrl;
      },
      // 输入框输入或选择微信昵称
      onInputNickname(event) {
        this.nickname = event.target.value;
      },

      toIndex() {
        uni.login({
          provider: 'weixin',
          success: (loginRes) => {
            console.log('code为:', loginRes.code);
            this.code = loginRes.code;
            uni.setStorageSync('nickname', this.nickname);//存储用户名
            uni.setStorageSync('avatarUrl', this.avatarUrl);//存储头像地址
            uni.request({
              url: apiBaseUrl + '/vx/vxLogin',
              method: 'POST',
              data: {
                code: this.code,
                openName: this.nickname
              },
              success: (res) => {
                console.log(res);
                const accessToken = res.data.data.access_token;
                uni.setStorageSync('accessToken', accessToken);
                // 如果是普通用户, 即未绑定openId, 就渲染publicBar, 只显示在线报修和我的报修, 并跳转到在线报修页面
                if (accessToken === '普通用户') {
                  this.$store.dispatch('changeTabbar', publicBar);
                  uni.switchTab({
                    url: '/pages/onlrepairs/onlrepairs'
                  })
                }
                // 如果绑定了openId, 就渲染selfBar, 显示首页、 巡检、 工单, 并跳转到首页
                else {
                  this.$store.dispatch('changeTabbar', selfBar);
                  uni.switchTab({
                    url: '/pages/home/home'
                  })
                }
              }
            })
          }
        });
      }

    },
  };
</script>

<style lang="scss">
  .container {
    width: 100%;
    height: 100%;
    display: flex;
    flex-direction: column;
    align-items: center;
    justify-content: center;
    padding: 260rpx 0 300rpx 0;
    box-sizing: border-box;

    .avatar-wrapper {
      width: 60px;
      height: 60px;
      padding: 0;

      .avatar {
        width: 60px;
        height: 60px;
      }
    }

    .petName {
      display: flex;
      align-items: center;
      padding: 10px;
      margin-top: 20px;
      border-top: 1px solid #e8e8e8;
      border-bottom: 1px solid #e8e8e8;
      margin-bottom: 30px;

      .petName_name {
        margin-right: 30px;
      }
    }

    .loginBtn {
      width: 70%;
      color: #fff;
      border-radius: 35px;
      background: #226be4;
    }

  }
</style>
到了这里,关于Uniapp写微信小程序时,如何获取用户头像和昵称使用微信用户信息登录?的文章就介绍完了。如果您还想了解更多内容,请在右上角搜索TOY模板网以前的文章或继续浏览下面的相关文章,希望大家以后多多支持TOY模板网!


