什么是MQTT
简介
MQTT(英文全称Message Queuing Telemetry Transport,消息队列遥测传输协议)。
MQTT是一种轻量级的协议,适用于需要较小代码占用空间或网络带宽非常宝贵的远程连接,是专为受限设备和低带宽、高延迟或不可靠的网络而设计。这些原则也使该协议成为新兴的“机器到机器”(M2M)或物联网(IoT)世界的连接设备,以及带宽和电池功率非常高的移动应用的理想选择。
主要模式及图示
MQTT的主要模式是发布/订阅(PUBLISH/SUBSCRIBE)模式,简单图示如下:

服务器(server)在MQTT中被称作消息服务器(Broker),而客户端(client)可以是发布者(publisher)也可以是订阅者(subscriber),client也可以同时是publisher和subscriber。
在发布者发布主题(topic)之后,订阅者就可以订阅该主题,之后就会收到所订阅主题的消息(payload),消息的内容叫做负载(payload)。一个发布者可以发布多个主题,一个订阅者同样可以订阅多个主题,一个主题可以有多个订阅者。事实上这种模式解耦了传统的client跟server的关系。不必预先知道对方的存在(ip/port), 不必同时运行。
MQTT特点
开放消息协议,简单易实现
发布订阅模式,一对多消息发布
基于TCP/IP网络连接,提供有序,无损,双向连接。(事实上也有以UDP实现的,比如MQTT-SN)
1字节固定报头,2字节心跳报文,负载小,最小化传输开销和协议交换,有效减少网络流量。
消息QoS支持,可靠传输保证
QoS=0:“至多一次”,消息发布完全依赖底层TCP/IP网络。会发生消息丢失或重复。这一级别可用于如下情况,环境传感器数据,丢失一次读记录无所谓,因为不久后还会有第二次发送。这一种方式主要普通APP的推送,倘若你的智能设备在消息推送时未联网,推送过去没收到,再次联网也就收不到了。
QoS=1:“至少—次”,确保消息到达,但消息重复可能会发生。
QoS=2:“只有一次”,确保消息到达一次。在一些要求比较严格的计费系统中,可以使用此级别。在计费系统中,消息重复或丢失会导致不正确的结果。这种最高质量的消息发布服务还可以用于即时通讯类的APP的推送,确保用户收到且只会收到一次。
主题分级
主题可以分级,以“/”隔开,比如 a/b/c/d
Suscriber在订阅主题的时候,也可以包含通配符,通配符有两种“+”和“#”。+表示一个任意层级,比如 a/+,可以同时匹配a/b或者a/c,但匹配不到a/b/c,而#表示往后多个层级,比如a/#可以匹配a/b/c/d。+可以放在中间层级,比如a/+/c,而#只能放在末尾。
Publisher发布主题的时候只能指定一个清晰的主题名,具体到a/b/c/d某个主题,不能以通配符的形式指定。
环境搭建
Broker搭建
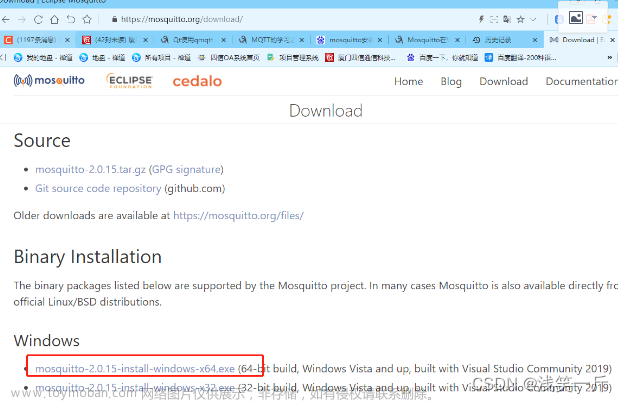
选择比较常用的emqx作为Broker环境搭建:
登录到https://www.emqx.io/zh/downloads?os=Ubuntu 选择你对应的服务器版本,我使用的是ubuntu22.4
登录进网页中,会显示对应版本的指令,在服务器中依次执行指令安装并启动emqx:
wget https://www.emqx.com/zh/downloads/broker/5.0.20/emqx-5.0.20-ubuntu22.04-amd64.deb
sudo apt install ./emqx-5.0.20-ubuntu22.04-amd64.deb
sudo systemctl start emqx
创建账户,用户名和密码替换为你自己想设置的值:
sudo emqx ctl admins add 用户名 密码使用创建的用户名密码登录到emqx,端口一般都是指定18083
http://服务器IP:18083
我的是本地服务器:http://192.168.200.128:18083/#/login?to=/dashboard/overview

登陆之后可以查看各种信息,后续写代码的时候再细看:

Python下mqtt环境安装
我们使用paho-mqtt:
pip install paho-mqttclient代码实现
创建工程目录并新建两个py文件:

查看mqtt client类初始化参数:
def __init__(self, client_id="", clean_session=None, userdata=None,
                 protocol=MQTTv311, transport="tcp", reconnect_on_failure=True):
        """client_id is the unique client id string used when connecting to the
        broker. If client_id is zero length or None, then the behaviour is
        defined by which protocol version is in use. If using MQTT v3.1.1, then
        a zero length client id will be sent to the broker and the broker will
        generate a random for the client. If using MQTT v3.1 then an id will be
        randomly generated. In both cases, clean_session must be True. If this
        is not the case a ValueError will be raised.

        clean_session is a boolean that determines the client type. If True,
        the broker will remove all information about this client when it
        disconnects. If False, the client is a persistent client and
        subscription information and queued messages will be retained when the
        client disconnects.
        Note that a client will never discard its own outgoing messages on
        disconnect. Calling connect() or reconnect() will cause the messages to
        be resent.  Use reinitialise() to reset a client to its original state.
        The clean_session argument only applies to MQTT versions v3.1.1 and v3.1.
        It is not accepted if the MQTT version is v5.0 - use the clean_start
        argument on connect() instead.

        userdata is user defined data of any type that is passed as the "userdata"
        parameter to callbacks. It may be updated at a later point with the
        user_data_set() function.

        The protocol argument allows explicit setting of the MQTT version to
        use for this client. Can be paho.mqtt.client.MQTTv311 (v3.1.1),
        paho.mqtt.client.MQTTv31 (v3.1) or paho.mqtt.client.MQTTv5 (v5.0),
        with the default being v3.1.1.

        Set transport to "websockets" to use WebSockets as the transport
        mechanism. Set to "tcp" to use raw TCP, which is the default.
        """
我们可以试着自定义client_id,其他的使用默认即可。
clean_session(bool, disconnect后是否清除数据,默认为True)、
user_data(str, 用户自定义数据)
protocol(enum,协议版本为MQTTv311或者MQTTv5,默认为MQTTv311)
transport(tcp或者websocket,默认为tcp)
reconnect_on_failure(bool, connect失败后是否自动重新connect,默认为True)
on_connect函数是client connect之后的回调函数,我们可以自定义回调函数
def on_connect(client, userdata, flags, rc):
        print("Connection returned " + str(rc))


    **IMPORTANT** the required function signature for a callback can differ
    depending on whether you are using MQTT v5 or MQTT v3.1.1/v3.1. See the
    documentation for each callback.

    All of the callbacks as described below have a "client" and an "userdata"
    argument. "client" is the Client instance that is calling the callback.
    "userdata" is user data of any type and can be set when creating a new client
    instance or with user_data_set(userdata).

    If you wish to suppress exceptions within a callback, you should set
    `client.suppress_exceptions = True`

    The callbacks are listed below, documentation for each of them can be found
    at the same function name:

    on_connect, on_connect_fail, on_disconnect, on_message, on_publish,
    on_subscribe, on_unsubscribe, on_log, on_socket_open, on_socket_close,
    on_socket_register_write, on_socket_unregister_write
    """
查看on_connect的说明,需要多个参数:
client:client对象实例
userdata:自定义数据,创建client时传入的
flags:broker回应的标记
rc:返回值,返回0为成功连接
基本的信息了解清楚后,尝试写Publisher例程代码,主函数中简单地死循环发布topic,这样订阅者就可以持续收到topic的payload message:
import random
import time
from paho.mqtt import client as mqtt_client

class Mqtt_Publisher:
    def __init__(self, broker_ip='192.168.200.128', client_prefix="pub_", port=1883, timeout=60):
        self.broker_ip = broker_ip #server ip
        self.port = port #network port
        self.timeout = timeout #connect timeout time
        self.connected = False
        self.client_id = client_prefix + str(random.randint(10000,99999)) #create an random integer as client id
        self.start()

    def start(self):
        self.client = mqtt_client.Client(self.client_id)
        self.client.on_connect = self.on_connect
        self.client.connect(self.broker_ip, self.port, self.timeout)
        self.client.loop_start() #default loop to try connection forever until you call disconnect()

    def on_connect(self, client, userdata, flags, rc):
        if rc == 0:
            self.connected = True
        else:
            raise Exception("Failed to connect mqtt server")

    def publish(self, topic, payload, qos=0):
        if self.connected:
            return self.client.publish(topic, payload=payload, qos=qos)
        else:
            raise Exception("mqtt server not connected, cannot publish topic")

if __name__=='__main__':
    pub=Mqtt_Publisher()
    while not pub.connected: #waiting for client connection
        time.sleep(0.05)
    print("publisher connect successfully")
    while True:
        pub.publish('topic_test','this is a test message')
        pub.publish('topic_test1/a','this is level2 testa')
        pub.publish('topic_test1/b','this is level2 testb')
        pub.publish('topic_test1/a/c','this is level3 testc')
        time.sleep(1)
虽然publish了四次,事实上这是两个topic,只是第二个topic分成了多个级别。
执行代码,查看broker:


可以看到client的连接状态,已经有一个publisher连接了,并且每秒有4个消息。
接着编写Subscriber的代码:
需要多一个修改publish接口为subscribe接口,另外额外需要一个回调函数on_message处理topic发出的payload, 查看on_message_callback的示例:
on_message_callback(client, userdata, message)
    client:     the client instance for this callback
    userdata:   the private user data as set in Client() or userdata_set()
    message:    an instance of MQTTMessage.
                This is a class with members topic, payload, qos, retain.
我们简单地实现为打印出payload即可:
 def on_message(self, client, userdata, msg): #after subscribing topic, will get topic message, this is the callback function
        print(msg.payload.decode('utf-8')) #simply print message
上subscriber完整代码:
import random
import time
from paho.mqtt import client as mqtt_client

class Mqtt_Subscriber:
    def __init__(self, broker_ip='192.168.200.128', client_prefix="sub_", port=1883, timeout=60, topic_name="topic_test"):
        self.broker_ip = broker_ip #server ip
        self.port = port #network port
        self.timeout = timeout #connect timeout time
        self.topic_name = topic_name
        self.connected = False
        self.client_id = client_prefix + str(random.randint(10000,99999)) #create an random integer as client id
        self.start()

    def start(self):
        self.client = mqtt_client.Client(self.client_id)
        self.client.on_connect = self.on_connect
        self.client.on_message = self.on_message
        self.client.connect(self.broker_ip, self.port, self.timeout)
        self.client.subscribe(self.topic_name)
        self.client.loop_start() #default loop to try connection forever until you call disconnect()

    def on_connect(self, client, userdata, flags, rc):
        if rc == 0:
            self.connected = True
        else:
            raise Exception("Failed to connect mqtt server")

    def on_message(self, client, userdata, msg): #after subscribing topic, will get topic message, this is the callback function
        print(msg.payload.decode('utf-8')) #simply print message

    def subscribe(self, topic, qos=0):
        if self.connected:
            return self.client.subscribe(topic, qos=qos, options=None, properties=None)
        else:
            raise Exception("mqtt server not connected, cannot publish topic")

if __name__=='__main__':
    sub=Mqtt_Subscriber(topic_name="topic_test1")
    while not sub.connected: #waiting for client connection
        time.sleep(0.05)
    print("subsciber connect successfully")
    sub.subscribe(topic="topic_test")
    while True:
        time.sleep(1)
执行subscriber,发现topic_test1没有指定到下一级别,并不能成功订阅,必须指定具体的级别:

修改代码为“+”通配符:
if __name__=='__main__':
    sub=Mqtt_Subscriber(topic_name="topic_test1/+")
    while not sub.connected: #waiting for client connection
        time.sleep(0.05)
    print("subsciber connect successfully")
    sub.subscribe(topic="topic_test")
    while True:
        time.sleep(1)
可以看到订阅到了test1/a和test1/b 还有test:

测试通配符“#”:
if __name__=='__main__':
    sub=Mqtt_Subscriber(topic_name="topic_test1/#")
    while not sub.connected: #waiting for client connection
        time.sleep(0.05)
    print("subsciber connect successfully")
    sub.subscribe(topic="topic_test")
    while True:
        time.sleep(1)
可以看到订阅到所有的topic了。

对应查看broker状态,此时可以看到subsciber和publisher

订阅后也可以看到topic的数量,没有subscribe的时候并不能看到:

思维导图总结

代码已添加到github:https://github.com/Sampsin/learning.git文章来源:https://www.toymoban.com/news/detail-761571.html
就到这里。文章来源地址https://www.toymoban.com/news/detail-761571.html
到了这里,关于MQTT概述及环境搭建、python例程的文章就介绍完了。如果您还想了解更多内容,请在右上角搜索TOY模板网以前的文章或继续浏览下面的相关文章,希望大家以后多多支持TOY模板网!


