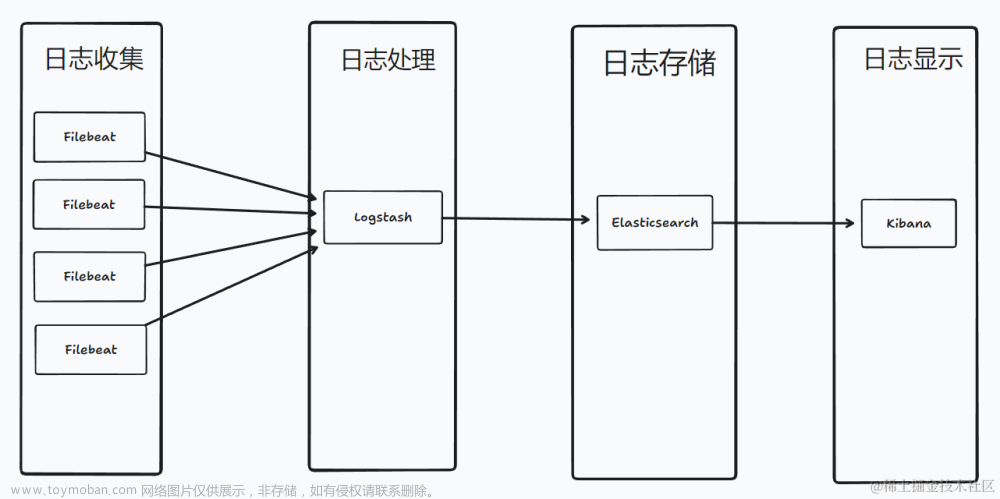
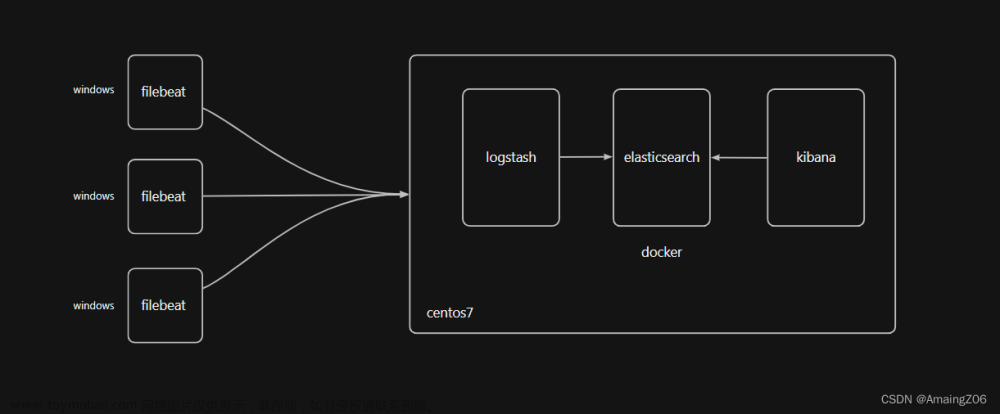
一、介绍
Elasticsearch: 权威指南 | Elastic
二、使用Docker 搭建ES以及Kibana环境
拉取ES以及Kibana镜像:
// es和kibana保持一致,这里选择7.8.1版本
docker pull elasticsearch:7.8.1
docker pull kibana:7.8.1
ES部分搭建:
创建目录、配置文件、其他配置以及启动

1、目录部分:
// 创建配置项目录
-p ES/config
cd ES

// 创建数据存储目录
mkdir data1
mkdir data2
mkdir data3

// 这里是7.8.1版本,所以需要开启data1 data2 data3 777权限
chmod 777 data1 data2 data3
2、端口部分:
// 开启防火墙端口
firewall-cmd --add-port=9300/tcp
firewall-cmd --add-port=9301/tcp
firewall-cmd --add-port=9302/tcp
3、配置文件创建
// 使用vim命令分别创建es1.yml、es2.yml、es3.yml配置

// es1
cluster.name: elasticsearch-cluster
node.name: es-node1
network.bind_host: 0.0.0.0
network.publish_host: 宿主机IP
http.port: 9200
transport.tcp.port: 9300
http.cors.enabled: true
http.cors.allow-origin: "*"
node.master: true
node.data: true
discovery.zen.ping.unicast.hosts: ["宿主机IP:9300","宿主机IP","宿主机IP:9302"]
discovery.zen.minimum_master_nodes: 2

// 指定主节点,可选择性配置
cluster.initial_master_nodes: es-node1

// es2
cluster.name: elasticsearch-cluster
node.name: es-node2
network.bind_host: 0.0.0.0
network.publish_host: 宿主机IP
http.port: 9201
transport.tcp.port: 9301
http.cors.enabled: true
http.cors.allow-origin: "*"
node.master: true
node.data: true
discovery.zen.ping.unicast.hosts: ["宿主机IP:9300","宿主机IP","宿主机IP:9302"]
discovery.zen.minimum_master_nodes: 2

// es3
cluster.name: elasticsearch-cluster
node.name: es-node3
network.bind_host: 0.0.0.0
network.publish_host: 宿主机IP
http.port: 9202
transport.tcp.port: 9302
http.cors.enabled: true
http.cors.allow-origin: "*"
node.master: true
node.data: true
discovery.zen.ping.unicast.hosts: ["宿主机IP:9300","宿主机IP","宿主机IP:9302"]
discovery.zen.minimum_master_nodes: 2
4、其他注意事项
// 由于ES运行时有内存不足的问题,这里需要增加虚拟机的预设内存
vim /etc/sysctl.conf
// 加入配置
vm.max_map_count=262144
// 启用配置
sysctl -p
5、启动容器
docker run -e ES_JAVA_OPTS="-Xms256m -Xmx256m" -d -p 9200:9200 -p 9300:9300 -v /home/soft/ES/config/es1.yml:/usr/share/elasticsearch/config/elasticsearch.yml -v /home/soft/ES/data1:/usr/share/elasticsearch/data --name ES01 elasticsearch:7.8.1

docker run -e ES_JAVA_OPTS="-Xms256m -Xmx256m" -d -p 9201:9201 -p 9301:9301 -v /home/soft/ES/config/es2.yml:/usr/share/elasticsearch/config/elasticsearch.yml -v /home/soft/ES/data2:/usr/share/elasticsearch/data --name ES02 elasticsearch:7.8.1

docker run -e ES_JAVA_OPTS="-Xms256m -Xmx256m" -d -p 9202:9202 -p 9302:9302 -v /home/soft/ES/config/es3.yml:/usr/share/elasticsearch/config/elasticsearch.yml -v /home/soft/ES/data3:/usr/share/elasticsearch/data --name ES03 elasticsearch:7.8.1
访问http://宿主机IP:9200/_cat/nodes?pretty
节点名称带表示为主节点*,这里作示范仅启动2个容器

Kibana部分搭建:
创建目录、配置文件、其他配置以及启动

1、配置文件创建
// 目录、配置文件创建同ES,不再进行说明

// kibana.yml配置

server.name: kibana
server.host: "0.0.0.0"
elasticsearch.hosts: ["http://宿主机IP:9200"]
2、启动容器
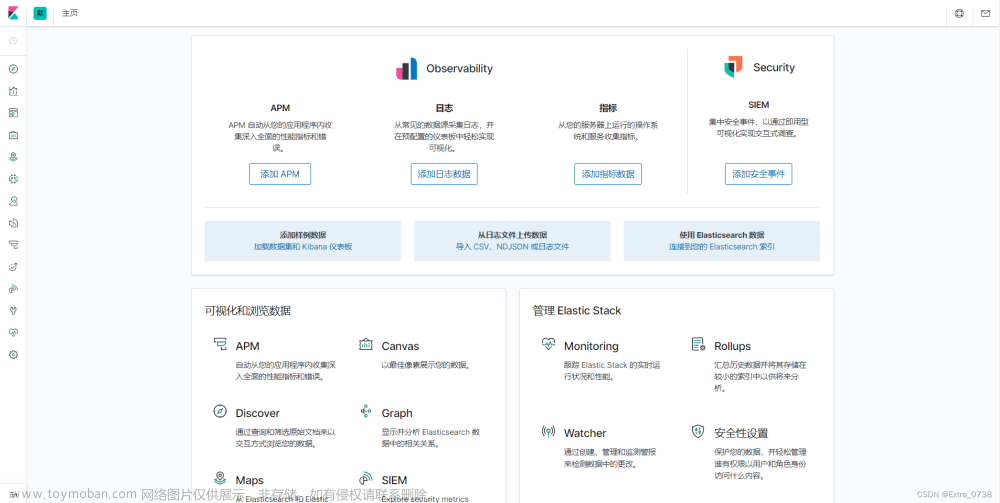
docker run --name kibana --link=ES01:ES01 --privileged=true -p 5601:5601 -v /home/kibana/kibana.yml:/usr/share/kibana/config/kibana.yml -d kibana:7.8.1访问Elastichttp://宿主机IP:5601/app/kibana#/homeElastic
三、Kibana基本使用
点击控制台进行基本使用

新增

查询

其他使用可参考 ES基础语法整理
Es基础语法整理_es 语法_Q z1997的博客-CSDN博客
四、ES基本使用
添加依赖
<dependency>
    <groupId>org.elasticsearch</groupId>
    <artifactId>elasticsearch</artifactId>
    <version>7.8.1</version>
</dependency>

<dependency>
    <groupId>org.elasticsearch.client</groupId>
    <artifactId>elasticsearch-rest-client</artifactId>
    <version>7.8.1</version>
</dependency>

<dependency>
    <groupId>org.elasticsearch.client</groupId>
    <artifactId>elasticsearch-rest-high-level-client</artifactId>
    <version>7.8.1</version>
</dependency>
测试类
public class ESTest {


    @Test
    public void testCreateIndex() throws IOException {
        RestHighLevelClient client = new RestHighLevelClient(
                RestClient.builder(
                        new HttpHost("124.222.24.128", 9200, "http")));

        // 创建索引请求
        CreateIndexRequest request = new CreateIndexRequest("my_test");
        // 客户端执行请求IndicesClient,执行create方法创建索引,请求后获得响应
        CreateIndexResponse response=
                client.indices().create(request, RequestOptions.DEFAULT);
        System.out.println(response);
    }

    @Test
    public void testExistIndex() throws IOException {
        RestHighLevelClient client = new RestHighLevelClient(
                RestClient.builder(
                        new HttpHost("124.222.24.128", 9200, "http")));

        // 查询索引请求
        GetIndexRequest request = new GetIndexRequest("hotel");
        // 执行exists方法判断是否存在
        boolean exists = client.indices().exists(request, RequestOptions.DEFAULT);
        System.out.println(exists);
    }

    @Test
    public void testDeleteIndex() throws IOException {
        RestHighLevelClient client = new RestHighLevelClient(
                RestClient.builder(
                        new HttpHost("124.222.24.128", 9200, "http")));

        // 删除索引请求
        DeleteIndexRequest request=new DeleteIndexRequest("my_test");
        // 执行delete方法删除指定索引
        AcknowledgedResponse delete = client.indices().delete(request, RequestOptions.DEFAULT);
        System.out.println(delete.isAcknowledged());
    }


    @Test
    public void testSearch() throws IOException {
        RestHighLevelClient client = new RestHighLevelClient(
                RestClient.builder(
                        new HttpHost("124.222.24.128", 9200, "http")));
        SearchRequest searchRequest = new SearchRequest("hotel"); //里面可以放多个索引
        SearchSourceBuilder sourceBuilder = new SearchSourceBuilder(); //构造搜索条件

        // 此处可以使用QueryBuilders工具类中的方法
        // 查询所有
        sourceBuilder.query(QueryBuilders.matchAllQuery());
        // 查询city中含有青岛的
        sourceBuilder.query(QueryBuilders.multiMatchQuery("青岛","city"));
        // 分页查询
        sourceBuilder.from(0).size(5);
        // 按照score正序排列
        sourceBuilder.sort(SortBuilders.scoreSort().order(SortOrder.ASC));

        searchRequest.source(sourceBuilder);
        SearchResponse searchResponse = client.search(searchRequest, RequestOptions.DEFAULT);

        // 获取总条数
        System.out.println(searchResponse.getHits().getTotalHits().value);
        // 输出结果数据(如果不设置返回条数,大于10条默认只返回10条)
        SearchHit[] hits = searchResponse.getHits().getHits();
        for (SearchHit hit : hits) {
            Map<String,Object> source = hit.getSourceAsMap();
            System.out.println("index->" + hit.getIndex());
            System.out.println("id->" + hit.getId());
            for(Map.Entry<String, Object> s:source.entrySet()){
                System.out.println(s.getKey() + "--" + s.getValue());
            }
        }
    }
}
创建

查询

删除

综合查询

 文章来源:https://www.toymoban.com/news/detail-763370.html
五、ES复杂查询以及封装
持续更新,敬请期待文章来源地址https://www.toymoban.com/news/detail-763370.html
到了这里,关于Docker 搭建 ElasticSearch、Kibana 以及基础使用的文章就介绍完了。如果您还想了解更多内容,请在右上角搜索TOY模板网以前的文章或继续浏览下面的相关文章,希望大家以后多多支持TOY模板网!


