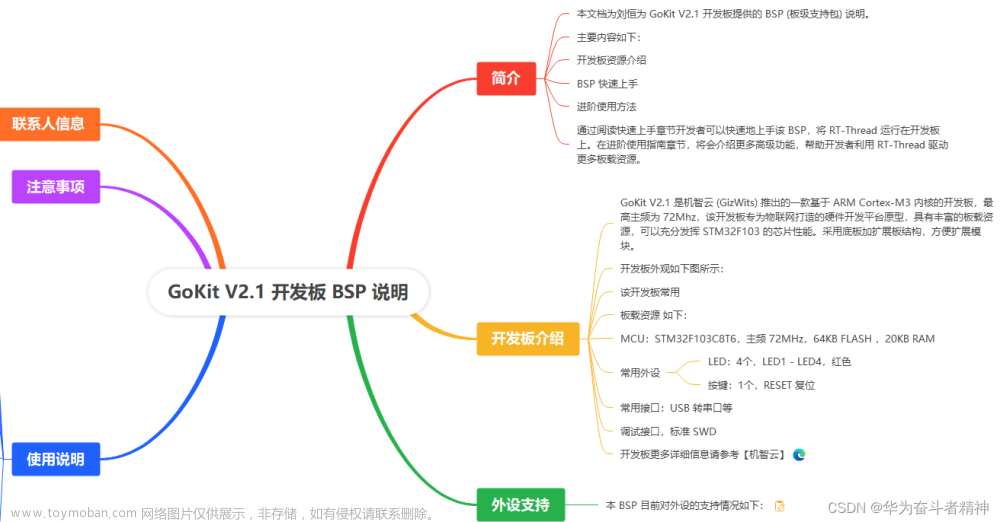
RT-Thread STM32L431 Bear-Pi开发板BSP说明

简介
本文档为Bear-Pi 开发板的 BSP (板级支持包) 说明。
主要内容如下:
- 开发板资源介绍
- BSP 快速上手
- 进阶使用方法
通过阅读快速上手章节开发者可以快速地上手该 BSP,将 RT-Thread 运行在开发板上。在进阶使用指南章节,将会介绍更多高级功能,帮助开发者利用 RT-Thread 驱动更多板载资源。
开发板介绍
对于 Bear-Pi,内核是 Cortex-M4,这款芯片是低功耗系列,板载 ST-LINK/V2-1 调试器/编程器,迷你尺寸,mirco USB 接口,可数的外设,Arduino™ nano 兼容的接口。
开发板外观如下图所示:
该开发板常用 板载资源 如下:
- MCU:STM32L431RC,主频 80MHz,256KB FLASH ,64KB RAM。
- 常用外设
- SPI FLASH: 8M
- 按键:2个功能键,一个复位按键。
- 支持E53系列传感器案例扩展板
- LCD: 240 * 240 tft
- LED:一个用户LED, 上电指示灯,下载灯。
- 常用接口:USB 支持 3 种不同接口:虚拟 COM 端口、大容量存储和调试端口。
- 调试接口:板载 ST-LINK/V2-1 调试器。
开发板更多详细信息请参考【Bear-Pi 官网】 Bear-Pi。
外设支持
本 BSP 目前对外设的支持情况如下:
| 板载外设 | 支持情况 | 备注 |
|---|---|---|
| 板载 ST-LINK 转串口 | 支持 | UART1 |
| 片上外设 | 支持情况 | 备注 |
| GPIO | 支持 | PA0, PA1… PC15 —> PIN: 0, 1…47 |
| UART | 支持 | UART1 |
使用说明
使用说明分为如下两个章节:
-
快速上手
本章节是为刚接触 RT-Thread 的新手准备的使用说明,遵循简单的步骤即可将 RT-Thread 操作系统运行在该开发板上,看到实验效果 。
-
进阶使用
本章节是为需要在 RT-Thread 操作系统上使用更多开发板资源的开发者准备的。通过使用 ENV 工具对 BSP 进行配置,可以开启更多板载资源,实现更多高级功能。
快速上手
本 BSP 为开发者提供 MDK5 和 IAR 工程,并且支持 GCC 开发环境。下面以 MDK5 开发环境为例,介绍如何将系统运行起来。
硬件连接
使用数据线连接开发板到 PC,打开电源开关。
编译下载
双击 project.uvprojx 文件,打开 MDK5 工程,编译并下载程序到开发板。
工程默认配置使用 ST-LINK 仿真器下载程序,在通过 microUSB 连接开发板的基础上,点击下载按钮即可下载程序到开发板
运行结果
下载程序成功之后,系统会自动运行,观察开发板上 LED 的运行效果,红色 D5、蓝色 LED 会周期性闪烁。
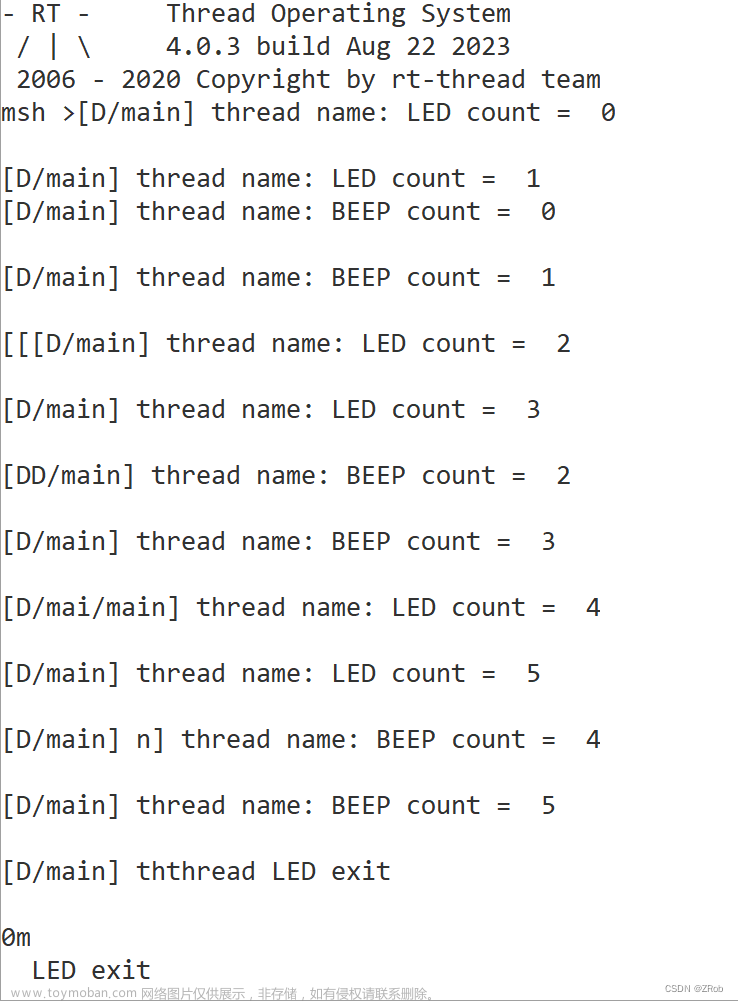
USB 虚拟 COM 端口默认连接串口 1,在终端工具里打开相应的串口(115200-8-1-N),复位设备后,可以看到 RT-Thread 的输出信息:
 \ | /
- RT -     Thread Operating System
 / | \     4.0.3 build Dec 28 2020
 2006 - 2020 Copyright by rt-thread team
---Welcome use BearPi---
msh >
进阶使用
此 BSP 默认只开启了 GPIO 和 串口2 的功能,如果需使用更多高级功能,需要利用 ENV 工具对 BSP 进行配置,步骤如下:
-
在 bsp 下打开 env 工具。
-
输入
menuconfig命令配置工程,配置好之后保存退出。 -
输入
pkgs --update命令更新软件包。 -
输入
scons --target=mdk4/mdk5/iar命令重新生成工程。
本章节更多详细的介绍请参考 STM32 系列 BSP 外设驱动使用教程。
注意事项
- 开机时如果不能打印 RT-Thread 版本信息,请将BSP中串口 GPIO 速率调低
- 开机时如果不能打印 RT-Thread 版本信息,请重新选择 PC 端串口调试软件的串口号
示例代码
…\rt-threadcode\src\ipc.c
/**
 * @brief    This function will try to take a mutex, if the mutex is unavailable, the thread returns immediately.
 *
 * @note     This function is very similar to the rt_mutex_take() function, when the mutex is not available,
 *           except that rt_mutex_trytake() will return immediately without waiting for a timeout
 *           when the mutex is not available.
 *           In other words, rt_mutex_trytake(mutex) has the same effect as rt_mutex_take(mutex, 0).
 *
 * @see      rt_mutex_take()
 *
 * @param    mutex is a pointer to a mutex object.
 *
 * @return   Return the operation status. ONLY When the return value is RT_EOK, the operation is successful.
 *           If the return value is any other values, it means that the mutex take failed.
 */
rt_err_t rt_mutex_trytake(rt_mutex_t mutex)
{
    return rt_mutex_take(mutex, RT_WAITING_NO);
}
RTM_EXPORT(rt_mutex_trytake);


/**
 * @brief    This function will release a mutex. If there is thread suspended on the mutex, the thread will be resumed.
 *
 * @note     If there are threads suspended on this mutex, the first thread in the list of this mutex object
 *           will be resumed, and a thread scheduling (rt_schedule) will be executed.
 *           If no threads are suspended on this mutex, the count value mutex->value of this mutex will increase by 1.
 *
 * @param    mutex is a pointer to a mutex object.
 *
 * @return   Return the operation status. When the return value is RT_EOK, the operation is successful.
 *           If the return value is any other values, it means that the mutex release failed.
 */
rt_err_t rt_mutex_release(rt_mutex_t mutex)
{
    rt_base_t level;
    struct rt_thread *thread;
    rt_bool_t need_schedule;

    /* parameter check */
    RT_ASSERT(mutex != RT_NULL);
    RT_ASSERT(rt_object_get_type(&mutex->parent.parent) == RT_Object_Class_Mutex);

    need_schedule = RT_FALSE;

    /* only thread could release mutex because we need test the ownership */
    RT_DEBUG_IN_THREAD_CONTEXT;

    /* get current thread */
    thread = rt_thread_self();

    level = rt_spin_lock_irqsave(&(mutex->spinlock));

    LOG_D("mutex_release:current thread %s, hold: %d",
          thread->parent.name, mutex->hold);

    RT_OBJECT_HOOK_CALL(rt_object_put_hook, (&(mutex->parent.parent)));

    /* mutex only can be released by owner */
    if (thread != mutex->owner)
    {
        thread->error = -RT_ERROR;
        rt_spin_unlock_irqrestore(&(mutex->spinlock), level);

        return -RT_ERROR;
    }

    /* decrease hold */
    mutex->hold --;
    /* if no hold */
    if (mutex->hold == 0)
    {
        /* remove mutex from thread's taken list */
        rt_list_remove(&mutex->taken_list);

        /* whether change the thread priority */
        if ((mutex->ceiling_priority != 0xFF) || (thread->current_priority == mutex->priority))
        {
            rt_uint8_t priority = 0xff;

            /* get the highest priority in the taken list of thread */
            priority = _thread_get_mutex_priority(thread);

            rt_thread_control(thread,
                              RT_THREAD_CTRL_CHANGE_PRIORITY,
                              &priority);

            need_schedule = RT_TRUE;
        }

        /* wakeup suspended thread */
        if (!rt_list_isempty(&mutex->parent.suspend_thread))
        {
            /* get the first suspended thread */
            struct rt_thread *next_thread = rt_list_entry(mutex->parent.suspend_thread.next,
                                   struct rt_thread,
                                   tlist);

            LOG_D("mutex_release: resume thread: %s",
                  next_thread->parent.name);

            rt_spin_lock(&(next_thread->spinlock));
            /* remove the thread from the suspended list of mutex */
            rt_list_remove(&(next_thread->tlist));

            /* set new owner and put mutex into taken list of thread */
            mutex->owner = next_thread;
            mutex->hold  = 1;
            rt_list_insert_after(&next_thread->taken_object_list, &mutex->taken_list);
            /* cleanup pending object */
            next_thread->pending_object = RT_NULL;
            rt_spin_unlock(&(next_thread->spinlock));
            /* resume thread */
            rt_thread_resume(next_thread);

            /* update mutex priority */
            if (!rt_list_isempty(&(mutex->parent.suspend_thread)))
            {
                struct rt_thread *th;

                th = rt_list_entry(mutex->parent.suspend_thread.next,
                        struct rt_thread,
                        tlist);
                mutex->priority = th->current_priority;
            }
            else
            {
                mutex->priority = 0xff;
            }

            need_schedule = RT_TRUE;
        }
        else
        {
            /* clear owner */
            mutex->owner    = RT_NULL;
            mutex->priority = 0xff;
        }
    }

    rt_spin_unlock_irqrestore(&(mutex->spinlock), level);

    /* perform a schedule */
    if (need_schedule == RT_TRUE)
        rt_schedule();

    return RT_EOK;
}
RTM_EXPORT(rt_mutex_release);


/**
 * @brief    This function will set some extra attributions of a mutex object.
 *
 * @note     Currently this function does not implement the control function.
 *
 * @param    mutex is a pointer to a mutex object.
 *
 * @param    cmd is a command word used to configure some attributions of the mutex.
 *
 * @param    arg is the argument of the function to execute the command.
 *
 * @return   Return the operation status. When the return value is RT_EOK, the operation is successful.
 *           If the return value is any other values, it means that this function failed to execute.
 */
rt_err_t rt_mutex_control(rt_mutex_t mutex, int cmd, void *arg)
{
    /* parameter check */
    RT_ASSERT(mutex != RT_NULL);
    RT_ASSERT(rt_object_get_type(&mutex->parent.parent) == RT_Object_Class_Mutex);

    return -RT_ERROR;
}
RTM_EXPORT(rt_mutex_control);

/**@}*/
#endif /* RT_USING_MUTEX */
源码下载
…\bsp\stm32\stm32l431-BearPi\project.uvproj
 文章来源:https://www.toymoban.com/news/detail-763863.html
RT-Thread STM32L431 Bear-Pi开发板BSP说明 源码下载文章来源地址https://www.toymoban.com/news/detail-763863.html
维护人:
- 华为奋斗者精神, 邮箱:1992152446@qq.com
到了这里,关于RT-Thread STM32L431 Bear-Pi开发板BSP说明的文章就介绍完了。如果您还想了解更多内容,请在右上角搜索TOY模板网以前的文章或继续浏览下面的相关文章,希望大家以后多多支持TOY模板网!