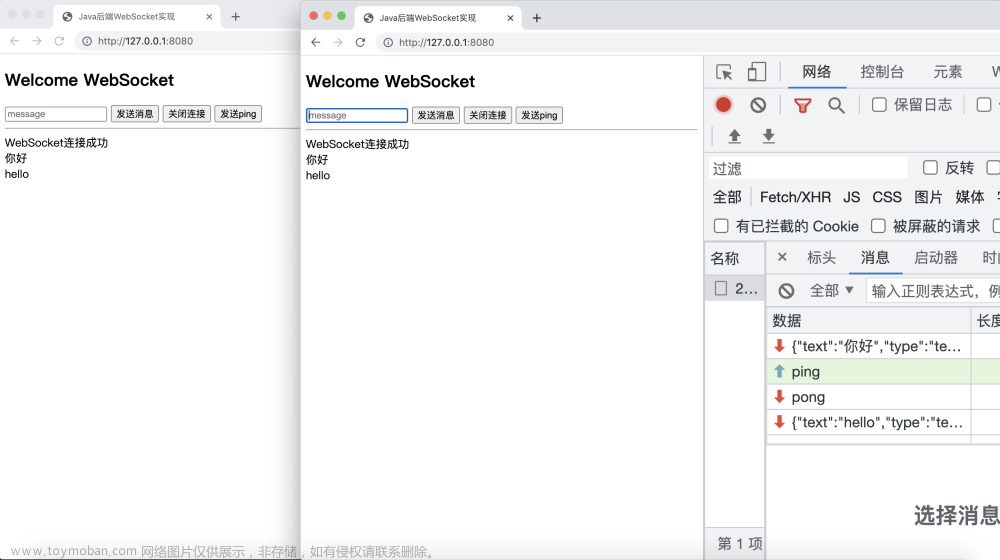
这样一个需求:把设备异常的状态每10秒推送到页面并且以弹窗弹出来,这个时候用Websocket最为合适,今天主要是后端代码展示。
添加依赖
<dependency>
    <groupId>io.netty</groupId>
    <artifactId>netty-all</artifactId>
    <version>4.1.36.Final</version>
</dependency>
<dependency>
    <groupId>org.springframework.boot</groupId>
    <artifactId>spring-boot-starter-websocket</artifactId>
</dependency>
定义netty端口号
websocket:
  netty:
    port: 8888
  path: /websocket
netty服务器
@Slf4j
@Component
public class NettyServer {
    /**
     * netty服务端口号
     */
    @Value("${websocket.netty.port}")
    private int port;
    /**
     * netty事件辅助组
     */
    private EventLoopGroup bossGroup;
    /**
     * netty事件工作组
     */
    private EventLoopGroup workGroup;

    /**
     * 管道配置
     */
    private final CustomChannelInitializer channelInitializer;

    public NettyServer(CustomChannelInitializer channelInitializer) {
        this.channelInitializer = channelInitializer;
    }


    /**
     * netty服务初始化
     */
    @PostConstruct
    public void start() {
        new Thread(() -> {

            bossGroup = new NioEventLoopGroup();

            workGroup = new NioEventLoopGroup();

            ServerBootstrap bootstrap = new ServerBootstrap();
            //bossGroup辅助客户端的tcp连接请求, workGroup负责与客户端之前的读写操作
            bootstrap.group(bossGroup, workGroup);
            //设置NIO类型的channel
            bootstrap.channel(NioServerSocketChannel.class);
            //设置监听端口
            bootstrap.localAddress(new InetSocketAddress(port));
            //设置管道
            bootstrap.childHandler(channelInitializer);
            try {
                ChannelFuture channelFuture = bootstrap.bind().sync();
                log.info("Netty服务启动成功,开启监听:{}", channelFuture.channel().localAddress());
                //对关闭通道进行监听
                channelFuture.channel().closeFuture().sync();
            } catch (InterruptedException e) {
                log.error("Netty服务启动失败!", e);
                throw new RuntimeException(e);
            }

        }).start();
    }

}
Netty配置
管理全局Channel以及用户对应的channel(推送消息)
import io.netty.channel.Channel;
import io.netty.channel.group.ChannelGroup;
import io.netty.channel.group.DefaultChannelGroup;
import io.netty.util.concurrent.GlobalEventExecutor;

import java.util.concurrent.ConcurrentHashMap;

/**
 * @version 1.0.0
 * @description 业务类
 */
public class NettyConfig {
    /**
     * 定义全局单利channel组 管理所有channel
     */
    private static volatile ChannelGroup channelGroup = null;

    /**
     * 存放请求ID与channel的对应关系
     */
    private static volatile ConcurrentHashMap<String, Channel> channelMap = null;

    /**
     * 定义两把锁
     */
    private static final Object lock1 = new Object();
    private static final Object lock2 = new Object();


    public static ChannelGroup getChannelGroup() {
        if (null == channelGroup) {
            synchronized (lock1) {
                if (null == channelGroup) {
                    channelGroup = new DefaultChannelGroup(GlobalEventExecutor.INSTANCE);
                }
            }
        }
        return channelGroup;
    }

    public static ConcurrentHashMap<String, Channel> getChannelMap() {
        if (null == channelMap) {
            synchronized (lock2) {
                if (null == channelMap) {
                    channelMap = new ConcurrentHashMap<>();
                }
            }
        }
        return channelMap;
    }

    public static Channel getChannel(String userId) {
        if (null == channelMap) {
            return getChannelMap().get(userId);
        }
        return channelMap.get(userId);
    }
}
管道配置
import io.netty.channel.ChannelInitializer;
import io.netty.channel.ChannelPipeline;
import io.netty.channel.socket.SocketChannel;
import io.netty.handler.codec.http.HttpObjectAggregator;
import io.netty.handler.codec.http.HttpServerCodec;
import io.netty.handler.codec.http.websocketx.WebSocketServerProtocolHandler;
import io.netty.handler.codec.serialization.ObjectEncoder;
import io.netty.handler.stream.ChunkedWriteHandler;
import org.springframework.beans.factory.annotation.Value;
import org.springframework.stereotype.Component;


/**
 * @version 1.0.0
 * @description Netty管道配置类
 */
@Component
public class CustomChannelInitializer extends ChannelInitializer<SocketChannel> {
    /**
     * webSocket协议名
     */
    private static final String WEBSOCKET_PROTOCOL = "WebSocket";
    /**
     * websocket服务地址
     */
    @Value("${websocket.path:/websocket}")
    private String websocketPath;
    private final CustomChannelHandler channelHandler;

    public CustomChannelInitializer(CustomChannelHandler channelHandler) {
        this.channelHandler = channelHandler;
    }

    @Override
    protected void initChannel(SocketChannel socketChannel) throws Exception {
        // 设置管道
        ChannelPipeline pipeline = socketChannel.pipeline();
        // 流水线管理通道中的处理程序(Handler),用来处理业务
        // webSocket协议本身是基于http协议的,所以这边也要使用http编解码器
        pipeline.addLast(new HttpServerCodec());
        pipeline.addLast(new ObjectEncoder());
        // 以块的方式来写的处理器
        pipeline.addLast(new ChunkedWriteHandler());
        pipeline.addLast(new HttpObjectAggregator(8192));
        pipeline.addLast(new WebSocketServerProtocolHandler(websocketPath, WEBSOCKET_PROTOCOL, true, 65536 * 10));
        // 自定义的handler,处理业务逻辑
        pipeline.addLast(channelHandler);
    }
}
自定义CustomChannelHandler
import cn.hutool.json.JSONObject;
import cn.hutool.json.JSONUtil;
import com.ruoyi.common.utils.StringUtils;
import io.netty.channel.ChannelHandler;
import io.netty.channel.ChannelHandlerContext;
import io.netty.channel.SimpleChannelInboundHandler;
import io.netty.handler.codec.http.websocketx.TextWebSocketFrame;
import io.netty.util.AttributeKey;
import lombok.extern.slf4j.Slf4j;
import org.springframework.stereotype.Component;

/**
 * @version 1.0.0
 * @description Netty管道handler类
 */
@Slf4j
@Component
@ChannelHandler.Sharable
public class CustomChannelHandler extends SimpleChannelInboundHandler<TextWebSocketFrame> {
    /**
     * 一旦连接,第一个被执行
     */
    @Override
    public void handlerAdded(ChannelHandlerContext ctx) throws Exception {
        log.info("有新的客户端链接:[{}]", ctx.channel().id().asLongText());
        // 添加到channelGroup 通道组
        NettyConfig.getChannelGroup().add(ctx.channel());
    }

    /**
     * 读取数据
     */
    @Override
    protected void channelRead0(ChannelHandlerContext ctx, TextWebSocketFrame msg) throws Exception {
        log.info("服务器收到消息:{}", msg.text());

        // 获取用户ID,关联channel
        JSONObject jsonObject = JSONUtil.parseObj(msg.text());
        String uid = jsonObject.getStr("uid");
        if(StringUtils.isNotEmpty(uid)){
            NettyConfig.getChannelMap().put(uid, ctx.channel());
            // 将用户ID作为自定义属性加入到channel中,方便随时channel中获取用户ID
            AttributeKey<String> key = AttributeKey.valueOf("userId");
            ctx.channel().attr(key).setIfAbsent(uid);
            // 回复消息
            ctx.channel().writeAndFlush(new TextWebSocketFrame("服务器收到消息啦"));
        }
    }

    @Override
    public void handlerRemoved(ChannelHandlerContext ctx) throws Exception {
        log.info("用户下线了:{}", ctx.channel().id().asLongText());
        // 删除通道
        NettyConfig.getChannelGroup().remove(ctx.channel());
        removeUserId(ctx);
    }

    @Override
    public void exceptionCaught(ChannelHandlerContext ctx, Throwable cause) throws Exception {
        log.info("异常:{}", cause.getMessage());
        super.exceptionCaught(ctx,cause);
        // 删除通道
        NettyConfig.getChannelGroup().remove(ctx.channel());
        removeUserId(ctx);
        ctx.close();
    }

    /**
     * 删除用户与channel的对应关系
     */
    private void removeUserId(ChannelHandlerContext ctx) {
        AttributeKey<String> key = AttributeKey.valueOf("userId");
        String userId = ctx.channel().attr(key).get();
        if(StringUtils.isNotEmpty(userId)){
            NettyConfig.getChannelMap().remove(userId);
        }
    }
}
推送消息接口及实现类
public interface PushMsgService {
    /**
     * 推送给指定用户
     */
    void pushMsgToOne(String group, String msg);

    /**
     * 推送给所有用户
     */
    void pushMsgToAll(String msg);
}
实现接口文章来源:https://www.toymoban.com/news/detail-764707.html
@Service
public class PushMsgServiceImpl implements PushMsgService {

    @Override
    public void pushMsgToOne(String group, String msg) {
        Channel channel = NettyConfig.getChannel(group);
        if (Objects.isNull(channel)) {
            throw new RuntimeException("未连接socket服务器");
        }

        channel.writeAndFlush(new TextWebSocketFrame(msg));
    }
    @Override
    public void pushMsgToAll(String msg) {
        NettyConfig.getChannelGroup().writeAndFlush(new TextWebSocketFrame(msg));
    }
}
具体的controller层接口
   /**
     * 获取弹框网关状态
     */
    @GetMapping("/upKnxNetworkLink/{uid}")
    public void upKnxNetworkLink(@PathVariable String uid){
        KnxNetworkLinkInfo knxNetworkLinkInfo =new KnxNetworkLinkInfo();
        knxNetworkLinkInfo.setStatus("0");
       List<KnxNetworkLinkInfo>knxNetworkLinkInfoList=knxNetworkLinkInfoService.queryList(knxNetworkLinkInfo);
        JSONArray array= JSONArray.parseArray(JSON.toJSONString(knxNetworkLinkInfoList));
        pushMsgService.pushMsgToOne(uid,array.toJSONString());
    }
使用postman测试Websocket推送
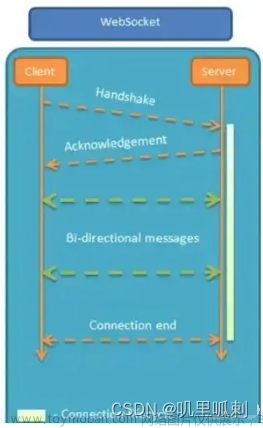
连接Websocket
在开一个窗口测试发送消息的接口
发送过后在回到连接Websocket窗口
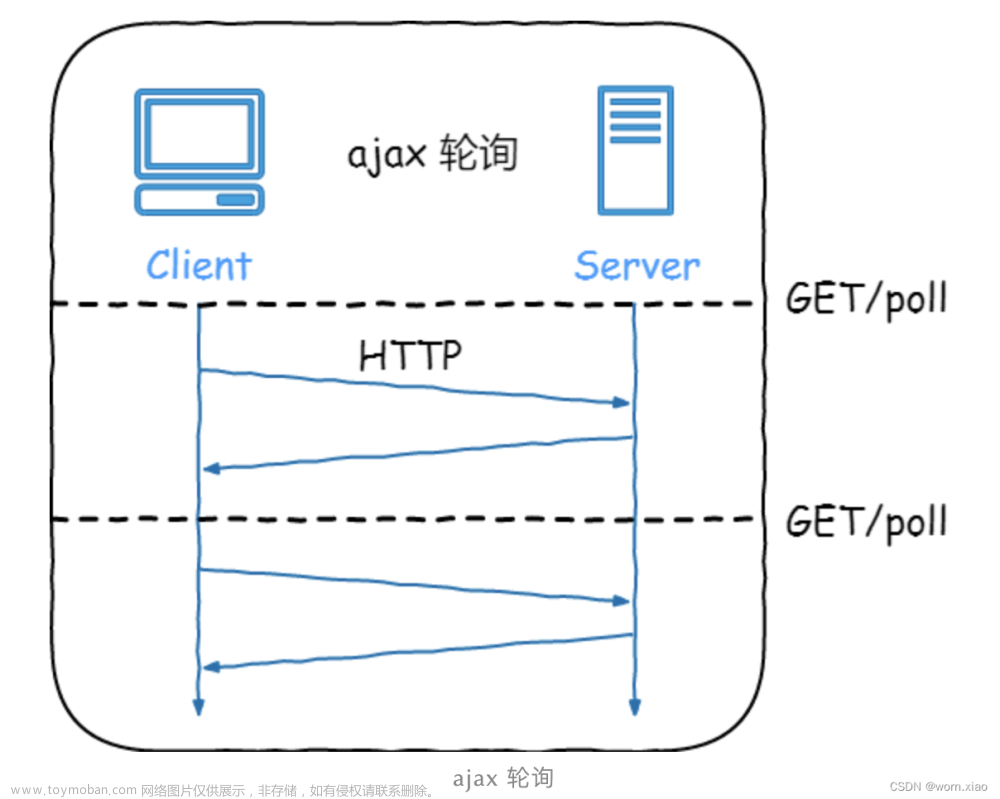
前端需要做一个定时访问发送消息的接口,每发一次就会往前端推送一次数据。
参考:Springboot + netty +websocket 实现推送消息文章来源地址https://www.toymoban.com/news/detail-764707.html
到了这里,关于SpringBoot+Netty+Websocket实现消息推送的文章就介绍完了。如果您还想了解更多内容,请在右上角搜索TOY模板网以前的文章或继续浏览下面的相关文章,希望大家以后多多支持TOY模板网!