一、GitLab
GitLab 是一个用于仓库管理系统的开源项目,使用 Git 作为代码管理工具,并在此基础上搭建起来的 Web 服务。
安装方法是参考 GitLab 在 GitHub 上的 Wiki 页面。Gitlab 是被广泛使用的基于 git 的开源代码管理平台, 基于 Ruby on Rails 构建, 主要针对软件开发过程中产生的代码和文档进行管理,。
Gitlab 主要针对 group 和 project 两个维度进行代码和文档管理,:
- 其中 group 是群组, project 是工程项目, 一个 group 可以管理多个 project, 可以理解为一个群组中有多项软件开发任务
- 一个 project 中可能包含多个 branch, 意为每个项目中有多个分支, 分支间相互独立, 不同分支可以进行归并。
Git的家族成员
- Git:是一种版本控制系统,是一个命令,是一种工具,详解介绍。
- Gitlib:是用于实现 Git 功能的开发库。
- Github:是一个基于Git实现的在线代码托管仓库,包含一个网站界面,向互联网开放。
- GitLab:是一个基于Git实现的在线代码仓库托管软件,你可以用gitlab自己搭建一个类似于Github一样的系统,一般用于在企业、学校等内部网络搭建git私服。
二、GitLab-CI/CD
官方文档
GitLab CI/CD 是一个内置在 GitLab 中的工具,用于通过持续方法进行软件开发,这些方法使得可以在开发周期的早期发现 bugs 和 errors,从而确保部署到生产环境的所有代码都符合为应用程序建立的代码标准:
- Continuous Integration(CI):持续集成,工作原理是将小的代码块推送到 Git 仓库中托管的应用程序代码库中,并且每次推送时,都要运行一系列脚本来构建、测试和验证代码更改,然后再将其合并到主分支中。
- Continuous Delivery(CD):持续交付
- Continuous Deployment(CD):持续部署,持续交付和部署相当于更进一步的 CI,可以在每次推送到仓库默认分支的同时将应用程序部署到生产环境。
GitLab CI/CD 怎么执行:GitLab Runner 执行
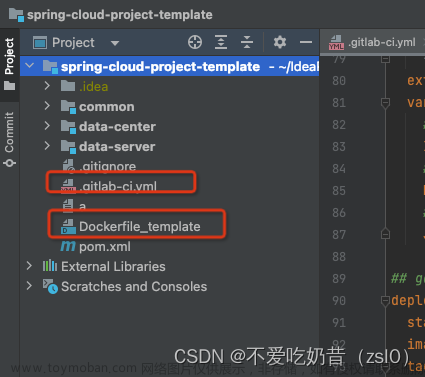
GitLab CI/CD 由一个名为 .gitlab-ci.yml 的文件进行配置,该文件需要位于仓库的根目录下并配置 GitLab Runner,每次提交代码的时候,gitlab 就会自动识别文件中指定的脚本由 GitLab Runner 执行。
2.1 gitlab-ci.yml
在这个文件中,可以定义要运行的脚本,定义包含的依赖项,选择要按顺序运行的命令和要并行运行的命令,定义要在何处部署应用程序,以及指定是否 要自动运行脚本或手动触发脚本。
为了可视化处理过程,假设添加到配置文件中的所有脚本与在计算机的终端上运行的命令相同。
一旦已经添加了 .gitlab-ci.yml 到仓库中,GitLab 将检测到该文件,并使用名为 GitLab Runner 的工具运行脚本。该工具的操作与终端类似。
2.1.1 基础概念
1、Pipeline:
每个推送到 Gitlab 的提交都会产生一个与该提交关联的 pipeline,若一次推送包含了多个提交,则 pipeline 与最后那个提交相关联,pipeline 就是一个分成不同 stage 的 job 的集合。
整个 pipeline 如下图所示,由 3 个 stage 组成。

2、Stage:
stage 是对批量的作业的一个逻辑上的划分,每个 GitLab CI/CD 都必须包含至少一个 Stage。多个 Stage 是按照顺序执行的,如果其中任何一个 Stage 失败,则后续的 Stage 不会被执行,整个 CI 过程被认为失败。
下图中共 3 个 stage,多个 stage 组成 pipeline,每个 stage 里边又包括了很多 job。
3、Job
Job 就是 Runner 要执行的指令集合,Job 可以被关联到一个 Stage。当一个 Stage 执行的时候,与其关联的所有 Job 都会被执行。在有足够运行器的前提下,同一阶段的所有作业会并发执行。Job 状态与 Stage 状态是一样的,实际上,Stage 的状态就是继承自 job 的。
Job 必须包含 script(由 Runner 执行的 shell 脚本),随着项目越来越大,Job 越来越多,Job 中包含的重复逻辑可能会让配置文件臃肿不堪, .gitlab-ci.yml 中提供了 before_script 和 after_script 两个全局配置项。这两个配置项在所有 Job 的 script 执行前和执行后调用。
Job 的执行过程中往往会产生一些数据,默认情况下 GitLab Runner 会保存 Job 生成的这些数据,然后在下一个 Job 执行之前(甚至不局限于当次 CI/CD)将这些数据恢复。这样即便是不同的 Job 运行在不同的 Runner 上,它也能看到彼此生成的数据。
如下图所示,每个 stage 包含多个 job。

2.1.2 创建 yml 文件
创建:在对应分支上,点击 + 号,然后点击 New file,然后填写 file name,.gitlab-ci.yml

创建成功后就会生成如下文件:

.gitlab-ci.yml 一个简单的文件内容示例如下:
build-job:
  stage: build
  script:
    - echo "Hello, $GITLAB_USER_LOGIN!"

test-job1:
  stage: test
  script:
    - echo "This job tests something"

test-job2:
  stage: test
  script:
    - echo "This job tests something, but takes more time than test-job1."
    - echo "After the echo commands complete, it runs the sleep command for 20 seconds"
    - echo "which simulates a test that runs 20 seconds longer than test-job1"
    - sleep 20

deploy-prod:
  stage: deploy
  script:
    - echo "This job deploys something from the $CI_COMMIT_BRANCH branch."
  environment: production
上面的例子中包含了 4 个 jobs:
- build-job
- test-job1
- test-job2
- deploy-prod
2.1.3 yml 文件中的关键字
1、全局关键字
-
default:自定义 job 关键字的默认值 -
include:从其他 yaml 文件中 import 配置 -
stage:pipeline 每个 stage 的名字和顺序 -
variables:定义所有 job 的 CI/CD 变量 -
workflow:控制 pipeline 运行的类型
① default:
default:
  image: ruby:3.0

rspec:
  script: bundle exec rspec

rspec 2.7:
  image: ruby:2.7
  script: bundle exec rspec
-
ruby:3.0是 pipeline 中所有 job 的默认 image,respec 2.7 中定义了自己的特定值,在该 job 中使用自己定义的ruby:2.7 - 创建 pipeline 时,每个默认值都会复制到未定义该关键字的 job 中
- 如果 job 中有了其中一个关键字,则优先使用 job 中的配置,不会被默认值替换
- 控制 job 中默认关键字的继承
inherit:default
② include:
可以从外部 include 其他 yaml 文件到 .gitlab-ci.yml 中,文件拆分可以增加可读性,或减少在多个地方重复的配置。最多可以包含 100 个 include。
参数:
1、include: local,用于引入和 .gitlab-ci.yml 位于相同仓库中的文件

include:
  - local: '/templates/.gitlab-ci-template.yml'

2、include: project,用于引入其他项目中的文件,project 后跟文件夹
   include: file,文件的完整路径,相对于根目录(/)
   include: ref,可选的参数,tag

include:
  - project: 'my-group/my-project'
    ref: main                                      # Git branch
    file: '/templates/.gitlab-ci-template.yml'
  - project: 'my-group/my-project'
    ref: v1.0.0                                    # Git Tag
    file: '/templates/.gitlab-ci-template.yml'
  - project: 'my-group/my-project'
    ref: 787123b47f14b552955ca2786bc9542ae66fee5b  # Git SHA
    file: '/templates/.gitlab-ci-template.yml'

3、include: remote,使用 url 从其他地方引入文件

include:
  - remote: 'https://gitlab.com/example-project/-/raw/main/.gitlab-ci.yml'

4、include: template,引入 .gitlab-ci.yml 模版

include:
  - template: Android-Fastlane.gitlab-ci.yml
  - template: Auto-DevOps.gitlab-ci.yml
- job 中的配置比 include 的文件配置优先级更高
- 可以在 job 中重写 included 的配置,使用相同的 job name 或全局 keyword
- 如果对 job 重新运行,则 include 文件不会被重新读取,所有的配置是在 pipeline 创建的时候读取的,所以 include 的东西不会重新读取
- 如果对 pipeline 重新运行,则 include 文件会被重新读取,如果更改了后,会生效
③ stages:可以定义一系列 job 在哪个 stage 中执行
如果 stages 没有在 yml 中定义,则默认的顺序如下:
- .pre → build → test → deploy → .post
- 一个 stage 中的 job,是并行执行的
- 下一个 stage 中的 job 要等上一个 stage 全部执行完之后才能执行
- 如果一个 pipeline 只包含 .pre 或 .post 中的 job,则不会执行
示例:
stages:
  - build
  - test
  - deploy
在这个例子中:
- build 并行执行的所有 job。
- 如果所有 job 都 build 成功,则 test job 并行执行。
- 如果所有 job 都 test 成功,则 deploy job 并行执行。
- 如果所有 job 都 deploy 成功,pipeline 将标记为 passed。
- 如果任何 job 失败,pipeline 将被标记为 failed 并且后续阶段的 job 不会启动。当前阶段的 job 不会停止并继续运行。
- 如果 job 未指定 stage,则默认分配到 test 阶段
④ workflow:控制 pipeline 的行为
workflow: name,为 pipeline 定义一个名称

workflow:
  name: 'Pipeline for branch: $CI_COMMIT_BRANCH'

variables:
  PIPELINE_NAME: 'Default pipeline name'

workflow:
  name: '$PIPELINE_NAME'
  rules:
    - if: '$CI_PIPELINE_SOURCE == "merge_request_event"'
      variables:
        PIPELINE_NAME: 'MR pipeline: $CI_COMMIT_BRANCH'
    - if: '$CI_MERGE_REQUEST_LABELS =~ /pipeline:run-in-ruby3/'
      variables:
        PIPELINE_NAME: 'Ruby 3 pipeline'
workflow: rules,用来控制是否创建整个 pipeline

rules: if.
rules: changes.
rules: exists.
when, can only be always or never when used with workflow.
variables.


示例:
workflow:
  rules:
    - if: $CI_COMMIT_TITLE =~ /-draft$/ # 当 pipeline 的 commit title 不是以 -draft 结尾,pipeline 就会运行
      when: never
    - if: $CI_PIPELINE_SOURCE == "merge_request_event"
    - if: $CI_COMMIT_BRANCH == $CI_DEFAULT_BRANCH
workflow: rules: variables,使用 variables 来定义特殊条件下生效的变量,当条件吻合时,创建变量并用于所有 jobs。

variables:
  DEPLOY_VARIABLE: "default-deploy"

workflow:
  rules:
    - if: $CI_COMMIT_REF_NAME == $CI_DEFAULT_BRANCH
      variables:
        DEPLOY_VARIABLE: "deploy-production"  # Override globally-defined DEPLOY_VARIABLE
    - if: $CI_COMMIT_REF_NAME =~ /feature/
      variables:
        IS_A_FEATURE: "true"                  # Define a new variable.
    - when: always                            # Run the pipeline in other cases

job1:
  variables:
    DEPLOY_VARIABLE: "job1-default-deploy"
  rules:
    - if: $CI_COMMIT_REF_NAME == $CI_DEFAULT_BRANCH
      variables:                                   # Override DEPLOY_VARIABLE defined
        DEPLOY_VARIABLE: "job1-deploy-production"  # at the job level.
    - when: on_success                             # Run the job in other cases
  script:
    - echo "Run script with $DEPLOY_VARIABLE as an argument"
    - echo "Run another script if $IS_A_FEATURE exists"

job2:
  script:
    - echo "Run script with $DEPLOY_VARIABLE as an argument"
    - echo "Run another script if $IS_A_FEATURE exists"


When the branch is the default branch:

job1’s DEPLOY_VARIABLE is job1-deploy-production.
job2’s DEPLOY_VARIABLE is deploy-production.
When the branch is feature:

job1’s DEPLOY_VARIABLE is job1-default-deploy, and IS_A_FEATURE is true.
job2’s DEPLOY_VARIABLE is default-deploy, and IS_A_FEATURE is true.
When the branch is something else:

job1’s DEPLOY_VARIABLE is job1-default-deploy.
job2’s DEPLOY_VARIABLE is default-deploy.
2、Job 关键字
-
after_script:定义所有 job 执行过后需要执行的命令,可以接受一个数组或者多行字符串 -
allow_failure:允许 job 失败,失败的 job 不会导致 pipeline 失败。 -
artifacts:成功时附加到作业的文件和目录列表 -
before_script:定义所有 job 执行之前需要执行的命令 -
cache:缓存的文件列表 -
coverage:job 的代码覆盖率 -
dast_configuration:在 job level 使用的 DAST 配置文件中的配置 -
dependencies:任务依赖。指定 job 的前置 job。添加该参数后,可以获取到前置 job 的 artifacts。注意如果前置 job 执行失败, 导致没能生成 artifacts, 则 job 也会直接失败 -
environment:job 部署使用的环境 -
except:控制什么时候 job 不生效 -
extends:job 继承自的配置 -
image:使用的 Docker 镜像 -
inherit:所有 job 继承全局默认值 -
interruptible:当一个分支的 pipeline 多次被触发时,是否自动取消旧的流水线 -
needs:定义 job 的执行顺序 -
only:控制创建 job 的时间 -
pages:上传结果并和 gitlab pages 一起使用 -
parallel:并行运行几个 job -
release:创建一个发布 -
resource_group:限制 job 的并发 -
retry:job 失败后重新启动的次数 -
rules:当前作业运行失败后,是否不停止 pipeline,继续往下执行 -
script:由 runner 执行的 shell 脚本 -
secrets:CI/CD 保密工作需要 -
services:使用 docker 服务镜像 -
stage:定义 job 的阶段 -
tags:选择 runner 的标签 -
timeout:定义优先于 project 设置的 job-level 的超时时长 -
trigger:定义下游 pipeline 触发器 -
variables:在 job-level 定义 job 变量 -
when:运行 job 的时间
1) after_scripts:
job:
  script:
    - echo "An example script section."
  after_script:
    - echo "Execute this command after the `script` section completes."
2)allow_failure:true → 某些 job 失败后,pipeline 继续执行,false→ 某些 job 失败后,pipeline 停止执行
job1:
  stage: test
  script:
    - execute_script_1

job2:
  stage: test
  script:
    - execute_script_2
  allow_failure: true

job3:
  stage: deploy
  script:
    - deploy_to_staging
  environment: staging

In this example, job1 and job2 run in parallel:

If job1 fails, jobs in the deploy stage do not start.
If job2 fails, jobs in the deploy stage can still start.
allow_failure: exit_codes,后面跟参数,控制什么时候 job 允许失败
test_job_1:
  script:
    - echo "Run a script that results in exit code 1. This job fails."
    - exit 1
  allow_failure:
    exit_codes: 137

test_job_2:
  script:
    - echo "Run a script that results in exit code 137. This job is allowed to fail."
    - exit 137
  allow_failure:
    exit_codes:
      - 137
      - 255
3)artifacts:指定需要保存的结果
artifacts: paths      指定结果保存的路径
artifacts: name       指定文件保存的名称,未指定的话就是 artifacts.zip
artifacts: exclude    不保存的文件
job:
  artifacts:
    paths:
      - binaries/
      - .config
# 保存 binary 中的所有文件,除过 *.o 的文件外
artifacts:
  paths:
    - binaries/
  exclude:
    - binaries/**/*.o
4) before_script:在每个 job 的 script 运行前需要运行的东西
job:
  before_script:
    - echo "Execute this command before any 'script:' commands."
  script:
    - echo "This command executes after the job's 'before_script' commands."
5) cache:
cache: paths,用于配置要缓存的文件路径

rspec:
  script:
    - echo "This job uses a cache."
  cache:
    key: binaries-cache
    paths:
      - binaries/*.apk
      - .config

cache: key,让每个缓存都有特有的 key

cache-job:
  script:
    - echo "This job uses a cache."
  cache:
    key: binaries-cache-$CI_COMMIT_REF_SLUG
    paths:
      - binaries/
6) coverage:用于提前日志中的覆盖率,你可以设置一个正则表达式,如果当前作业的日志命中了该表达式,覆盖率将会被提取出来。如果命中了多个,将以最后一个为准,提取出来的覆盖率可以显示到项目 UI 上。
7) dependencies:任务依赖。指定 job 的前置 job。添加该参数后,可以获取到前置 job 的 artifacts。注意如果前置 job 执行失败,导致没能生成 artifacts, 则 job 也会直接失败
build osx:
  stage: build
  script: make build:osx
  artifacts:
    paths:
      - binaries/

build linux:
  stage: build
  script: make build:linux
  artifacts:
    paths:
      - binaries/

test osx:
  stage: test
  script: make test:osx
  dependencies:
    - build osx

test linux:
  stage: test
  script: make test:linux
  dependencies:
    - build linux

deploy:
  stage: deploy
  script: make deploy
  environment: production
本例中,build osc 和 build linux 有 artifacts,当 test osx 执行后,会下载 build osx 的 artifacts
8)environment:定义 job 部署的环境
deploy to production:
  stage: deploy
  script: git push production HEAD:main
  environment: production
environment: name,给 environment 设置一个名称

deploy to production:
  stage: deploy
  script: git push production HEAD:main
  environment:
    name: production
environment: url,给 environment 设置一个 url

deploy to production:
  stage: deploy
  script: git push production HEAD:main
  environment:
    name: production
    url: https://prod.example.com
9) extends:替代了 YAML Anchors,可读性好,而且更加灵活。它定义一个可以让 job 去继承的模板,这样可以让我们把一些共同的 key 进行抽象,方便以后的维护与扩展
输入:pipeline 中其他 job 的名称
下面的例子中,rspec job 使用 .test 模版 job 中的配置
.tests:
  script: rake test
  stage: test
  only:
    refs:
      - branches

rspec:
  extends: .tests
  script: rake rspec
  only:
    variables:
      - $RSPEC
rspec job 的配置最终如下:
rspec:
  script: rake rspec
  stage: test
  only:
    refs:
      - branches
    variables:
      - $RSPEC
10) image:指定 job 使用的 docker image
default:
  image: ruby:3.0

rspec:
  script: bundle exec rspec

rspec 2.7:
  image: registry.example.com/my-group/my-project/ruby:2.7
  script: bundle exec rspec
11)inherit:控制是否继承 default 的关键字和变量
inherit: default
inherit: default: [keywords1, keywords2] #也可以使用 list 定义继承的关键字

default:
  retry: 2
  image: ruby:3.0
  interruptible: true

job1:
  script: echo "This job does not inherit any default keywords."
  inherit:
    default: false

job2:
  script: echo "This job inherits only the two listed default keywords. It does not inherit 'interruptible'."
  inherit:
    default:
      - retry
      - image
inherit: variables, 控制全局变量关键字是否继承
inherit: variables: [VARIABLE1, VARIABLE2] # 也可以使用 list 参与继承的全局变量

variables:
  VARIABLE1: "This is variable 1"
  VARIABLE2: "This is variable 2"
  VARIABLE3: "This is variable 3"

job1:
  script: echo "This job does not inherit any global variables."
  inherit:
    variables: false

job2:
  script: echo "This job inherits only the two listed global variables. It does not inherit 'VARIABLE3'."
  inherit:
    variables:
      - VARIABLE1
      - VARIABLE2
12)interruptible:当 pipeline 重新运行时,job 是否中断,true/false(默认)
stages:
  - stage1
  - stage2
  - stage3

step-1:
  stage: stage1
  script:
    - echo "Can be canceled."
  interruptible: true

step-2:
  stage: stage2
  script:
    - echo "Can not be canceled."

step-3:
  stage: stage3
  script:
    - echo "Because step-2 can not be canceled, this step can never be canceled, even though it's set as interruptible."
  interruptible: true
上面示例中:
- 如果只有 step-1 执行或等待,则停止
- 如果在 step-2 开始之后,则不停止
13)needs:使用 needs 能不依据顺序来执行 jobs
- [] 表示当 pipeline 创建的时候,就开始执行
- [linux: build] 表示在
linux: build后执行
linux:build:
  stage: build
  script: echo "Building linux..."

mac:build:
  stage: build
  script: echo "Building mac..."

lint:
  stage: test
  needs: []
  script: echo "Linting..."

linux:rspec:
  stage: test
  needs: ["linux:build"]
  script: echo "Running rspec on linux..."

mac:rspec:
  stage: test
  needs: ["mac:build"]
  script: echo "Running rspec on mac..."

production:
  stage: deploy
  script: echo "Running production..."
  environment: production
needs: artifacts, true / false,控制 job 的 artifacts 是否下载

test-job1:
  stage: test
  needs:
    - job: build_job1  # test-job1 下载 build-job1 的 artifacts
      artifacts: true

test-job2:
  stage: test
  needs:
    - job: build_job2 # test-job2 不下载 build-job2 的 artifacts
      artifacts: false

test-job3:
  needs:
    - job: build_job1 # test-job3 下载 3 个 build-job 的所有 artifacts
      artifacts: true
    - job: build_job2
    - build_job3
needs: project,下载某个项目,某个 job,某个分支的 artifacts

build_job:
  stage: build
  script:
    - ls -lhR
  needs:
    - project: namespace/group/project-name
      job: build-1
      ref: main
      artifacts: true
    - project: namespace/group/project-name-2
      job: build-2
      ref: main
      artifacts: true

13.3 版本之后,可以使用全局变量来定义:

build_job:
  stage: build
  script:
    - ls -lhR
  needs:
    - project: $CI_PROJECT_PATH
      job: $DEPENDENCY_JOB_NAME
      ref: $ARTIFACTS_DOWNLOAD_REF
      artifacts: true
14)only/except:用来控制什么时候将 job 添加到 pipeline
-
only:定义什么时候 job 开始执行 -
except:定义什么时候 job 不执行 -
only/refs:基于 branch name 或 pipeline type 来定义什么时候 job 开始执行 -
except/refs:基于 branch name 或 pipeline type 来定义什么时候 job 不执行 -
only/variables:基于 variables 来定义什么时候 job 开始执行 -
except/variables:基于 variables 来定义什么时候 job 不执行 -
only:changes:当某些参数变化时,执行 job -
except:changes:除过某些参数变化,才会执行 job
job1:
  script: echo
  only:
    - main
    - /^issue-.*$/
    - merge_requests

job2:
  script: echo
  except:
    - main
    - /^stable-branch.*$/
    - schedules
variables 示例:

deploy:
  script: cap staging deploy
  only:
    variables:
      - $RELEASE == "staging"
      - $STAGING
change 示例:

docker build:
  script: docker build -t my-image:$CI_COMMIT_REF_SLUG .
  only:
    refs:
      - branches
    changes:
      - Dockerfile
      - docker/scripts/*
      - dockerfiles/**/*
      - more_scripts/*.{rb,py,sh}
      - "**/*.json"
15)pages:能够定义一个 gitlab pages,上传相关内容,在网站上发布
pages:
  stage: deploy
  script:
    - mkdir .public
    - cp -r * .public
    - mv .public public
  artifacts:
    paths:
      - public
  rules:
    - if: $CI_COMMIT_BRANCH == $CI_DEFAULT_BRANCH
  environment: production
上面的例子,将project 的 root 下所有文件都移到了 public/ 文件夹下
16)parallel:并行执行某个 job N 次
并行创建 5 个 jobs,名字为 test 1/5 到 test 5/5
test:
  script: rspec
  parallel: 5
parallel: matrix,并行执行一个 job,每个实例都使用不同的参数

deploystacks:
  stage: deploy
  script:
    - bin/deploy
  parallel:
    matrix:
      - PROVIDER: aws
        STACK:
          - monitoring
          - app1
          - app2
      - PROVIDER: ovh
        STACK: [monitoring, backup, app]
      - PROVIDER: [gcp, vultr]
        STACK: [data, processing]
  environment: $PROVIDER/$STACK

上面的示例会生成 10 个并行的 deploystacks jobs,每个 job 有不同的 PROVIDER 和 STACK:

deploystacks: [aws, monitoring]
deploystacks: [aws, app1]
deploystacks: [aws, app2]
deploystacks: [ovh, monitoring]
deploystacks: [ovh, backup]
deploystacks: [ovh, app]
deploystacks: [gcp, data]
deploystacks: [gcp, processing]
deploystacks: [vultr, data]
deploystacks: [vultr, processing]
17)release:创建一个版本
release_job:
  stage: release
  image: registry.gitlab.com/gitlab-org/release-cli:latest
  rules:
    - if: $CI_COMMIT_TAG                  # Run this job when a tag is created manually
  script:
    - echo "Running the release job."
  release:
    tag_name: $CI_COMMIT_TAG
    name: 'Release $CI_COMMIT_TAG'
    description: 'Release created using the release-cli.'
18)resource_group:创建一个 resource_group,以确保同一项目的 job 在不同 pipeline 之间是互斥的。
19)retry:配置一个 job 失败后自动重新开始的次数,如果没有定义的话,默认为 0,即不会自动重新开始
输入有三种:0/1/2,默认为 0

test:
  script: rspec
  retry: 2
retry: when,和 retry: max 联合使用,当某种失败的时候(when 后面跟的),retry 的最大次数

单个失败类型:
test:
  script: rspec
  retry:
    max: 2
    when: runner_system_failure

多种失败类型:
test:
  script: rspec
  retry:
    max: 2
    when:
      - runner_system_failure
      - stuck_or_timeout_failure
19)rules:用 rules 来指定 pipeline 中是否包含该 job
rules: if,特定条件下,将 job 添加到 pipeline 中

If an if statement is true, add the job to the pipeline.
If an if statement is true, but it’s combined with when: never, do not add the job to the pipeline.
If no if statements are true, do not add the job to the pipeline.

job:
  script: echo "Hello, Rules!"
  rules:
    - if: $CI_MERGE_REQUEST_SOURCE_BRANCH_NAME =~ /^feature/ && $CI_MERGE_REQUEST_TARGET_BRANCH_NAME != $CI_DEFAULT_BRANCH
      when: never
    - if: $CI_MERGE_REQUEST_SOURCE_BRANCH_NAME =~ /^feature/
      when: manual
      allow_failure: true
    - if: $CI_MERGE_REQUEST_SOURCE_BRANCH_NAME
rules: changes,如果检测到特定的文件有变化,则将 job 添加到 pipeline 中

docker build:
  script: docker build -t my-image:$CI_COMMIT_REF_SLUG .
  rules:
    - if: $CI_PIPELINE_SOURCE == "merge_request_event"
      changes:
        - Dockerfile
      when: manual
      allow_failure: true
20)script:指定需要执行的命令,所有的 job(除过 trigger job)以外,都需要 script 关键字
job1:
  script: "bundle exec rspec"

job2:
  script:
    - uname -a
    - bundle exec rspec
21)secrets:秘钥
22)services:指定另外的 docker image 来执行脚本
下面示例中,job 使用 Ruby container,然后,又使用另外的 container 来执行 PG

default:
  image:
    name: ruby:2.6
    entrypoint: ["/bin/bash"]

  services:
    - name: my-postgres:11.7
      alias: db-postgres
      entrypoint: ["/usr/local/bin/db-postgres"]
      command: ["start"]

  before_script:
    - bundle install

test:
  script:
    - bundle exec rake spec
23)stage:定义 job 在哪个阶段运行,同一个 stage 中的 job 可以并行执行
- 如果没有定义 stage,则默认该 job 是 test stage
-
.pre:如果某个 job 的 stage 为.pre,则该 job 总会先于所有的 stage 执行,不是必须要定义.pre -
.post:如果某个 job 的 stage 为.post,则该 job 会在其他 stage 的 job 执行完成后执行,也就是 pipeline 中的最后一个执行的 stage - 如果一个 pipeline 中只包含
.pre或.post,则是不会执行的
stages:
  - build
  - test
  - deploy

job1:
  stage: build
  script:
    - echo "This job compiles code."

job2:
  stage: test
  script:
    - echo "This job tests the compiled code. It runs when the build stage completes."

job3:
  script:
    - echo "This job also runs in the test stage".

job4:
  stage: deploy
  script:
    - echo "This job deploys the code. It runs when the test stage completes."
  environment: production
.pre 示例

stages:
  - build
  - test

job1:
  stage: build
  script:
    - echo "This job runs in the build stage."

first-job:
  stage: .pre
  script:
    - echo "This job runs in the .pre stage, before all other stages."

job2:
  stage: test
  script:
    - echo "This job runs in the test stage."
.post 示例

stages:
  - build
  - test

job1:
  stage: build
  script:
    - echo "This job runs in the build stage."

last-job:
  stage: .post
  script:
    - echo "This job runs in the .post stage, after all other stages."

job2:
  stage: test
  script:
    - echo "This job runs in the test stage."
24)tags:从一系列 runners 中指定特定的 runner 来运行 job
下面的例子中,只有 tages 为 ruby 和 postgres 的 runners 可以运行 job
job:
  tags:
    - ruby
    - postgres
25)timeout:指定特定的 job 运行的时间限制,超过时间还没有完成的话会失败
build:
  script: build.sh
  timeout: 3 hours 30 minutes

test:
  script: rspec
  timeout: 3h 30m
26)trigger:用于创建 downstream pipeline,即下游的流水线,包括:
- multi-project pipeline
- child pipeline
trigger(触发) jobs 能使用的关键字较少,包括:
- allow_failure.
- extends.
- needs, but not needs:project.
- only and except.
- rules.
- stage.
- trigger.
- variables.
- when (only with a value of on_success, on_failure, or always).
trigger: include,用于声明一个 job 是 trigger job,且是开始了一个 child pipeline
trigger: include: artifact,用于触发一个动态 child pipeline

输入:child pipeline 的 yml 的路径

trigger-child-pipeline:
  trigger:
    include: path/to/child-pipeline.gitlab-ci.yml
trigger: project,用于声明一个 job 是 trigger job,且是开始了一个 multi-project pipeline

输入:下游 project 的路径

trigger-multi-project-pipeline:
  trigger:
    project: my-group/my-project


不同 branch 的示例:

trigger-multi-project-pipeline:
  trigger:
    project: my-group/my-project
    branch: development
trigger: strategy,强制让 trigger job 等待下游 pipeline 全部完成后,再标记为 success
default 的设置:当下游 pipeline 开始的时候,本 job 就被标记为 success 了

下面的示例中,后面 stage 的 jobs 会等待被触发的 pipeline 全部成功后,才开始

trigger_job:
  trigger:
    include: path/to/child-pipeline.yml
    strategy: depend
trigger: forward,指定将什么传递到下游 pipeline
输入:yaml_variables,pipeline_variables

variables: # default variables for each job
  VAR: value

# Default behavior:
# - VAR is passed to the child
# - MYVAR is not passed to the child
child1:
  trigger:
    include: .child-pipeline.yml

# Forward pipeline variables:
# - VAR is passed to the child
# - MYVAR is passed to the child
child2:
  trigger:
    include: .child-pipeline.yml
    forward:
      pipeline_variables: true

# Do not forward YAML variables:
# - VAR is not passed to the child
# - MYVAR is not passed to the child
child3:
  trigger:
    include: .child-pipeline.yml
    forward:
      yaml_variables: false
27)variables:是根据不同 job 可配置的参数,使用关键字 variables 来创建变量
-
variables: description:定义 pipeline-level 的变量,该变量在手动运行时被预填充 -
variables: expand:定义变量是否可扩展(true / false)
variables:
  DEPLOY_SITE: "https://example.com/"

deploy_job:
  stage: deploy
  script:
    - deploy-script --url $DEPLOY_SITE --path "/"
  environment: production

deploy_review_job:
  stage: deploy
  variables:
    REVIEW_PATH: "/review"
  script:
    - deploy-review-script --url $DEPLOY_SITE --path $REVIEW_PATH
  environment: production
variables: description

variables:
  DEPLOY_ENVIRONMENT:
    description: "The deployment target. Change this variable to 'canary' or 'production' if needed."
    value: "staging"
variables: expand

variables:
  VAR1: value1
  VAR2: value2 $VAR1
  VAR3:
    value: value3 $VAR1
    expand: false

VAR2 的结果是 value2 value1
VAR3 的结果是 value3 $VAR1
28)when:配置 job 运行的时间,如果没有定义的话,则默认的值为 when: on_succes
可能的输入:
- on_success (default): Run the job only when all jobs in earlier stages succeed or have allow_failure: true.
- manual: Run the job only when triggered manually.
- always: Run the job regardless of the status of jobs in earlier stages. Can also be used in workflow:rules.
- on_failure: Run the job only when at least one job in an earlier stage fails.
- delayed: Delay the execution of a job for a specified duration.
- never: Don’t run the job. Can only be used in a rules section or workflow: rules.
stages:
  - build
  - cleanup_build
  - test
  - deploy
  - cleanup

build_job:
  stage: build
  script:
    - make build

cleanup_build_job:
  stage: cleanup_build
  script:
    - cleanup build when failed
  when: on_failure

test_job:
  stage: test
  script:
    - make test

deploy_job:
  stage: deploy
  script:
    - make deploy
  when: manual
  environment: production

cleanup_job:
  stage: cleanup
  script:
    - cleanup after jobs
  when: always
上面的实例中:
- 当
build_job失败时,会执行cleanup_build_job - 无论失败还是成功,都会在 pipeline 的最后一步执行
cleanup_job - 当手动在 gitlab UI 中执行
deploy_job时,该 job 才会被执行
29)在全局设置中已经弃用的关键字
image, services, cache, before_script, after_script
如果要使用的话,要使用 default:
default:
  image: ruby:3.0
  services:
    - docker:dind
  cache:
    paths: [vendor/]
  before_script:
    - bundle config set path vendor/bundle
    - bundle install
  after_script:
    - rm -rf tmp/
2.2 GitLab Runner
官方文档
当在项目的根目录添加了 .gitlab-ci.yml 后,在每次提交的时候,gitlab 就能自动检测到需要进行 CI,就会调用 GitLab Runner 来执行 Job 中定义的 scripts(也就是脚本,即需要执行的东西)
GitLab Runner 是一个开源项目,用于运行您的作业并将结果发送回 GitLab。它与 GitLab CI 一起使用,GitLab CI 是 GitLab 随附的开源持续集成服务,用于协调作业。
GitLab Runner 是用 Go 编写,可以作为单个二进制文件运行,不需要语言特定的要求,能够运行在目前常用的平台上,例如:
- Linux/Unix
- Windows
- MacOS
- Kubernetes
GitLab Runner 的三种类型:
- shared:运行整个平台项目的 job (gitlab)
- group:运行特定group下的所有项目的 job (group)
- specific:运行指定的项目 job (project)
GitLab Runner 两种状态:
- locked:无法运行项目作业
- paused:不会运行作业
GitLab Runner 安装(这里只介绍使用 docker 的方式):
$ mkdir -p /data/gitlab-runner/config

$ docker run -itd --restart=always --name gitlab-runner \
-v /data/gitlab-runner/config:/etc/gitlab-runner \
-v /var/run/docker.sock:/var/run/docker.sock  gitlab/gitlab-runner:latest

$ docker exec -it gitlab-runner bash
root@24dc60abee0b:/# gitlab-runner -v
Version:      13.8.0
Git revision: 775dd39d
Git branch:   13-8-stable
GO version:   go1.13.8
Built:        2021-01-20T13:32:47+0000
OS/Arch:      linux/amd64
Runner 的注册:
- 将Runner在选择的机器上安装好了以后,需要将 Runner 注册到你部署的 Gitlab 上,这样 Gitlab 才能知道有多少管理的 Runner,同时 Runner 也能根据 CI/CD 里的配置来选择自己对应的任务去执行。
- 如果使用 docker 安装,则注册的时候也要进入 docker 容器里边进行
- runner 注册完成后会在 /etc/gitlab-runner 目录下生成一个 config.toml 的文件。这个就是 runner 的配置文件
- 注册完成后 gitlab UI 能够查看注册的 runner
docker exec -it gitlab-runner bash
gitlab-runner register
执行器(Executor):
- Runner 根据 CI/CD 上的配置选择自己对应的任务,将任务内容读取到它所在的机器上。但是实际执行任务的并不是 Runner,它只负责取任务并在任务执行成功或者失败的时候,返回对应的结果。
- 实际执行任务的是执行器(Executor),执行器是一个造出来的概念,实际上就是机器上的 shell,例如 linux 上的 bash shell、Windows 上的 PowerShell 等。
- 在 CI/CD 的任务里面,无非也都是代码编译、打包,而编译打包的命令都来自 shell 环境。而在注册 Runner 的时候,会要求你为这个 Runner 选择一个执行器,即这个 Runner 可以提供一个什么样的 shell 环境让你运行命令。因此 Bash Shell 类型的 Runner 只能运行 bash 命令,如果你给它传一个 powershell 的命令,就直接报错。
Runner 的执行流程:文章来源:https://www.toymoban.com/news/detail-765206.html
- Runner向/api/v4/runners 发送 POST 请求,请求里带有注册 Token
- 注册成功后返回 runner_token
- Runner 通过循环向 /api/v4/rquest 发送 POST 请求,请求里带上 runner_token
- 认证通过后接口返回带有任务信息的 payload 和任务相关的 job_token
- 然后将任务信息发送给执行器,执行器使用 job_token来克隆所需的代码,下载配置或组件
- 执行器执行完成后,返回任务输出和任务状态信息
- Runner 向 GitLab 返回任务输出、任务状态以及 job_token
 文章来源地址https://www.toymoban.com/news/detail-765206.html
到了这里,关于【git】2、gitlab CICD 模型部署自动化的文章就介绍完了。如果您还想了解更多内容,请在右上角搜索TOY模板网以前的文章或继续浏览下面的相关文章,希望大家以后多多支持TOY模板网!


