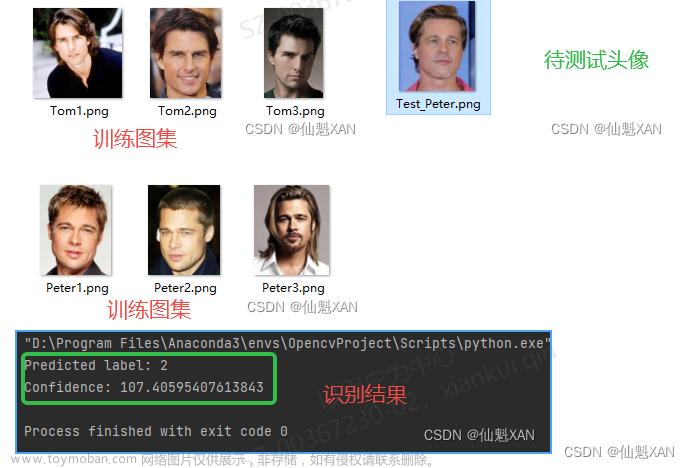
进行人脸识别首要的任务就是要定位出画面中的人脸,这个任务就是人脸检测。人脸检测总体上算是目标检测的一个特殊情况,但也有自身的特点,比如角度多变,表情多变,可能存在各类遮挡。早期传统的方法有Haar Cascade、HOG等,基本做法就是特征描述子+滑窗+分类器,随着2012年Alexnet的出现,慢慢深度学习在这一领域开始崛起。算法和硬件性能的发展,也让基于深度学习的人脸识别不仅性能取得了很大的提升,速度也能达到实时,使得人脸技术真正进入了实用。
人脸检测大体上跟随目标检测技术的发展,不过也有些自己的方法,主要可以分为一下几类方法.
人脸检测算法概览
由于这个系列重点并不在于算法细节本身,因而对于一些算法只是提及,有兴趣可以自己精读。
Cascade-CNN Based Models
这类方法通过级联几个网络来逐步提高准确率,比较有代表性的是MTCNN方法。
MTCNN通过级联PNet, RNet, ONet,层层过滤来提高整个检测的精度。这个方法更适合CPU,那个时期的嵌入式设备使用比较多。 由于有3个网络,训练起来比较麻烦。
R-CNN
这一块主要来源于目标检测中的RCNN, Fast RCNN, Faster RCNN
这类方法精度高,但速度相对较慢。
Single Shot Detection Models
SSD是目标检测领域比较有代表性的一个算法,与RCNN系列相比,它是one stage方法,速度比较快。基于它的用于人脸检测的代表性方法是SSH.
Feature Pyramid Network Based Models

YOLO系列
YOLO系列在目标检测领域比较成功,自然的也会用在人脸检测领域,比如tiny yolo face,yolov5face, yolov8face等,基本上每一代都会应用于人脸。
开源模型的选型
为了能够达到实时,同时也要有较好的效果,我们将目光锁定在yolo系列上,yolo在精度和速度的平衡上做的比较好,也比较易用。目前最新的是yolov8, 经过搜索,也已经有人将其用在人脸检测上了:derronqi/yolov8-face: yolov8 face detection with landmark (github.com),
推理框架的选择
简单起见,我们选择onnxruntime,该框架既支持CPU也支持GPU, 基本满足了我们的开发要求。
yolov8-face的使用
为了减少重复工作,我们可以定义一个模型的基类, 对模型载入、推理的操作进行封装,这样就不需要每个模型都实现一遍了:
from easydict import EasyDict as edict
import onnxruntime
import threading

class BaseModel:
    def __init__(self, model_path, device='cpu', **kwargs) -> None:
        self.model = self.load_model(model_path, device)
        self.input_layer = self.model.get_inputs()[0].name
        self.output_layers = [output.name for output in self.model.get_outputs()]
        self.lock = threading.Lock()

    def load_model(self, model_path:str, device:str='cpu'):
        available_providers = onnxruntime.get_available_providers()
        if device == "gpu" and "CUDAExecutionProvider" not in available_providers:
            print("CUDAExecutionProvider is not available, use CPUExecutionProvider instead")
            device = "cpu"

        if device == 'cpu':
            self.model = onnxruntime.InferenceSession(model_path, providers=['CPUExecutionProvider'])
        else:
            self.model = onnxruntime.InferenceSession(model_path,providers=['CUDAExecutionProvider'])

        return self.model

    def inference(self, input):
        with self.lock:
            outputs = self.model.run(self.output_layers, {self.input_layer: input})
        return outputs

    def preprocess(self, **kwargs):
        pass

    def postprocess(self, **kwargs):
        pass

    def run(self, **kwargs):
        pass
继承BaseModel, 实现模型的前处理和后处理:
class Yolov8Face(BaseModel):
    def __init__(self, model_path, device='cpu',**kwargs) -> None:
        super().__init__(model_path, device, **kwargs)
        self.conf_threshold = kwargs.get('conf_threshold', 0.5)
        self.iou_threshold = kwargs.get('iou_threshold', 0.4)
        self.input_size = kwargs.get('input_size', 640)
        self.input_width, self.input_height = self.input_size, self.input_size
        self.reg_max=16
        self.project = np.arange(self.reg_max)
        self.strides=[8, 16, 32]

        self.feats_hw = [(math.ceil(self.input_height / self.strides[i]), math.ceil(self.input_width / self.strides[i])) for i in range(len(self.strides))]
        self.anchors = self.make_anchors(self.feats_hw)

    def make_anchors(self, feats_hw, grid_cell_offset=0.5):
        """Generate anchors from features."""
        anchor_points = {}
        for i, stride in enumerate(self.strides):
            h,w = feats_hw[i]
            x = np.arange(0, w) + grid_cell_offset  # shift x
            y = np.arange(0, h) + grid_cell_offset  # shift y
            sx, sy = np.meshgrid(x, y)
            # sy, sx = np.meshgrid(y, x)
            anchor_points[stride] = np.stack((sx, sy), axis=-1).reshape(-1, 2)
        return anchor_points

    def preprocess(self, image, **kwargs):
        return resize_image(image, keep_ratio=True, dst_width=self.input_width, dst_height=self.input_height)

    def distance2bbox(self, points, distance, max_shape=None):
        x1 = points[:, 0] - distance[:, 0]
        y1 = points[:, 1] - distance[:, 1]
        x2 = points[:, 0] + distance[:, 2]
        y2 = points[:, 1] + distance[:, 3]
        if max_shape is not None:
            x1 = np.clip(x1, 0, max_shape[1])
            y1 = np.clip(y1, 0, max_shape[0])
            x2 = np.clip(x2, 0, max_shape[1])
            y2 = np.clip(y2, 0, max_shape[0])
        return np.stack([x1, y1, x2, y2], axis=-1)

    def postprocess(self, preds, scale_h, scale_w, top, left, **kwargs):
        bboxes, scores, landmarks = [], [], []
        for i, pred in enumerate(preds):
            stride = int(self.input_height/pred.shape[2])
            pred = pred.transpose((0, 2, 3, 1))

            box = pred[..., :self.reg_max * 4]
            cls = 1 / (1 + np.exp(-pred[..., self.reg_max * 4:-15])).reshape((-1,1))
            kpts = pred[..., -15:].reshape((-1,15)) ### x1,y1,score1, ..., x5,y5,score5

            # tmp = box.reshape(self.feats_hw[i][0], self.feats_hw[i][1], 4, self.reg_max)
            tmp = box.reshape(-1, 4, self.reg_max)
            bbox_pred = softmax(tmp, axis=-1)
            bbox_pred = np.dot(bbox_pred, self.project).reshape((-1,4))

            bbox = self.distance2bbox(self.anchors[stride], bbox_pred, max_shape=(self.input_height, self.input_width)) * stride
            kpts[:, 0::3] = (kpts[:, 0::3] * 2.0 + (self.anchors[stride][:, 0].reshape((-1,1)) - 0.5)) * stride
            kpts[:, 1::3] = (kpts[:, 1::3] * 2.0 + (self.anchors[stride][:, 1].reshape((-1,1)) - 0.5)) * stride
            kpts[:, 2::3] = 1 / (1+np.exp(-kpts[:, 2::3]))

            bbox -= np.array([[left, top, left, top]])  ###合理使用广播法则
            bbox *= np.array([[scale_w, scale_h, scale_w, scale_h]])
            kpts -= np.tile(np.array([left, top, 0]), 5).reshape((1,15))
            kpts *= np.tile(np.array([scale_w, scale_h, 1]), 5).reshape((1,15))

            bboxes.append(bbox)
            scores.append(cls)
            landmarks.append(kpts)

        bboxes = np.concatenate(bboxes, axis=0)
        scores = np.concatenate(scores, axis=0)
        landmarks = np.concatenate(landmarks, axis=0)

        bboxes_wh = bboxes.copy()
        bboxes_wh[:, 2:4] = bboxes[:, 2:4] - bboxes[:, 0:2]  ####xywh
        classIds = np.argmax(scores, axis=1)
        confidences = np.max(scores, axis=1)  ####max_class_confidence

        mask = confidences>self.conf_threshold
        bboxes_wh = bboxes_wh[mask]  ###合理使用广播法则
        confidences = confidences[mask]
        classIds = classIds[mask]
        landmarks = landmarks[mask]

        if len(bboxes_wh) == 0:
            return np.empty((0, 5)), np.empty((0, 5))

        indices = cv2.dnn.NMSBoxes(bboxes_wh.tolist(), confidences.tolist(), self.conf_threshold,
                                   self.iou_threshold).flatten()
        if len(indices) > 0:
            mlvl_bboxes = bboxes_wh[indices]
            confidences = confidences[indices]
            classIds = classIds[indices]
            ## convert box to x1,y1,x2,y2
            mlvl_bboxes[:, 2:4] = mlvl_bboxes[:, 2:4] + mlvl_bboxes[:, 0:2]

            # concat box, confidence, classId
            mlvl_bboxes = np.concatenate((mlvl_bboxes, confidences.reshape(-1, 1), classIds.reshape(-1, 1)), axis=1)

            landmarks = landmarks[indices]
            return mlvl_bboxes, landmarks.reshape(-1, 5, 3)[..., :2]
        else:
            return np.empty((0, 5)), np.empty((0, 5))


    def run(self, image, **kwargs):
        img, newh, neww, top, left = self.preprocess(image)
        scale_h, scale_w = image.shape[0]/newh, image.shape[1]/neww
        # convert to RGB
        img = cv2.cvtColor(img, cv2.COLOR_BGR2RGB)
        img = img.astype(np.float32)
        img = img / 255.0
        img = np.transpose(img, (2, 0, 1))
        img = np.expand_dims(img, axis=0)
        output = self.inference(img)
        bboxes, landmarks = self.postprocess(output, scale_h, scale_w, top, left)
        # limit box in image
        bboxes[:, 0] = np.clip(bboxes[:, 0], 0, image.shape[1])
        bboxes[:, 1] = np.clip(bboxes[:, 1], 0, image.shape[0])

        return bboxes, landmarks
测试
在Intel® Core™ i5-10210U上,yolov8-lite-t耗时50ms, 基本可以达到实时的需求。 文章来源:https://www.toymoban.com/news/detail-767169.html
参考文献:
ZOU, Zhengxia, et al. Object detection in 20 years: A survey. Proceedings of the IEEE, 2023.
MINAEE, Shervin, et al. Going deeper into face detection: A survey. arXiv preprint arXiv:2103.14983, 2021.文章来源地址https://www.toymoban.com/news/detail-767169.html
到了这里,关于人脸识别实战之基于开源模型搭建实时人脸识别系统(二):人脸检测概览与模型选型的文章就介绍完了。如果您还想了解更多内容,请在右上角搜索TOY模板网以前的文章或继续浏览下面的相关文章,希望大家以后多多支持TOY模板网!


