目录
目录
一、功能需求
二 、页面布局
一,将所需图片导入
二, 顶部top.xml设计
三,底部buttom1.xml设计
四,中间页面设计
五, 将底部中部以及中部进行整合
三、页面跳转控制
一,BlankFragment文件
二,MainActivity文件
四、在任一tab页中实现列表效果
一, 添加的RecyclerView控件
二, 建立xml文件存放显示内容
三,修改对应fragment文件
四,创建contact_adapter.java文件
五、结果展示
六、实践总结
七、代码分享
一、功能需求
完成一个类似微信页面的布局,要求:
- 页面最上方是标题居中
- 页面中间界面显示内容,内容随下方栏的选择而切换
- 页面最下方有四个按钮
- 点击按钮后,显示框变换内容
- 在任一tab页中实现列表效果
二 、页面布局
一,将所需图片导入
将准备好的图片文件导入到drawable目录下。
如图:

二, 顶部top.xml设计
在layout文件目录下创建top.xml文件,添加文本框,设置文字,字体大小,颜色及其背景,并将文字居中。
代码:
<?xml version="1.0" encoding="utf-8"?>
<androidx.constraintlayout.widget.ConstraintLayout xmlns:android="http://schemas.android.com/apk/res/android"
    xmlns:app="http://schemas.android.com/apk/res-auto"
    xmlns:tools="http://schemas.android.com/tools"
    android:layout_width="match_parent"
    android:layout_height="match_parent"
    android:layout_gravity="center">

    <TextView
        android:id="@+id/textView2"
        android:layout_width="match_parent"
        android:layout_height="55dp"
        android:background="#4CAF50"
        android:gravity="center"
        android:text="微信"
        android:textSize="40dp"
        tools:ignore="HardcodedText,MissingConstraints,SpUsage" />
</androidx.constraintlayout.widget.ConstraintLayout>
效果如下:

三,底部buttom1.xml设计
1先新建layout布局文件button1.xml。
2再添加一个LinearLayout(vertical),修改LinearLayout大小和颜色:修改gravity所对应的配置信息为center,再修改大小,添加id。
3在刚刚添加的LinearLayout(vertical)下添加ImageView,选择我们刚刚导入的图片。再添加textView控件,设置文本,调整大小,将其居中。
4复制三个我们修改好的LinearLayout,修改ImageButton的资源路径,分别修改LinearLayout、ImageView、textView的id,设置相应图片以及文本。
代码:
<?xml version="1.0" encoding="utf-8"?>
<LinearLayout xmlns:android="http://schemas.android.com/apk/res/android"
    xmlns:tools="http://schemas.android.com/tools"
    android:layout_width="match_parent"
    android:layout_height="wrap_content"
    xmlns:app="http://schemas.android.com/apk/res-auto"
    android:orientation="horizontal">

    <LinearLayout
        android:id="@+id/聊天"
        android:layout_width="100dp"
        android:layout_height="80dp"
        android:onClick="onClick"
        android:orientation="vertical"
        tools:ignore="SpeakableTextPresentCheck">

        <ImageView
            android:id="@+id/imageView1"
            android:layout_width="match_parent"
            android:layout_height="46dp"
            android:src="@drawable/wx" />

        <TextView
            android:id="@+id/textView1"
            android:layout_width="match_parent"
            android:layout_height="33dp"
            android:gravity="center"
            android:text="微信" />

    </LinearLayout>

    <LinearLayout
        android:id="@+id/通讯录"
        android:layout_width="100dp"
        android:layout_height="80dp"
        android:onClick="onClick"
        android:orientation="vertical"
        tools:ignore="SpeakableTextPresentCheck">

        <ImageView
            android:id="@+id/imageView2"
            android:layout_width="match_parent"
            android:layout_height="46dp"
            android:src="@drawable/txl" />

        <TextView
            android:id="@+id/textView2"
            android:layout_width="match_parent"
            android:layout_height="33dp"
            android:gravity="center"
            android:text="通讯录" />
    </LinearLayout>

    <LinearLayout
        android:id="@+id/发现"
        android:layout_width="100dp"
        android:layout_height="80dp"
        android:onClick="onClick"
        android:orientation="vertical"
        tools:ignore="SpeakableTextPresentCheck">

        <ImageView
            android:id="@+id/imageView3"
            android:layout_width="match_parent"
            android:layout_height="46dp"
            android:src="@drawable/fx" />

        <TextView
            android:id="@+id/textView3"
            android:layout_width="match_parent"
            android:layout_height="33dp"
            android:gravity="center"
            android:text="发现" />
    </LinearLayout>

    <LinearLayout
        android:id="@+id/我"
        android:layout_width="107dp"
        android:layout_height="80dp"
        android:onClick="onClick"
        android:orientation="vertical"
        tools:ignore="SpeakableTextPresentCheck">

        <ImageView
            android:id="@+id/imageView4"
            android:layout_width="match_parent"
            android:layout_height="46dp"
            android:src="@drawable/w" />

        <TextView
            android:id="@+id/textView4"
            android:layout_width="match_parent"
            android:layout_height="33dp"
            android:gravity="center"
            android:text="我" />
    </LinearLayout>
</LinearLayout>
效果如下:

四,中间页面设计
新建一个fragment.xml文件,分别添加一个ImageView,修改文字内容,并将ImageView设置居中 ,然后将文件复制三份并修改相应内容。
如图:

其中一个文件的代码:
<?xml version="1.0" encoding="utf-8"?>
<FrameLayout xmlns:android="http://schemas.android.com/apk/res/android"
    xmlns:tools="http://schemas.android.com/tools"
    android:layout_width="match_parent"
    android:layout_height="match_parent"
    tools:context=".wx_BlankFragment">

    <TextView
        android:layout_width="match_parent"
        android:layout_height="600dp"
        android:gravity="center"
        android:text="这是微信界面"
        android:textSize="35sp" />

</FrameLayout>
效果如下:

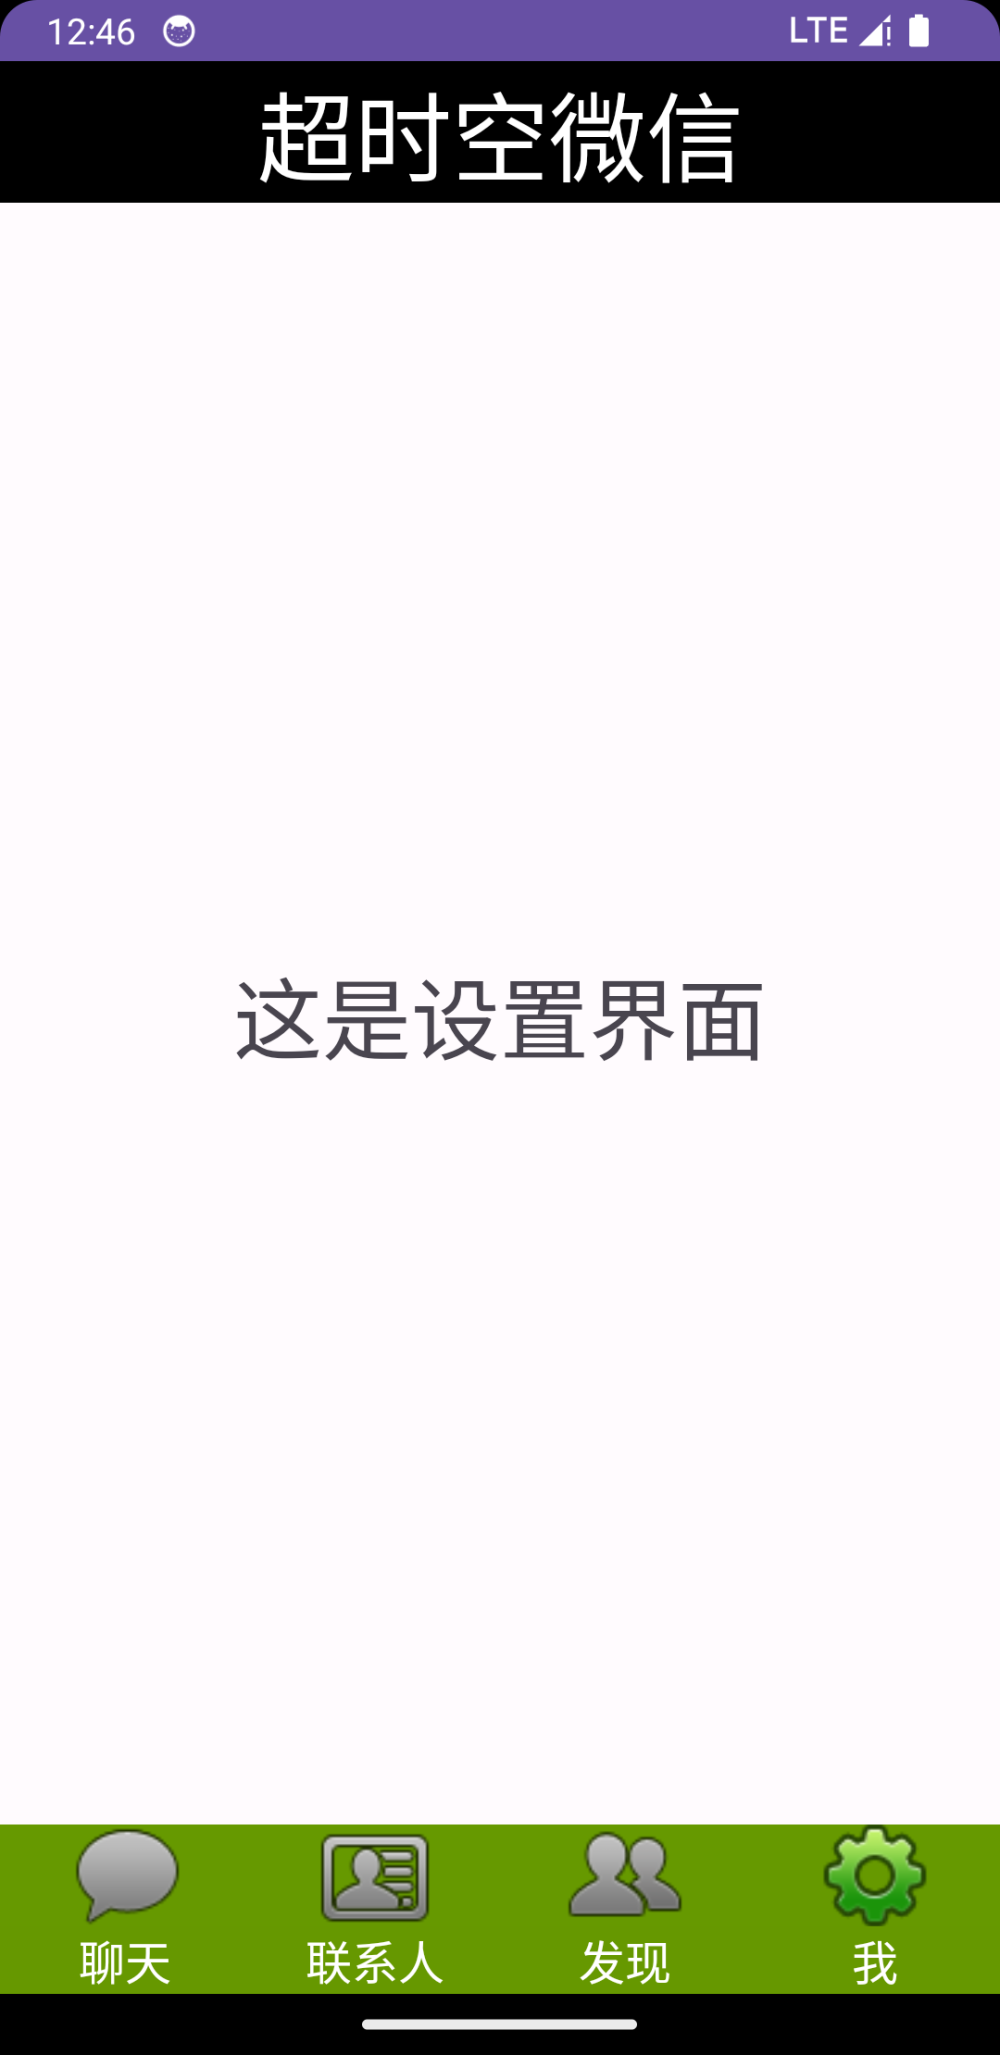
五, 将底部中部以及中部进行整合
我们想要的效果是页面最上方是标题,中间显示文本,最下方有四个按钮,故在activity_main.xml中先添加一个LinearLayout。在LinearLayout中按顺序添加三个部分:通过include标签添加top.xml和button.xml,由于四个显示文本的页面都是在中间,故选择通过放一个FrameLayout在top和button的中间。
代码:
<?xml version="1.0" encoding="utf-8"?>
<LinearLayout xmlns:android="http://schemas.android.com/apk/res/android"
    xmlns:tools="http://schemas.android.com/tools"
    android:layout_width="match_parent"
    android:layout_height="match_parent"
    android:orientation="vertical">

    <include
        layout="@layout/top"
        android:layout_width="match_parent"
        android:layout_height="wrap_content"/>

    <FrameLayout
        android:id="@+id/id_content"
        android:layout_width="match_parent"
        android:layout_height="600dp"
        android:layout_weight="1" />

    <include
        layout="@layout/buttom1"
        android:layout_width="match_parent"
        android:layout_height="wrap_content" />

</LinearLayout>
效果如下:
三、页面跳转控制
一,BlankFragment文件
在java文件夹中创建四个Fragment文件,分别对应你的“微信”、“朋友”、“通讯录”、“设置”,我命名为wxBlankFragment、txlBlankFragment、wBlankFragment、fxBlankFragment。
如图:

将代码结尾选中区域改成你自己的界面编号。
如:
 public View onCreateView(LayoutInflater inflater, ViewGroup container,
                             Bundle savedInstanceState) {
        // Inflate the layout for this fragment
        return inflater.inflate(R.layout.fragment1, container, false);
    }
二,MainActivity文件
1头文件导入以及变量声。
代码:
package com.example.myapplication;

import androidx.appcompat.app.AppCompatActivity;
import androidx.fragment.app.Fragment;
import androidx.fragment.app.FragmentManager;
import android.annotation.SuppressLint;
import android.os.Bundle;
import android.view.View;
import android.widget.LinearLayout;

public class MainActivity extends AppCompatActivity implements View.OnClickListener{
    private LinearLayout linearLayout1,linearLayout2,linearLayout3,linearLayout4;
    Fragment fragment1,fragment2,fragment3,fragment4;
    FragmentManager manager;
2导入四个中间fragment卡片到主体界面里面,需要先new出该各个界面的对象并创建出一个管理对象fragfragment变量。
代码:
fragment1=new wx_BlankFragment();
        fragment2=new txl_BlankFragment();
        fragment3=new fx_BlankFragment();
        fragment4=new w_BlankFragment();
        manager=getSupportFragmentManager();
3新建一个inital函数用以给Fragment页面初始化,在此函数中,将此前定义个4个Fragment变量使用fragmentManager添加到main文件中的中间主体部分的布局中。
代码:
private void inital() {
        int transaction = manager.beginTransaction()
        .add(R.id.id_content, fragment1)
        .add(R.id.id_content, fragment2)
        .add(R.id.id_content, fragment3)
        .add(R.id.id_content, fragment4)
        .commit();
    }
4在点击四个部件时需要展示其所代表的界面,故编写新的一个函数showfragment,展示fragment界面。
代码:
 private void showfragment(Fragment fragment) {
        int transaction = manager.beginTransaction()
                .show(fragment)
                .commit();
    }
5编写一个新的函数fragmentHide,将所有的fragment界面都隐藏。
代码:
public void fragmentHide(){
        int transaction=manager.beginTransaction()
                .hide(fragment1)
                .hide(fragment2)
                .hide(fragment3)
                .hide(fragment4)
                .commit();
    }
6对底部选择栏的四个控件进行监听,并根据监听所得到的结果调用fragment界面。
代码:
 linearLayout1.setOnClickListener(this);
        linearLayout2.setOnClickListener(this);
        linearLayout3.setOnClickListener(this);
        linearLayout4.setOnClickListener(this);
public void onClick(View view) {
fragmentHide();
if(view.getId()==R.id.聊天)
{
showfragment(fragment1);
}
else if(view.getId()==R.id.通讯录)
{
showfragment(fragment2);
}
else if(view.getId()==R.id.发现)
{
showfragment(fragment3);
}
else if(view.getId()==R.id.我)
{
showfragment(fragment4);
}
}7而在最开始的界面自然就是聊天界面,故在最开始的时候就调用聊天的fragment。
代码:
showfragment(fragment1);四、在任一tab页中实现列表效果
一, 添加的RecyclerView控件
我们选择给上次编写的发现界面处(fragment3.xml)的内容添加一个滑动删除的RecyclerView控件,将原本的textview删除然后加入一个recyclerview并丰富内容。
代码:
<?xml version="1.0" encoding="utf-8"?>
<FrameLayout xmlns:android="http://schemas.android.com/apk/res/android"
    xmlns:tools="http://schemas.android.com/tools"
    android:layout_width="match_parent"
    android:layout_height="match_parent"
    xmlns:app="http://schemas.android.com/apk/res-auto"
    tools:context=".fx_BlankFragment">

    <androidx.recyclerview.widget.RecyclerView
        android:id="@+id/rcv3"
        android:layout_width="match_parent"
        android:layout_height="match_parent"
        android:layout_margin="8dp"
        android:overScrollMode="never"
        android:scrollbars="none"
        app:layout_constraintEnd_toEndOf="parent"
        app:layout_constraintStart_toStartOf="parent"
        app:layout_constraintTop_toTopOf="parent" />

</FrameLayout>
结果如图:

二, 建立xml文件存放显示内容
将发现界面中要显示的的内容建立一个xml文件(rcv1_item.xml)存放。
代码:
<?xml version="1.0" encoding="utf-8"?>
<LinearLayout xmlns:android="http://schemas.android.com/apk/res/android"
    android:id="@+id/team"
    android:layout_width="match_parent"
    android:layout_height="100dp"
    android:layout_margin="8dp"
    android:background="@android:color/darker_gray"
    android:orientation="vertical">

    <TextView
        android:id="@+id/team_num"
        android:layout_width="wrap_content"
        android:layout_height="wrap_content"
        android:layout_margin="8dp"
        android:text="1" />

    <TextView
        android:id="@+id/team_content"
        android:layout_width="wrap_content"
        android:layout_height="wrap_content"
        android:layout_margin="8dp"
        android:text="内容" />


</LinearLayout>
效果如图:

三,修改对应fragment文件
我选择的是发现界面,故修改对应的 fx_BlankFragement.java文件。
创建initData()方法用于初始化数据,将数据添加到mylist列表中,我选择的是世界500强企业中前30的名称。
代码:
 private void initData(){
        myList.add("沃尔玛");
        myList.add("沙特阿美公司");
        myList.add("国家电网有限公司");
        myList.add("亚马逊");
        myList.add("中国石油天然气集团有限公司");
        myList.add("中国石油化工集团有限公司");
        myList.add("埃克森美孚");
        myList.add("苹果公司");
        myList.add("壳牌公司");
        myList.add("联合健康集团");
        myList.add("CVS Health公司");
        myList.add("托克集团");
        myList.add("中国建筑集团有限公司");
        myList.add("伯克希尔-哈撒韦公司");
        myList.add("大众公司");
        myList.add("Uniper公司");
        myList.add("Alphabet公司");
        myList.add("麦克森公司");
        myList.add("丰田汽车公司");
        myList.add("道达尔能源公司");
        myList.add("嘉能可");
        myList.add("英国石油公司");
        myList.add("雪佛龙");
        myList.add("美源伯根公司");
        myList.add("三星电子");
        myList.add("开市客");
        myList.add("鸿海精密工业股份有限公司");
        myList.add("中国工商银行股份有限公司");
        myList.add("中国建设银行股份有限公司");
        myList.add("微软");


    }
再创建intview3()方法用于初始化界面,创建一个名为contact_adapter的适配器实例,通过ID找到XML布局中的RecyclerView组件(contact_adapter文件接下来创建)。
创建一个线性布局管理器,用于配置RecyclerView的布局方向。
将布局管理器分配给RecyclerView,将适配器分配给RecyclerView。
将数据列表 mylist 设置到适配器中,以便在RecyclerView中显示企业的名称。
代码:
private void initView3() {
        context=this.getActivity();
        adapter_contact adapter = new adapter_contact(context);

        RecyclerView rcv_1 = recyclerView.findViewById(R.id.rcv3);

        LinearLayoutManager manager_3 = new LinearLayoutManager(context);
        manager_3.setOrientation(LinearLayoutManager.VERTICAL);


        rcv_1.setLayoutManager(manager_3);
        rcv_1.setHasFixedSize(true);
        rcv_1.setAdapter(adapter);

        adapter.setVerticalDataList(myList);
    }
四,创建contact_adapter.java文件
这是一个Android RecyclerView的适配器(Adapter)类的代码,用于将数据与RecyclerView中的视图进行绑定。
- 导入相关类和包:
package com.example.myapplication;

import android.content.Context;
import android.util.Log;
import android.view.LayoutInflater;
import android.view.View;
import android.view.ViewGroup;
import android.widget.TextView;

import androidx.annotation.NonNull;
import androidx.recyclerview.widget.RecyclerView;

import java.util.ArrayList;
import java.util.List;
2.构造函数用于初始化适配器,并接受上下文和数据列表作为参数。
public adapter_contact(Context context) {
        myContext = context;
    }
3.创建函数表示RecyclerView中每个视图项的布局。它包含一个TextView用于显示数据内容。
  public VerticalViewHolder(View itemView) {
            super(itemView);
            teamNum = itemView.findViewById(R.id.team_num);
            teamContent = itemView.findViewById(R.id.team_content);
        }
五、结果展示


六、实践总结
在完成类微信界面实验时,我们需要熟悉常见控件的使用方法,如RecyclerView、EditText、Button等;了解常用布局的特点,如LinearLayout、RelativeLayout等;使用自定义View或第三方库来实现一些特殊的效果,如表情输入框、图片选择等。在这次的实验下我也对AS这款软件进行了熟悉,让我初步了解了安卓开发,对于其提词器的强大有了很深的印象,代码能力得到了一定的提升。RecyclerView是一个功能强大的Android控件,用于高效显示列表数据。了解了如何创建RecyclerView、适配器以及如何实现数据绑定和单击事件处理。RecyclerView的灵活性使其适用于各种不同的列表布局和需求。本次实验使我更深入地了解了Android开发中的列表控件和RecyclerView的用法。通过这次实验,我已经能够初步构建更具交互性和高性能的列表视图,获得了一定的掌握。文章来源:https://www.toymoban.com/news/detail-767987.html
七、代码分享
pfsongzw/learners: AS安卓开发学习 (github.com)https://github.com/pfsongzw/learners文章来源地址https://www.toymoban.com/news/detail-767987.html
到了这里,关于Android Studio之搭建微信界面的文章就介绍完了。如果您还想了解更多内容,请在右上角搜索TOY模板网以前的文章或继续浏览下面的相关文章,希望大家以后多多支持TOY模板网!


