1.环境准备
1.1 集群规划
| 序号 | bigdata-001 | bigdata-002 | bigdata-003 | bigdata-004 | bigdata-005 |
|---|---|---|---|---|---|
| IP | x x x | x x x | xxx | xxx | xxx |
| 组件 | hadoop1 | hadoop2 | hadoop3 | hadoop4 | hadoop5 |
| 内存 | 64G | 64G | 128G | 128G | 128G |
| CPU核 | 16 | 16 | 32 | 32 | 32 |
| Hadoop-3.3.4 | NameNode | NameNode | DataNode | DataNode | DataNode |
| ResourceManager | ResourceManager | NodeManager | NodeManager | NodeManager | |
| DFSZKFailoverController | DFSZKFailoverController | JournalNode | JournalNode | JournalNode | |
| HistoryServer | |||||
| Zookeeper-3.5.7 | zk | zk | zk |
1.1 添加新用户并修改权限
useradd hadoop
passwd hadoop

visudo
# 在root   ALL=(ALL)       ALL一行下面添加
hadoop    ALL=(ALL)       NOPASSWD: ALL
1.2 配置hosts
sudo vim /etc/hosts
xxxx hadoop1
xxxx hadoop2
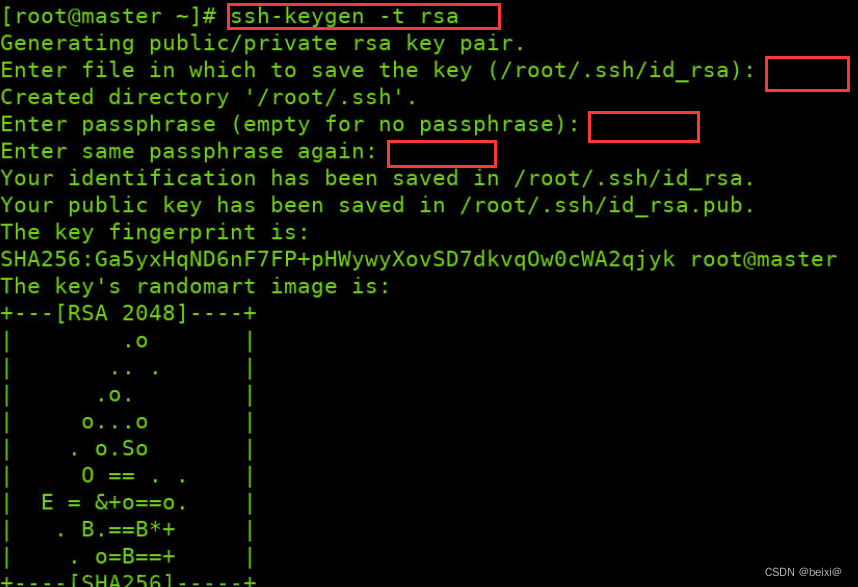
1.3 SSH免密登录
mkdir ~/.ssh
cd ~/.ssh
ssh-keygen -t rsa -m PEM
touch authorized_keys
#将authorized_keys配置好后,在编其他机器增加ssh的authorized_keys内入复制过去(必须有该机器的id_rsa.pub)
2.JDK安装
tar -zxvf jdk-8u212-linux-x64.tar.gz -C /data/module/
 mv jdk1.8.0_212/ jdk1.8.0_212
 #设置环境变量配置JDK
 sudo vim /etc/profile.d/my_env.sh

 #添加JAVA_HOME
export JAVA_HOME=/data/module/jdk1.8.0_212
export PATH=$PATH:$JAVA_HOME/bin
# 让环境变量生效
source /etc/profile.d/my_env.sh
# 测试JDK是否安装成功
java -version
#每一台机器都需要配置
3.Zookeeper安装及配置
#解压安装

# (1)解压Zookeeper安装包到/data/module/目录下
[hadoop@master1 software]$ tar -zxvf apache-zookeeper-3.5.7-bin.tar.gz -C /data/module/
# (2)修改/data/module/apache-zookeeper-3.5.7-bin名称为zookeeper-3.5.7
[hadoop@master1 module]$ mv apache-zookeeper-3.5.7-bin/  zk-3.5.7
# 2)配置服务器编号
# (1)在/data/module/zk-3.5.7/这个目录下创建zkData
[hadoop@master1 zookeeper]$ mkdir zkData
# (2)在/data/module/zk-3.5.7/zkData目录下创建一个myid的文件
[hadoop@master1 zkData]$ vim myid
# 添加myid文件,注意一定要在linux里面创建,在notepad++里面很可能乱码
# 在文件中添加与server对应的编号(保证每一个节点对饮的编号均不同):
 2
# 3)配置zoo.cfg文件
# (1)重命名/data/module/zk-3.5.7/conf这个目录下的zoo_sample.cfg为zoo.cfg
[hadoop@master1 conf]$ mv zoo_sample.cfg zoo.cfg
# (2)打开zoo.cfg文件
[hadoop@master1 conf]$ vim zoo.cfg
# 修改数据存储路径配置
dataDir=/data/module/zookeeper-3.5.7/zkData
# 增加如下配置
#######################cluster##########################
server.1=hadoop3:2888:3888
server.2=hadoop4:2888:3888
server.3=hadoop5:2888:3888
# (3)同步/data/module/zookeeper-3.5.7目录内容到master2、common1
4.Hadoop安装
4.1 组件安装
# 1)用SecureCRT工具将hadoop-3.3.4.tar.gz导入到data目录下面的software文件夹下面
# 2)进入到Hadoop安装包路径下
[hadoop@master1 ~]$ cd /data/software/
# 3)解压安装文件到/data/module下面
[hadoop@master1 software]$ tar -zxvf hadoop-3.3.4.tar.gz -C /data/module/
# 4)查看是否解压成功
[hadoop@master1 software]$ ls /data/module/hadoop-3.3.4
# 5)重命名
[hadoop@master1 software]$ mv /data/module/hadoop-3.3.4 /data/module/hadoop-3.3.4
# 7)将Hadoop添加到环境变量
# 	(1)获取Hadoop安装路径
[hadoop@master1 hadoop]$ pwd
/data/module/hadoop-3.3.4
	# (2)打开/etc/profile.d/my_env.sh文件
[hadoop@master1 hadoop]$ sudo vim /etc/profile.d/my_env.sh
# 在profile文件末尾添加JDK路径:(shitf+g)
#HADOOP_HOME
export HADOOP_HOME=/data/module/hadoop-3.3.4
export PATH=$PATH:$HADOOP_HOME/bin
export PATH=$PATH:$HADOOP_HOME/sbin
export HADOOP_CONF_DIR=${HADOOP_HOME}/etc/hadoop
export HADOOP_CLASSPATH=`hadoop classpath`

#USER_HOME
export USER_HOME=/home/hadoop
export PATH=$PATH:$USER_HOME/bin


# (3)保存后退出
:wq
	# (4)分发环境变量文件
# (5)source 是之生效(5台节点)
[hadoop@master1 module]$ source /etc/profile.d/my_env.sh
4.2 Hadoop配置集群
4.2.1 core配置文件
cd $HADOOP_HOME/etc/hadoo
vim core-site.xml
文件内容如下:
<?xml version="1.0" encoding="UTF-8"?>
<?xml-stylesheet type="text/xsl" href="configuration.xsl"?>

<configuration>
 <!-- 20231219 add for 垃圾回收时间为删除72小时后  -->
 <property>
    <name>fs.trash.interval</name>
    <value>4320</value>
  </property>

 <!-- 指定NameNode的地址 -->
  <property>
    <name>fs.defaultFS</name>
    <value>hdfs://hadoopcluster</value>
  </property>
  <!-- 指定hadoop数据的存储目录 -->
  <property>
    <name>hadoop.tmp.dir</name>
    <value>/data/module/hadoop-3.3.4/data</value>
  </property>
  <!-- 配置HDFS网页登录使用的静态用户为tlz -->
  <property>
    <name>hadoop.http.staticuser.user</name>
    <value>hadoop</value>
  </property>
  <!-- 指定zkfc要连接的zkServer地址 -->
  <property>
    <name>ha.zookeeper.quorum</name>
    <value>xxxx</value>
  </property>

<!-- 注:start-dfs.sh脚本有个坑,它先启动NN再启动JN,如果机器比较慢,会遇到NN挂掉的情况,以下可配置NN重连 -->

<!-- NN连接JN重试次数,默认是10次 -->
<property>
  <name>ipc.client.connect.max.retries</name>
  <value>30</value>
</property>

<!-- 重试时间间隔,默认1s -->
<property>
  <name>ipc.client.connect.retry.interval</name>
  <value>1000</value>
</property>
<property>
    <name>hadoop.proxyuser.hadoop.hosts</name>
    <value>*</value>
</property>
<property>
    <name>hadoop.proxyuser.hadoop.groups</name>
    <value>*</value>
</property>

<!--URI and Region Properties  以下均为cos配置
<property>
        <name>fs.defaultFS</name>
        <value>cosn://<bucket-appid></value>
        <description>
            Optional: If you don't want to use CosN as the default file system, you don't need to configure it.
        </description>
    </property>

-->

    <property>
        <name>fs.cosn.bucket.region</name>
        <value>ap-beijing</value>
        <description>The region where the bucket is located</description>
    </property>


<!--User Authentication Properties-->
<property>
        <name>fs.cosn.credentials.provider</name>
        <value>org.apache.hadoop.fs.auth.SimpleCredentialProvider</value>
</property>

    <property>
        <name>fs.cosn.userinfo.secretId</name>
        <value>xxxx</value>
        <description>Tencent Cloud Secret Id </description>
    </property>

    <property>
        <name>fs.cosn.userinfo.secretKey</name>
        <value>xxxx</value>
        <description>Tencent Cloud Secret Key</description>
    </property>

<!--Integration Properties-->
<property>
        <name>fs.cosn.impl</name>
        <value>org.apache.hadoop.fs.CosFileSystem</value>
        <description>The implementation class of the CosN Filesystem</description>
    </property>

    <property>
        <name>fs.AbstractFileSystem.cosn.impl</name>
        <value>org.apache.hadoop.fs.CosN</value>
        <description>The implementation class of the CosN AbstractFileSystem.</description>
    </property>
<!--Other Runtime Properties-->
<property>
        <name>fs.cosn.tmp.dir</name>
        <value>/tmp/hadoop_cos</value>
        <description>Temporary files would be placed here.</description>
    </property>

    <property>
        <name>fs.cosn.buffer.size</name>
        <value>33554432</value>
        <description>The total size of the buffer pool.</description>
    </property>

    <property>
        <name>fs.cosn.block.size</name>
        <value>8388608</value>
        <description>
        Block size to use cosn filesysten, which is the part size for MultipartUpload. Considering the COS supports up to 10000 blocks, user should estimate the maximum size of a single file. For example, 8MB part size can allow  writing a 78GB single file.
        </description>
    </property>

    <property>
        <name>fs.cosn.maxRetries</name>
        <value>3</value>
        <description>
      The maximum number of retries for reading or writing files to COS, before throwing a failure to the application.
        </description>
    </property>

    <property>
        <name>fs.cosn.retry.interval.seconds</name>
        <value>3</value>
        <description>The number of seconds to sleep between each COS retry.</description>
    </property>

</configuration>
4.2.2 MapReduce配置文件
配置mapred-site.xml
[hadoop@master1 hadoop]$ vim mapred-site.xml
文件内容如下
<?xml version="1.0"?>
<?xml-stylesheet type="text/xsl" href="configuration.xsl"?>
<configuration>

	<!-- 指定MapReduce程序运行在Yarn上 -->
    <property>
        <name>mapreduce.framework.name</name>
        <value>yarn</value>
    </property>
<!-- 历史服务器端地址 -->
<property>
    <name>mapreduce.jobhistory.address</name>
    <value>xxx:10020</value>
</property>

<!-- 历史服务器web端地址 -->
<property>
    <name>mapreduce.jobhistory.webapp.address</name>
    <value>xxx:19888</value>
</property>
</configuration>
4.2.3 配置workers
[hadoop@master1 hadoop]$ vim /data/module/hadoop-3.3.4/etc/hadoop/workers
# 在该文件中增加如下内容:
hadoop3
hadoop4
hadoop5
4.2.4 HDFS配置文件
配置hdfs-site.xml
[hadoop@master1 ~]$ cd $HADOOP_HOME/etc/hadoop
[hadoop@master1 hadoop]$ vim hdfs-site.xml
文件内容如下:
<?xml version="1.0" encoding="UTF-8"?>
<?xml-stylesheet type="text/xsl" href="configuration.xsl"?>

<!-- Put site-specific property overrides in this file. -->

<configuration>

<!-- NameNode数据存储目录 -->
  <property>
    <name>dfs.namenode.name.dir</name>
    <value>file://${hadoop.tmp.dir}/name</value>
  </property>
  <!-- DataNode数据存储目录 -->
  <property>
    <name>dfs.datanode.data.dir</name>
   <value>xxx</value>
  </property>

  <!-- JournalNode数据存储目录 -->
  <property>
    <name>dfs.journalnode.edits.dir</name>
	<value>xxx</value>
  </property>
  <!-- 完全分布式集群名称 -->
  <property>
    <name>dfs.nameservices</name>
    <value>hadoopcluster</value>
  </property>
  <!-- 集群中NameNode节点都有哪些 -->
  <property>
    <name>dfs.ha.namenodes.hadoopcluster</name>
    <value>nn1,nn2</value>
  </property>
  <!-- NameNode的RPC通信地址 -->
  <property>
    <name>dfs.namenode.rpc-address.hadoopcluster.nn1</name>
    <value>xxx:8020</value>
  </property>
  <property>
    <name>dfs.namenode.rpc-address.hadoopcluster.nn2</name>
    <value>xxx:8020</value>
  </property>

  <!-- 修改hdfs块大小为256m -->
  <property>
    <name>dfs.blocksize</name>
    <value>268435456</value>
    </property>
  <!-- NameNode的http通信地址 -->
  <property>
    <name>dfs.namenode.http-address.hadoopcluster.nn1</name>
    <value>xxx:9870</value>
  </property>
  <property>
    <name>dfs.namenode.http-address.hadoopcluster.nn2</name>
    <value>xxx:9870</value>
  </property>

  <!-- 指定NameNode元数据在JournalNode上的存放位置 -->
  <property>
    <name>dfs.namenode.shared.edits.dir</name>
    <value>qjournal://xxx:8485;xxx:8485;xxx:8485/hadoopcluster</value>
  </property>
  <!-- 访问代理类:client用于确定哪个NameNode为Active -->
  <property>
    <name>dfs.client.failover.proxy.provider.hadoopcluster</name>
    <value>org.apache.hadoop.hdfs.server.namenode.ha.ConfiguredFailoverProxyProvider</value>
  </property>
  <!-- 配置隔离机制,即同一时刻只能有一台服务器对外响应 -->
  <property>
    <name>dfs.ha.fencing.methods</name>
    <value>sshfence(hadoop:12898)</value>
  </property>
<property>
    <name>dfs.ha.fencing.ssh.connect-timeout</name>
    <value>30000</value>
</property>

  <!-- 使用隔离机制时需要ssh秘钥登录-->
  <property>
    <name>dfs.ha.fencing.ssh.private-key-files</name>
    <value>/home/hadoop/.ssh/id_rsa</value>
  </property>
  <!-- 启用nn故障自动转移 -->
  <property>
    <name>dfs.ha.automatic-failover.enabled</name>
    <value>true</value>
  </property>

 <!-- 通过httpfs协议访问rest接口,以root用户包装自己用户的方式操作HDFS,开启rest端口-->
<property>
<name>dfs.webhdfs.enabled</name>
<value>true</value>
</property>
<!-- NameNode有一个工作线程池,用来处理不同DataNode的并发心跳以及客户端并发的元数据操作。默认值是10-->
<property>
    <name>dfs.namenode.handler.count</name>
    <value>21</value>
</property>
 <!-- DataNode用来连接NameNode的RPC请求的线程数量。默认值是3-->
<property>
    <name>dfs.datanode.handler.count</name>
    <value>7</value>
</property>
 <!--  DataNode可以同时处理的数据传输连接数 默认值是256-->
<property>
    <name>dfs.datanode.max.xcievers</name>
    <value>4096</value>
</property>
<!-- 白名单 -->
<property>
     <name>dfs.hosts</name>
     <value>/data/module/hadoop-3.3.4/etc/hadoop/whitelist</value>
</property>

<!-- 黑名单 -->
<property>
     <name>dfs.hosts.exclude</name>
     <value>/data/module/hadoop-3.3.4/etc/hadoop/blacklist</value>
</property>
<!--
<property>
	  <name>dfs.namenode.duringRollingUpgrade.enable</name>
	  <value>true</value>
</property>
 -->
</configuration>
4.2.5 YARN配置文件
配置yarn-site.xml
[hadoop@master1 hadoop]$ vim yarn-site.xml
<?xml version="1.0"?>

<configuration>

<!-- Site specific YARN configuration properties -->

<!-- 指定MR和spark走shuffle -->
  <property>
    <name>yarn.nodemanager.aux-services</name>
    <value>mapreduce_shuffle,spark_shuffle</value>
  </property>
<property>
    <name>yarn.nodemanager.aux-services.spark_shuffle.class</name>
    <value>org.apache.spark.network.yarn.YarnShuffleService</value>
</property>

  <!-- 环境变量的继承 -->
  <property>
    <name>yarn.nodemanager.env-whitelist</name>
    <value>JAVA_HOME,HADOOP_COMMON_HOME,HADOOP_HDFS_HOME,HADOOP_CONF_DIR,CLASSPATH_PREPEND_DISTCACHE,HADOOP_YARN_HOME,HADOOP_MAPRED_HOME</value>
  </property>
  <!-- 开启日志聚集功能 -->
  <property>
    <name>yarn.log-aggregation-enable</name>
    <value>true</value>
  </property>
  <!-- 设置日志聚集服务器地址 -->
  <property>
    <name>yarn.log.server.url</name>
    <value>http:/xxx:19888/jobhistory/logs</value>
  </property>
  <!-- 设置日志保留时间为7天 -->
  <property>
    <name>yarn.log-aggregation.retain-seconds</name>
    <value>604800</value>
  </property>

  <property>
    <name>yarn.nodemanager.vmem-check-enabled</name>
    <value>false</value>
  </property>
  <property>
    <name>yarn.nodemanager.pmem-check-enabled</name>
    <value>true</value>
  </property>
  <!-- NodeManager使用内存数,默认8G -->
  <property>
    <name>yarn.nodemanager.resource.memory-mb</name>
    <value>114688</value>
  </property>

  <!-- nodemanager的CPU核数,不按照硬件环境自动设定时默认是8个 -->
  <property>
    <name>yarn.nodemanager.resource.cpu-vcores</name>
    <value>28</value>
  </property>
  <property>
    <description>The minimum allocation for every container request at the RM	in MBs. Memory requests lower than this will be set to the value of this	property. Additionally, a node manager that is configured to have less memory	than this value will be shut down by the resource manager.
    </description>
    <name>yarn.scheduler.minimum-allocation-mb</name>
    <value>128</value>
  </property>

  <!-- 容器最大内存,默认16G -->
  <property>
    <description>The maximum allocation for every container request at the RM	in MBs. Memory requests higher than this will throw an	InvalidResourceRequestException.
    </description>
    <name>yarn.scheduler.maximum-allocation-mb</name>
    <value>114688</value>
  </property>
  <!-- 容器最小CPU核数,默认1个 -->
  <property>
    <description>The minimum allocation for every container request at the RM	in terms of virtual CPU cores. Requests lower than this will be set to the	value of this property. Additionally, a node manager that is configured to	have fewer virtual cores than this value will be shut down by the resource	manager.
    </description>
    <name>yarn.scheduler.minimum-allocation-vcores</name>
    <value>1</value>
  </property>

  <!-- 容器最大CPU核数,默认4个 -->
  <property>
    <description>The maximum allocation for every container request at the RM	in terms of virtual CPU cores. Requests higher than this will throw an
    InvalidResourceRequestException.</description>
    <name>yarn.scheduler.maximum-allocation-vcores</name>
    <value>28</value>
  </property>

  <!-- 启用resourcemanager ha -->
  <property>
    <name>yarn.resourcemanager.ha.enabled</name>
    <value>true</value>
  </property>

  <!-- 声明两台resourcemanager的地址 -->
  <property>
    <name>yarn.resourcemanager.cluster-id</name>
    <value>cluster-yarn1</value>
  </property>

  <!--指定resourcemanager的逻辑列表-->
  <property>
    <name>yarn.resourcemanager.ha.rm-ids</name>
    <value>rm1,rm2</value>
  </property>
  <!-- ========== rm1的配置 ========== -->
  <!-- 指定rm1的主机名 -->
  <property>
    <name>yarn.resourcemanager.hostname.rm1</name>
    <value>xxx</value>
  </property>

  <!-- 指定rm1的web端地址 -->
  <property>
    <name>yarn.resourcemanager.webapp.address.rm1</name>
    <value>xxx:8088</value>
  </property>

  <!-- 指定rm1的内部通信地址 -->
  <property>
    <name>yarn.resourcemanager.address.rm1</name>
    <value>xxx:8032</value>
  </property>

  <!-- 指定AM向rm1申请资源的地址 -->
  <property>
    <name>yarn.resourcemanager.scheduler.address.rm1</name>
    <value>xxx:8030</value>
  </property>

  <!-- 指定供NM连接的地址 -->
  <property>
  <name>yarn.resourcemanager.resource-tracker.address.rm1</name>
    <value>xxxx:8031</value>
  </property>

  <!-- ========== rm2的配置 ========== -->
  <!-- 指定rm2的主机名 -->
  <property>
    <name>yarn.resourcemanager.hostname.rm2</name>
    <value>xxx</value>
  </property>
  <property>
    <name>yarn.resourcemanager.webapp.address.rm2</name>
    <value>xxx:8088</value>
  </property>
  <property>
    <name>yarn.resourcemanager.address.rm2</name>
    <value>xxx:8032</value>
  </property>
  <property>
    <name>yarn.resourcemanager.scheduler.address.rm2</name>
    <value>xxxx:8030</value>
  </property>

  <property>
  <name>yarn.resourcemanager.resource-tracker.address.rm2</name>
    <value>xxxx:8031</value>
  </property>

  <!-- 指定zookeeper集群的地址 -->
  <property>
    <name>yarn.resourcemanager.zk-address</name>
    <value>xxxx</value>
  </property>

  <!-- 启用自动恢复 -->
  <property>
    <name>yarn.resourcemanager.recovery.enabled</name>
    <value>true</value>
  </property>

  <!-- 指定resourcemanager的状态信息存储在zookeeper集群 -->
  <property>
    <name>yarn.resourcemanager.store.class</name>
    <value>org.apache.hadoop.yarn.server.resourcemanager.recovery.ZKRMStateStore</value>
  </property>


  <!--NodeManager 存储中间数据文件的本地文件系统中的目录列表-,只有nodemanage配置->

      <!-- <property>
                <name>yarn.nodemanager.local-dirs</name>
                <value>
                xxxx
                </value>
            </property>
        <!--NodeManager日志目录,注意,一般也可以直接配置一个目录-->
        <property>
            <name>yarn.nodemanager.log-dirs</name>
            <value>/data2/logs</value>
        </property>  -->

<property>
    <name>yarn.resourcemanager.scheduler.class</name>
    <value>org.apache.hadoop.yarn.server.resourcemanager.scheduler.capacity.CapacityScheduler</value>
    <description>配置使用容量调度器</description>
</property>
<!-- ResourceManager处理调度器请求的线程数量,默认50;如果提交的任务数大于50,可以增加该值,但是不能超过3台 * 4线程 = 12线程(去除其他应用程序实际不能超过8) -->
<property>
	<description>Number of threads to handle scheduler interface.</description>
	<name>yarn.resourcemanager.scheduler.client.thread-count</name>
	<value>100</value>
</property>
<!-- 首先配置 yarn-site.xml,配置resourcemanager重启次数 -->
<property>
  <name>yarn.resourcemanager.am.max-attempts</name>
  <value>4</value>
  <description>
    The maximum number of application master execution attempts,默认值2次
  </description>
</property>

<!--
<property>
    <name>yarn.resourcemanager.scheduler.class</name>
    <value>org.apache.hadoop.yarn.server.resourcemanager.scheduler.fair.FairScheduler</value>
    <description>配置使用公平调度器</description>
</property>

<property>
    <name>yarn.scheduler.fair.allocation.file</name>
    <value>/data/module/hadoop-3.1.3/etc/hadoop/fair-scheduler.xml</value>
    <description>指明公平调度器队列分配配置文件</description>
</property>

<property>
  <name>yarn.scheduler.fair.user-as-default-queue</name>
  <value>false</value>
<description>未指定队列的情况下,是否使用【用户名】作为队列名当设置为true时,当`yellow`用户提交作业时,会自动创建并使用`root.yellow`队列当设置为false时,所有用户默认使用`root.default`队列当配置了`yarn.scheduler.fair.allocation.file`时,本配置将被忽略</description>
</property>

<property>
    <name>yarn.scheduler.fair.preemption</name>
    <value>false</value>
    <description>禁止队列间资源抢占</description>
</property>
-->

<property>
    <name>yarn.timeline-service.enabled</name>
    <value>true</value>
</property>

<property>
    <name>hadoop.http.cross-origin.allowed-origins</name>
    <value>*</value>
</property>

<property>
    <name>yarn.nodemanager.webapp.cross-origin.enabled</name>
    <value>true</value>
</property>

<property>
    <name>yarn.resourcemanager.webapp.cross-origin.enabled</name>
    <value>true</value>
</property>

<property>
    <name>yarn.timeline-service.http-cross-origin.enabled</name>
    <value>true</value>
</property>

<property>
  <description>Publish YARN information to Timeline Server</description>
  <name> yarn.resourcemanager.system-metrics-publisher.enabled</name>
  <value>true</value>
</property>

<property>
  <description>The hostname of the Timeline service web application.</description>
  <name>yarn.timeline-service.hostname</name>
  <value>xxx</value>
</property>

<!-- 标示client是否通过timeline history-service查询通用的application数据。如果未启用,则application数据只能从Resource Manager查询。默认为false。-->
   <property>
        <name>yarn.timeline-service.generic-application-history.enabled</name>
        <value>true</value>
   </property>
   <property>
        <description>Address for the Timeline server to start the RPC server.</description>
        <name>yarn.timeline-service.address</name>
        <value>xxx:10201</value>
   </property>
   <property>
        <description>The http address of the Timeline service web application.</description>
        <name>yarn.timeline-service.webapp.address</name>
        <value>xxx:8188</value>
   </property>
   <property>
        <description>The https address of the Timeline service web application.</description>
        <name>yarn.timeline-service.webapp.https.address</name>
        <value>xxx:2191</value>
   </property>
   <property>
        <name>yarn.timeline-service.handler-thread-count</name>
        <value>10</value>
   </property>

<property>
     <name>yarn.resourcemanager.scheduler.monitor.enable</name>
     <value>true</value>
</property>

</configuration>
4.2.6 调度类型配置
容量调度类型配置文章来源:https://www.toymoban.com/news/detail-769916.html
<configuration>

  <property>
    <name>yarn.scheduler.capacity.maximum-applications</name>
    <value>10000</value>
    <description>
      Maximum number of applications that can be pending and running.
    </description>
  </property>

  <property>
    <name>yarn.scheduler.capacity.maximum-am-resource-percent</name>
    <value>0.8</value>
    <description>
      Maximum percent of resources in the cluster which can be used to run
      application masters i.e. controls number of concurrent running
      applications.
    </description>
  </property>

  <property>
    <name>yarn.scheduler.capacity.resource-calculator</name>
    <value>org.apache.hadoop.yarn.util.resource.DefaultResourceCalculator</value>
    <description>
      The ResourceCalculator implementation to be used to compare
      Resources in the scheduler.
      The default i.e. DefaultResourceCalculator only uses Memory while
      DominantResourceCalculator uses dominant-resource to compare
      multi-dimensional resources such as Memory, CPU etc.
    </description>
  </property>

  <property>
    <name>yarn.scheduler.capacity.root.queues</name>
    <value>xx2,xx1</value>
    <description>
      The queues at the this level (root is the root queue).
    </description>
  </property>

  <property>
    <name>yarn.scheduler.capacity.root.xx2.capacity</name>
    <value>65</value>
    <description>Default queue target capacity.</description>
  </property>

  <property>
    <name>yarn.scheduler.capacity.root.xx2.user-limit-factor</name>
    <value>2</value>
    <description>
      Default queue user limit a percentage from 0.0 to 1.0.
    </description>
  </property>

  <property>
    <name>yarn.scheduler.capacity.root.xx2.maximum-capacity</name>
    <value>80</value>
    <description>
      The maximum capacity of the default queue.
    </description>
  </property>

  <property>
    <name>yarn.scheduler.capacity.root.xx2.state</name>
    <value>RUNNING</value>
    <description>
      The state of the default queue. State can be one of RUNNING or STOPPED.
    </description>
  </property>

  <property>
    <name>yarn.scheduler.capacity.root.xx2.acl_submit_applications</name>
    <value>*</value>
    <description>
      The ACL of who can submit jobs to the default queue.
    </description>
  </property>

  <property>
    <name>yarn.scheduler.capacity.root.xx2.acl_administer_queue</name>
    <value>*</value>
    <description>
      The ACL of who can administer jobs on the default queue.
    </description>
  </property>

  <property>
    <name>yarn.scheduler.capacity.root.xx2.acl_application_max_priority</name>
    <value>*</value>
    <description>
      The ACL of who can submit applications with configured priority.
      For e.g, [user={name} group={name} max_priority={priority} default_priority={priority}]
    </description>
  </property>

   <property>
     <name>yarn.scheduler.capacity.root.xx2.maximum-application-lifetime
     </name>
     <value>-1</value>
     <description>
        Maximum lifetime of an application which is submitted to a queue
        in seconds. Any value less than or equal to zero will be considered as
        disabled.
        This will be a hard time limit for all applications in this
        queue. If positive value is configured then any application submitted
        to this queue will be killed after exceeds the configured lifetime.
        User can also specify lifetime per application basis in
        application submission context. But user lifetime will be
        overridden if it exceeds queue maximum lifetime. It is point-in-time
        configuration.
        Note : Configuring too low value will result in killing application
        sooner. This feature is applicable only for leaf queue.
     </description>
   </property>

   <property>
     <name>yarn.scheduler.capacity.root.xx2.default-application-lifetime
     </name>
     <value>-1</value>
     <description>
        Default lifetime of an application which is submitted to a queue
        in seconds. Any value less than or equal to zero will be considered as
        disabled.
        If the user has not submitted application with lifetime value then this
        value will be taken. It is point-in-time configuration.
        Note : Default lifetime can't exceed maximum lifetime. This feature is
        applicable only for leaf queue.
     </description>
   </property>

  <property>
    <name>yarn.scheduler.capacity.node-locality-delay</name>
    <value>40</value>
    <description>
      Number of missed scheduling opportunities after which the CapacityScheduler
      attempts to schedule rack-local containers.
      When setting this parameter, the size of the cluster should be taken into account.
      We use 40 as the default value, which is approximately the number of nodes in one rack.
      Note, if this value is -1, the locality constraint in the container request
      will be ignored, which disables the delay scheduling.
    </description>
  </property>

  <property>
    <name>yarn.scheduler.capacity.rack-locality-additional-delay</name>
    <value>-1</value>
    <description>
      Number of additional missed scheduling opportunities over the node-locality-delay
      ones, after which the CapacityScheduler attempts to schedule off-switch containers,
      instead of rack-local ones.
      Example: with node-locality-delay=40 and rack-locality-delay=20, the scheduler will
      attempt rack-local assignments after 40 missed opportunities, and off-switch assignments
      after 40+20=60 missed opportunities.
      When setting this parameter, the size of the cluster should be taken into account.
      We use -1 as the default value, which disables this feature. In this case, the number
      of missed opportunities for assigning off-switch containers is calculated based on
      the number of containers and unique locations specified in the resource request,
      as well as the size of the cluster.
    </description>
  </property>

  <property>
    <name>yarn.scheduler.capacity.queue-mappings</name>
    <value></value>
    <description>
      A list of mappings that will be used to assign jobs to queues
      The syntax for this list is [u|g]:[name]:[queue_name][,next mapping]*
      Typically this list will be used to map users to queues,
      for example, u:%user:%user maps all users to queues with the same name
      as the user.
    </description>
  </property>

  <property>
    <name>yarn.scheduler.capacity.queue-mappings-override.enable</name>
    <value>false</value>
    <description>
      If a queue mapping is present, will it override the value specified
      by the user? This can be used by administrators to place jobs in queues
      that are different than the one specified by the user.
      The default is false.
    </description>
  </property>

  <property>
    <name>yarn.scheduler.capacity.per-node-heartbeat.maximum-offswitch-assignments</name>
    <value>1</value>
    <description>
      Controls the number of OFF_SWITCH assignments allowed
      during a node's heartbeat. Increasing this value can improve
      scheduling rate for OFF_SWITCH containers. Lower values reduce
      "clumping" of applications on particular nodes. The default is 1.
      Legal values are 1-MAX_INT. This config is refreshable.
    </description>
  </property>


  <property>
    <name>yarn.scheduler.capacity.application.fail-fast</name>
    <value>false</value>
    <description>
      Whether RM should fail during recovery if previous applications'
      queue is no longer valid.
    </description>
  </property>


<!-- 指定xx1队列的资源额定容量 -->
<property>
    <name>yarn.scheduler.capacity.root.xx1.capacity</name>
    <value>35</value>
</property>

<!-- 用户最多可以使用队列多少资源,1表示表示一个user获取的资源容量不能超过queue配置的capacity,无论集群有多少空闲资源。此值为float类型 -->
<property>
    <name>yarn.scheduler.capacity.root.xx1.user-limit-factor</name>
    <value>2</value>
</property>

<!-- 指定realtime队列的资源最大容量 -->
<property>
    <name>yarn.scheduler.capacity.root.xx1.maximum-capacity</name>
    <value>50</value>
</property>

<!-- 集群中用于运行应用程序ApplicationMaster的资源比例上限 -->
<property>
<name>yarn.scheduler.capacity.root.xx1.maximum-am-resource-percent</name>
    <value>0.85</value>
</property>

<!-- 启动realtime队列 -->
<property>
    <name>yarn.scheduler.capacity.root.xx1.state</name>
    <value>RUNNING</value>
</property>

<!-- 哪些用户有权向队列提交作业 -->
<property>
    <name>yarn.scheduler.capacity.root.xx1.acl_submit_applications</name>
    <value>*</value>
</property>

<!-- 哪些用户有权操作队列,管理员权限(查看/杀死) -->
<property>
    <name>yarn.scheduler.capacity.root.xx1.acl_administer_queue</name>
    <value>*</value>
</property>

<!-- 哪些用户有权配置提交任务优先级 -->
<property>
    <name>yarn.scheduler.capacity.root.xx1.acl_application_max_priority</name>
    <value>*</value>
</property>

<!-- 任务的超时时间设置:yarn application -appId appId -updateLifetime Timeout 参考资料:https://blog.cloudera.com/enforcing-application-lifetime-slas-yarn/ -->

<!-- 如果application指定了超时时间,则提交到该队列的application能够指定的最大超时时间不能超过该值  -->
<property>
<name>yarn.scheduler.capacity.root.xx1.maximum-application-lifetime</name>
    <value>-1</value>
</property>

<!-- 如果application没指定超时时间,则用default-application-lifetime作为默认值 -->
<property>
    <name>yarn.scheduler.capacity.root.xx1.default-application-lifetime</name>
    <value>-1</value>
</property>


</configuration>
4.2.7 修改 hadoop-env.sh
# export HADOOP_SSH_OPTS="-o BatchMode=yes -o StrictHostKeyChecking=no -o ConnectTimeout=10s"
export HADOOP_SSH_OPTS="-p 12898" export
# Where pid files are stored.  /tmp by ,此处不保存,时间长后无法关闭hadoop
default.HADOOP_PID_DIR=/data/module/hadoop-3.3.4/pids
4.2.8 创建 whitelist blacklist(空即可,不使用某个common节点放里面就可以)
4.2.9 同步配置文件
4.2.10 启动QJM集群(三台JournalNode)
hdfs --daemon start journalnode
# 关闭命令,此处不执行:hdfs --daemon stop journalnode
4.2.11 格式化NN(
# 在102执行
hdfs namenode -format
# 启动NameNode
hdfs --daemon start namenode
# (关闭命令,此处不执行:hdfs --daemon stop namenode)
4.2.12 其他hadoop2节点同步NN数据
# 在103执行
hdfs namenode -bootstrapStandby
#然后启动NameNode
# 在103执行
hdfs --daemon start namenode
hdfs --daemon stop namenode
4.2.13 启动zookeeper集群
zkServer.sh start
4.2.14 初始化zkfc在zookeeper中的父节点
# 在NN节点执行
hdfs zkfc -formatZK
4.2.15 在三台DN节点启动DN
# 在三台节点都执行
hdfs --daemon start datanode
# hdfs --daemon stop datanode
4.2.16 以后集群的启停
start-dfs.sh/stop-dfs.sh
start-yarn.sh/stop-yarn.sh
4.2.17 启动历史服务器
mapred --daemon start historyserver
5.Hadoop其他组件配套安装
详见本博客其他篇章
Hive和Spark生产集群搭建(spark on doris)
Hadoop集成对象存储和HDFS磁盘文件存储
最全HSQL命令大全(Hive命令)文章来源地址https://www.toymoban.com/news/detail-769916.html
到了这里,关于最全Hadoop实际生产集群高可用搭建的文章就介绍完了。如果您还想了解更多内容,请在右上角搜索TOY模板网以前的文章或继续浏览下面的相关文章,希望大家以后多多支持TOY模板网!