自动化生成代码是现在一种非常常见的技术,它可以大大提高开发效率,减少重复劳动。而在 Java 开发中,MyBatis 是一个非常流行的 ORM 框架,而其中的 Generator 和 MyBatis-Plus 中的 AutoGenerator 是两个非常好用的自动化代码生成工具,下面我们来分别介绍一下它们的使用。
Mybatis Generator自动化生成代码
MyBatis Generator概述
MyBatis Generator 是 MyBatis 框架提供的一个自动生成代码的工具,它能够根据数据库中的表自动生成对应的 POJO、Mapper 接口和 XML 配置文件,同时也支持自定义插件的开发。使用 MyBatis Generator 的步骤如下:
使用Java代码形式
1. 在 Maven 或 Gradle 中添加 MyBatis Generator 的依赖:
<dependency>
  <groupId>org.mybatis.generator</groupId>
  <artifactId>mybatis-generator-core</artifactId>
  <version>1.4.0</version>
</dependency>
2. 编写配置文件 GeneratorConfig.xml,配置需要生成的数据库表和对应的生成器:
<?xml version="1.0" encoding="UTF-8"?>
<!DOCTYPE generatorConfiguration
    PUBLIC "-//mybatis.org//DTD MyBatis Generator Configuration 1.0//EN"
    "http://mybatis.org/dtd/mybatis-generator-config_1_0.dtd">

<generatorConfiguration>
    <context id="testTables" targetRuntime="MyBatis3">
        <plugin type="org.mybatis.generator.plugins.SerializablePlugin" />
        <commentGenerator>
            <property name="suppressAllComments" value="true" />
        </commentGenerator>

        <jdbcConnection driverClass="com.mysql.jdbc.Driver"
            connectionURL="jdbc:mysql://localhost:3306/test"
            userId="root"
            password="root" />

        <javaTypeResolver>
            <property name="forceBigDecimals" value="false" />
        </javaTypeResolver>

        <javaModelGenerator targetPackage="com.example.pojo"
            targetProject="src/main/java">
            <property name="enableSubPackages" value="true" />
            <property name="trimStrings" value="true" />
        </javaModelGenerator>

        <sqlMapGenerator targetPackage="com.example.mapper"
            targetProject="src/main/resources">
            <property name="enableSubPackages" value="true" />
        </sqlMapGenerator>

        <javaClientGenerator type="XMLMAPPER"
            targetPackage="com.example.mapper"
            targetProject="src/main/java">
            <property name="enableSubPackages" value="true" />
        </javaClientGenerator>

        <table tableName="tb_user" domainObjectName="User"
            enableCountByExample="false" enableUpdateByExample="false"
            enableDeleteByExample="false" enableSelectByExample="false"
            selectByExampleQueryId="false" />

    </context>
</generatorConfiguration>
3. 在命令行中使用 MyBatis Generator 进行代码生成:
java -jar mybatis-generator-core-1.4.0.jar -configfile GeneratorConfig.xml -overwrite
这样就会在指定的包路径和项目路径下生成对应的 POJO、Mapper 接口和 XML 配置文件。但编写代码还需要配置一些信息,也挺麻烦哈,偷个懒吧再,使用Maven 插件帮咱们干活。
使用Maven插件
pom.xml中添加依赖
<dependency>
    <groupId>org.mybatis.spring.boot</groupId>
    <artifactId>mybatis-spring-boot-starter</artifactId>
    <version>2.2.2</version>
</dependency>

<dependency>
    <groupId>mysql</groupId>
    <artifactId>mysql-connector-java</artifactId>
    <scope>runtime</scope>
</dependency>
pom.xml中build-plugins下添加插件
添加了插件后,我们使用 configurationFile 元素来指定一个配置文件 mybatis-generator-config.xml
而且数据库表可能会发生变动,因此我们需要追加一个配置 <overwrite>true</overwrite>,允许覆盖旧的文件。为了防止我们编写的 SQL 语句被覆盖掉,MyBatis Generator 只会覆盖旧的 po、dao、而 *mapper.xml 不会覆盖,而是追加。
<!-- MyBatis Generator 插件 -->
<plugin>
    <groupId>org.mybatis.generator</groupId>
    <artifactId>mybatis-generator-maven-plugin</artifactId>
    <version>1.3.7</version>
    <configuration>
        <!-- MyBatis Generator 生成器的配置文件-->
        <configurationFile>src/main/resources/mybatis-generator-config.xml</configurationFile>
        <!-- 允许覆盖生成的文件,确定骨架代码后就可以设为 false 了,免得覆盖原有代码 -->
        <overwrite>true</overwrite>
        <!-- 将当前 pom 的依赖项添加到生成器的类路径中-->
        <includeCompileDependencies>true</includeCompileDependencies>
    </configuration>
</plugin>
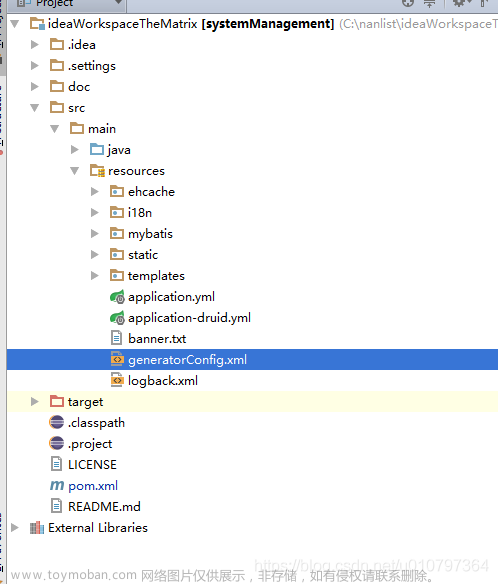
结构如下图:
mybatis-generator-config.xml
<generatorConfiguration>
<context id="myContext" targetRuntime="MyBatis3" defaultModelType="flat">
<!-- 注释 -->
<commentGenerator>
<!-- 是否不生成注释 -->
<property name="suppressAllComments" value="true"/>
</commentGenerator>
<!-- jdbc连接 -->
<jdbcConnection driverClass="com.mysql.cj.jdbc.Driver"
connectionURL="jdbc:mysql://localhost:3306/test?useUnicode=true&characterEncoding=utf-8&serverTimezone=Asia/Shanghai&useSSL=false"
userId="root"
password="1234">
</jdbcConnection>
<!-- 类型转换 -->
<javaTypeResolver>
<!--是否使用bigDecimal,默认false。
false:把JDBC DECIMAL 和 NUMERIC 类型解析为 Integer
true:把JDBC DECIMAL 和 NUMERIC 类型解析为java.math.BigDecimal-->
<property name="forceBigDecimals" value="true"/>
</javaTypeResolver>
<!-- 生成实体类地址 -->
<javaModelGenerator targetPackage="com.example.pojo" targetProject="src/main/java">
<!-- 是否针对string类型的字段在set方法中进行修剪,默认false -->
<property name="trimStrings" value="true"/>
</javaModelGenerator>
<!-- 生成Mapper.xml文件 -->
<sqlMapGenerator targetPackage="com.example.mapper" targetProject="src/main/resources">
</sqlMapGenerator>
<!-- 生成 XxxMapper.java 接口-->
<javaClientGenerator targetPackage="com.example.mapper" targetProject="src/main/java" type="XMLMAPPER">
<property name="enableSubPackages" value="true" />
</javaClientGenerator>
<!-- schema为数据库名,oracle需要配置,mysql不需要配置。
tableName为对应的数据库表名
domainObjectName 是要生成的实体类名(可以不指定,默认按帕斯卡命名法将表名转换成类名)
enableXXXByExample 默认为 true, 为 true 会生成一个对应Example帮助类,帮助你进行条件查询,不想要可以设为false
-->
<table schema="" tableName="posts" domainObjectName="Posts"
enableCountByExample="false" enableDeleteByExample="false" enableSelectByExample="false"
enableUpdateByExample="false" selectByExampleQueryId="false">
</table>
</context>
</generatorConfiguration>
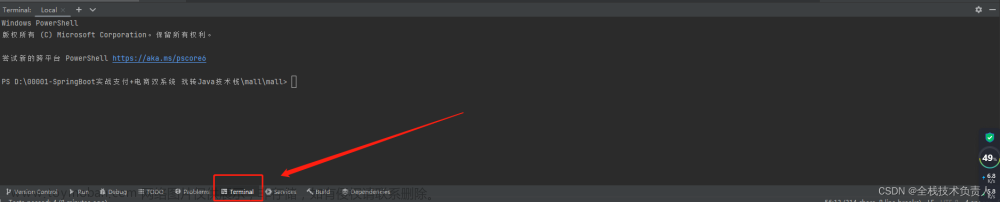
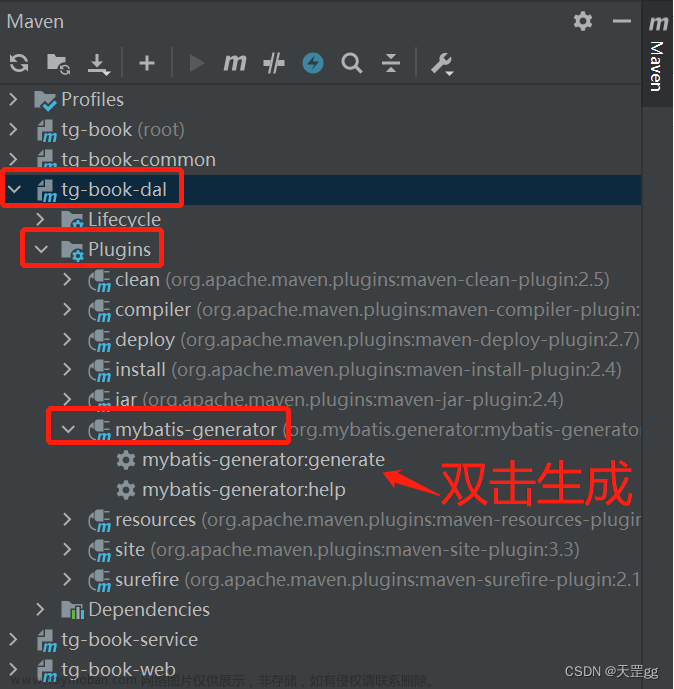
运行

MyBatis-Plus 的 AutoGenerator
MyBatis-Plus AutoGenerator概述
MyBatis-Plus 是在 MyBatis 的基础上扩展了一些功能的框架,其中 AutoGenerator 就是 MyBatis-Plus 提供的自动生成代码的工具,它能够一键生成对应的 POJO、Mapper 接口和 XML 配置文件,并且还支持模板引擎的自定义。
使用 MyBatis-Plus AutoGenerator 的步骤如下:
1. 在 Maven 或 Gradle 中添加 MyBatis-Plus 的依赖:
<dependency>
    <groupId>com.baomidou</groupId>
    <artifactId>mybatis-plus-boot-starter</artifactId>
    <version>3.3.1</version>
</dependency>
2. 配置数据源和 MyBatis-Plus 的相关配置:
spring:
  datasource:
    url: jdbc:mysql://localhost:3306/test?useUnicode=true&characterEncoding=utf8&useSSL=false&serverTimezone=UTC
    username: root
    password: root
    driver-class-name: com.mysql.jdbc.Driver

mybatis-plus:
  mapper-locations: classpath:mapper/*.xml
  type-aliases-package: com.example.pojo
  global-config:
    db-config:
      id-type: auto
3. 编写配置文件 MybatisPlusConfig.java,配置自动生成代码的相关信息:
@Configuration
public class MybatisPlusConfig {

    @Bean
    public MybatisPlusInterceptor mybatisPlusInterceptor() {
        MybatisPlusInterceptor interceptor = new MybatisPlusInterceptor();
        interceptor.addInnerInterceptor(new PaginationInnerInterceptor(DbType.MYSQL));
        return interceptor;
    }

    @Bean
    public MybatisPlusPropertiesCustomizer plusPropertiesCustomizer() {
        return plusProperties -> plusProperties.getGlobalConfig().setBanner(false);
    }

    @Bean
    public AutoGenerator autoGenerator(DataSource dataSource) {
        AutoGenerator autoGenerator = new AutoGenerator();
        autoGenerator.setDataSource(dataSource);

        // 全局配置
        GlobalConfig globalConfig = new GlobalConfig();
        globalConfig.setOutputDir(System.getProperty("user.dir") + "/src/main/java");
        globalConfig.setAuthor("mybatis-plus");
        globalConfig.setFileOverride(true);
        globalConfig.setOpen(false);
        globalConfig.setEntityName("%sDO");
        autoGenerator.setGlobalConfig(globalConfig);

        // 数据库表配置
        StrategyConfig strategyConfig = new StrategyConfig();
        strategyConfig.setNaming(NamingStrategy.underline_to_camel);
        strategyConfig.setColumnNaming(NamingStrategy.underline_to_camel);
        strategyConfig.setEntityLombokModel(true);
        strategyConfig.setRestControllerStyle(true);
        strategyConfig.setControllerMappingHyphenStyle(true);
        strategyConfig.setInclude("tb_user");

        // 包配置
        PackageConfig packageConfig = new PackageConfig();
        packageConfig.setParent("com.example");
        packageConfig.setEntity("pojo");
        packageConfig.setMapper("mapper");
        packageConfig.setXml("mapper");

        // 模板引擎配置
        TemplateConfig templateConfig = new TemplateConfig();

        // 自定义模板配置,可以根据自己的需求进行修改
        templateConfig.setService("/templates/service.vm");
        templateConfig.setServiceImpl("/templates/serviceImpl.vm");
        templateConfig.setEntity("/templates/entity.vm");
        templateConfig.setMapper("/templates/mapper.vm");
        templateConfig.setXml("/templates/mapperXml.vm");

        autoGenerator.setTemplate(templateConfig);
        autoGenerator.setPackageInfo(packageConfig);
        autoGenerator.setStrategy(strategyConfig);

        return autoGenerator;
    }
}
4. 在启动类中调用 AutoGenerator 的 run 方法即可进行代码生成:
@SpringBootApplication
public class Application {
    public static void main(String[] args) {
        SpringApplication.run(Application.class, args);

        AutoGenerator autoGenerator = (AutoGenerator) ApplicationContextUtils.getBean("autoGenerator");
        autoGenerator.execute();
    }
}
这样就可以在指定的包路径和项目路径下生成对应的 POJO、Mapper 接口和 XML 配置文件。
两者对比
| 维度 | MyBatis Generator | MyBatis-Plus AutoGenerator |
|---|---|---|
| 依赖配置 | 需要添加 MyBatis Generator 的单独依赖 | 需要添加 MyBatis-Plus 的整体依赖 |
| 配置文件 | 需要编写 GeneratorConfig.xml 配置文件 | 不需要额外的配置文件 |
| 支持数据库 | 支持主流的关系型数据库(如 MySQL、Oracle 等) | 支持主流的关系型数据库(如 MySQL、Oracle 等) |
| 可生成内容 | POJO、Mapper 接口和 XML 配置文件 | POJO、Mapper 接口和 XML 配置文件 |
| 插件支持 | 支持自定义插件开发 | 支持使用 MyBatis-Plus 内置的插件 |
| 模板引擎支持 | 不支持模板引擎 | 支持使用模板引擎进行自定义 |
| 配置灵活性 | 配置项较多,灵活度高 | 配置项较少,但使用起来更加简便 |
| 兼容性 | 对于 MyBatis 的版本兼容性较好 | 需要与 MyBatis-Plus 版本配套使用 |
| 社区支持和文档资料数 | 社区支持较好,文档资料丰富 | 社区支持较好,但文档资料数目相对较少 |
综上所述,MyBatis Generator 和 MyBatis-Plus AutoGenerator 都是非常好用的自动化代码生成工具,根据项目需求的不同,我们可以选择适合自己的工具来进行开发。MyBatis Generator 配置灵活度较高,可以根据需要进行自定义插件的开发,但需要编写较多的配置文件,而 MyBatis-Plus AutoGenerator 则更加简便,支持模板引擎的自定义,但配置项较少。文章来源:https://www.toymoban.com/news/detail-774317.html
总结
以上就是 MyBatis Generator 和 MyBatis-Plus AutoGenerator 两个自动化代码生成工具的使用方法和区别,它们可以大大提升开发效率,减少重复劳动。在实际开发中,我们可以根据项目的需求选择合适的工具进行使用。文章来源地址https://www.toymoban.com/news/detail-774317.html
到了这里,关于自动化生成代码:MyBatis 的 Generator与MyBatis-Plus 的 AutoGenerator的文章就介绍完了。如果您还想了解更多内容,请在右上角搜索TOY模板网以前的文章或继续浏览下面的相关文章,希望大家以后多多支持TOY模板网!