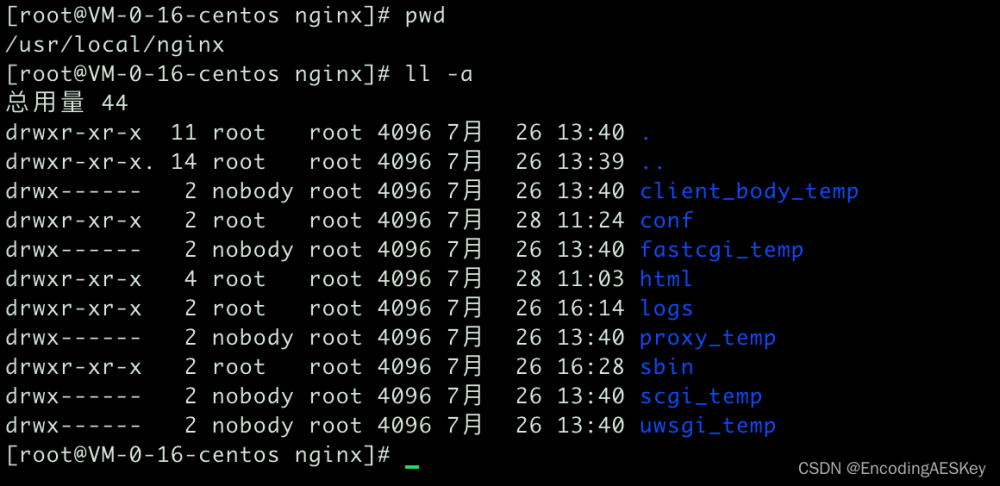
操作说明
1、nginx目录中html目录下放置green 前端项目
监听端口:8181
nginx配置文件配置location时使用root方式
	# root 方式
		#  方式1 域名直接可访问到  即 localhost:8181
		#location / {
        #    root   html;
        #    index  green/index.html green/index.htm;
        #}

		#  方式2 域名直接可访问到  即 localhost:8181
		#location / {
        #    root   html/green/;
        #    index  index.html index.htm;
        #}

		#  方式2.1 域名直接可访问到  即 localhost:8181
		#location / {
        #    root   html/green;
        #    index  index.html index.htm;
        #}

		# 方式3  域名+/green  可访问到  即 localhost:8181/green
        #location /green/ {
        #    root   html;
        #    index  index.html index.htm;
        #}

		# 方式3.1  访问不到green下任务资源
        #location /green/ {
        #    root   html/green/;
        #    index  index.html index.htm;
        #}
以上三种 方式结论验证 用root属性指定的值是要加入到最终路径中的,匹配条件会拼接到路径中
即最终获取的静态页面路径为:域名 + root + 区配条件 + index
即找到 localhost:8181/html/green/index.html文章来源:https://www.toymoban.com/news/detail-776909.html
备注:方式2 和方式2.1 用于验证 root 属性的值最后的 “/“为非必须,有没有最后一个”/” 都可以访问到
nginx配置文件配置location时使用alias方式
# alias 方式
		#  方式1  域名直接可访问到  即 localhost:8181
		#location / {
        #    alias   html/green/;
        #    index  index.html index.htm;
        #}

		#  方式1.1  访问不到green下任务资源
		#location / {
        #    alias   html/green;
        #    index  index.html index.htm;
        #}

		#  方式2  域名直接可访问到  即 localhost:8181
		#location / {
        #    alias   html/;
        #    index  green/index.html green/index.htm;
        #}

		#  方式3  域名直接可访问到  即 localhost:8181/green
		#location /green {
        #    alias   html/green/;
        #    index  index.html index.htm;
        #}

		#  方式3.1  域名直接可访问到  即 localhost:8181/green
		#location /green/ {
        #    alias   html/green/;
        #    index  index.html index.htm;
        #}
以上三种 方式结论验证 用alias属性指定的值,匹配条件不会拼接到路径中,会直接在alias属性的值下面去找资源
即最终获取的静态页面路径为:域名 + alias + index
即找到 localhost:8181/html/green/index.html文章来源地址https://www.toymoban.com/news/detail-776909.html
备注:方式1 和方式1.1 用于验证 alias 属性的值最后的 “/“为必须,没有最后一个”/” 访问不到
完整的nginx配置文件如下
#user  nobody;
worker_processes  1;

#error_log  logs/error.log;
#error_log  logs/error.log  notice;
#error_log  logs/error.log  info;

#pid        logs/nginx.pid;


events {
    worker_connections  1024;
}


http {
    include       mime.types;
    default_type  application/octet-stream;

    log_format  main  '$remote_addr - $remote_user [$time_local] "$request" '
                      '$status $body_bytes_sent "$http_referer" '
                      '"$http_user_agent" "$http_x_forwarded_for"';

	map $time_iso8601 $logdate{
            '~^(?<ymd>\d{4}-\d{2}-\d{2})' $ymd;
            default 'date-not-found';
    }

    access_log  logs/access-$logdate.log  main;

    sendfile        on;
    #tcp_nopush     on;

    #keepalive_timeout  0;
    keepalive_timeout  65;

    #gzip  on;

    server {
        listen       8181;
        server_name  localhost;

        access_log  logs/access-$logdate.log  main;

		# root 方式
		#  方式1 域名直接可访问到  即 localhost:8181
		location / {
            root   html;
            index  green/index.html green/index.htm;
        }

		#  方式2 域名直接可访问到  即 localhost:8181
		#location / {
        #    root   html/green/;
        #    index  index.html index.htm;
        #}

		#  方式2.1 域名直接可访问到  即 localhost:8181
		#location / {
        #    root   html/green;
        #    index  index.html index.htm;
        #}

		# 方式3  域名+/green  可访问到  即 localhost:8181/green
        #location /green/ {
        #    root   html;
        #    index  index.html index.htm;
        #}

		# 方式3.1  访问不到green下任务资源
        #location /green/ {
        #    root   html/green/;
        #    index  index.html index.htm;
        #}

		# 以上三种 方式结论验证  用root属性指定的值是要加入到最终路径中的,匹配条件会拼接到路径中
		# 即最终获取的静态页面路径为:域名 + root + 区配条件 + index
		# 即找到 localhost:8181/html/green/index.html
		# 备注:方式2  和方式2.1 用于验证 root 属性的值最后的 "/"为非必须,有没有最后一个"/" 都可以访问到


		# alias 方式
		#  方式1  域名直接可访问到  即 localhost:8181
		#location / {
        #    alias   html/green/;
        #    index  index.html index.htm;
        #}

		#  方式1.1  访问不到green下任务资源
		#location / {
        #    alias   html/green;
        #    index  index.html index.htm;
        #}

		#  方式2  域名直接可访问到  即 localhost:8181
		#location / {
        #    alias   html/;
        #    index  green/index.html green/index.htm;
        #}

		#  方式3  域名直接可访问到  即 localhost:8181/green
		#location /green {
        #    alias   html/green/;
        #    index  index.html index.htm;
        #}

		#  方式3.1  域名直接可访问到  即 localhost:8181/green
		#location /green/ {
        #    alias   html/green/;
        #    index  index.html index.htm;
        #}
		# 以上三种 方式结论验证  用alias属性指定的值,匹配条件不会拼接到路径中,会直接在alias属性的值下面去找资源
		# 即最终获取的静态页面路径为:域名 + alias +  index
		# 即找到 localhost:8181/html/green/index.html
		# 备注:方式1  和方式1.1 用于验证 alias 属性的值最后的 "/"为必须,没有最后一个"/" 访问不到


        #  后台服务;
        location /fdiagnose/ {
			proxy_ignore_client_abort   on;
			proxy_set_header Host $http_host;
			proxy_set_header X-Real-IP $remote_addr;
			proxy_set_header REMOTE-HOST $remote_addr;
			proxy_set_header X-Forwarded-For $proxy_add_x_forwarded_for;
        	proxy_pass http://localhost:9090;
        }

    }

}
到了这里,关于nginx部署前端项目时location时root和alias配置的文章就介绍完了。如果您还想了解更多内容,请在右上角搜索TOY模板网以前的文章或继续浏览下面的相关文章,希望大家以后多多支持TOY模板网!


