开发完毕后将代码上传到码云
Gitee - 基于 Git 的代码托管和研发协作平台面向企业提供一站式研发管理解决方案,包括代码管理、项目管理、文档协作、测试管理、CICD、效能度量等多个模块,支持SaaS、私有化等多种部署方式,帮助企业有序规划和管理研发过程,提升研发效率和质量。https://gitee.com/
配置jdk环境变量
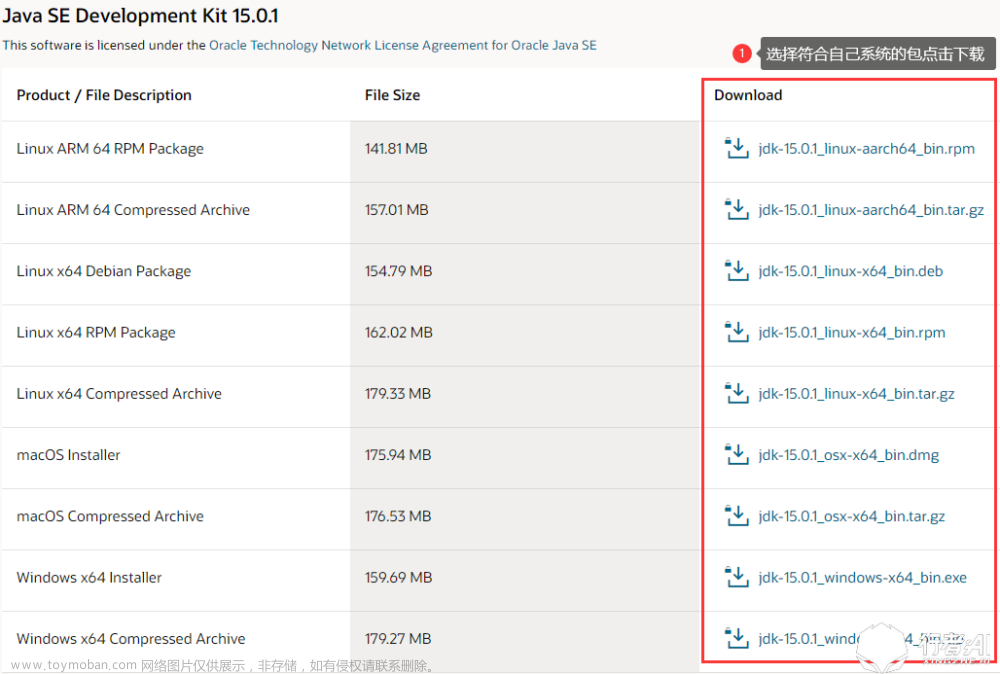
下载JDK
Java Downloads | Oraclehttps://www.oracle.com/java/technologies/downloads/通过指令tar -zxvf XXX(JDK的压缩文件) 进行解压

export JAVA_HOME=/home/jdk/jdk-17.0.9 export JRE_HOME=${JAVA_HOME}/jre
export CLASSPATH=.:${JAVA_HOME}/lib:${JRE_HOME}/lib
export PATH=${JAVA_HOME}/bin:$PATH

配置完毕后source /etc/profile 让其生效

linux下tomcat的安装
下载安装tomcat
https://tomcat.apache.org/download-90.cgi
将下载的tomcat通过xftp传到linux服务器上
通过命令tar -zxvf xxxxx(tomcat的压缩包)解压tomcat压缩包
cd 切换到tomcat的bin目录下
通过指令sh startup.sh 开启tomcat
通过指令sh shutdown.sh 关闭tomcat

jenkins下载安装配置
jenkins下载地址
https://www.jenkins.io/download/
linux下allure的安装
jenkins安装allure插件(自动化接口跑完后界面化展示)
下载allure
Releases · allure-framework/allure2 · GitHubAllure Report is a flexible, lightweight multi-language test reporting tool. It provides clear graphical reports and allows everyone involved in the development process to extract the maximum of information from the everyday testing process - Releases · allure-framework/allure2https://github.com/allure-framework/allure2/releases
tgz包进行解压

配置allure环境变量
sudo vim /etc/profile

配置生效验证allure是否安装成功
source /etc/profile
allure --version

linux的jenkins下载安装
wget http://pkg.jenkins-ci.org/redhat-stable/jenkins-2.190.3-1.1.noarch.rpm
修改jenkins占用的端口号
vim /etc/init.d/jenkins

jenkins修改jdk的配置路径
vim /etc/init.d/jenkins

启动jenkins
systemctl start jenkins
jenkins下载war包
https://get.jenkins.io/war-stable/2.332.4/jenkins.war
jenkins的war包放入webapps2文件夹下

tomcat配置service增加jenkins的端口


访问jenkins
http://114.55.115.33:8090/jenkins/login?from=%2Fjenkins%2F

Jenkins配置
jenkins安装allure插件

配置allure的安装
allure的别名(随便起)
allure的安装目录

新建持续集成项目
项目描述(随便写)

pytest项目代码的存放地址和账户名/密码

配置执行指令

配置allure报告的存放路径

jenkins安装插件失败解决

http://114.55.115.33:8090/jenkins/manage/pluginManager/advanced 下面设置清华大学开源软件镜像站地址

jenkins启动报错解决
yum -y install dejavu-sans-fonts fontconfig xorg-x11-server-Xvfb

服务器接口用springboot(java)开发
springboot打war包部署到tomcat后无法访问的解决方法
 文章来源:https://www.toymoban.com/news/detail-779022.html
利用pytest测试接口自动化的代码
#coding:utf-8
from urllib.parse import urljoin

import requests
import pytest


#接口服务器地址
base_url = "http://114.55.115.33:8088"

@pytest.fixture(scope="function",autouse=True)
def go_demo():
    print("执行测试demo")
    yield
    print("执行成功后的测试demo")

def test_demo():
    url = urljoin(base_url,"/testdemo")
    print(url)
    response = requests.post(url)
    response_dict = response.json()
    code = response_dict["code"]
    print(code)
    assert code == "0"
@pytest.mark.parametrize("data",[{"param1":"有参数的接口被调用"}])
def test_demo_parameter(data):
    url = urljoin(base_url,"/testParameter")
    params = {
        'param1': data["param1"]
    }
    response = requests.get(url, params=params)
    print(response.json())
    response_dict = response.json()
    code = response_dict["code"]
    print(code)
    assert code == "0"
服务器接口开发代码
springboot代码框架搞的文章来源地址https://www.toymoban.com/news/detail-779022.html
@Component
@RestController
public class controllerdemo {
    @RequestMapping(value="/testdemo")
    public TestDemo test(){
        TestDemo testDemo = new TestDemo();
        testDemo.setCode("0");
        testDemo.setContent("调用到无参测试demo");
        return testDemo;
    }
    @RequestMapping(value="/testParameter")
    public TestDemo testParameter(@RequestParam String param1){
        TestDemo testDemo = new TestDemo();
        testDemo.setCode("0");
        testDemo.setContent(param1+"");
        return testDemo;
    }
}
到了这里,关于jenkins+pytest+allure的文章就介绍完了。如果您还想了解更多内容,请在右上角搜索TOY模板网以前的文章或继续浏览下面的相关文章,希望大家以后多多支持TOY模板网!


