一、安装Netcode for Gameobjects
Netcode for Gameobjects是Unity新推出的联机解决方案,该解决方案目前处于初期,相关功能不是很完善,但是用起来还不错。下面介绍一下相关用法。
首先下载安装Netcode for Gameobjects,其官方网站为Netcode for Gameobjects,安装方式也很简单,新建好Unity项目,打开菜单栏Window-Package Manager,点击加号add Package from git Url,输入以下地址,点击add等待安装完成即可。
com.unity.netcode.gameobjects

如果出现报错,首先是版本问题,需要更换其他版本的Unity。
二、NetworkManager组件
新建空物体,命名NetworkManager,添加NetworkManager组件
同时注意点击Selec transport下拉选项,选择Unity Transport即可。
在NetworkManager组件里,有几个参数比较重要:
Player Prefab:玩家预制体
Network Prefab:网络预制体
TickRate:编译和发送数据的频率,一般默认为30,发送的间隔时间就为1/30s
在UnityTransport组件下,也有几个参数要注意:
Address:IP地址
Port:网络端口号
Server Listen Adress:服务器监听地址
三、创建登陆界面
在Unity中创建如下界面:
注意不能缺少EventSystem组件。
创建服务器:创建一个游戏服务器,该服务器只作为服务器使用,不同时作为客户端
加入服务器:以客户端身份加入已存在的服务器
输入框:输入ip地址加入
四、创建场景和玩家角色
在场景中创建一个地面和一些方块即可
在Unity资源商店,导入第三人称免费资源包
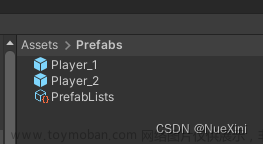
在Assets文件夹找到如下资源包,拖入场景中,为两个预制体添加父对象Player
同时取消两个预制体预制体关联。
为Player添加网络组件NetworkObject。
将Player拖入Prefabs文件夹制作成预制体,然后删除场景中的Player。
将预制体Player拖到NetworkManager的玩家预制体中。
为了让联机更有趣,我们给玩家制作发射子弹击中减血的效果,因此在玩家的头顶,添加一个立体的UI画布,如下图所示:
同时,为了发射子弹,添加两个空物体,作为子弹生成和发射方向的物体,然后保存预制体。
创建一个球体作为子弹,给球体添加如下组件,其中Bullet为创建的新脚本。
删除MainCamera,新建Camera,在Scene中调整到合适视角,然后选中Camera点击Align With View,对齐视角。该摄像机作为服务器端使用的摄像机,进入的如果是客户端,隐藏该相机。
五、创建服务器和加入服务器
首先创建一个脚本NetMain,挂在NetworkManager下,主要代码如下:
using System.Collections;
using System.Collections.Generic;
using Unity.Netcode;
using Unity.Netcode.Transports.UTP;
using UnityEngine;
using UnityEngine.UI;

public class NetMain : MonoBehaviour
{
    /// <summary>
    /// 单例
    /// </summary>
    public static NetMain instance;
    /// <summary>
    /// 创建服务器按钮
    /// </summary>
    public Button createServerBtn;
    /// <summary>
    /// 加入服务器按钮
    /// </summary>
    public Button joinServerBtn;
    /// <summary>
    /// 输入IP地址框
    /// </summary>
    public InputField ipinput;
    //玩家生成点
    public Transform playerSpawnPos;
    //默认相机
    public GameObject _camera;

    /// <summary>
    /// 测试面板
    /// </summary>
    public GameObject testPanel;
    /// <summary>
    /// 本地玩家
    /// </summary>
    public NetPlayer localPlayer;
    private void Awake()
    {
        instance = this;
    }
    void Start()
    {
        //绑定按钮事件
        createServerBtn.onClick.AddListener(CreateServerBtnClick);
        joinServerBtn.onClick.AddListener(JoinServerBtnClick);
    }

    // Update is called once per frame
    void Update()
    {

    }

    /// <summary>
    /// 创建服务器按钮绑定事件
    /// </summary>
    private void CreateServerBtnClick()
    {
        //获取Unity传输组件
        UnityTransport unityTransport = NetworkManager.Singleton.GetComponent<UnityTransport>();
        //设置ip地址和端口,0.0.0.0代表任意ip地址
        unityTransport.SetConnectionData("0.0.0.0", 7777);
        //启动服务器
        NetworkManager.Singleton.StartServer();
        //隐藏UI界面
        createServerBtn.transform.parent.gameObject.SetActive(false);
        testPanel.SetActive(true);
    }

    /// <summary>
    /// 加入服务器按钮点击事件
    /// </summary>
    private void JoinServerBtnClick()
    {
        //获取输入的ip地址
        string ip = ipinput.text;
        //判断ip地址是否为空
        if (ipinput.text.Equals(""))
        {
            //如果为空,默认ip地址为127.0.0.1
            ip = "127.0.0.1";
            print("未输入IP地址,使用默认地址");
        }
        //获取Unity传输组件
        UnityTransport unityTransport = NetworkManager.Singleton.GetComponent<UnityTransport>();
        //设置要连接的ip地址和端口
        unityTransport.SetConnectionData(ip, 7777);
        //启动连接到服务器,以客户端的身份
        NetworkManager.Singleton.StartClient();
        //隐藏UI界面
        joinServerBtn.transform.parent.gameObject.SetActive(false);
        //关闭消息调试面板
        testPanel.SetActive(true);
    }
}
六、玩家和发射子弹同步
新建一个NetPlayerSync脚本,挂在第三人称控制器的玩家身上,主要代码如下:
using System.Collections;
using System.Collections.Generic;
using UnityEngine;
using Unity.Netcode;
using UnityEngine.UI;
using Invector.vCharacterController;

public class NetPlayerSync : NetworkBehaviour
{
    /// <summary>
    /// 动画组件
    /// </summary>
    private Animator _animator;

    /// <summary>
    /// 需要进行服务端更新的参数,包含发射和接收
    /// </summary>
    NetworkVariable<float> _SyncInputHorizontal = new NetworkVariable<float>();
    NetworkVariable<float> _SyncInputVertical = new NetworkVariable<float>();
    NetworkVariable<float> _SyncInputMagnitude = new NetworkVariable<float>();
    NetworkVariable<bool> _SyncIsGrounded = new NetworkVariable<bool>();
    NetworkVariable<bool> _SyncIsStrafing = new NetworkVariable<bool>();
    NetworkVariable<bool> _SyncIsSprinting = new NetworkVariable<bool>();
    NetworkVariable<float> _SyncGroundDistance = new NetworkVariable<float>();

    NetworkVariable<Vector3> _SyncPosition = new NetworkVariable<Vector3>();
    NetworkVariable<Quaternion> _SyncRotation = new NetworkVariable<Quaternion>();
    NetworkVariable<float> _SyncHealth = new NetworkVariable<float>();


    #region Variables

    [Header("Controller Input")]
    public string horizontalInput = "Horizontal";
    public string verticallInput = "Vertical";
    public KeyCode jumpInput = KeyCode.Space;
    public KeyCode strafeInput = KeyCode.Tab;
    public KeyCode sprintInput = KeyCode.LeftShift;

    [Header("Camera Input")]
    public string rotateCameraXInput = "Mouse X";
    public string rotateCameraYInput = "Mouse Y";

    [HideInInspector] public vThirdPersonController cc;
    [HideInInspector] public vThirdPersonCamera tpCamera;
    [HideInInspector] public Camera cameraMain;

    #endregion

    public Image fillImage;
    public float currentHealth;
    public float maxHealth = 100;

    public NetPlayer mPlayer;


    private void Start()
    {
        _animator = GetComponent<Animator>();
        maxHealth = 100;
        currentHealth = maxHealth;
        mPlayer.playerSync = this;


        InitilizeController();
        InitializeTpCamera();

    }

    private void FixedUpdate()
    {
        if (IsLocalPlayer)
        {
            cc.UpdateMotor();               // updates the ThirdPersonMotor methods
            cc.ControlLocomotionType();     // handle the controller locomotion type and movespeed
            cc.ControlRotationType();       // handle the controller rotation type
        }
    }
    private void Update()
    {
        if (IsLocalPlayer)
        {
            InputHandle();                  // update the input methods
            cc.UpdateAnimator();            // updates the Animator Parameters
            UpdateAnimator();
            SetHealthToServerRpc(currentHealth);
        }
    }
    private void LateUpdate()
    {
        if (!IsLocalPlayer)
        {
            SyncInput();
            UpdateOtherPlayerHealth();
        }
        UpdateHealthImage();
    }
    public virtual void OnAnimatorMove()
    {
        if (cc!=null)
        {
            cc.ControlAnimatorRootMotion(); // handle root motion animations
        }

    }

    private void UpdateAnimator()
    {
        float h = _animator.GetFloat("InputHorizontal");
        float v = _animator.GetFloat("InputVertical");
        float m = _animator.GetFloat("InputMagnitude");
        bool ground = _animator.GetBool("IsGrounded");
        bool straf = _animator.GetBool("IsStrafing");
        bool sprint = _animator.GetBool("IsSprinting");
        float grounddistance = _animator.GetFloat("GroundDistance");
        //上面先获取到当前参数,然后发给服务端,服务端再发给各个客户端进行同步
        UpdatePlayerAnimatorServerRpc(h, v, m, ground, straf, sprint, grounddistance);
        UpdatePlayerMovementServerRpc(transform.position, transform.rotation);

    }

    [ServerRpc]
    private void UpdatePlayerAnimatorServerRpc(float h, float v, float m, bool ground, bool straf, bool sprint, float grounddistance)
    {
        _SyncInputHorizontal.Value = h;
        _SyncInputVertical.Value = v;
        _SyncInputMagnitude.Value = m;
        _SyncIsGrounded.Value = ground;
        _SyncIsStrafing.Value = straf;
        _SyncIsSprinting.Value = sprint;
        _SyncGroundDistance.Value = grounddistance;


    }
    [ServerRpc]
    private void UpdatePlayerMovementServerRpc(Vector3 pos, Quaternion rot)
    {
        _SyncPosition.Value = pos;
        _SyncRotation.Value = rot;
    }

    [ServerRpc]
    private void SetHealthToServerRpc(float health)
    {
        _SyncHealth.Value = health;
    }
    /// <summary>
    /// 如果不是本地玩家,只需要接收服务端更新的数据
    /// </summary>
    private void SyncInput()
    {
        _animator.SetFloat("InputHorizontal", _SyncInputHorizontal.Value);
        _animator.SetFloat("InputVertical", _SyncInputVertical.Value);
        _animator.SetFloat("InputMagnitude", _SyncInputMagnitude.Value);
        _animator.SetBool("IsGrounded", _SyncIsGrounded.Value);
        _animator.SetBool("IsStrafing", _SyncIsStrafing.Value);
        _animator.SetBool("IsSprinting", _SyncIsSprinting.Value);
        _animator.SetFloat("GroundDistance", _SyncGroundDistance.Value);

        transform.position = _SyncPosition.Value;
        transform.rotation = _SyncRotation.Value;
    }
    private void UpdateOtherPlayerHealth()
    {
        currentHealth = _SyncHealth.Value;
    }

    private void UpdateHealthImage()
    {
        fillImage.fillAmount = currentHealth / maxHealth;
    }


    #region Basic Locomotion Inputs

    protected virtual void InitilizeController()
    {
        cc = GetComponent<vThirdPersonController>();

        if (cc != null)
            cc.Init();
    }

    protected virtual void InitializeTpCamera()
    {
        if (tpCamera == null)
        {
            tpCamera = FindObjectOfType<vThirdPersonCamera>();
            if (tpCamera == null)
                return;
            if (tpCamera)
            {
                tpCamera.SetMainTarget(this.transform);
                tpCamera.Init();
            }
        }
    }

    protected virtual void InputHandle()
    {
        MoveInput();
        CameraInput();
        SprintInput();
        StrafeInput();
        JumpInput();
    }

    public virtual void MoveInput()
    {
        cc.input.x = Input.GetAxis(horizontalInput);
        cc.input.z = Input.GetAxis(verticallInput);
    }

    protected virtual void CameraInput()
    {
        if (!cameraMain)
        {
            if (!Camera.main) Debug.Log("Missing a Camera with the tag MainCamera, please add one.");
            else
            {
                cameraMain = Camera.main;
                cc.rotateTarget = cameraMain.transform;
            }
        }

        if (cameraMain)
        {
            cc.UpdateMoveDirection(cameraMain.transform);
        }

        if (tpCamera == null)
            return;

        var Y = Input.GetAxis(rotateCameraYInput);
        var X = Input.GetAxis(rotateCameraXInput);

        tpCamera.RotateCamera(X, Y);
    }

    protected virtual void StrafeInput()
    {
        if (Input.GetKeyDown(strafeInput))
            cc.Strafe();
    }

    protected virtual void SprintInput()
    {
        if (Input.GetKeyDown(sprintInput))
            cc.Sprint(true);
        else if (Input.GetKeyUp(sprintInput))
            cc.Sprint(false);
    }

    /// <summary>
    /// Conditions to trigger the Jump animation & behavior
    /// </summary>
    /// <returns></returns>
    protected virtual bool JumpConditions()
    {
        return cc.isGrounded && cc.GroundAngle() < cc.slopeLimit && !cc.isJumping && !cc.stopMove;
    }

    /// <summary>
    /// Input to trigger the Jump
    /// </summary>
    protected virtual void JumpInput()
    {
        if (Input.GetKeyDown(jumpInput) && JumpConditions())
            cc.Jump();
    }

    #endregion
}
新建一个NetPlayer脚本,挂在Player玩家预制体身上。
using System.Collections;
using System.Collections.Generic;
using UnityEngine;
using Unity.Netcode;
using Invector.vCharacterController;
using Invector.Utils;
using UnityEngine.UI;

public class NetPlayer : NetworkBehaviour
{


    /// <summary>
    /// 子物体玩家
    /// </summary>
    public GameObject _player;
    /// <summary>
    /// 子物体第三人称相机
    /// </summary>
    public GameObject _camera;

    //子弹出生点或者说生成点
    public Transform spawnPoint;
    //子弹发射方向
    public Transform endpoint;
    //子弹预制体
    public GameObject bullet;
    //玩家同步脚本
    public NetPlayerSync playerSync;

    /// <summary>
    /// 当玩家生成时
    /// </summary>
    public override void OnNetworkSpawn()
    {
        //显示调试信息
        NetMain.instance.testPanel.GetComponentInChildren<Text>().text += OwnerClientId;
        //设置玩家名字
        gameObject.name = OwnerClientId.ToString();

        //如果是本地玩家
        if (IsLocalPlayer)
        {
            //初始化参数
            NetMain.instance.localPlayer = this;
            NetMain.instance._camera.SetActive(false);
            transform.position = NetMain.instance.playerSpawnPos.position;


        }

        //不是本地玩家
        if (!IsLocalPlayer)
        {
            //删除部分组件
            if (_player.GetComponent<vThirdPersonController>()!=null)
            {
                Destroy(_player.GetComponent<vThirdPersonController>());
            }
            if (_player.GetComponent<vComment>()!=null)
            {
                Destroy(_player.GetComponent<vComment>());
            }
            if (_player.GetComponent<vThirdPersonInput>()!=null)
            {
                Destroy(_player.GetComponent<vThirdPersonInput>());
            }
            if (_camera!=null)
            {
                Destroy(_camera);
            }

        }

    }

    private void Update()
    {
        //如果是本地玩家,才可以进行发射子弹,其他玩家收到服务器控制,不接受本地的控制
        if (IsLocalPlayer)
        {
            TestAttack();

        }

    }


    private void TestAttack()
    {
        if (Input.GetKeyDown(KeyCode.F))
        {
            SpawnBulletServerRpc();
        }

    }

    /// <summary>
    /// 客户端向服务器发射消息
    /// </summary>
    [ServerRpc]
    private void SpawnBulletServerRpc()
    {
        SpawnBulletToClientRpc();
    }

    /// <summary>
    /// 服务端向客户端发射消息
    /// </summary>
    [ClientRpc]
    private void SpawnBulletToClientRpc()
    {
        if (IsLocalPlayer)
        {
            GameObject go = NetworkManager.Instantiate(bullet, spawnPoint.position, spawnPoint.rotation);
            go.GetComponent<Bullet>().dir = endpoint.position - spawnPoint.position;
        }
        else
        {
            GameObject go = NetworkManager.Instantiate(bullet, spawnPoint.position, spawnPoint.rotation);
            go.GetComponent<Bullet>().dir = endpoint.position - spawnPoint.position;

        }

    }

    /// <summary>
    /// 本地测试发射子弹
    /// </summary>
    private void LocalSpawnBullet()
    {
        GameObject go = NetworkManager.Instantiate(bullet, spawnPoint.position, spawnPoint.rotation);
        go.GetComponent<Bullet>().dir = endpoint.position - spawnPoint.position;
    }


    /// <summary>
    /// 向服务端发射消息:更新被射中的玩家的血量
    /// </summary>
    /// <param name="id"></param>
    [ServerRpc]
    public void SendHealthInfoToServerRpc(ulong id)
    {
        SetHealthChangeToClientRpc(id);
    }


    /// <summary>
    /// 通知所有玩家,判断是否为射中的玩家,如果是减血量
    /// </summary>
    /// <param name="id"></param>
    [ClientRpc]
    public void SetHealthChangeToClientRpc(ulong id)
    {
        if (id == NetMain.instance.localPlayer.OwnerClientId)
        {
            NetMain.instance.testPanel.GetComponentInChildren<Text>().text += "\n当前的id为" + id;
            NetMain.instance.localPlayer.playerSync.currentHealth -= 1;
        }
    }

}
新建一个HealthImage脚本,挂在玩家血条上,使血条始终朝向摄像机。
using System.Collections;
using System.Collections.Generic;
using UnityEngine;

public class HealthImage : MonoBehaviour
{
    //朝向相机
    private Transform Camtarget;
    private void Update()
    {
        //不断查找所有的摄像机,判断哪个是已启用的,把已启用的摄像机设置为目标摄像机
        GameObject[] gos = GameObject.FindGameObjectsWithTag("MainCamera");
        for (int i = 0; i < gos.Length; i++)
        {
            if (gos[i].activeInHierarchy)
            {
                Camtarget = gos[i].transform;
                break;
            }
        }
        if (Camtarget!=null)
        {
            transform.rotation = Camtarget.rotation;
        }
    }
}
子弹Bullet代码:文章来源:https://www.toymoban.com/news/detail-779871.html
using System.Collections;
using System.Collections.Generic;
using Unity.Netcode;
using UnityEngine;
using UnityEngine.UI;

public class Bullet : NetworkBehaviour
{
    public Vector3 dir;
    Rigidbody rigid;


    private void Start()
    {
        rigid = GetComponent<Rigidbody>();
        Destroy(gameObject, 5);
    }

    private void FixedUpdate()
    {
        rigid.velocity = dir * Time.deltaTime * 5000;
    }

    private void OnCollisionEnter(Collision collision)
    {
        if (collision.collider.CompareTag("Player"))
        {
            NetPlayerSync mps = collision.collider.GetComponent<NetPlayerSync>();
            if (!mps.mPlayer.IsLocalPlayer)
            {
                print(mps.OwnerClientId);
             NetMain.instance.localPlayer.SendHealthInfoToServerRpc(mps.OwnerClientId);
                Destroy(gameObject);
            }
        }
    }


}
七、测试与总结
完成代码之后需要手动拖的游戏物体:


效果如下:
项目源文件,使用版本为2020.3.28
链接:https://pan.baidu.com/s/1d8zuQzzekIefJGgQvJKfXw
提取码:yrpc文章来源地址https://www.toymoban.com/news/detail-779871.html
到了这里,关于Unity Netcode for GameObjects多人联机(源文件)的文章就介绍完了。如果您还想了解更多内容,请在右上角搜索TOY模板网以前的文章或继续浏览下面的相关文章,希望大家以后多多支持TOY模板网!