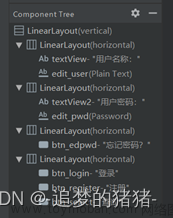
要求:每种错误信息采用Toast进行提示
(1)未注册的用户不能进行登录;
(2)用户名和密码不能为空;
(3)用户名不能重复;
一、创建新工程

点击next

修改名字 ,language看自己情况修改,sdk最好选21,这样21之后的都可以用,location自己改,点击finish

点击左上角的Android,切换成project

创建新的activity

修改名字,点击finish,同样的,再创建一个注册Activity
在AndroidMainfest.xml文件中将登录界面设为主界面
<application
        android:allowBackup="true"
        android:dataExtractionRules="@xml/data_extraction_rules"
        android:fullBackupContent="@xml/backup_rules"
        android:icon="@mipmap/ic_launcher"
        android:label="@string/app_name"
        android:roundIcon="@mipmap/ic_launcher_round"
        android:supportsRtl="true"
        android:theme="@style/Theme.MyLogin"
        tools:targetApi="31">
        <activity
            android:name=".Register"
            android:exported="false" />
        <activity
            android:name=".Login"
            android:exported="true">
            <intent-filter>
                <action android:name="android.intent.action.MAIN" />

                <category android:name="android.intent.category.LAUNCHER" />
            </intent-filter>
        </activity>
        <activity
            android:name=".MainActivity"
            android:exported="false"/>
    </application>
二、UI界面设计
插入图片,名字只能是小写

Login:ps:复制的时候得把注释去掉
<?xml version="1.0" encoding="utf-8"?>
<LinearLayout//线性布局
    xmlns:android="http://schemas.android.com/apk/res/android"
    android:layout_width="match_parent"
    android:layout_height="match_parent"
    android:background="@drawable/img"//界面背景图
    android:orientation="vertical">//布局方式,vertical为垂直布局,horizontal为水平布局
    <LinearLayout
        android:layout_marginLeft="30dp"//容器中的左边距
        android:layout_marginRight="30dp"//容器中的右边距
        android:layout_width="match_parent"//和父容器一样大小
        android:layout_height="0dp"//按比例分配大小
        android:layout_weight="1"
        android:orientation="vertical">
        <LinearLayout
            android:layout_width="match_parent"
            android:layout_height="wrap_content"//大小包裹内容
            android:orientation="horizontal">
            <TextView
                android:layout_width="0dp"
                android:layout_height="wrap_content"
                android:text="用户名:"
                android:layout_marginTop="30dp"//容器中的上边距
                android:textSize="25sp"//sp主要是字体大小
                android:textColor="#000000"
                android:layout_weight="1"/>
            <EditText
                android:id="@+id/userName"//如果要调用,就得加id
                android:layout_width="0dp"
                android:layout_height="wrap_content"
                android:hint="请输入用户名"
                android:layout_marginTop="30dp"
                android:textSize="20sp"
                android:textColor="#2196F3"
                android:layout_weight="2"/>
        </LinearLayout>
        <LinearLayout
            android:layout_width="match_parent"
            android:layout_height="wrap_content"
            android:orientation="horizontal">
            <TextView
                android:layout_width="0dp"
                android:layout_height="wrap_content"
                android:text="密码:"
                android:textSize="25sp"
                android:layout_marginTop="30dp"
                android:textColor="#000000"
                android:layout_weight="1"/>
            <EditText
                android:id="@+id/userpassword"
                android:layout_width="0dp"
                android:layout_height="wrap_content"
                android:layout_marginTop="30dp"
                android:hint="请输入密码"
                android:textSize="20sp"
                android:textColor="#2196F3"
                android:layout_weight="2"
                android:inputType="textWebPassword"/>
        </LinearLayout>
    </LinearLayout>
    <LinearLayout
        android:layout_width="match_parent"
        android:layout_height="wrap_content"
        android:layout_marginBottom="10dp"
        android:orientation="vertical">
        <Button
            android:id="@+id/login"
            android:layout_width="match_parent"
            android:layout_height="wrap_content"
            android:text="登录"
            android:textAllCaps="false"//按钮上的英文可以展现大小写,默认为true,即显示的都是大写
            android:textColor="#FFFFFF"
            android:layout_marginLeft="30dp"
            android:layout_marginRight="30dp"
            android:layout_marginTop="30dp"
            android:textSize="25sp" />
        <Button
            android:layout_marginLeft="30dp"
            android:layout_marginRight="30dp"
            android:layout_marginTop="30dp"
            android:textSize="25sp"
            android:textColor="#FFFFFF"
            android:textAllCaps="false"
            android:text="注册"
            android:id="@+id/register"
            android:layout_width="match_parent"
            android:layout_height="wrap_content"/>
    </LinearLayout>
</LinearLayout>
Register:
<?xml version="1.0" encoding="utf-8"?>
<LinearLayout
    xmlns:android="http://schemas.android.com/apk/res/android"
    android:layout_width="match_parent"
    android:layout_height="match_parent"
    android:orientation="vertical"
    android:background="@drawable/img">
    <LinearLayout
        android:orientation="horizontal"
        android:layout_width="match_parent"
        android:layout_height="wrap_content">
        <TextView
            android:layout_width="0dp"
            android:layout_height="wrap_content"
            android:text="用户名:"
            android:layout_marginTop="30dp"
            android:textSize="25sp"
            android:textColor="#000000"
            android:layout_weight="1"/>
        <EditText
            android:id="@+id/userName"
            android:layout_width="0dp"
            android:layout_height="wrap_content"
            android:hint="请输入用户名"
            android:layout_marginTop="30dp"
            android:textSize="20sp"
            android:textColor="#2196F3"
            android:layout_weight="2"/>
    </LinearLayout>

    <LinearLayout
        android:orientation="horizontal"
        android:layout_width="match_parent"
        android:layout_height="wrap_content">
        <TextView
            android:layout_width="0dp"
            android:layout_height="wrap_content"
            android:text="密码:"
            android:textSize="25sp"
            android:layout_marginTop="30dp"
            android:textColor="#000000"
            android:layout_weight="1"/>
        <EditText
            android:id="@+id/userpassword"
            android:layout_width="0dp"
            android:layout_height="wrap_content"
            android:layout_marginTop="30dp"
            android:hint="请输入密码"
            android:textSize="20sp"
            android:textColor="#2196F3"
            android:layout_weight="2"
            android:inputType="textWebPassword"/>
    </LinearLayout>

    <LinearLayout
        android:layout_width="match_parent"
        android:layout_height="match_parent"
        android:orientation="vertical">

        <Button
            android:textColor="#000000"
            android:layout_marginTop="40dp"
            android:layout_marginLeft="30dp"
            android:layout_marginRight="30dp"
            android:textSize="25sp"
            android:textAllCaps="false"
            android:text="确认"
            android:id="@+id/reday"
            android:layout_width="match_parent"
            android:layout_height="wrap_content"/>
        <Button
            android:textColor="#000000"
            android:layout_marginTop="20dp"
            android:layout_marginLeft="30dp"
            android:layout_marginRight="30dp"
            android:textSize="25sp"
            android:textAllCaps="false"
            android:text="取消"
            android:id="@+id/back"
            android:layout_width="match_parent"
            android:layout_height="wrap_content"/>
    </LinearLayout>

</LinearLayout>
三、逻辑设计
先建立数据类,建立一个只包含用户名和密码的user类。

同样,创建一个DatabaseHelper类,包含对数据库的一些基本操作(仅有创建数据库、更新数据库和数据的的插入和查询)
User:
package com.example.mylogin;

public class User {
    private  int id;
    private  String name;
    private  String password;
    public User(String name,String password){
        super();
        this.name = name;
        this.password = password;
    }
    public  int getId() {
        return  id;
    }
    public void setId(int id) {
        this.id = id;
    }
    public String getName() {
        return name;
    }
    public void setName(String name) {
        this.name = name;
    }
    public String getPassword() {
        return password;
    }
    public void setPassword(String password) {
        this.password = password;
    }
    @Override
    public String toString() {
        return "User{id ="+ id + ", name = "+ name +",password ="+password +"}";
    }
}
DatabaseHelper:
package com.example.mylogin;

import android.content.Context;
import android.database.Cursor;
import android.database.sqlite.SQLiteDatabase;
import android.database.sqlite.SQLiteOpenHelper;
import androidx.annotation.Nullable;
import java.util.ArrayList;

public class DatabaseHelper extends SQLiteOpenHelper {
    //创建一个数据库
    private SQLiteDatabase db;

    public DatabaseHelper(@Nullable Context context) {
        super(context, "db_test", null, 1);
        db = getReadableDatabase();
    }
    @Override
    public void onCreate(SQLiteDatabase db) {
        //在第一次创建数据库的时候,创建一些字段
        String sql = "create table user(_id integer, name varchar(50), password varchar(40))";
        db.execSQL(sql);//sql语句的执行函数
    }
    @Override
    public void onUpgrade(SQLiteDatabase db, int oldVersion, int newVersion) {
        //如果这个表中存在user,我们可以先把他去掉,然后重新创建
        String sql = "DROP TABLE IF EXISTS user";
        db.execSQL(sql);
        onCreate(db);
    }
    //为使项目结构更加紧凑,我们在此类中编写增删改查的函数,因为只有登录和注册界面,因此只涉及到写入数据库insert和query的操作
    public void insert(String name,String password ){
        db.execSQL("insert into user(name,password)VALUES(?,?)",new Object[]{name,password});
    }

    public ArrayList<User> getAllDATA(){//查询数据库
        ArrayList<User> list = new ArrayList<User>();
        //查询数据库中的数据,并将这些数据按照降序的情况排列
        Cursor cursor = db.query("user",null,null,null,null,null,"name DESC");
        while(cursor.moveToNext()){
            int index_name = cursor.getColumnIndex("name");
            int index_password = cursor.getColumnIndex("password");
            String name = cursor.getString(index_name);
            String password = cursor.getString(index_password);
            list.add(new User(name,password));
        }
        return list;
    }
}
Register部分的逻辑代码:
package com.example.mylogin;

import androidx.appcompat.app.AppCompatActivity;

import android.content.Intent;
import android.os.Bundle;
import android.text.TextUtils;
import android.view.View;
import android.widget.Button;
import android.widget.EditText;
import android.widget.TextView;
import android.widget.Toast;

import java.util.ArrayList;

public class Register extends AppCompatActivity {

    private DatabaseHelper mSQLite;

    @Override
    protected void onCreate(Bundle savedInstanceState) {
        super.onCreate(savedInstanceState);
        setContentView(R.layout.activity_register);

        //找到各个控件
        Button btn_ready = findViewById(R.id.reday);
        Button btn_back = findViewById(R.id.back);
        EditText ed_name = findViewById(R.id.userName);
        EditText ed_password = findViewById(R.id.userpassword);

        //注册监听事件
        btn_ready.setOnClickListener(new View.OnClickListener() {
            @Override
            public void onClick(View view) {
                //获取输入的用户名和密码
                String name = ed_name.getText().toString().trim();
                String password = ed_password.getText().toString().trim();

                //获取数据库数据,判断用户名是否已存在
                ArrayList<User> data = mSQLite.getAllDATA();
                boolean flag = false;
                for(int i = 0; i < data.size(); i++){
                    User userdata = data.get(i);
                    if(name.equals(userdata.getName())){
                        flag = true;
                        break;
                    }else{
                        flag = false;
                    }
                }
                //判断用户名和密码是否为空
                if(!TextUtils.isEmpty(name)&&!TextUtils.isEmpty(password)){
                    if(!flag){
                        mSQLite.insert(name, password);
                        Intent intent1 = new Intent(Register.this, login.class);
                        startActivity(intent1);
                        finish();
                        Toast.makeText(Register.this, "注册成功", Toast.LENGTH_SHORT).show();
                    }
                    else{
                        Toast.makeText(Register.this, "用户名已被注册", Toast.LENGTH_SHORT).show();
                    }
                }
                else{
                    Toast.makeText(Register.this, "用户名与密码不能为空", Toast.LENGTH_SHORT).show();
                }
            }
        });

        //监听返回按钮
        btn_back.setOnClickListener(new View.OnClickListener() {
            @Override
            public void onClick(View view) {
                Intent intent2 = new Intent(Register.this, login.class);
                startActivity(intent2);
                finish();
            }
        });

        mSQLite = new DatabaseHelper(Register.this);
    }
}Login部分逻辑代码:文章来源:https://www.toymoban.com/news/detail-779992.html
package com.example.mylogin;

import androidx.appcompat.app.AppCompatActivity;

import android.content.Intent;
import android.os.Bundle;
import android.text.TextUtils;
import android.view.View;
import android.widget.Button;
import android.widget.EditText;
import android.widget.Toast;

import java.util.ArrayList;

public class Login extends AppCompatActivity {

    private DatabaseHelper mSQLite;

    @Override
    protected void onCreate(Bundle savedInstanceState) {
        super.onCreate(savedInstanceState);
        setContentView(R.layout.activity_login);
        Button btn_login = findViewById(R.id.login);
        Button btn_register = findViewById(R.id.register);
        EditText ed_name = findViewById(R.id.userName);
        EditText ed_password = findViewById(R.id.userpassword);

        btn_login.setOnClickListener(new View.OnClickListener() {
            @Override
            public void onClick(View view) {

                String name = ed_name.getText().toString().trim();
                String password = ed_password.getText().toString().trim();

                ArrayList<User> data = mSQLite.getAllDATA();
                boolean flag = false;
                for(int i = 0; i < data.size(); i++){
                    User userdata = data.get(i);
                    if(name.equals(userdata.getName())&&password.equals(userdata.getPassword())){
                        flag = true;
                        break;
                    }else{
                        flag = false;
                    }
                }

                if(!TextUtils.isEmpty(name)&&!TextUtils.isEmpty(password)){
                    if(flag){
                        Intent intent1 = new Intent(Login.this, MainActivity.class);
                        startActivity(intent1);
                        finish();
                        Toast.makeText(Login.this, "登录成功", Toast.LENGTH_SHORT).show();
                    }
                    else{
                        Toast.makeText(Login.this, "用户名或密码不正确", Toast.LENGTH_SHORT).show();
                    }
                }
                else{
                    Toast.makeText(Login.this, "用户名与密码不能为空", Toast.LENGTH_SHORT).show();
                }
            }
        });

        btn_register.setOnClickListener(new View.OnClickListener() {
            @Override
            public void onClick(View view) {
                Intent intent2 = new Intent(Login.this, Register.class);
                startActivity(intent2);
                finish();
            }
        });
        mSQLite = new DatabaseHelper(Login.this);
    }
}到这里就基本实现了一个登陆界面文章来源地址https://www.toymoban.com/news/detail-779992.html
到了这里,关于AndroidStudio-实现登录界面(数据存储在SQLite)的文章就介绍完了。如果您还想了解更多内容,请在右上角搜索TOY模板网以前的文章或继续浏览下面的相关文章,希望大家以后多多支持TOY模板网!


