简介

BestYOLO:https://github.com/WangRongsheng/BestYOLO
BestYOLO是一个以科研和竞赛为导向的最好的YOLO实践框架!
目前BestYOLO是一个完全基于YOLOv5 v7.0 进行改进的开源库,该库将始终秉持以落地应用为导向,以轻便化使用为宗旨,简化各种模块的改进。目前已经集成了基于torchvision.models 模型为Backbone的YOLOv5目标检测算法,同时也将逐渐开源更多YOLOv5应用程序。
合成雾增强算法
合成雾数据增强算法是一种基于图像处理技术的算法,用于增加由雾霾天气产生的雾气效果,从而提高图像的质量和可用性。该算法通过模拟雾气的形成原理,对图像进行处理和合成,使其看起来更加真实和自然。
合成雾数据增强算法的具体实现步骤如下:
-
提取图像的深度信息和细节信息,包括场景的几何结构、纹理和颜色等。
-
通过计算雾气的传播模型,确定雾气的密度和浓度,从而模拟出雾气效果。
-
根据模拟的雾气效果,对图像进行混合处理,包括颜色平衡、对比度调整以及明暗度等参数的调整。
-
针对特定场景的需求,可以对雾气的效果进行调整和优化,比如增强景深、调整雾气的颜色和透明度等。
通过合成雾数据增强算法,可实现对图像的自然场景雾化处理,从而提高图像的可视化效果和实用性。该算法在计算机视觉、图像处理、人工智能等领域都有着广泛的应用和研究价值。
实现效果

为YOLOv5\YOLOv8引入合成雾数据增强算法
synthetic_fog.py
"""
直接运行程序可以测试合成雾气效果
Produced by: zhangzhengde@sjtu.edu.cn
"""
import os
import math
import cv2
import time
from pathlib import Path
import numpy as np
import matplotlib.pyplot as plt
from tqdm import tqdm
import shutil


class SyntheticFog(object):
    def __init__(self):
        pass

    def __call__(self, show=False):
        img_path = '../example/fog_image/raw.jpg'
        # img_path = '../sources/IMG_6685.JPG'
        assert os.path.exists(img_path), f'error: img does not exists, {img_path}'
        img = cv2.imread(img_path)
        print(img.shape)
        img = img/255.0
        print(f'fogging...')
        t0 = time.time()
        br = 0.7
        th = 0.05
        fogged_img = self.fogging_img(
            img, brightness=br, thickness=th,
            high_efficiency=True)
        print(f'fogging time: {(time.time()-t0)*1000:.4f}ms')
        rf = 1  # resize factor
        img = cv2.resize(img, (int(img.shape[1]*rf), int(img.shape[0]*rf)))
        fogged_img = cv2.resize(fogged_img, ((int(fogged_img.shape[1]*rf)), (int(fogged_img.shape[0]*rf))))
        fogged_img = np.array(fogged_img*255, dtype=np.uint8)
        if show:
            cv2.imshow('src', img)
            cv2.imshow('fogged', fogged_img)
            cv2.waitKey(0)
        cv2.imwrite(f'../example/fog_image/fogged_br{br}_th{th}.jpg', fogged_img)

    def fogging_dir(self, sp, tp=None, random_params=True, brightness=None, thickness=None, save_src_img=False):
        """
        fogging images in a directory
        :param sp: str, source dir path
        :param tp: str, target dir path, tp is fogged_{sp} by default
        :param random_params: bool, use random brightness and fog thickness params if True
        :param brightness: float, 0.1 to 0.9, gray of synthetic fog, pure white fog if 1, dark fog if 0.
        :param thickness: float, 0.01 to 0.09, thickness of synthetic fog, the larger the value, the thicker the fog.
        :param save_src_img: save source image at the same time i.e. copy source imgs to tp
        :return: None, all fogged images will be saved to target dir path.
        """
        tp = tp if tp is not None else f'{Path(sp).parent}/fogged_{Path(sp).name}'
        if os.path.exists(tp):
            ipt = input(f'Target dir: {tp} exists, do you want to remove it and continue. [Yes]/No: ')
            if ipt in ['', 'Yes', 'Y', 'yes']:
                shutil.rmtree(tp)
            else:
                print('do nothing')
                exit()
        os.makedirs(f'{tp}')

        imgs = [x for x in os.listdir(sp) if str(Path(x).suffix).lower() in ['.jpg', '.bmp']]
        print(f'Fogging {len(imgs)} images in dir {sp}, \nfogged images will be save to {tp}.')
        bar = tqdm(imgs)
        for i, img_name in enumerate(bar):
            img_path = f'{sp}/{img_name}'
            # stem = Path(img_path).stem
            # suffix = Path(img_path).suffix

            if save_src_img:  # save source img
                shutil.copy(f'{sp}/{img_name}', f'{tp}/{img_name}')

            img = cv2.imread(img_path)
            h, w, c = img.shape
            normed_img = img.copy()/255.0

            if random_params:
                br = np.clip(0.2 * np.random.randn() + 0.5, 0.1, 0.9)  # 0.1~0.9
                th = np.clip(0.01 * np.random.randn() + 0.05, 0.01, 0.09)
            else:
                br = brightness
                th = thickness
                assert br is not None
                assert th is not None
            fogged_img = self.fogging_img(normed_img, br, th, high_efficiency=True)
            fogged_img = np.array(fogged_img * 255, dtype=np.uint8)
            cv2.imwrite(f'{tp}/fogged_{img_name}', fogged_img)

            bar.set_description(f'Fogged image saved, fogged_{img_name}')

    def fogging_img(self, img, brightness=0.7, thickness=0.05, high_efficiency=True):
        """
        fogging single image
        :param img: src img
        :param brightness: brightness
        :param thickness: fog thickness, without fog when 0, max 0.1,
        :param high_efficiency: use matrix to improve fogging speed when high_efficiency is True, else use loops
                low efficiency: about 4000ms, high efficiency: about 80ms, tested in (864, 1152, 3) img
        :return: fogged image
        """
        assert 0 <= brightness <= 1
        assert 0 <= thickness <= 0.1
        fogged_img = img.copy()
        h, w, c = fogged_img.shape
        if not high_efficiency:  # use default loop to fogging, low efficiency
            size = np.sqrt(np.max(fogged_img.shape[:2]))  # 雾化尺寸
            center = (h // 2, w // 2)  # 雾化中心
            # print(f'shape: {img.shape} center: {center} size: {size}')  # 33
            # d_list = []
            for j in range(h):
                for l in range(w):
                    d = -0.04 * math.sqrt((j - center[0]) ** 2 + (l - center[1]) ** 2) + size
                    # print(f'd {d}')
                    td = math.exp(-thickness * d)
                    # d_list.append(td)
                    fogged_img[j][l][:] = fogged_img[j][l][:] * td + brightness * (1 - td)
                # x = np.arange(len(d_list))
                # plt.plot(x, d_list, 'o')
                # if j == 5:
                #     break
        else:  # use matrix  # TODO: 直接使用像素坐标,距离参数不适用于大分辨率图像,会变成鱼眼镜头的样子. done.
            use_pixel = True
            size = np.sqrt(np.max(fogged_img.shape[:2])) if use_pixel else 1  # 雾化尺寸
            h, w, c = fogged_img.shape
            hc, wc = h // 2, w // 2
            mask = self.get_mask(h=h, w=w, hc=hc, wc=wc, pixel=use_pixel)  # (h, w, 2)
            d = -0.04 * np.linalg.norm(mask, axis=2) + size

            td = np.exp(-thickness * d)

            for cc in range(c):
                fogged_img[..., cc] = fogged_img[..., cc] * td + brightness*(1-td)

            # a = np.linalg.norm(mask, axis=2)
            # print(f'size: {fogged_img.shape} a: {a} max: {np.max(fogged_img)} {np.min(fogged_img)}')

            fogged_img = np.clip(fogged_img, 0, 1)  # 解决黑白噪点的问题
            # print(f'mask: {mask[:, :, 1]} {mask.shape}')
            # print(f'd: {d} {d.shape}')

        return fogged_img

    def get_mask(self, h, w, hc, wc, pixel=True):
        mask = np.zeros((h, w, 2), dtype=np.float32)
        if pixel:
            mask[:, :, 0] = np.repeat(np.arange(h).reshape((h, 1)), w, axis=1) - hc
            mask[:, :, 1] = np.repeat(np.arange(w).reshape((1, w)), h, axis=0) - wc
        else:
            mask[:, :, 0] = np.repeat(np.linspace(0, 1, h).reshape(h, 1), w, axis=1) - 0.5
            mask[:, :, 1] = np.repeat(np.linspace(0, 1, w).reshape((1, w)), h, axis=0) - 0.5
        return mask


if __name__ == '__main__':
    synf = SyntheticFog()
    synf(show=True)
fog_augment.py文章来源:https://www.toymoban.com/news/detail-780533.html
"""
fogging train and test datasets using synthetic fog algorithm
"""

import os, sys
import shutil
from pathlib import Path
import numpy as np
from tqdm import tqdm
import cv2
import random
from copy import deepcopy

from synthetic_fog import SyntheticFog


class AugmentCrosswalkDataset(object):
    def __init__(self, source_path):
        self.sp = source_path  # source path
        p = Path(self.sp)
        self.tp = f'{p.parent}/fogged_{p.stem}'  # target path

        self.sf = SyntheticFog()  # synthetic fog object

    def augment(self, show=False):
        """augment train and test set in YOLOv5 format"""
        # 逐张进行增强
        sp = self.sp
        tp = self.tp
        print(f'fogged data will be saved to: {tp}')
        if os.path.exists(self.tp):

            shutil.rmtree(self.tp)
        os.makedirs(f'{self.tp}/train/images')
        os.makedirs(f'{self.tp}/test/images')
        os.makedirs(f'{self.tp}/train/labels')
        os.makedirs(f'{self.tp}/test/labels')

        for trte in ['train', 'test']:
            pi = f'{sp}/{trte}/images'  # path of images
            pl = f'{sp}/{trte}/labels'
            ti = f'{tp}/{trte}/images'
            tl = f'{tp}/{trte}/labels'

            imgs = [f'{x}' for x in os.listdir(pi) if x.endswith('.jpg')]
            #print(f'transform {trte} images, total: {len(imgs)}, transformed total: {2*len(img)}.')
            bar = tqdm(imgs)
            for i, img_name in enumerate(bar):
                img_path = f'{pi}/{img_name}'
                stem = Path(img_path).stem
                assert os.path.exists(img_path), f'img does not exists {img_path}'

                # 先拷贝原始图像和标注
                shutil.copy(img_path, f'{ti}/{img_name}')
                shutil.copy(f'{pl}/{stem}.txt', f'{tl}/{stem}.txt')

                # fogging
                img = cv2.imread(img_path)
                h, w, c = img.shape
                # random brightness and thickness
                br = np.clip(0.2 * np.random.randn() + 0.5, 0.1, 0.9)  # 0.1~0.9
                th = np.clip(0.01 * np.random.randn() + 0.05, 0.01, 0.09)
                normed_img = img.copy()/255.0
                fogged_img = self.sf.fogging_img(
                    normed_img, brightness=br, thickness=th, high_efficiency=True)
                fogged_img = np.array(fogged_img*255, dtype=np.uint8)

                # save fogged images and labels
                cv2.imwrite(f'{ti}/fogged_{img_name}', fogged_img)
                shutil.copy(f'{pl}/{stem}.txt', f'{tl}/fogged_{stem}.txt')

                if show:
                    print(f'img_name: {Path(img_path).name} img: {img.shape} br: {br} th: {th} max: {np.max(fogged_img)}')
                    self.show(img, name='src_img', wait=False)
                    self.show(fogged_img, name='fogged_img', wait=False)
                    if cv2.waitKey(0) == ord('q'):
                        break

                bar.set_description(f'Img and fogged img saved, {stem}.')

    def show(self, img, name='xx', wait=True):
        h, w, c = img.shape
        scale = 0.5
        show_img = cv2.resize(img, (int(w*scale), int(h*scale)))
        cv2.imshow(name, show_img)
        if wait:
            cv2.waitKey(0)

    def augment_testset(self, dir):
        """augment only test set"""
        self.sf.fogging_dir(sp=dir, tp=None, random_params=True, save_src_img=True)


if __name__ == '__main__':
    source_path = './data'
    acd = AugmentCrosswalkDataset(source_path)
    acd.augment(show=False)
    # test_imgs_path = '/home/zzd/datasets/crosswalk/testsets_1770/Images'
    # acd.augment_testset(test_imgs_path)
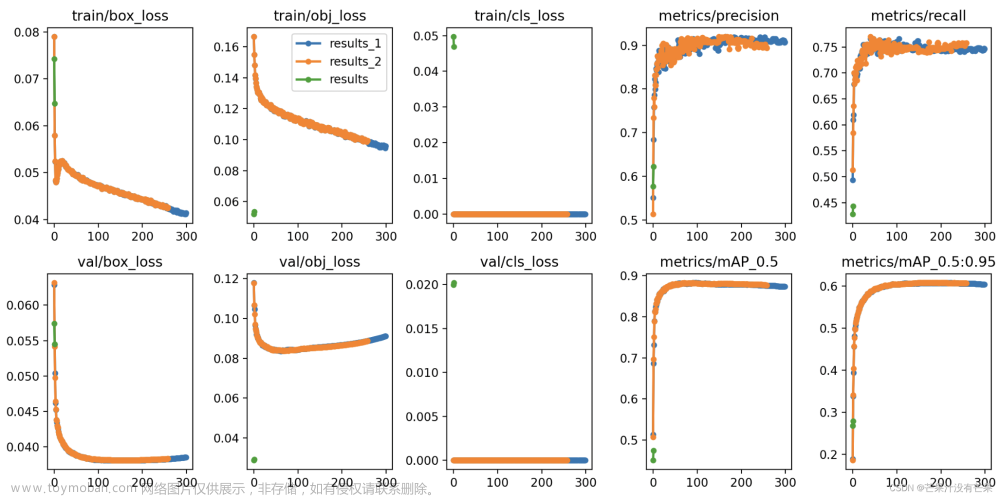
所有离线增强的数据都可以用于YOLOv5或者YOLOv8模型的训练,可以有效提升YOLO算法的模型泛化性能。文章来源地址https://www.toymoban.com/news/detail-780533.html
到了这里,关于为YOLOv5、YOLOv8带来全新的数据增强方式-合成雾增强算法的文章就介绍完了。如果您还想了解更多内容,请在右上角搜索TOY模板网以前的文章或继续浏览下面的相关文章,希望大家以后多多支持TOY模板网!