一、前言
基于真实生产级项目分享,帮助有需要的同学快速构建完整可交付项目
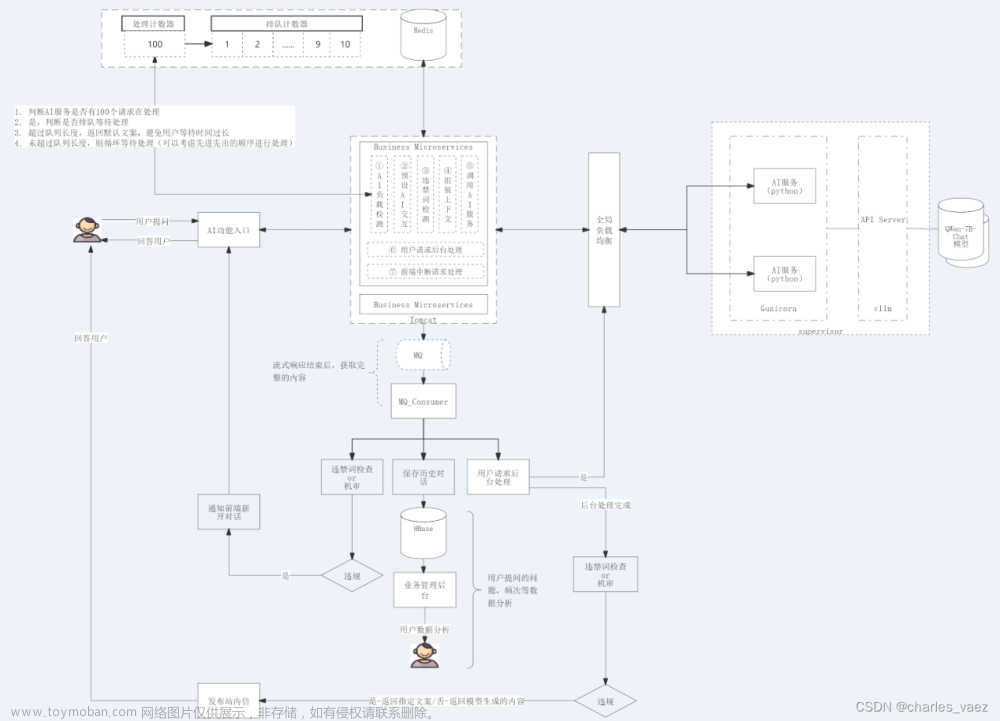
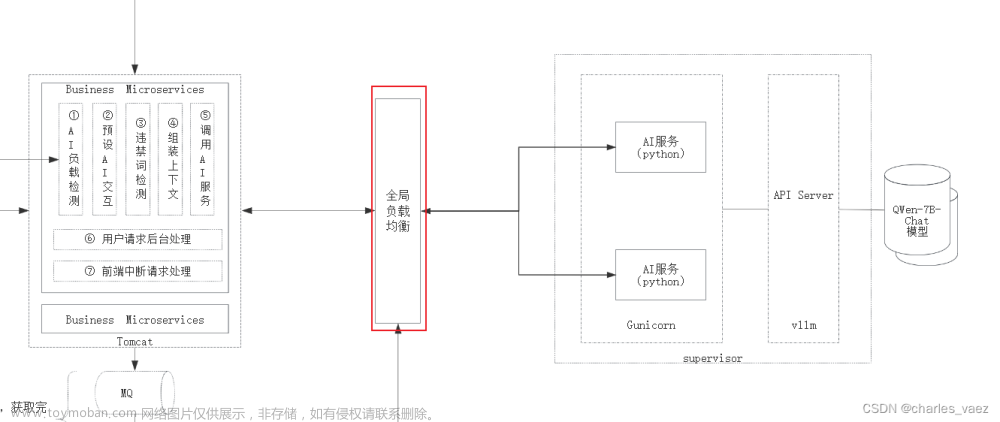
项目流程包括(去掉业务部分):
- 开源模型测试,包括baichuan、qwen、chatglm、bloom
- 数据爬取及清洗
- 模型微调及评估
- 搭建AI交互能力
- 搭建IM交互能力
- 搭建违禁词识别能力
- 优化模型推理速度
- 增强模型长期记忆能力
二、术语介绍
2.1. vLLM
vLLM是一个开源的大模型推理加速框架,通过PagedAttention高效地管理attention中缓存的张量,实现了比HuggingFace Transformers高14-24倍的吞吐量。
2.2. qwen-7b
通义千问-7B(Qwen-7B) 是阿里云研发的通义千问大模型系列的70亿参数规模的模型。
2.3.Anaconda
Anaconda(官方网站)就是可以便捷获取包且对包能够进行管理,同时对环境可以统一管理的发行版本。Anaconda包含了conda、Python在内的超过180个科学包及其依赖项。
三、构建环境
3.1. 基础环境及前置条件
- 操作系统:centos7
- Tesla V100-SXM2-32GB CUDA Version: 12.2
- 提前下载好qwen-7b-chat模型
通过以下两个地址进行下载,优先推荐魔搭
https://modelscope.cn/models/qwen/Qwen-7B-Chat/files
https://huggingface.co/Qwen/Qwen-7B-Chat/tree/main
3.2. Anaconda安装
1. 更新软件包
sudo yum upgrade -y
2. 下载Anaconda
wget https://repo.anaconda.com/archive/Anaconda3-2022.10-Linux-x86_64.sh
3. 安装
默认安装
bash Anaconda3-2022.10-Linux-x86_64.sh
-p 指定安装目录为/opt/anaconda3
bash Anaconda3-2022.10-Linux-x86_64.sh -p /opt/anaconda3
4. 初始化
source ~/.bashrc
5. 验证安装结果
conda --version
6. 配置镜像源
conda config --add channels https://mirrors.tuna.tsinghua.edu.cn/anaconda/pkgs/free/
conda config --add channels https://mirrors.tuna.tsinghua.edu.cn/anaconda/pkgs/main/
conda config --set show_channel_urls yes
3.3. 创建虚拟环境
2.3.1.创建新环境
conda create --name vllm python=3.10
2.3.2.切换环境
conda activate vllm
3.4. vLLM安装
2.4.1.安装软件包
pip install vllm -i https://pypi.tuna.tsinghua.edu.cn/simple
pip install tiktoken -i https://pypi.tuna.tsinghua.edu.cn/simple
ps: vllm版本为0.2.7,tiktoken版本为0.5.2
2.4.2.查看已软件包
conda list 或者 pip list
注意:上述命令必须先切换至vllm虚拟环境
四、部署服务
4.1. 启动vllm服务
python -m vllm.entrypoints.api_server --model /data/model/qwen-7b-chat --swap-space 24 --disable-log-requests --trust-remote-code --max-num-seqs 256 --host 0.0.0.0 --port 9000 --dtype float16 --max-parallel-loading-workers 1 --enforce-eager
常用参数:
--model <model_name_or_path>
Name or path of the huggingface model to use.
--trust-remote-code
Trust remote code from huggingface
--dtype {auto,half,float16,bfloat16,float,float32}
Data type for model weights and activations.
• “auto” will use FP16 precision for FP32 and FP16 models, and BF16 precision for BF16 models.
• “half” for FP16. Recommended for AWQ quantization.
• “float16” is the same as “half”.
• “bfloat16” for a balance between precision and range.
• “float” is shorthand for FP32 precision.
• “float32” for FP32 precision
--swap-space <size>
CPU swap space size (GiB) per GPU.
--max-num-seqs <sequences>
Maximum number of sequences per iteratio
--quantization (-q) {awq,squeezellm,None}
Method used to quantize the weights.
五、测试
5.1. 流式案例文章来源:https://www.toymoban.com/news/detail-783530.html
import threading
import requests
import json

class MyThread(threading.Thread):
    def run(self):
        headers = {"User-Agent": "Stream Test"}
        pload = {
                "prompt": "<|im_start|>system\n你是一位知名作家,名字叫张三,你擅长写作.<|im_end|>\n<|im_start|>user\n以中秋为主写一篇1000字的文章<|im_end|>\n<|im_start|>assistant\n",
                "n": 1,
                "temperature": 0.35,
                "max_tokens": 8192,
                "stream": True,
                "stop": ["<|im_end|>", "<|im_start|>",]
            }
        #此处端口9000要与vLLM Server发布的端口一致
        response = requests.post("http://127.0.0.1:9000/generate", headers=headers, json=pload, stream=True)


        for chunk in response.iter_lines(chunk_size=8192, decode_unicode=False, delimiter=b"\0"):
                if chunk:
                    now_thread = threading.current_thread()
                    data = json.loads(chunk.decode("utf-8"))
                    output = data["text"]
                    print(f'now thread name: {now_thread.name},output: {output}')

if __name__ == '__main__':
    threads = []
    for i in range(1, 10, 1):
        t = MyThread()
        threads.append(t)

    # 启动线程
    for t in threads:
        t.start()

    # 等待所有线程完成
    for t in threads:
        t.join()
五、后续文章来源地址https://www.toymoban.com/news/detail-783530.html
- 支持多轮对话
- 支持高可用
- 兼容复杂业务场景
- 性能优化
到了这里,关于开源模型应用落地-qwen-7b-chat与vllm实现推理加速的正确姿势(一)的文章就介绍完了。如果您还想了解更多内容,请在右上角搜索TOY模板网以前的文章或继续浏览下面的相关文章,希望大家以后多多支持TOY模板网!


