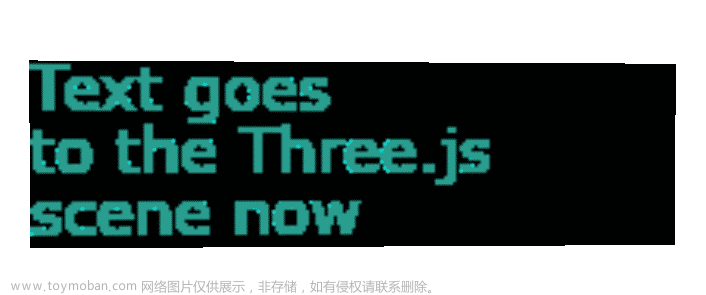
对于一些设计网页中经常会出现一些3D的文字效果,本文将利用Three.js实现各种动画WebGL文本输入效果。
 文章来源地址https://www.toymoban.com/news/detail-783638.html
示例效果
原文章
文本采样
通常情况下,文本网格是2D的平面形状,我们所要实现的3D文本形状则是要在2D的平面下,再生成z值形成一个立体的效果。
首先,我们创建一个canvas元素,对其应用一些与字体相关的样式,并确保其大小canvas足以容纳文本。
// 字体样式设置
const fontName = 'Verdana';
const textureFontSize = 100;

// 显示内容
let string = 'Some text' + '\n' + 'to sample' + '\n' + 'with Canvas';

// 创建canvas的2D上下文
const textCanvas = document.createElement('canvas');
const textCtx = textCanvas.getContext('2d');
document.body.appendChild(textCanvas);
设置样式后,我们在canvas上绘制文本。
function sampleCoordinates() {

    // 解析文本
    const lines = string.split(`\n`);
    const linesMaxLength = [...lines].sort((a, b) => b.length - a.length)[0].length;
    const wTexture = textureFontSize * .7 * linesMaxLength;
    const hTexture = lines.length * textureFontSize;

    // 绘制文本
    const linesNumber = lines.length;
    textCanvas.width = wTexture;
    textCanvas.height = hTexture;
    textCtx.font = '100 ' + textureFontSize + 'px ' + fontName;
    textCtx.fillStyle = '#2a9d8f';
    textCtx.clearRect(0, 0, textCanvas.width, textCanvas.height);
    for (let i = 0; i < linesNumber; i++) {
        textCtx.fillText(lines[i], 0, (i + .8) * hTexture / linesNumber);
    }

    // ...
}
接下来我们可以从中获取ImageData,该ImageData对象包含一个一维数组,其中包含每个像素的RGBA数据。通过canvas的大小,我们可以遍历该数组并检查已有像素颜色位置(即文本位置)。
    // 采样坐标
    textureCoordinates = [];
    const samplingStep = 4;
    if (wTexture > 0) {
        const imageData = textCtx.getImageData(0, 0, textCanvas.width, textCanvas.height);
        for (let i = 0; i < textCanvas.height; i += samplingStep) {
            for (let j = 0; j < textCanvas.width; j += samplingStep) {
                // 因为背景的RGBA是(0,0,0,0),所以可以通过判断r通道颜色来区分是否是文字
                if (imageData.data[(j + i * textCanvas.width) * 4] > 0) {
                    textureCoordinates.push({
                        x: j,
                        y: i
                    })
                }
            }
        }
    }
在采样步骤其实可以做一些比如添加随机性、对文本运用轮廓描边等工作。把点采样出来之后,可以在2d canvas上再绘制一遍检验效果。

在Three.js的场景中绘制
设置一个基本的Three.js场景,创建一个Plane对象,我们可以使用上一步中的文本采样画布作为Plane的材质。

生成粒子
我们可以使用相同的采样函数来对文字生成3D坐标。X、Y坐标是从画布中采集的,对于Z坐标,我们可以取一个随机数。我们可以用THREE.Points来展示这些例子
function createParticles() {
    const geometry = new THREE.BufferGeometry();
    const material = new THREE.PointsMaterial({
        color: 0xff0000,
        size: 2
    });
    const vertices = [];
    for (let i = 0; i < textureCoordinates.length; i ++) {
        vertices.push(textureCoordinates[i].x, textureCoordinates[i].y, 5 * Math.random());
    }
    geometry.setAttribute('position', new THREE.Float32BufferAttribute(vertices, 3));
    const particles = new THREE.Points(geometry, material);
    scene.add(particles);
}
因为纹理坐标和三维场景坐标y轴的不同,所以生成的粒子会发现上下颠倒。所以我们需要翻转每个粒子的Y值,为此我们需要计算文本的边界框。作为一种临时解决方案,我们可以将最大X、Y值作为文本的最大宽高值。
function refreshText() {
    sampleCoordinates();

    const maxX = textureCoordinates.map(v => v.x).sort((a, b) => (b - a))[0];
    const maxY = textureCoordinates.map(v => v.y).sort((a, b) => (b - a))[0];
    stringBox.wScene = maxX;
    stringBox.hScene = maxY;

    createParticles();
}
对于每个点,Y坐标变为boxTotalHeight-Y。将整个粒子系统移动盒子的一半宽度和一半高度可以解决居中问题。
function createParticles() {

    // ...
    for (let i = 0; i < textureCoordinates.length; i ++) {
       // 将Y进行翻转
       vertices.push(textureCoordinates[i].x, stringBox.hScene - textureCoordinates[i].y, 5 * Math.random());
    }
    // ...

    // 将文字居中
    particles.position.x = -.5 * stringBox.wScene;
    particles.position.y = -.5 * stringBox.hScene;
}
到目前为止,我们是借助文本canvas直接从3D场景中收集的像素坐标。但是假设我们需要3D文本的高度等于10个单位。如果我们将字体大小设置为10,则canvas分辨率将太低而无法进行适当的采样。为了避免这种情况(并且更灵活地使用粒子密度),我们可以添加一个额外的缩放因子(在3D空间中使用它们之前,我们将与画布坐标相乘的值)。
// ...
const textureFontSize = 30;
const fontScaleFactor = .3;
// ...
function refreshText() {
    // ...
    textureCoordinates = textureCoordinates.map(c => {
        return { x: c.x * fontScaleFactor, y: c.y * fontScaleFactor }
    });
    // ...
}
切换到InstancedMesh
THREE.Points的主要限制是粒子大小。THREE.PointsMaterial是基于WebGL的gl_PointSize,它可以以大约50 到 100 的最大像素大小进行渲染,具体取决于显卡。如果我们想要用3D形状来作为粒子形状的话,只能用THREE.InstancedMesh。
首先根据粒子数量创建InstancedMesh,然后添加要用于每个实例的几何体和材质,再创建一个虚拟对象,帮助我们为每个粒子生成一个 4×4 变换矩阵。使用setMatrixAt方法将变换矩阵应用于每个实例
function updateParticlesMatrices() {
    let idx = 0;
    textureCoordinates.forEach(p => {

        // we apply samples coordinates like before + some random rotation
        dummy.rotation.set(2 * Math.random(), 2 * Math.random(), 2 * Math.random());
        dummy.position.set(p.x, stringBox.hScene - p.y, Math.random());

        dummy.updateMatrix();
        instancedMesh.setMatrixAt(idx, dummy.matrix);

        idx ++;
    })
    instancedMesh.instanceMatrix.needsUpdate = true;
}
基本动画
我们可以为文字做一些基本的动画。我们可以添加一个额外的Particle对象数组来存储每个实例的参数,仍然需要textureCoordinates数组来存储以像素为单位的2D坐标,但现在我们将它们重新映射到particles数组。然后粒子变换更新放到主render循环中。
每个Particle对象都包含一个属性列表和一个grow()更新其中一些属性的函数。
首先,我们定义位置、旋转和缩放。每个粒子的位置都是静态的,创建粒子时比例会从零增加到一,并且旋转将始终设置动画。
function Particle([x, y]) {
    this.x = x;
    this.y = y;
    this.z = 0;
    this.rotationX = Math.random() * 2 * Math.PI;
    this.rotationY = Math.random() * 2 * Math.PI;
    this.rotationZ = Math.random() * 2 * Math.PI;
    this.scale = 0;
    this.deltaRotation = .2 * (Math.random() - .5);
    this.deltaScale = .01 + .2 * Math.random();
    this.grow = function () {
        this.rotationX += this.deltaRotation;
        this.rotationY += this.deltaRotation;
        this.rotationZ += this.deltaRotation;
        if (this.scale < 1) {
            this.scale += this.deltaScale;
        }
    }
}
// ...
function updateParticlesMatrices() {
    let idx = 0;
    // textureCoordinates.forEach(p => {
    particles.forEach(p => {
        // update the particles data
        p.grow();
        // dummy.rotation.set(2 * Math.random(), 2 * Math.random(), 2 * Math.random());
        dummy.rotation.set(p.rotationX, p.rotationY, p.rotationZ);
        dummy.scale.set(p.scale, p.scale, p.scale);
        dummy.position.set(p.x, stringBox.hScene - p.y, p.z);
        dummy.updateMatrix();
        instancedMesh.setMatrixAt(idx, dummy.matrix);
        idx ++;
    })
    instancedMesh.instanceMatrix.needsUpdate = true;
}
其他扩展
我们也可以利用上述流程做一些气泡、云朵、花草的文字效果。
 文章来源:https://www.toymoban.com/news/detail-783638.html

到了这里,关于Three.js中的3D文字效果的文章就介绍完了。如果您还想了解更多内容,请在右上角搜索TOY模板网以前的文章或继续浏览下面的相关文章,希望大家以后多多支持TOY模板网!


