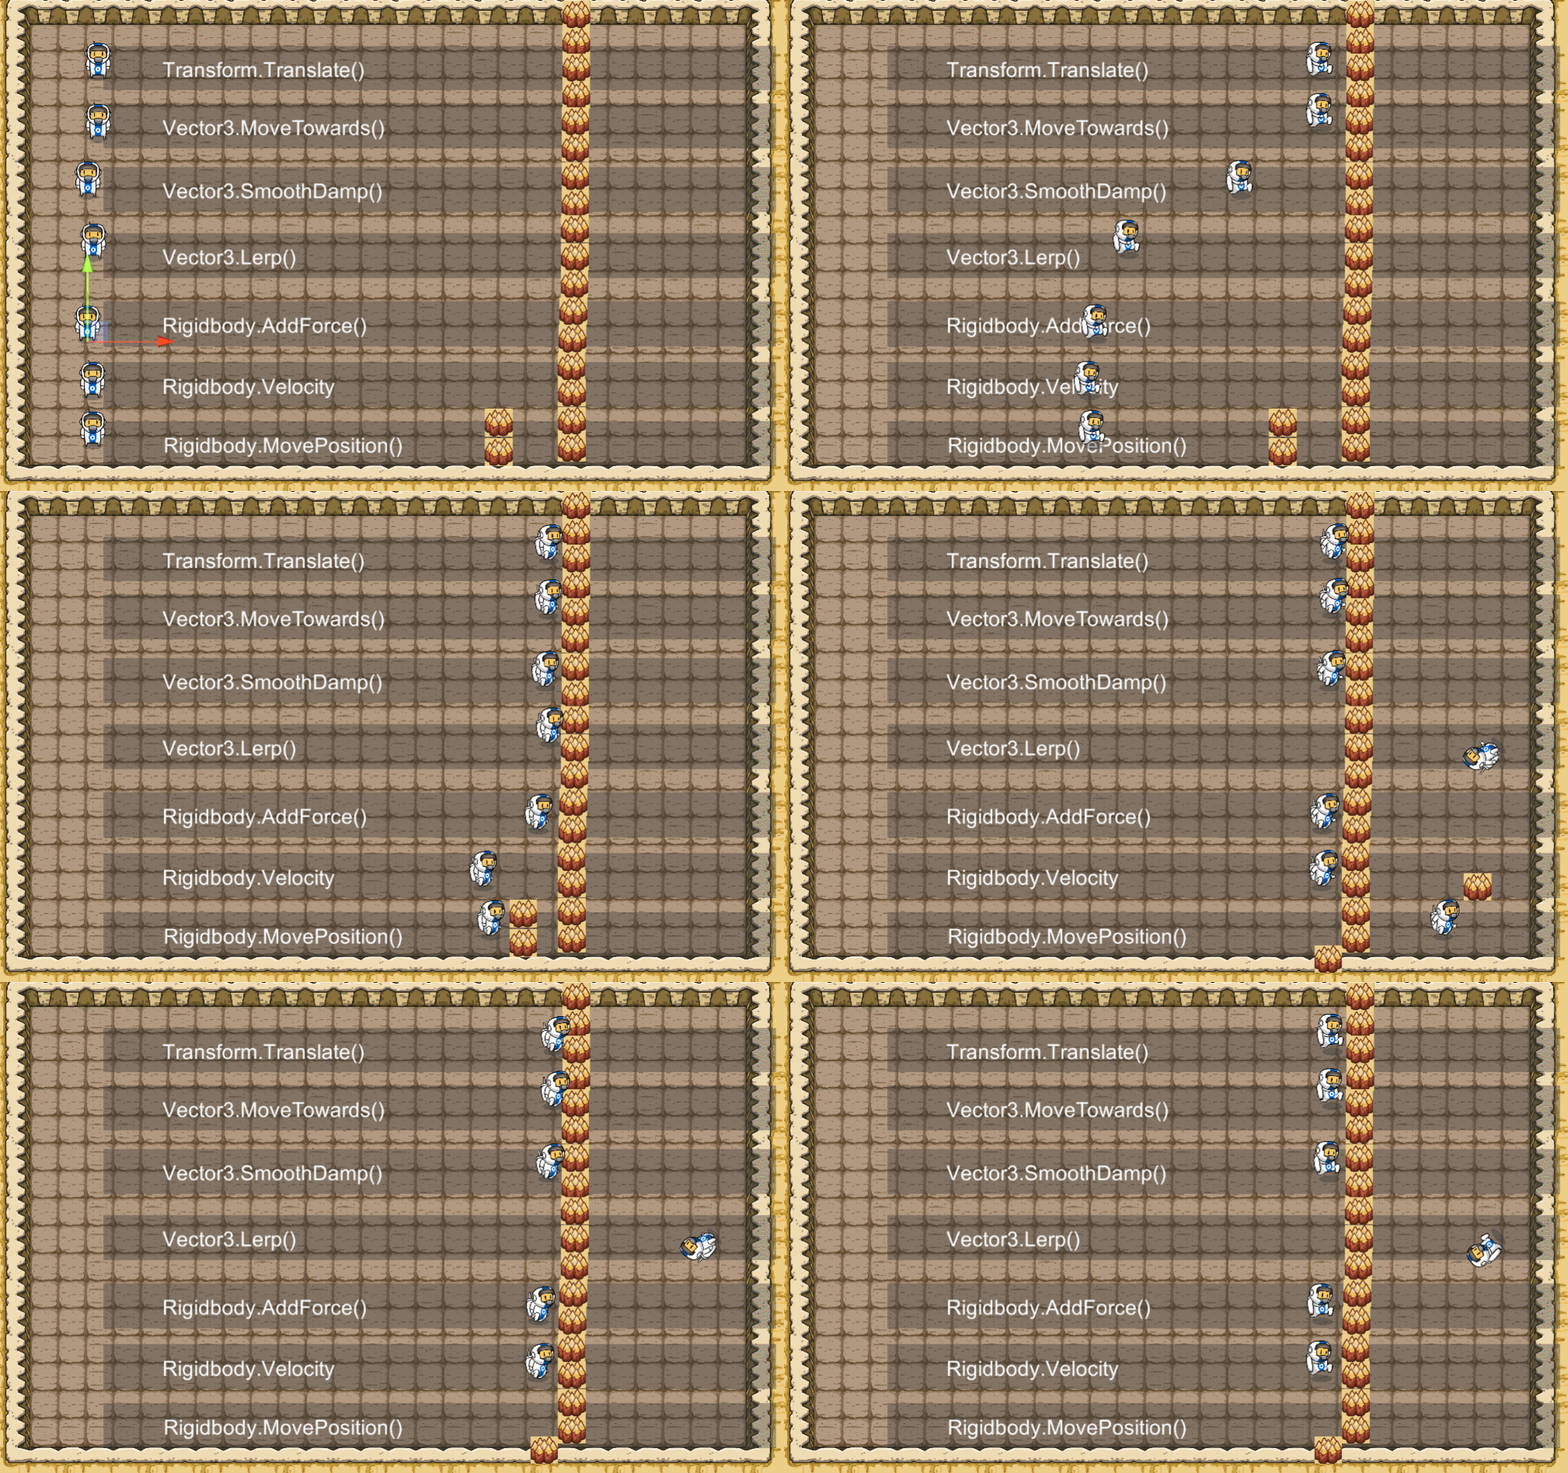
一、通过修改位置来实现移动
利用修改Transform组件的position的两种常用方法。
- 使用Translate()函数
/*物体将向x方向移动1.5单位*/
transform.Translate(1.5f,0,0);
- 直接指定新的位置
/*将物体放在(1.5f,0,0)的位置上*/
transform.position = new Vector3(1.5f,0,0);
将上述两种方法在 void Update()实现每一帧物体向x方向移动1.5个单位,具体代码如下:
  void Update()
    {
        transform.Translate(1.5f,0,0);
        //或
        transform.position += new Vector3(1.5f,0,0);
    }
注意:此处1.5为啥要写1.5f,根据C#的语法规定,直接写1.5会被认为double类型的数,而这里需要flaot类型数,三个数据只要其中一个带有f就行。
由于电脑无法保证稳定的帧率,会出现帧率高,物体移动就快,帧率低,物体移动就慢。而在游戏开发大部分情况中,我们应该确保”每秒移动同样的距离”,因此,我们应该做如下修改。
	void Update()
    {
        transform.Translate(1.5f*Time.deltaTime,0,0);
        //或
        transform.position += new Vector3(1.5f*Time.deltaTime,0,0);
    }
此处*Time.deltatime是确保每秒移动同样的距离。
Time.deltatime 是两帧之间的间隔,如帧率为60帧/秒,则Time.deltatime =0.0167秒,或者帧率为10帧/秒,则Time.delatatime = 0.1秒。所以Time.delatatime是一个随帧率改变而改变的数值,确保物体每秒移动的数值是一样的。
ps:Time.deltatime是一个很小的数值,因此与他相乘的数值应该大些。
二、通过物理系统实现位移
适用于对已经挂载刚体组件的物体
以下是常用的两种方法
- 利用AddForce()对物体施加力改变位置
	public Rigidbody rb;
	void Update()
	{
		rb.AddForce(100,0,0);
	}
注意:一定要给物体挂载刚体,物体才会收到力的作用
此处AddForce()的参数为Vector3类型,该参数用一个向量表示力,且符合牛顿力学
这里表示每帧(时间)对物体轴方向施加100N的力,根据牛顿力学,力至少持续一点时间才会引起物体速度的变化。所以此处必有位移,具体的位移,由你施加的力跟每帧的时间有关。在游戏开发中,我们只需要一边测试一边修改,确保一个合适数值即可。
- 直接修改物体的速度
此处表示物体在X轴以10m/s的速度移动,y轴跟z轴方向速度保持不变。
此方法相比上一个方法能让物体直接跳过加速度引起速度变化的步骤,使物体能够匀速运动。
注意:物理系统对于时间是非常敏感的。
举个例子:我们需要子弹0.1秒后击中目标,当更新频率不一定,子弹0.3秒才击中目标,这不是我们想要的。
当设备运行不流畅的时候,帧率下降,Time.deltatime会变大,不在适用。所以我们应该做如下修改,利用 FixedUpdate()函数,可以保证稳定的间隔。获取两段Update之间的时间间隔为Time.deltatime,而获得两次FixedUpdate之间的时间间隔为Time.fixedDeltaTime,一般Time.fixedDeltaTime是一个固定的值(默认为0.0.2秒,可通过Edit——Project Setting——Time来修改)。
修改代码如下:
	public Rigidbody rb;
	void FixedUpdate()
	{
		rb.AddForce(10*Time.fixedDeltaTime,0,0);
		//或
		rb.velocity = new Vector3(10*Time.fixedDeltaTime,rb.velocity .y,rb.velocity.z);
	}
三、通过CharacterController组件
	private void Start()
    {
        _playerCC = this.GetComponent<CharacterController>();
    }
    void FixedUpdate()
	{
		_playerCC.Move(new Vector3(1.5f*Time.deltaTime,0,0););
	}
四、通过输入控制物体移动
第一种方法
	void Update()
    {
        float horizontal = Input.GetAxis("Horizontal");
        float vetical = Input.GetAxis("Vetical");

       transform.Translate(horizontal*speed*Time.deltaTime,vetical*speed*Time.deltaTime,0);
       //或
       transform.position += new Vector3(horizontal*speed*Time.deltaTime,vetical*speed*Time.deltaTime,0);
    }
此处的speed为一个变量,我们可以通过修改speed来控制物体移动的距离。
假设我们定义 float speed =10;
即此处每帧最大的位移为1100.0167=0.167米。
第二种方法
	public Rigidbody rb;
    public float speed;
    void FixedUpdate()
    {
        float horizontal = Input.GetAxis("Horizontal");
        float vetical = Input.GetAxis("Vetical");

        rb.AddForce(horizontal*speed*Time.fixedDeltaTime,vetical*speed*Time .fixedDeltaTime,0);
       //或添加速度
        rb.velocity = new Vector3(horizontal*speed*Time.fixedDeltaTime,vetical*speed*Time.fixedDeltaTime,rb.velocity.z);
    }
第三种方法文章来源:https://www.toymoban.com/news/detail-786860.html
    private void Start()
    {
        _playerCC = this.GetComponent<CharacterController>();
    }
    public void FixedUpdate()
    {
        Vector3 motionValue = Vector3.zero;
        /*获取键盘输入*/
        float h_InputValue = Input.GetAxis("Horizontal");//左右移动
        float v_InputValue = Input.GetAxis("Vertical");//前后移动
        motionValue += this.transform.forward * v_InputValue * moveSpeed * Time.fixedDeltaTime;//前后方向的位移
        motionValue += this.transform.right * h_InputValue * moveSpeed * Time.fixedDeltaTime;//左右方向的位移
        _playerCC.Move(motionValue);
    }
通过上述的三种方法,我们就可以实现,每当按下相应的键,物体就会往相应的方向移动一定的距离。文章来源地址https://www.toymoban.com/news/detail-786860.html
到了这里,关于【Unity入门】物体5种移动方法的文章就介绍完了。如果您还想了解更多内容,请在右上角搜索TOY模板网以前的文章或继续浏览下面的相关文章,希望大家以后多多支持TOY模板网!


![[Unity] 使用Mathf函数实现平滑移动物体的7种方法](https://imgs.yssmx.com/Uploads/2024/02/526252-1.jpg)


