一、需求
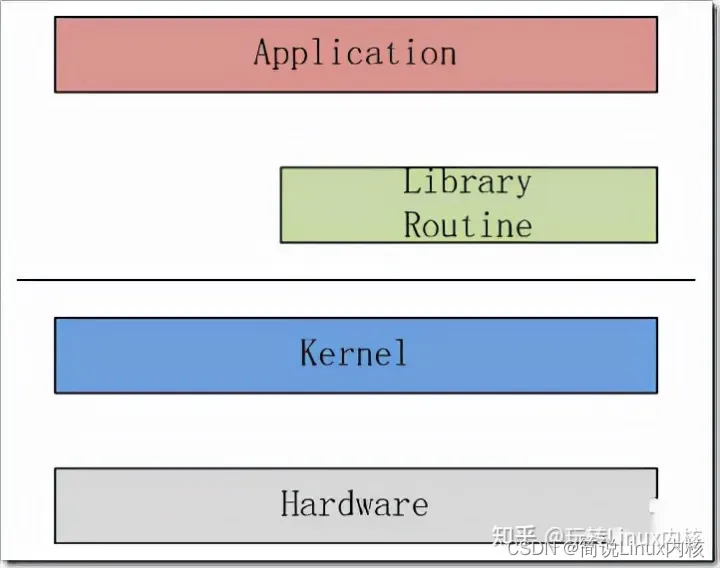
有一段代码需要在运行时加载注入内核中,当用户层需要访问时可以提供内核态环境去运行。
二、c代码构建
// #include <errno.h>
// #include <string.h>
// #include <stdio.h>
// #include <fcntl.h>
// #include <stdlib.h>
// #include <unistd.h>
#include <linux/ioctl.h>
// #include <sys/syscall.h>
#include <linux/init.h>
#include <linux/module.h>
#include <linux/kernel.h>
#include <linux/fs.h>
#include <linux/time.h>
#include <linux/sched.h>
#include <linux/unistd.h>
// #include <asm/uaccess.h>

static int sk_init(void)
{
    printk(KERN_INFO "sk:init.\n");
    return 0;
}
module_init(sk_init);

static void sk_exit(void)
{
    printk(KERN_INFO "sk:exit.\n");
    return;
}
module_exit(sk_exit);

MODULE_AUTHOR("Even");
MODULE_LICENSE("GPL");
// MODULE_DESCRITION("secure key get module");
MODULE_ALIAS("a simplest module");
三、c代码讲解
3.1头文件声明
关键代码
// #include <errno.h>
// #include <string.h>
// #include <stdio.h>
// #include <fcntl.h>
// #include <stdlib.h>
// #include <unistd.h>
#include <linux/ioctl.h>
// #include <sys/syscall.h>
#include <linux/init.h>
#include <linux/module.h>
#include <linux/kernel.h>
#include <linux/fs.h>
#include <linux/time.h>
#include <linux/sched.h>
#include <linux/unistd.h>
// #include <asm/uaccess.h>
由于此部分代码属于内核,因此所有的函数都需要使用内核提供的库函数实现,被屏蔽的头文件是首先从应用层移植过来的应用层函数库,因此无法使用做屏蔽处理。已使用的函数库一般是在“linux/”目录下,少数可能会用到的函数库会在"asm/"路径下。
3.2初始化与退出函数构建
关键代码
static int sk_init(void)
{
    printk(KERN_INFO "sk:init.\n");
    return 0;
}
module_init(sk_init);

static void sk_exit(void)
{
    printk(KERN_INFO "sk:exit.\n");
    return;
}
module_exit(sk_exit);此部分函数中,首先定义初始化函数“sk_init”以及退出函数“sk_exit”,注意,其中使用的打印函数为内核打印函数“printk”。其次使用模块安装函数向内核声明安装时要执行的函数“module_init”,此函数必须要写,否则会导致模块装载找不到初始化函数。同理,使用module_exit声明模块卸载函数。
3.3其他声明
关键函数
MODULE_AUTHOR("Even");
MODULE_LICENSE("GPL");
// MODULE_DESCRITION("secure key get module");
MODULE_ALIAS("a simplest module");
不可省略,此处会向模块声明作者、规范与介绍。
四、Makefile文件构建
在该c文件相同路径下,新建Makefile文件。
关键代码
obj-m:=secure_key.o
KDIR := /home/Evenurs/f1c100s/dev/f1c100s/tina/lichee/linux-3.10
PWD :=$(shell pwd)
CROSS_COMPILE := /home/Evenurs/f1c100s/dev/f1c100s/tina/prebuilt/gcc/linux-x86/arm/toolchain-sunxi-arm9-musl/toolchain/bin/arm-openwrt-linux-muslgnueabi-
ARCH := arm
all:
	make ARCH=$(ARCH) CROSS_COMPILE=$(CROSS_COMPILE) -C $(KDIR) M=$(PWD) modules
clean:
	rm -f *.ko *.o
五、Makefile讲解
第一行:obj-m:声明本文件以模块形式进行编译,m表示“module”。
第二行:KDIR:声明内核路径,即kernel dir。
第三行:PWD:声明当前工作目录绝对路径,$(shell pwd)表示执行pwd命令。
第四行:CROSS_COMPILE:声明编译工具,注意,需省去末尾的gcc,因为在编译时会自动补充“gcc”。
第五行:ARCH:声明架构为arm。
第六行及以后:声明命令与执行的内容。
注意:make指令的末尾的modules代表以模块形式进行编译。
六、目录结构
--root
--*.c
--Makefile
七、在Makefile文件目录下,执行make命令,会生成*.ko文件。
八、使用insmod指令装载ko
效果如下
![[linux]编译一个ko文件并运行,linux,ko,kernel,内核,Makefile,编译ko](https://imgs.yssmx.com/Uploads/2024/01/789182-1.png)
![[linux]编译一个ko文件并运行,linux,ko,kernel,内核,Makefile,编译ko](https://imgs.yssmx.com/Uploads/2024/01/789182-2.png) 文章来源:https://www.toymoban.com/news/detail-789182.html
文章来源:https://www.toymoban.com/news/detail-789182.html
九、结论
在处理ko时,时刻记住此时身处内核态下,操作都需要使用内核态的方法。文章来源地址https://www.toymoban.com/news/detail-789182.html
到了这里,关于[linux]编译一个ko文件并运行的文章就介绍完了。如果您还想了解更多内容,请在右上角搜索TOY模板网以前的文章或继续浏览下面的相关文章,希望大家以后多多支持TOY模板网!


