一、RabbitMQ运行
拉取docker镜像
docker pull rabbitmq:3-management
基础运行命令
docker run \
	-e RABBITMQ_DEFAULT_USER=rabbitmq \
	-e RABBITMQ_DEFAULT_PASS=rabbitmq \
	--name rabbitmq \
	-p 15672:15672 \
	-p 5672:5672 \
	-d \
	rabbitmq:3-management
15672是网页后台管理系统,5672是给服务用的。
官方入门教程可以看这里RabbitMQ Tutorials — RabbitMQ
二、整合SpringAMQP
1. 引入依赖
		<dependency>
            <groupId>org.springframework.boot</groupId>
            <artifactId>spring-boot-starter-amqp</artifactId>
        </dependency>
spring:
  rabbitmq:
    host: localhost # rabbitMQ的ip地址
    port: 5672 # rabbitMQ服务端口
    username: rabbitmq
    password: rabbitmq
三、测试
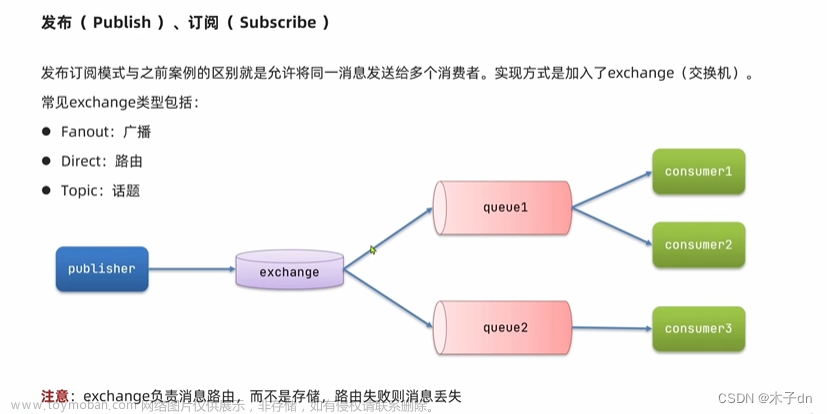
这边采用常用的消费者-生产者模型,使用默认的Direct类型exchange。不懂的可以先继续学习rabbitmq再来实践。
1. 消费者
在消费者服务随便新建一个listener
@Slf4j
@Component
public class SpringRabbitListener {

    @RabbitListener(bindings = @QueueBinding(
            value = @Queue(name = "simple.queue"),
            exchange = @Exchange(name = "simple.exchange"),
            key = "simple"
    ))
    public void listenSimpleQueue(String msg) {
        log.info("消费者接收到simple.queue的消息:【" + msg + "】");
    }
}
2. 生产者
在生产者服务的Test模块新建一个测试
@Slf4j
@RunWith(SpringRunner.class)
@SpringBootTest
public class SpringAmqpTest {
    @Autowired
    private RabbitTemplate rabbitTemplate;

    @Test
    public void testSendMessage2SimpleQueue() throws InterruptedException {
        String message = "hello, spring amqp!";
        rabbitTemplate.convertAndSend("simple.exchange", "simple", message);
    }
}
3. 运行
先启动消费者。
登录http://localhost:15672/,可以看到simple.exchange和simple.queue已被创建。

然后启动测试testSendMessage2SimpleQueue,出现类似以下日志,消息发送成功。文章来源:https://www.toymoban.com/news/detail-798661.html
12:17:43:771  INFO 21064 --- [           main] o.s.a.r.c.CachingConnectionFactory       : Attempting to connect to: [localhost:5672]
12:17:43:808  INFO 21064 --- [           main] o.s.a.r.c.CachingConnectionFactory       : Created new connection: rabbitConnectionFactory#50f40653:0/SimpleConnection@536d97f8 [delegate=amqp://rabbitmq@127.0.0.1:5672/, localPort= 59641]
消费者出现类似以下日志,收到消息。文章来源地址https://www.toymoban.com/news/detail-798661.html
12:17:31:074  INFO 8924 --- [           main] o.s.a.r.c.CachingConnectionFactory       : Created new connection: rabbitConnectionFactory#2a27cb34:0/SimpleConnection@671facee [delegate=amqp://rabbitmq@127.0.0.1:5672/, localPort= 59634]
12:17:31:141  INFO 8924 --- [           main] cn.itcast.mq.ConsumerApplication         : Started ConsumerApplication in 1.011 seconds (JVM running for 1.462)
12:17:43:848  INFO 8924 --- [ntContainer#0-1] c.i.mq.listener.SpringRabbitListener     : 消费者接收到simple.queue的消息:【hello, spring amqp!】
到了这里,关于Docker运行RabbitMQ并使用SpringAMQP操作的文章就介绍完了。如果您还想了解更多内容,请在右上角搜索TOY模板网以前的文章或继续浏览下面的相关文章,希望大家以后多多支持TOY模板网!


