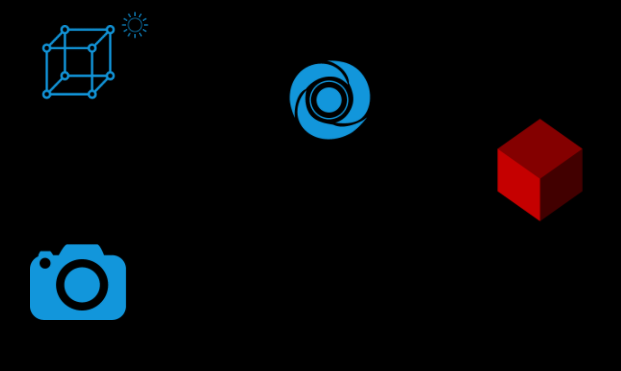
效果: 点击按钮或直接点击模型都可以实现运动效果

 文章来源:https://www.toymoban.com/news/detail-801135.html
代码:文章来源地址https://www.toymoban.com/news/detail-801135.html
<template>
  <div>
    <el-container>
      <el-main>
        <div class="box-card-left">
          <div id="threejs" style="border: 1px solid red"></div>
          <div class="box-right">
            <el-button type="primary" @click="lookFor('设备A')">设备A</el-button>
            <el-button type="primary" @click="lookFor('设备B')">设备B</el-button>
            <el-button type="primary" @click="lookAll">整体</el-button>
            <el-button type="primary" @click="saveImg">保存图片</el-button>
          </div>
        </div>
      </el-main>
    </el-container>
  </div>
</template>
<script>
// 引入轨道控制器扩展库OrbitControls.js
import { OrbitControls } from "three/examples/jsm/controls/OrbitControls.js";
import TWEEN from "@tweenjs/tween.js";

export default {
  data() {
    return {
      scene: null,
      camera: null,
      renderer: null,
      mesh: null,
      geometry: null,
      group: null,
      material: null,
      clock: null,
      mixer: null,
    };
  },
  created() {},
  mounted() {
    this.name = this.$route.query.name;
    this.init();
    // 监听点击事件
    this.addClickEventListener();
  },
  methods: {
    goBack() {
      this.$router.go(-1);
    },
    init() {
      // 创建场景对象
      this.scene = new this.$three.Scene();
      this.group = new this.$three.Group();
      this.createMesh({
        x: 50, y: 50, z: 50, name: '设备A'
      })
      this.createMesh({
        x: -50, y: 50, z: 50, name: '设备B'
      })

      this.scene.add(this.group);
      const axesHelper = new this.$three.AxesHelper(150);
      this.scene.add(axesHelper);
      // 创建环境光对象
      const ambientLight = new this.$three.AmbientLight(0xffffff);
      this.scene.add(ambientLight);
      // 创建相机对象
      this.camera = new this.$three.PerspectiveCamera();
      this.camera.position.set(300,300,300);
      this.camera.lookAt(0,0,0);
      // 创建渲染器对象
      this.renderer = new this.$three.WebGLRenderer({
        preserveDrawingBuffer: true // 把画布内容保存为图片时,需要设置为true
      });
      this.renderer.setSize(1000,800);
      this.renderer.render(this.scene, this.camera);
      window.document.getElementById("threejs").append(this.renderer.domElement);

      // 创建相机空间轨道控制器对象
      this.controls = new OrbitControls(this.camera, this.renderer.domElement);
      this.controls.addEventListener("change", () => {
        this.renderer.render(this.scene, this.camera);
        console.log(' this.camera.position', this.camera.position.x, this.camera.position.y, this.camera.position.z);
      })
    },
    // 创建网格模型的方法
    createMesh(obj) {
      // 创建立方缓冲几何体对象
      const geometry = new this.$three.BoxGeometry(obj.x, obj.y, obj.z);
      // 创建材质对象
      const material = new this.$three.MeshLambertMaterial({
        color: this.randomColor()
      });
      const mesh = new this.$three.Mesh(geometry, material);
      mesh.position.set(obj.x, obj.y, obj.z);
      mesh.name = obj.name;
      if(this.group) {
        this.group.add(mesh);
      }
    },
    lookFor(name){
      if(this.scene && this.scene.getObjectByName(name)) {
        // 通过 getObjectByName() 方法获取name为设备A的模型
        const equipment_A = this.scene.getObjectByName(name);
        // 创建Vector3类型的位置对象
        const position = new this.$three.Vector3();
        // 获取设置A的世界坐标并赋值到position对象中
        equipment_A.getWorldPosition(position);
        // 向量x,y,z坐标值在position的基础上增加50,
        const position_scalar = position.clone().addScalar(100);
        // 创建TWEEN对象并调用Tween方法
        new TWEEN.Tween({
          x: this.camera.position.x,
          y: this.camera.position.y,
          z: this.camera.position.z,
          px: this.controls.target.x,
          py: this.controls.target.y,
          pz: this.controls.target.z,
        }).to({
          x: position_scalar.x,
          y: position_scalar.y,
          z: position_scalar.z,
          px: equipment_A.position.x,
          py: equipment_A.position.y,
          pz: equipment_A.position.z,
        }, 1000).onUpdate(obj => {
          // 设置相机位置
          this.camera.position.set(obj.x, obj.y, obj.z);
          // 设置控制器指向
          this.controls.target.set(obj.px, obj.py, obj.pz);
          // 更新控制器
          this.controls.update();
        }).start();
        this.loop();
      }
    },
    loop() {
      this.renderer.render(this.scene, this.camera);
      TWEEN.update();
      window.requestAnimationFrame(this.loop);
    },
    lookAll() {
      /**
       * 查看整体的思路:
       * 用包围盒 Box3, 将场景中所有的模型包裹起来,计算出
       * (box3.min.x + box.max.x) / 2 = centerX
       * (box.min.y + box.max.y) / 2 = centerY
       * (box.min.z + box.max.z) / 2 = centerZ
       * , 计算出 centerX, centerY, centerZ  整体的中心坐标,
       *  为了显示包围盒的边界,可以使用Box3Helper辅助对象;
       * 相机的位置position要从当前位置定位到
       *
       *  */
      // 创建包围盒对象
      const box3 = new this.$three.Box3();
      // 设置包围盒中的对象
      const groupBox = box3.expandByObject(this.group);
      console.log(groupBox);
      const box3Helper = new this.$three.Box3Helper(box3, 0xffffff);
      this.scene.add(box3Helper);
      let max_x = groupBox.max.x;
      let max_y = groupBox.max.y;
      let max_z = groupBox.max.z;
      let min_x = groupBox.min.x;
      let min_y = groupBox.min.y;
      let min_z = groupBox.min.z;
      let center_x = (max_x + min_x) / 2;
      let center_y = (max_y + min_y) / 2;
      let center_z = (max_z + min_z) / 2;
      //
      let increment_x = Math.abs(max_x) > Math.abs(min_x) ? Math.abs(max_x) : Math.abs(min_y);
      let increment_y = Math.abs(max_y) > Math.abs(min_y) ? Math.abs(max_y) : Math.abs(min_y);
      let increment_z = Math.abs(max_z) > Math.abs(min_z) ? Math.abs(max_z) : Math.abs(min_z);

      new TWEEN.Tween({
        x: this.camera.position.x,
        y: this.camera.position.y,
        z: this.camera.position.z,
        px: this.controls.target.x,
        py: this.controls.target.y,
        pz: this.controls.target.z,
      }).to({
        x: center_x + increment_x * 2,
        y: center_y + increment_y * 2,
        z: center_z + increment_z * 2,
        px: center_x,
        py: center_y,
        pz: center_z,
      },1200).onUpdate(obj => {
        this.camera.position.set(obj.x, obj.y, obj.z);
        this.controls.target.set(obj.px, obj.py, obj.pz);
        this.controls.update();
      }).start();
        this.loop();

    },
    saveImg() {
      const link = document.createElement('a');
      const canvas = this.renderer.domElement;
      link.href = canvas.toDataURL('image/png');
      link.download = 'threejs.png';
      link.click();
    },
    randomColor() {
      const numbers = Array.from({ length: 255 }, (_, i) => i);
      const color = [...numbers];
        // 要生成min-max之间的随机数,公式为:Math.random()*(max-min+1)+min
        let i = Math.floor(Math.random() * (color.length - 0 + 1) + 0);
        let j = Math.floor(Math.random() * (color.length - 0 + 1) + 0);
        let k = Math.floor(Math.random() * (color.length - 0 + 1) + 0);
        return new this.$three.Color(
          "rgb(" +
            i +
            ", " +
            j +
            ", " +
            k +
            ")"
        );
    },
    // 在canvas画布上添加监听点击的事件
    addClickEventListener() {
      // 获取id 是 threejs 的元素;
      const dom = window.document.getElementById("threejs");
      const canvasWidth = dom.clientWidth; // 获取元素的宽度
      const canvasHeight = dom.clientHeight; // 获取元素的高度
      dom.addEventListener("click", e => {
        const x = e.offsetX; // 获取鼠标当前点击的点距离dom元素左上角原点  在x轴方向上的距离
        const y = e.offsetY;// 获取鼠标当前点击的点距离dom元素左上角原点  在y轴方向上的距离
        console.log(x,y);
        // 由于canvas画布上的坐标值与普通2d页面的坐标值是不一样的;
        // 在canvas画布上的坐标轴是以画布的中心点为原点,左右x轴,值 -1 ~ 1,,上下y轴,值-1 ~ 1;
        // 坐标需要进行坐标转换
        const pos_x = (x / canvasWidth) * 2 - 1; // 转换后的x坐标
        const pos_y = -(y / canvasHeight) * 2 + 1; // 转换后的y坐标
        // 创建射线投射器对象(可以在初始化方法中创建,每次点击时创建有些浪费资源)
        const rayCaster = new this.$three.Raycaster();
        // 计算射线(在点击位置创建一条射线,用来拾取模型对象)
        rayCaster.setFromCamera(new this.$three.Vector2(pos_x, pos_y), this.camera);
        const mesh_list = [];
        // traverse 是threejs中的递归遍历方法;找出group中的mesh
        this.group.traverse(obj => {
          if(obj.isMesh) {
            mesh_list.push(obj);
          }
        });
        // 射线交叉计算(计算出与自身射线相交的网格模型)
        const intersects = rayCaster.intersectObjects(mesh_list);
        if(intersects && intersects.length > 0) {
          console.log(   intersects[0]);
          this.lookFor(intersects[0].object.name);
        }
      })
    }

  },
};
</script>
//
<style lang="less" scoped>
.box-card-left {
  display: flex;
  align-items: flex-start;
  flex-direction: row;

  width: 100%;

  .box-right {
    img {
      width: 500px;
      user-select: none;
    }
  }
}
</style>
到了这里,关于three.js 点按钮,相机飞行靠近观察设备的文章就介绍完了。如果您还想了解更多内容,请在右上角搜索TOY模板网以前的文章或继续浏览下面的相关文章,希望大家以后多多支持TOY模板网!