需求:
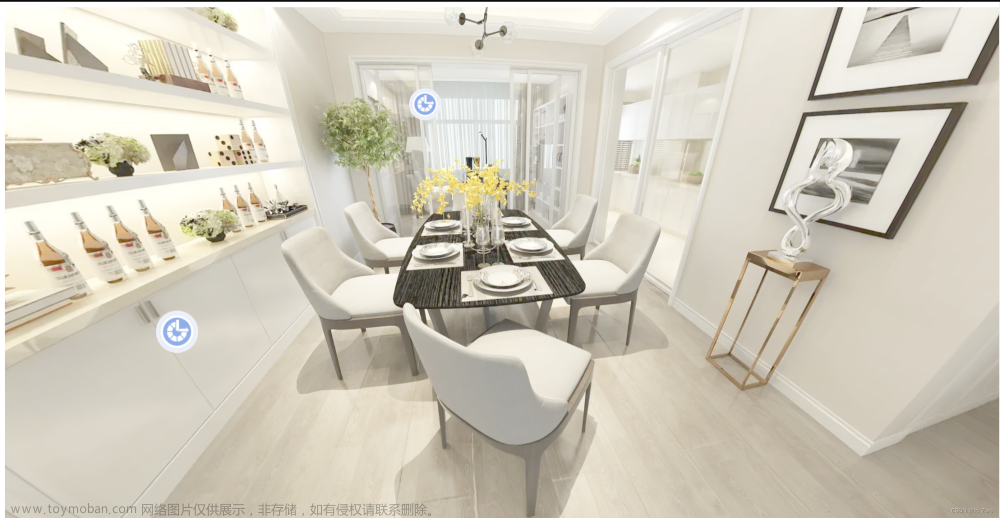
在很多看房软件,例如贝壳看房、VR博物馆或者VR展厅等等,为了更加真实的展示产品或者场景的特色,通常会通过一些VR或者全景图的方式,给用户带来沉浸式的体验,给视觉上带来比较震撼的效果,再加上一些动感的音乐,仿佛让人深陷其中,无法自拔。假的,因为这些实现效果比较便宜,而且性能要求不高
实现原理:
通过全景图的方式实现,其实就是在一个球体内部或者球体双面贴上全景图(下面简称全景球),让相机位于该球体的中心,当鼠标移动是,旋转相机即可;当需要漫游的时候,根据点击的点位获取下一个相机位置,并将相机移动至点击的全景球,影藏其他的全景球,显示下一个全景球;重复上面过程。怎么样,是不是很简单?
需要解决哪些问题:
1.初始化场景的时候相机是出于什么位置或者姿态?
答:从众多点位中的选取一个全景球的中心位置相机高度可以根据需要调节,作为相机的初始位置,不然相机就跑去了全景球导致看的脏东西。
2.当点击地面上的轨迹时,如何找到下一个全景球,也就是即将要进入的全景球
答:因为轨迹的点位和全景球在创建的时候,是有规律的,比如他们的命名是一一对应的,例如全景球的命名为VR_AA,那全景球对应的轨迹点可以命名为VR_A;当我们点击的到轨迹点VR_A时,就可以根据字符串的包含在之前的全景球数组中找到VR_AA,并且将它显示出来,这种情况每次都要遍历一次全景球数组;当然也可以创建一个方法,根据传进去的轨迹点name,然后对于的全景球
3.相机如何平滑的移动到指定的位置?
答:我们可以利用一个叫tweenjs/tween.js的库,把相机当前位置和目标位置生成一个平滑的过渡效果,然后应用在相机上就可以了
4.如果单纯的现实目标全景球和影藏全景球,那效果太生硬了,和网上看到的VR效果差别很大,如何实现显示和影藏的效果渐变呢?
答:相机在当前全景球位置平滑移动至目标全景球时,会有一个距离的比率ratio,这个比率很好理解,从A移动到B的时候,如果还没开始那ratio就是1.0;如果朝着B移动的距离是一半,那就是0.5;如果到达B了,那ratio就是0.0了,而这个ratio就可以用来设置A的透明度;而B的透明度则是1.0-ratio。
标签:坐标精准度不高
试想一下,在任何三维场景或者VR的场景中我们都会有很多标签信息,并绑定一些事件进行交互,然而这些标签的位置基本都是手动在场景中进行拾取的,那会带来什么问题呢?因为我们位于全景图中,当点击全景图中的物体的时候(其实点击的就是全景图中的某个位置),比如我们在全景球A中标记了空调的位置,并且保存了位置。那么这个空调的位置只会在全景球A中生效,也就是可以正确的展示空调的位置上,在其他的全景球无法正确展示空调的位置
解决办法一:把标签打在模型上面,也就是在全景球外面加载一个简单的模型作为辅助,不过不展示它,鼠标拾取位置的时候,拾取鼠标模型上的点作为标签的位置;这样子可以稍微解决一下标签位置不准确的位置上,但是也会有一定的误差,但是整个VR场景只需要一套标签即可
解决办法二:那就是简单粗暴,每个全景球对于一套标签,这样子位置绝对的准确,但是显得有点笨拙。
控制器:自定义一个VR控制器
因为three.js没有自带的类似babylon.js中的Freecamera, 可以根据官方的demo写一个简单版的控制器,控制器可以鼠标移动的来决定的相机的旋转,以下是控制代码
import * as THREE from "three";

export default class VRcontrol extends THREE.EventDispatcher {
  autoRotate = false;
  onPointerDownMouseX = 0;
  onPointerDownMouseY = 0;
  lon = 0;
  onPointerDownLon = 0;
  lat = 0;
  onPointerDownLat = 0;
  phi = 0;
  theta = 0;

  keyDown = false;

  camera: THREE.PerspectiveCamera;
  domElement: HTMLElement;

  constructor(camera: THREE.PerspectiveCamera, domElement: HTMLElement) {
    super();
    this.camera = camera;
    this.domElement = domElement;
    this.domElement.addEventListener(
      "pointerdown",
      this.onPointerDown.bind(this)
    );
    this.domElement.addEventListener(
      "pointermove",
      this.onPointerMove.bind(this)
    );
    window.addEventListener("pointerup", this.onPointerUp.bind(this));
    this.domElement.addEventListener(
      "wheel",
      this.onDocumentMouseWheel.bind(this)
    );
  }

  onPointerDown(event: PointerEvent) {
    if (event.isPrimary === false) return;

    this.keyDown = true;

    this.onPointerDownMouseX = event.clientX;
    this.onPointerDownMouseY = event.clientY;

    this.onPointerDownLon = this.lon;
    this.onPointerDownLat = this.lat;
  }

  onPointerMove(event: PointerEvent) {
    if (event.isPrimary === false || !this.keyDown) return;
    this.lon =
      (this.onPointerDownMouseX - event.clientX) * 0.1 + this.onPointerDownLon;
    this.lat =
      (event.clientY - this.onPointerDownMouseY) * 0.1 + this.onPointerDownLat;

    // 分发事件
    this.dispatchEvent({
      type: "camera",
      camera: this.camera,
    });
  }

  onPointerUp(event: PointerEvent) {
    if (event.isPrimary === false) return;

    this.keyDown = false;

    this.domElement.removeEventListener("pointermove", this.onPointerMove);
  }

  onDocumentMouseWheel(event: WheelEvent) {
    const fov = this.camera.fov + event.deltaY * 0.05;

    this.camera.fov = THREE.MathUtils.clamp(fov, 10, 75);

    this.camera.updateProjectionMatrix();
  }

  update() {
    if (this.autoRotate) {
      this.lon += 0.1;
    }

    this.lat = Math.max(-85, Math.min(85, this.lat));
    this.phi = THREE.MathUtils.degToRad(90 - this.lat);
    this.theta = THREE.MathUtils.degToRad(this.lon);

    const x = 500 * Math.sin(this.phi) * Math.cos(this.theta);
    const y = 500 * Math.cos(this.phi);
    const z = 500 * Math.sin(this.phi) * Math.sin(this.theta);

    this.camera.lookAt(x, y, z);
  }

  remove() {
    this.domElement.removeEventListener(
      "pointerdown",
      this.onPointerDown.bind(this)
    );
    this.domElement.removeEventListener(
      "pointermove",
      this.onPointerMove.bind(this)
    );
    window.removeEventListener("pointerup", this.onPointerUp.bind(this));
    this.domElement.removeEventListener(
      "wheel",
      this.onDocumentMouseWheel.bind(this)
    );
  }
}
接下来给出场景的核心代码,里面写的是一些demo,没有经过封装,里面包含了两个渲染器,一个是webGL,另外一个是CSS2DRenderer,主要用来渲染标签,里面也包含了一些创建标签的方法
import * as THREE from "three";
import FirstPersonCameraControl from "../controls/Mycontrol";
import { CSS2DRenderer } from "three/examples/jsm/renderers/CSS2DRenderer";
import {
  createrPoint,
  createVRItem,
  createVideoLabel,
  createIconLabel,
} from "../tools";
import TWEEN from "@tweenjs/tween.js";

export default class VR extends THREE.EventDispatcher {
  radii: number;
  parent: THREE.Group;
  pointObj: THREE.Group;
  currentVRItem: THREE.Mesh | any;
  preVRItem: THREE.Mesh | any;

  container: string | HTMLElement | any;
  scene: THREE.Scene;
  camera: THREE.PerspectiveCamera;
  renderer: THREE.WebGLRenderer;
  labelRenderer: CSS2DRenderer;
  initLocaltion: any;
  raycaster: THREE.Raycaster;
  mouse: THREE.Vector2;
  control: any;
  getMousePosition: (event: any) => void;
  onMouseDown: (event: any) => void;
  onResize: () => void;

  marking: boolean;
  labelContent: string;
  videoUrl: string;
  imgUrl: string;
  labelType: number;
  effective: number;

  textures: THREE.Texture[] = [];

  clock = new THREE.Clock();

  Pupop: THREE.Object3D<THREE.Event> | undefined;

  constructor(option: any) {
    super();
    this.marking = false;
    this.videoUrl = "";
    this.labelContent = "";
    this.imgUrl = "";
    this.labelType = 0;
    this.effective = 1;
    this.radii = 4; // 全景球半径
    this.pointObj = new THREE.Group();
    this.parent = new THREE.Group();

    this.container =
      option.container instanceof HTMLElement
        ? option.container
        : document.getElementById(option.container); // 渲染的DOM节点

    this.scene = new THREE.Scene(); // 三维场景
    this.scene.background = new THREE.Color(0xaaccff);
    this.scene.add(this.parent); // 全景球集合
    this.scene.add(this.pointObj); // 点集合

    this.camera = new THREE.PerspectiveCamera(
      70,
      this.container.clientWidth / this.container.clientHeight,
      0.05,
      500
    ); // 透视相机初始化

    // 初始化渲染器
    this.renderer = new THREE.WebGLRenderer({
      antialias: true,
      alpha: true,
      logarithmicDepthBuffer: true,
    });

    // 初始化标签渲染器
    this.labelRenderer = new CSS2DRenderer();
    this.labelRenderer.setSize(
      this.container.clientWidth,
      this.container.clientHeight
    );
    this.labelRenderer.domElement.style.position = "absolute";
    this.labelRenderer.domElement.style.top = "0px";

    this.renderer.setSize(
      this.container.clientWidth,
      this.container.clientHeight
    );
    // 设置渲染的尺寸
    // this.renderer.setPixelRatio = window.devicePixelRatio

    this.renderer.setClearColor(new THREE.Color("#1e1e1e"));
    this.initLocaltion = option.initLocaltion; // 全景图初始位置

    this.container.appendChild(this.labelRenderer.domElement);
    this.container.appendChild(this.renderer.domElement);

    this.raycaster = new THREE.Raycaster(); // 初始化射线
    this.mouse = new THREE.Vector2(); //初始化鼠标位置

    // 控制器
    this.control = new FirstPersonCameraControl(
      this.camera,
      this.labelRenderer.domElement
    );

    // 获取鼠标坐标
    this.getMousePosition = function (event) {
      this.mouse.x = (event.offsetX / this.container.clientWidth) * 2 - 1;
      this.mouse.y = -(event.offsetY / this.container.clientHeight) * 2 + 1; //这里为什么是-号,没有就无法点中
    };

    this.onMouseDown = async function (event) {
      this.getMousePosition(event);
      //将平面坐标系转为世界坐标系
      this.raycaster.setFromCamera(this.mouse, this.camera);
      //得到点击的几何体
      const raycasters = this.raycaster.intersectObjects(
        this.pointObj.children
      );

      const name = raycasters.length > 0 && raycasters[0].object.name;

      this.currentVRItem = this.scene.getObjectByName(name + "VR");
      if (this.currentVRItem) {
        const position = this.currentVRItem.position.clone();
        this.ChangeScene(position, () => {
          this.parent.children.forEach((mesh) => {
            if (mesh.name != name + "VR") {
              mesh.visible = false;
            }
          });
        });
      }
      const currentVRLocal = raycasters.find((item) => {
        if (item.distance > this.radii - 0.2 && item.distance < this.radii) {
          return item;
        }
      });

      let currentLabel;
      if (currentVRLocal && this.marking) {
        switch (this.labelType) {
          case 0:
            const position = currentVRLocal.point.clone();
          case 1:
            currentLabel = this.imgUrl && createIconLabel(this.imgUrl);
            break;
          case 2:
            currentLabel = this.videoUrl && createVideoLabel(this.videoUrl);
          default:
            break;
        }

        const position = currentVRLocal.point.clone();

        currentLabel && currentLabel.position.copy(position);
        currentLabel && this.scene.add(currentLabel);
      }
    };
    this.onResize = function () {
      this.renderer.setSize(
        this.container.clientWidth,
        this.container.clientHeight
      );
      this.camera.aspect =
        this.container.clientWidth / this.container.clientHeight;
      this.camera.updateProjectionMatrix();
    };

    this.container.addEventListener(
      "mousedown",
      this.onMouseDown.bind(this),
      false
    ); // 鼠标点击事件
    window.addEventListener("resize", this.onResize.bind(this), false); // 窗口缩重新渲染
  }

  // 切换动画
  ChangeScene(newTarget: THREE.Vector3, callback: () => void) {
    const leng = this.camera.position.clone().distanceTo(newTarget);
    const time = THREE.MathUtils.clamp(leng * 200, 800, 1200);
    const that = this;
    that.currentVRItem.visible = true;

    new TWEEN.Tween(that.camera.position)
      .to(newTarget, time)
      // easing缓动函数,Out表示最开始加速,最后放缓
      .easing(TWEEN.Easing.Quadratic.InOut)
      .onUpdate(function () {
        const ratio = that.camera.position.distanceTo(newTarget);
        const Ratio = ratio / leng;

        if (that.currentVRItem) {
          that.currentVRItem.material.uniforms.ratio.value = 1 - Ratio;
        }

        that.dispatchEvent({
          type: "camera",
          camera: that.camera,
        });
      })
      .start()
      .onComplete(function () {
        that.preVRItem = that.currentVRItem;
        callback();
      });
  }

  // 渲染函数
  renderFn() {
    TWEEN.update();
    this.control.update();
    this.renderer.render(this.scene, this.camera);

    this.labelRenderer.render(this.scene, this.camera);
    requestAnimationFrame(this.renderFn.bind(this));
  }

  initVR(infoList: any[]) {
    infoList.forEach((item) => {
      const point = createrPoint(item.id, item.tz, -0.5 * this.radii, item.tx);
      this.pointObj.add(point);

      const VRitem = createVRItem(
        item.img,
        item.id + "VR",
        item.tz,
        item.ty,
        item.tx
      );
      this.parent.add(VRitem.skyBox);
      this.textures.push(VRitem.textureA);
    });

    if (this.initLocaltion) {
      this.preVRItem = this.scene.getObjectByName(this.initLocaltion);
    } else {
      this.preVRItem = this.parent.children[0];
    }

    this.preVRItem.visible = true;

    this.camera.position.set(
      this.preVRItem.position.x,
      this.preVRItem.position.y,
      this.preVRItem.position.z
    );
  }
  dispose() {
    this.scene.children.forEach((item) => {
      if (item instanceof THREE.Mesh) {
        item.material.dispose();
        item.geometry.dispose();
      }
    });
    this.textures.forEach((texture) => {
      texture.dispose();
    });
    this.renderer.clear()
    this.renderer.forceContextLoss();
    this.renderer.dispose();
    this.scene.clear();
  }
}
还有一下几个工具方法,用来创建轨迹点的createrPoint,创建全景球的createVRItem,在着色器材质中,接收一个从当前点到下一个点的距离除以总距离,得到一个比率ratio,将这个比率作为一个透明度,传给着色器
import * as THREE from "three";
import { CSS2DObject } from "three/examples/jsm/renderers/CSS2DRenderer";
import { Font, FontLoader } from "three/examples/jsm/loaders/FontLoader";
import { TextGeometry } from "three/examples/jsm/geometries/TextGeometry";

/**
 *
 * @param {string} id
 * @param {string} tx
 * @param {string} ty
 * @param {string} tz
 * @returns {THREE.Mesh}
 */
export const createrPoint = (
  id: string,
  tx: number,
  ty: number,
  tz = 0
): THREE.Mesh => {
  const geometry = new THREE.CircleGeometry(0.15, 30);
  const material = new THREE.MeshBasicMaterial({ color: "#eeeeee" });

  const circle = new THREE.Mesh(geometry, material);
  circle.name = id;
  circle.translateX(tx);
  circle.translateY(ty);
  circle.translateZ(tz);
  circle.rotateX(-Math.PI / 2);
  return circle;
};

export const createVRItem = (
  url: string,
  id: string,
  tx: number,
  ty: number,
  tz = 0,
  radii = 4
) => {
  const vertexShader = `
    varying vec2 vUv;
    void main(){
        vUv = uv;
        gl_Position = projectionMatrix*viewMatrix*modelMatrix*vec4( position, 1.0 );
    }
`;
  const fragmentShader = `
    uniform sampler2D texture1;
    uniform float ratio;
    varying vec2 vUv;
    void main() {
        vec4 vcolor = texture2D( texture1, vUv );
        vec4 tcolor = vec4(0.,0.,0.,0.);
        gl_FragColor = mix(tcolor,vcolor,ratio);
     }
`;
  const textureA = new THREE.TextureLoader().load(url);
  const materialObj = new THREE.ShaderMaterial({
    uniforms: {
      texture1: {
        value: textureA,
      },
      ratio: {
        value: 1.0,
      },
    },
    vertexShader,
    fragmentShader,
  });

  materialObj.transparent = true;
  materialObj.depthWrite = false;

  const skyBox = new THREE.Mesh(
    new THREE.SphereGeometry(radii, 40, 40),
    materialObj
  );
  skyBox.name = id;
  skyBox.translateX(tx);
  skyBox.translateY(0);
  skyBox.translateZ(tz);
  skyBox.geometry.scale(1, 1, -1);
  skyBox.visible = false;
  return {
    skyBox,
    textureA,
  };
};

export const createVideoLabel = (url: string): CSS2DObject => {
  const x = document.createElement("video");
  x.setAttribute("width", "320");
  x.setAttribute("height", "240");
  x.setAttribute("controls", "controls");
  x.setAttribute("src", url);

  const videoObj = new CSS2DObject(x);
  videoObj.name = "video";
  return videoObj;
};

export const createIconLabel = (url: string, height = 50): CSS2DObject => {
  const img = document.createElement("img");
  img.src = url;
  img.height = height;

  const imgObj = new CSS2DObject(img);
  imgObj.name = "icon";
  return imgObj;
};

export const text3D = async (text: string): Promise<THREE.Mesh> => {
  const loader = new FontLoader();
  return new Promise((resolve) => {
    loader.load("font/helvetiker_regular.typeface.json", function (response) {
      const textGeo = new TextGeometry(text, {
        font: response,
        size: 1,
        height: 200,
        curveSegments: 1,
        bevelThickness: 1,
        bevelSize: 1,
        bevelEnabled: false,
      });

      const materials = [
        new THREE.MeshPhongMaterial({ color: 0xffffff, flatShading: true }), // front
        new THREE.MeshPhongMaterial({ color: 0xffffff }), // side
      ];
      const mesh = new THREE.Mesh(textGeo, materials);
      resolve(mesh);
    });
  });
};
使用的时候直接实例化VR这个类就可以了文章来源:https://www.toymoban.com/news/detail-802047.html
        vrScene = new VR({
            container: 'threeContainer'
        })

        vrScene.initVR(dataList)
        vrScene.renderFn()
        vrScene.addEventListener('camera', cameraFn)
    }
})
export const dataList = [
{
id: '01',
tx: 0,
ty: 0,
tz: 0,
img: 'models/gardent/别墅_地下室.jpg'
},
{
id: '02',
tx: 2,
ty: 0,
tz: 2,
img: 'models/gardent/别墅_主卫.jpg'
},
{
id: '03',
tx: 2,
ty: 0,
tz: 5,
img: 'models/gardent/别墅_主卧.jpg'
},
{
id: '04',
tx: 5,
ty: 0,
tz: 9,
img: 'models/gardent/卧室1.jpg'
},
{
id: '05',
tx: 6,
ty: 0,
tz: 1,
img: 'models/gardent/卧室2.jpg'
}
]上面是数据格式文章来源地址https://www.toymoban.com/news/detail-802047.html
到了这里,关于three.js实现VR看房自由的文章就介绍完了。如果您还想了解更多内容,请在右上角搜索TOY模板网以前的文章或继续浏览下面的相关文章,希望大家以后多多支持TOY模板网!


