前提
已经搭建好了k8s集群
一、安装KubeSphere前置环境
1、nfs文件系统
1.1、master节点上安装nfs-server服务器:
- 首先在每个节点上安装nfs工具:
# 在每个机器。
yum install -y nfs-utils
- 其次,在master节点操作
# 在master 执行以下命令
echo "/nfs/data/ *(insecure,rw,sync,no_root_squash)" > /etc/exports


# 执行以下命令,启动 nfs 服务;创建共享目录
mkdir -p /nfs/data


# 在master执行
systemctl enable rpcbind
systemctl enable nfs-server
systemctl start rpcbind
systemctl start nfs-server

# 使配置生效
exportfs -r


#检查配置是否生效
exportfs
1.2、配置nfs-client(选做)
在工作节点上操作:
showmount -e 192.168.162.31

mkdir -p /nfs/data

mount -t nfs 192.168.162.31:/nfs/data /nfs/data
1.3、配置默认存储
配置动态供应的默认存储类(master节点操作)
vi sc.yaml
## 创建了一个存储类
apiVersion: storage.k8s.io/v1
kind: StorageClass
metadata:
  name: nfs-storage
  annotations:
    storageclass.kubernetes.io/is-default-class: "true"
provisioner: k8s-sigs.io/nfs-subdir-external-provisioner
parameters:
  archiveOnDelete: "true"  ## 删除pv的时候,pv的内容是否要备份

---
apiVersion: apps/v1
kind: Deployment
metadata:
  name: nfs-client-provisioner
  labels:
    app: nfs-client-provisioner
  # replace with namespace where provisioner is deployed
  namespace: default
spec:
  replicas: 1
  strategy:
    type: Recreate
  selector:
    matchLabels:
      app: nfs-client-provisioner
  template:
    metadata:
      labels:
        app: nfs-client-provisioner
    spec:
      serviceAccountName: nfs-client-provisioner
      containers:
        - name: nfs-client-provisioner
          image: registry.cn-hangzhou.aliyuncs.com/lfy_k8s_images/nfs-subdir-external-provisioner:v4.0.2
          # resources:
          #    limits:
          #      cpu: 10m
          #    requests:
          #      cpu: 10m
          volumeMounts:
            - name: nfs-client-root
              mountPath: /persistentvolumes
          env:
            - name: PROVISIONER_NAME
              value: k8s-sigs.io/nfs-subdir-external-provisioner
            - name: NFS_SERVER
              value: 192.168.162.31 ## 指定自己nfs服务器地址
            - name: NFS_PATH
              value: /nfs/data  ## nfs服务器共享的目录
      volumes:
        - name: nfs-client-root
          nfs:
            server: 192.168.162.31
            path: /nfs/data
---
apiVersion: v1
kind: ServiceAccount
metadata:
  name: nfs-client-provisioner
  # replace with namespace where provisioner is deployed
  namespace: default
---
kind: ClusterRole
apiVersion: rbac.authorization.k8s.io/v1
metadata:
  name: nfs-client-provisioner-runner
rules:
  - apiGroups: [""]
    resources: ["nodes"]
    verbs: ["get", "list", "watch"]
  - apiGroups: [""]
    resources: ["persistentvolumes"]
    verbs: ["get", "list", "watch", "create", "delete"]
  - apiGroups: [""]
    resources: ["persistentvolumeclaims"]
    verbs: ["get", "list", "watch", "update"]
  - apiGroups: ["storage.k8s.io"]
    resources: ["storageclasses"]
    verbs: ["get", "list", "watch"]
  - apiGroups: [""]
    resources: ["events"]
    verbs: ["create", "update", "patch"]
---
kind: ClusterRoleBinding
apiVersion: rbac.authorization.k8s.io/v1
metadata:
  name: run-nfs-client-provisioner
subjects:
  - kind: ServiceAccount
    name: nfs-client-provisioner
    # replace with namespace where provisioner is deployed
    namespace: default
roleRef:
  kind: ClusterRole
  name: nfs-client-provisioner-runner
  apiGroup: rbac.authorization.k8s.io
---
kind: Role
apiVersion: rbac.authorization.k8s.io/v1
metadata:
  name: leader-locking-nfs-client-provisioner
  # replace with namespace where provisioner is deployed
  namespace: default
rules:
  - apiGroups: [""]
    resources: ["endpoints"]
    verbs: ["get", "list", "watch", "create", "update", "patch"]
---
kind: RoleBinding
apiVersion: rbac.authorization.k8s.io/v1
metadata:
  name: leader-locking-nfs-client-provisioner
  # replace with namespace where provisioner is deployed
  namespace: default
subjects:
  - kind: ServiceAccount
    name: nfs-client-provisioner
    # replace with namespace where provisioner is deployed
    namespace: default
roleRef:
  kind: Role
  name: leader-locking-nfs-client-provisioner
  apiGroup: rbac.authorization.k8s.io
创建安装storageclass资源:
kubectl apply -f sc.yaml
要保证安装的pod的状态running。
kubectl get pod -A

#确认配置是否生效
kubectl get sc

2、metrics-server
集群指标监控组件
vi metrics.yaml
apiVersion: v1
kind: ServiceAccount
metadata:
  labels:
    k8s-app: metrics-server
  name: metrics-server
  namespace: kube-system
---
apiVersion: rbac.authorization.k8s.io/v1
kind: ClusterRole
metadata:
  labels:
    k8s-app: metrics-server
    rbac.authorization.k8s.io/aggregate-to-admin: "true"
    rbac.authorization.k8s.io/aggregate-to-edit: "true"
    rbac.authorization.k8s.io/aggregate-to-view: "true"
  name: system:aggregated-metrics-reader
rules:
- apiGroups:
  - metrics.k8s.io
  resources:
  - pods
  - nodes
  verbs:
  - get
  - list
  - watch
---
apiVersion: rbac.authorization.k8s.io/v1
kind: ClusterRole
metadata:
  labels:
    k8s-app: metrics-server
  name: system:metrics-server
rules:
- apiGroups:
  - ""
  resources:
  - pods
  - nodes
  - nodes/stats
  - namespaces
  - configmaps
  verbs:
  - get
  - list
  - watch
---
apiVersion: rbac.authorization.k8s.io/v1
kind: RoleBinding
metadata:
  labels:
    k8s-app: metrics-server
  name: metrics-server-auth-reader
  namespace: kube-system
roleRef:
  apiGroup: rbac.authorization.k8s.io
  kind: Role
  name: extension-apiserver-authentication-reader
subjects:
- kind: ServiceAccount
  name: metrics-server
  namespace: kube-system
---
apiVersion: rbac.authorization.k8s.io/v1
kind: ClusterRoleBinding
metadata:
  labels:
    k8s-app: metrics-server
  name: metrics-server:system:auth-delegator
roleRef:
  apiGroup: rbac.authorization.k8s.io
  kind: ClusterRole
  name: system:auth-delegator
subjects:
- kind: ServiceAccount
  name: metrics-server
  namespace: kube-system
---
apiVersion: rbac.authorization.k8s.io/v1
kind: ClusterRoleBinding
metadata:
  labels:
    k8s-app: metrics-server
  name: system:metrics-server
roleRef:
  apiGroup: rbac.authorization.k8s.io
  kind: ClusterRole
  name: system:metrics-server
subjects:
- kind: ServiceAccount
  name: metrics-server
  namespace: kube-system
---
apiVersion: v1
kind: Service
metadata:
  labels:
    k8s-app: metrics-server
  name: metrics-server
  namespace: kube-system
spec:
  ports:
  - name: https
    port: 443
    protocol: TCP
    targetPort: https
  selector:
    k8s-app: metrics-server
---
apiVersion: apps/v1
kind: Deployment
metadata:
  labels:
    k8s-app: metrics-server
  name: metrics-server
  namespace: kube-system
spec:
  selector:
    matchLabels:
      k8s-app: metrics-server
  strategy:
    rollingUpdate:
      maxUnavailable: 0
  template:
    metadata:
      labels:
        k8s-app: metrics-server
    spec:
      containers:
      - args:
        - --cert-dir=/tmp
        - --kubelet-insecure-tls
        - --secure-port=4443
        - --kubelet-preferred-address-types=InternalIP,ExternalIP,Hostname
        - --kubelet-use-node-status-port
        image: registry.cn-hangzhou.aliyuncs.com/lfy_k8s_images/metrics-server:v0.4.3
        imagePullPolicy: IfNotPresent
        livenessProbe:
          failureThreshold: 3
          httpGet:
            path: /livez
            port: https
            scheme: HTTPS
          periodSeconds: 10
        name: metrics-server
        ports:
        - containerPort: 4443
          name: https
          protocol: TCP
        readinessProbe:
          failureThreshold: 3
          httpGet:
            path: /readyz
            port: https
            scheme: HTTPS
          periodSeconds: 10
        securityContext:
          readOnlyRootFilesystem: true
          runAsNonRoot: true
          runAsUser: 1000
        volumeMounts:
        - mountPath: /tmp
          name: tmp-dir
      nodeSelector:
        kubernetes.io/os: linux
      priorityClassName: system-cluster-critical
      serviceAccountName: metrics-server
      volumes:
      - emptyDir: {}
        name: tmp-dir
---
apiVersion: apiregistration.k8s.io/v1
kind: APIService
metadata:
  labels:
    k8s-app: metrics-server
  name: v1beta1.metrics.k8s.io
spec:
  group: metrics.k8s.io
  groupPriorityMinimum: 100
  insecureSkipTLSVerify: true
  service:
    name: metrics-server
    namespace: kube-system
  version: v1beta1
  versionPriority: 100
创建安装metrics组件:
kubectl apply -f metrics.yaml
要保证安装的pod的状态running。
kubectl get pod -A

查看pod的cpu和内存占用情况:
kubectl top pods

3、安装pvc
绑定默认的nfs存储系统
vi pvc.yaml
kind: PersistentVolumeClaim
apiVersion: v1
metadata:
  name: nginx-pvc
spec:
  accessModes:
    - ReadWriteMany
  resources:
    requests:
      storage: 200Mi
创建pvc服务:
kubectl appply -f pvc.yaml
查看pv和pvc状态:
kubectl get pv,pvc

二、安装KubeSphere
KubeSphere官网:https://kubesphere.com.cn/
1、下载核心文件
如果github下载不到,请到csdn下载:https://mp.csdn.net/mp_download/manage/download/UpDetailed
## master节点操作
wget https://github.com/kubesphere/ks-installer/releases/download/v3.1.1/kubesphere-installer.yaml

wget https://github.com/kubesphere/ks-installer/releases/download/v3.1.1/cluster-configuration.yaml
2、修改cluster-configuration
修改cluster-configuration.yaml
vim cluster-configuration.yaml
apiVersion: installer.kubesphere.io/v1alpha1
kind: ClusterConfiguration
metadata:
  name: ks-installer
  namespace: kubesphere-system
  labels:
    version: v3.1.1
spec:
  persistence:
    storageClass: ""        # If there is no default StorageClass in your cluster, you need to specify an existing StorageClass here.
  authentication:
    jwtSecret: ""           # Keep the jwtSecret consistent with the Host Cluster. Retrieve the jwtSecret by executing "kubectl -n kubesphere-system get cm kubesphere-config -o yaml | grep -v "apiVersion" | grep jwtSecret" on the Host Cluster.
  local_registry: ""        # Add your private registry address if it is needed.
  etcd:
    monitoring: true       # Enable or disable etcd monitoring dashboard installation. You have to create a Secret for etcd before you enable it.
    endpointIps: 192.168.162.31  # etcd cluster EndpointIps. It can be a bunch of IPs here.
    port: 2379              # etcd port.
    tlsEnable: true
  common:
    redis:
      enabled: true
    openldap:
      enabled: true
    minioVolumeSize: 20Gi # Minio PVC size.
    openldapVolumeSize: 2Gi   # openldap PVC size.
    redisVolumSize: 2Gi # Redis PVC size.
    monitoring:
      # type: external   # Whether to specify the external prometheus stack, and need to modify the endpoint at the next line.
      endpoint: http://prometheus-operated.kubesphere-monitoring-system.svc:9090 # Prometheus endpoint to get metrics data.
    es:   # Storage backend for logging, events and auditing.
      # elasticsearchMasterReplicas: 1   # The total number of master nodes. Even numbers are not allowed.
      # elasticsearchDataReplicas: 1     # The total number of data nodes.
      elasticsearchMasterVolumeSize: 4Gi   # The volume size of Elasticsearch master nodes.
      elasticsearchDataVolumeSize: 20Gi    # The volume size of Elasticsearch data nodes.
      logMaxAge: 7                     # Log retention time in built-in Elasticsearch. It is 7 days by default.
      elkPrefix: logstash              # The string making up index names. The index name will be formatted as ks-<elk_prefix>-log.
      basicAuth:
        enabled: false
        username: ""
        password: ""
      externalElasticsearchUrl: ""
      externalElasticsearchPort: ""
  console:
    enableMultiLogin: true  # Enable or disable simultaneous logins. It allows different users to log in with the same account at the same time.
    port: 30880
  alerting:                # (CPU: 0.1 Core, Memory: 100 MiB) It enables users to customize alerting policies to send messages to receivers in time with different time intervals and alerting levels to choose from.
    enabled: true         # Enable or disable the KubeSphere Alerting System.
    # thanosruler:
    #   replicas: 1
    #   resources: {}
  auditing:                # Provide a security-relevant chronological set of records,recording the sequence of activities happening on the platform, initiated by different tenants.
    enabled: true         # Enable or disable the KubeSphere Auditing Log System.
  devops:                  # (CPU: 0.47 Core, Memory: 8.6 G) Provide an out-of-the-box CI/CD system based on Jenkins, and automated workflow tools including Source-to-Image & Binary-to-Image.
    enabled: true             # Enable or disable the KubeSphere DevOps System.
    jenkinsMemoryLim: 2Gi      # Jenkins memory limit.
    jenkinsMemoryReq: 1500Mi   # Jenkins memory request.
    jenkinsVolumeSize: 8Gi     # Jenkins volume size.
    jenkinsJavaOpts_Xms: 512m  # The following three fields are JVM parameters.
    jenkinsJavaOpts_Xmx: 512m
    jenkinsJavaOpts_MaxRAM: 2g
  events:                  # Provide a graphical web console for Kubernetes Events exporting, filtering and alerting in multi-tenant Kubernetes clusters.
    enabled: true         # Enable or disable the KubeSphere Events System.
    ruler:
      enabled: true
      replicas: 2
  logging:                 # (CPU: 57 m, Memory: 2.76 G) Flexible logging functions are provided for log query, collection and management in a unified console. Additional log collectors can be added, such as Elasticsearch, Kafka and Fluentd.
    enabled: true         # Enable or disable the KubeSphere Logging System.
    logsidecar:
      enabled: true
      replicas: 2
  metrics_server:                    # (CPU: 56 m, Memory: 44.35 MiB) It enables HPA (Horizontal Pod Autoscaler).
    enabled: false                   # Enable or disable metrics-server.
  monitoring:
    storageClass: ""                 # If there is an independent StorageClass you need for Prometheus, you can specify it here. The default StorageClass is used by default.
    # prometheusReplicas: 1          # Prometheus replicas are responsible for monitoring different segments of data source and providing high availability.
    prometheusMemoryRequest: 400Mi   # Prometheus request memory.
    prometheusVolumeSize: 20Gi       # Prometheus PVC size.
    # alertmanagerReplicas: 1          # AlertManager Replicas.
  multicluster:
    clusterRole: none  # host | member | none  # You can install a solo cluster, or specify it as the Host or Member Cluster.
  network:
    networkpolicy: # Network policies allow network isolation within the same cluster, which means firewalls can be set up between certain instances (Pods).
      # Make sure that the CNI network plugin used by the cluster supports NetworkPolicy. There are a number of CNI network plugins that support NetworkPolicy, including Calico, Cilium, Kube-router, Romana and Weave Net.
      enabled: true # Enable or disable network policies.
    ippool: # Use Pod IP Pools to manage the Pod network address space. Pods to be created can be assigned IP addresses from a Pod IP Pool.
      type: calico # Specify "calico" for this field if Calico is used as your CNI plugin. "none" means that Pod IP Pools are disabled.
    topology: # Use Service Topology to view Service-to-Service communication based on Weave Scope.
      type: none # Specify "weave-scope" for this field to enable Service Topology. "none" means that Service Topology is disabled.
  openpitrix: # An App Store that is accessible to all platform tenants. You can use it to manage apps across their entire lifecycle.
    store:
      enabled: true # Enable or disable the KubeSphere App Store.
  servicemesh:         # (0.3 Core, 300 MiB) Provide fine-grained traffic management, observability and tracing, and visualized traffic topology.
    enabled: true     # Base component (pilot). Enable or disable KubeSphere Service Mesh (Istio-based).
  kubeedge:          # Add edge nodes to your cluster and deploy workloads on edge nodes.
    enabled: true   # Enable or disable KubeEdge.
    cloudCore:
      nodeSelector: {"node-role.kubernetes.io/worker": ""}
      tolerations: []
      cloudhubPort: "10000"
      cloudhubQuicPort: "10001"
      cloudhubHttpsPort: "10002"
      cloudstreamPort: "10003"
      tunnelPort: "10004"
      cloudHub:
        advertiseAddress: # At least a public IP address or an IP address which can be accessed by edge nodes must be provided.
          - ""            # Note that once KubeEdge is enabled, CloudCore will malfunction if the address is not provided.
        nodeLimit: "100"
      service:
        cloudhubNodePort: "30000"
        cloudhubQuicNodePort: "30001"
        cloudhubHttpsNodePort: "30002"
        cloudstreamNodePort: "30003"
        tunnelNodePort: "30004"
    edgeWatcher:
      nodeSelector: {"node-role.kubernetes.io/worker": ""}
      tolerations: []
      edgeWatcherAgent:
        nodeSelector: {"node-role.kubernetes.io/worker": ""}
        tolerations: []
3、执行安装
master节点操作:
kubectl apply -f kubesphere-installer.yaml

kubectl apply -f cluster-configuration.yaml
查看pod的安装状态:
kubectl get pod -A

如果没有安装完成,需要耐心等待安装完成,状态变为running。
4、查看安装进度
pod安装完成后,可以查看kubesphere的安装进度了:
kubectl logs -n kubesphere-system $(kubectl get pod -n kubesphere-system -l app=ks-install -o jsonpath='{.items[0].metadata.name}') -f

大概需要十几分钟的安装时间。
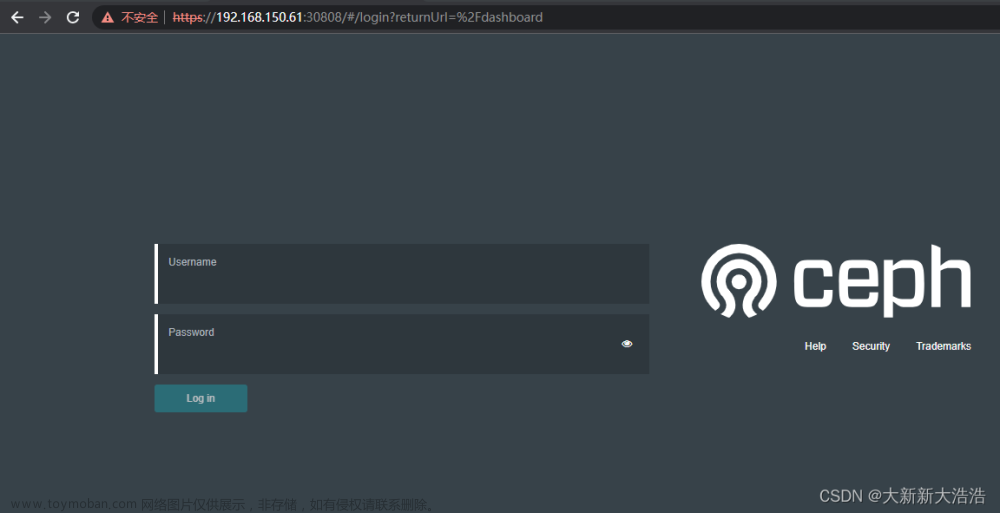
访问任意机器的 30880端口
账号 : admin
密码 : xxxxxxxx
– 解决etcd监控证书找不到问题
查看报错信息;
kubectl describe pod -n kubesphere-monitoring-system prometheus-k8s-0

文件挂载失败,原因是密钥证书没有找到文章来源:https://www.toymoban.com/news/detail-803339.html
kubectl -n kubesphere-monitoring-system create secret generic kube-etcd-client-certs --from-file=etcd-client-ca.crt=/etc/kubernetes/pki/etcd/ca.crt --from-file=etcd-client.crt=/etc/kubernetes/pki/apiserver-etcd-client.crt --from-file=etcd-client.key=/etc/kubernetes/pki/apiserver-etcd-client.key
正常访问kubesphere系统: 文章来源地址https://www.toymoban.com/news/detail-803339.html
到了这里,关于K8S集群上安装KubeSphere的详细过程的文章就介绍完了。如果您还想了解更多内容,请在右上角搜索TOY模板网以前的文章或继续浏览下面的相关文章,希望大家以后多多支持TOY模板网!