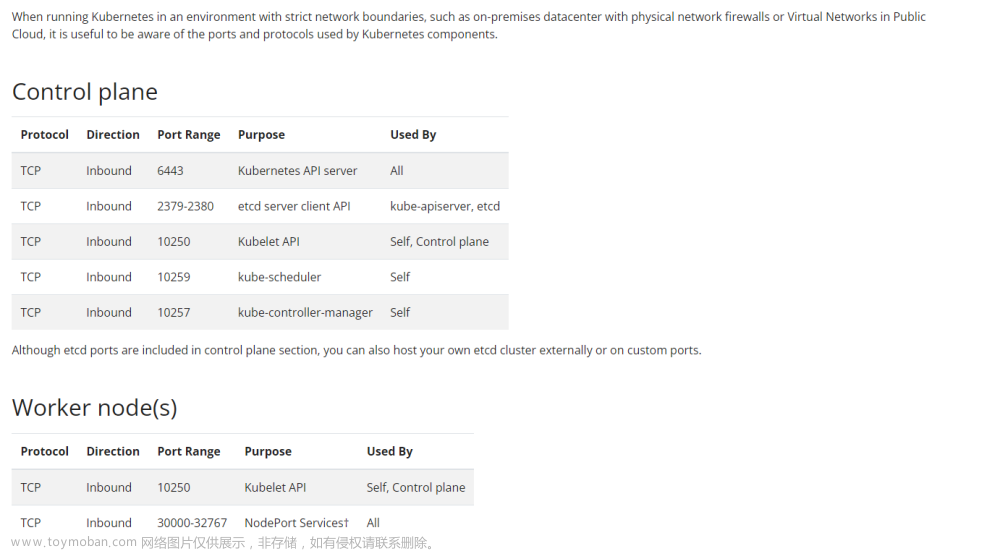
1.环境准备
1.1 集群规划
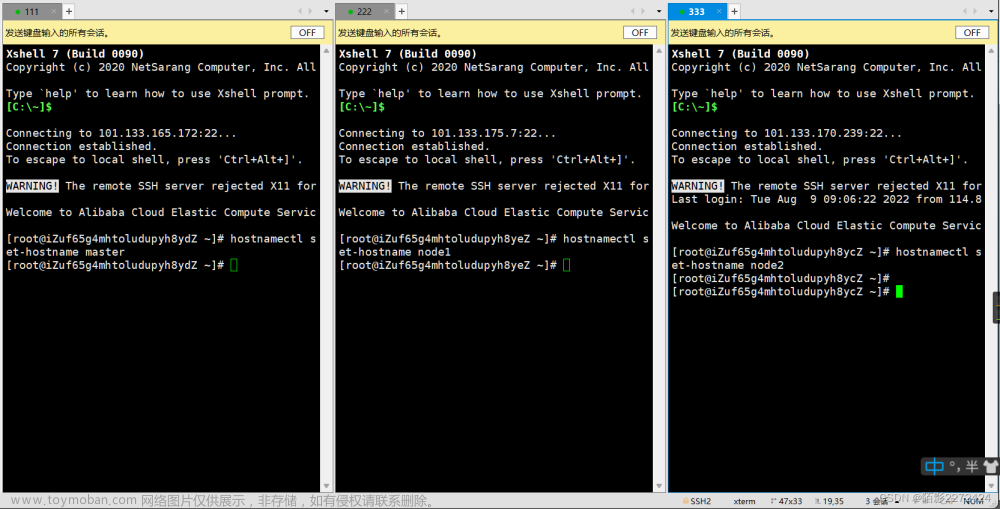
本次安装环境为:3台k8s+现有的mysql数据库+nfs
1.2 下载及介绍
DolphinScheduler-3.2.0官网:https://dolphinscheduler.apache.org/zh-cn/download/3.2.0
官网安装文档:https://dolphinscheduler.apache.org/zh-cn/docs/3.2.0/guide/installation/kubernetes#appendix-configurationr
2.前置工作
默认k8s集群已经安装完成,本次已腾讯的TKE为例介绍
参考腾讯TKE官方文档:https://cloud.tencent.com/document/product/457/32731
2.1 Helm配置
- 下载 Helm 客户端
curl -fsSL -o get_helm.sh https://raw.githubusercontent.com/helm/helm/master/scripts/get-helm-3
chmod 700 get_helm.sh
./get_helm.sh
如果curl无法下载可以直接网页点开后复制里面的内容,然后创建get_helm.sh文件继续操作即可
- 配置 Helm Chart 仓库(可选)
# 执行以下命令,配置 kubernetes 官方仓库
helm repo add stable https://kubernetes-charts.storage.googleapis.com/
# 执行以下命令,配置腾讯云应用市场。
helm repo add tkemarket https://market-tke.tencentcloudcr.com/chartrepo/opensource-stable
- 连接集群
#执行以下命令,通过指定参数的形式访问目标集群。
helm  install ....  --kubeconfig [kubeconfig所在路径]
# 如果警告如下:#WARNING: Kubernetes configuration file is group-readable. This is insecure. Location:  /data/config,修改权限
chmod -R 600   ~/.kube/config
- helm常用命令举例
#helm 删除 官方仓库
helm repo remove  stable
#仓库管理)查看添加的chart仓库,可在这些chart仓库中拉取chart
helm repo list
 #将chart包发布到k8s集群中安装部署
helm install releaseName chartName
#列出所有已发布的版本
helm list
helm list -n test
helm list -A
2.2 配置PV
apiVersion: v1
kind: PersistentVolume
metadata:
  name: dol-software
spec:
  accessModes:
  - ReadWriteMany
  capacity:
    storage: 5Gi
  csi:
    driver: com.tencent.cloud.csi.cfs
    volumeAttributes:
      host: xxx
      path: /software/dol_software
      vers: "4"
    #   此处volumeHandle值要和下面的不同采用,否则不能同时挂载两个pv
    volumeHandle: cfs2
  persistentVolumeReclaimPolicy: Retain
  storageClassName: dol-software
  volumeMode: Filesystem
---
apiVersion: v1
kind: PersistentVolume
metadata:
  name: dol-dolphinscheduler
spec:
  accessModes:
  - ReadWriteMany
  capacity:
    storage: 5Gi
  csi:
    driver: com.tencent.cloud.csi.cfs
    volumeAttributes:
      host: xxx
      path: /software/dolphinscheduler/data_dolphinscheduler
      vers: "4"
    volumeHandle: cfs3
  persistentVolumeReclaimPolicy: Retain
  storageClassName: dol-dolphinscheduler
  volumeMode: Filesystem
3.dolphinscheduler测试集群安装
测试集群使用会单独启动一个psql以及zookeeper
请下载源码包 apache-dolphinscheduler-3.2.0-src.tar.gz,下载
发布一个名为 dolphinscheduler 的版本(release),请执行以下命令:
$ tar -zxvf apache-dolphinscheduler-3.2.0-src.tar.gz
$ cd apache-dolphinscheduler-3.2.0-src/deploy/kubernetes/dolphinscheduler
$ helm repo add bitnami https://charts.bitnami.com/bitnami
$ helm dependency update .
$ helm install dolphinscheduler . --set image.tag=3.2.0
将名为 dolphinscheduler 的版本(release) 发布到 test 的命名空间中:
$ helm install dolphinscheduler . -n test
提示: 如果名为 test 的命名空间被使用, 选项参数 -n test 需要添加到 helm 和 kubectl 命令中
提示: 列出所有已发布的版本,使用 helm list,PostgreSQL (用户 root, 密码 root, 数据库 dolphinscheduler) 和 ZooKeeper 服务将会默认启动
4.dolphinscheduler生产集群安装
注:采用自有mysql存储元数据, ZooKeeper 服务将会默认启动
4.1 修改并重新构建各组件镜像
从 3.0.0 版本起,dolphinscheduler 已经微服务化,更改元数据存储需要对把所有的服务都替换为 MySQL 驱动包,包括 dolphinscheduler-tools, dolphinscheduler-master, dolphinscheduler-worker, dolphinscheduler-api, dolphinscheduler-alert-server
- 准备工作
mkdir /data
cp mysql-connector-java-8.0.16.jar /data
tee  /data/requirements.txt <<-'EOF'
flask
requests
EOF
- 配置Dockerfile
使用服务器构建
vim docker_test.sh
#!/bin/bash
tee /data/other/Dockerfile <<-'EOF'
FROM dolphinscheduler.docker.scarf.sh/apache/dolphinscheduler-worker:3.2.0
COPY mysql-connector-java-8.0.16.jar /opt/dolphinscheduler/libs
COPY requirements.txt /tmp
RUN apt-get update && \
    apt-get install -y --no-install-recommends python-pip && \
    pip install --no-cache-dir -r /tmp/requirements.txt && \
    pip install --no-cache-dir -U pip && \
    rm -rf /var/lib/apt/lists/*
RUN apt-get update && \
    apt-get install -y --no-install-recommends python3 && \
    apt-get install -y --no-install-recommends python3-pip && \
    rm -rf /var/lib/apt/lists/*
EOF

cd /data/other
docker build -t apache/dolphinscheduler-master:mysql-driver .

tee /data/other/Dockerfile <<-'EOF'
FROM dolphinscheduler.docker.scarf.sh/apache/dolphinscheduler-master:3.2.0
COPY mysql-connector-java-8.0.16.jar /opt/dolphinscheduler/libs
EOF

cd /data/other
docker build -t apache/dolphinscheduler-master:mysql-driver .

tee /data/other/Dockerfile <<-'EOF'
FROM dolphinscheduler.docker.scarf.sh/apache/dolphinscheduler-api:3.2.0
COPY mysql-connector-java-8.0.16.jar /opt/dolphinscheduler/libs
EOF

cd /da ta/other
docker build -t apache/dolphinscheduler-api:mysql-driver .

tee /data/other/Dockerfile <<-'EOF'
FROM dolphinscheduler.docker.scarf.sh/apache/dolphinscheduler-alert-server:3.2.0
COPY mysql-connector-java-8.0.16.jar /opt/dolphinscheduler/libs
EOF

cd /data/other
docker build -t apache/dolphinscheduler-alert-server:mysql-driver .


tee /data/other/Dockerfile <<-'EOF'
FROM dolphinscheduler.docker.scarf.sh/apache/dolphinscheduler-tools:3.2.0
COPY mysql-connector-java-8.0.16.jar /opt/dolphinscheduler/tools/libs
EOF

cd /data/other
docker build -t apache/dolphinscheduler-tools:mysql-driver .
使用mac本地编译(服务器太慢可以采用,需要在mac上安装docker并开启允许多架构操作)
vim docker_test.sh
#!/bin/bash
tee /Users/other/Dockerfile <<-'EOF'
FROM  dolphinscheduler.docker.scarf.sh/apache/dolphinscheduler-worker:3.2.0
COPY mysql-connector-java-8.0.16.jar /opt/dolphinscheduler/libs
EOF
cd /Users/other
docker  buildx  build --platform=linux/amd64 -t apache/dolphinscheduler-worker:mysql-driver .

tee  /Users/other/Dockerfile <<-'EOF'
FROM  dolphinscheduler.docker.scarf.sh/apache/dolphinscheduler-master:3.2.0
COPY mysql-connector-java-8.0.16.jar /opt/dolphinscheduler/libs
EOF

cd /Users/other
docker  buildx  build --platform=linux/amd64  -t apache/dolphinscheduler-master:mysql-driver .

tee /Users/other/Dockerfile <<-'EOF'
FROM   dolphinscheduler.docker.scarf.sh/apache/dolphinscheduler-api:3.2.0
COPY mysql-connector-java-8.0.16.jar /opt/dolphinscheduler/libs
EOF

cd /Users/other
docker  buildx  build --platform=linux/amd64  -t apache/dolphinscheduler-api:mysql-driver .

tee /Users/other/Dockerfile <<-'EOF'
FROM  dolphinscheduler.docker.scarf.sh/apache/dolphinscheduler-alert-server:3.2.0
COPY mysql-connector-java-8.0.16.jar /opt/dolphinscheduler/libs
EOF

cd /Users/other
docker  buildx  build --platform=linux/amd64 -t apache/dolphinscheduler-alert-server:mysql-driver .


tee /Users/other/Dockerfile <<-'EOF'
FROM - dolphinscheduler.docker.scarf.sh/apache/dolphinscheduler-tools:3.2.0
COPY mysql-connector-java-8.0.16.jar /opt/dolphinscheduler/tools/libs
EOF

cd /Users/other
docker  buildx  build --platform=linux/amd64  -t apache/dolphinscheduler-tools:mysql-driver .
运行脚本
nohup bash /data/other/docker_test.sh > /data/other/log.txt 2>&1 &
或者
nohup bash /Users/other/docker_test.sh > /Users/other/log.txt 2>&1 &
- 推送镜像到镜像库
推送写脚本有点问题,不知道问什么,需要单独推送
docker tag apache/dolphinscheduler-worker:mysql-driver storage/bigdata/dolphinscheduler-worker:mysql-driver
docker push storage/bigdata/dolphinscheduler-worker:mysql-driver

docker tag apache/dolphinscheduler-master:mysql-driver storage/bigdata/dolphinscheduler-master:mysql-driver
docker push storage/bigdata/dolphinscheduler-master:mysql-driver

docker tag apache/dolphinscheduler-api:mysql-driver storage/bigdata/dolphinscheduler-api:mysql-driver
docker push storage/bigdata/dolphinscheduler-api:mysql-driver

docker tag apache/dolphinscheduler-alert-server:mysql-driver storage/bigdata/dolphinscheduler-alert-server:mysql-driver
docker push storage/bigdata/dolphinscheduler-alert-server:mysql-driver

docker tag apache/dolphinscheduler-tools:mysql-driver storage/bigdata/dolphinscheduler-tools:mysql-driver
docker push storage/bigdata/dolphinscheduler-tools:mysql-driver
4.2 配置修改
4.2.1 修改源码配置文件
vim {源码地址}}/dolphinscheduler/deploy/kubernetes
/dolphinscheduler/values.yaml

image:
  registry: "storage/bigdata"
  tag: "mysql-driver"
  pullPolicy: "IfNotPresent"
  pullSecret: ""
  master: dolphinscheduler-master
  worker: dolphinscheduler-worker
  api: dolphinscheduler-api
  alert: dolphinscheduler-alert-server
  tools: dolphinscheduler-tools
#修改 values.yaml 文件中 postgresql 的 enabled 为 false
postgresql:
  enabled: false
  postgresqlUsername: "root"
  postgresqlPassword: "root"
#修改 values.yaml 文件中的 externalDatabase 配置 (尤其修改 host, username 和 password)
mysql:
  enabled: false
  driverClassName: "com.mysql.cj.jdbc.Driver"
  auth:
    username: "xxx"
    password: "xxx"
    database: "dolphinscheduler"
    params: "characterEncoding=utf8"
externalDatabase:
  enabled: true
  type: "mysql"
  host: "xxx"
  port: "3306"
  username: "xxx"
  password: "xxx"
  database: "dolphinscheduler"
  params: "useUnicode=true&characterEncoding=UTF-8"
  driverClassName: "com.mysql.cj.jdbc.Driver"
#数据持久化保存,可根据需要配置master/worker等
  sharedStoragePersistence:
    enabled: true
    mountPath: "/opt/soft"
    accessModes:
    - "ReadWriteMany"
    ## storageClassName must support the access mode: ReadWriteMany
    storageClassName: "dol-software"
    storage: "5Gi"
  ## If RESOURCE_STORAGE_TYPE is HDFS and FS_DEFAULT_FS is file:///, fsFileResourcePersistence should be enabled for resource storage
  fsFileResourcePersistence:
    enabled: true
    accessModes:
    - "ReadWriteMany"
    ## storageClassName must support the access mode: ReadWriteMany
    storageClassName: "dol-dolphinscheduler"
    storage: "5Gi"
#配置java最大和最小内存配置,如果dolphinscheduler启动后负载过高可以适当增大
    JAVA_OPTS: "-Xms1g -Xmx5g -Xmn512m"

#配置说明
#resource资源限制:namespace创建资源最大限制才可以配置,如不配置系统会给你的namespace配
4.2.2 安装
helm repo add bitnami https://charts.bitnami.com/bitnami
helm dependency update .
#helm install dolphinscheduler . -f values.yaml --set image.tag=3.2.0
helm install dolphinscheduler . -n test
4.2.3 安装过程中问题及解决
镜像问题
#报错如下:
# Error: INSTALLATION FAILED: An error occurred while checking for chart dependencies. You may need to run `helm dependency build` to fetch missing dependencies: found in Chart.yaml, but missing in charts/ directory: postgresql, zookeeper, mysql, minio
$ helm repo add bitnami-full-index https://raw.githubusercontent.com/bitnami/charts/archive-full-index/bitnami
#原请求地址为:https://raw.githubusercontent.com/,国内可能连接不上,变更RAW资源加速地址:https://raw.gitmirror.com
helm repo add bitnami-full-index  https://raw.gitmirror.com/bitnami/charts/archive-full-index/bitnami
"bitnami-full-index" has been added to your repositories
#重新安装
helm install dolphinscheduler . -n test

#列出所有已发布的版本
helm list
helm list -n test
helm list -A
其它问题
#问题1:dolphinscheduler Failed to obtain JDBC Connection; nested exception is com.mysql.cj.jdbc.exceptions.CommunicationsException: Communications link failure
解决办法:配置文件加上&useSSL=fals
params: "useSSL=false&useUnicode=true&characterEncoding=UTF-8&allowPublicKeyRetrieval=false&useJDBCCompliantTimezoneShift=true&useLegacyDatetimeCode=false&serverTimezone=GMT%2B8"

#问题2:pod 一直CrashLoopBackOff 并且执行kubectl logs podname 报错;exec /__cacert_entrypoint.sh: exec format error
# 容器镜像打包的有问题,不能在linux是使用,我用的mac,需要在mac上要开启 docker 的实验功能:
experimental: true
docker  buildx  build --platform=linux/amd64 -t apache/dolphinscheduler-worker:mysql-driver .

#问题3:创建租户错误 java.lang.NullPointerException: null
需要将value.yaml中的配置修改为hdfs
common:
  ## Configmap
  configmap:
    RESOURCE_STORAGE_TYPE: "HDFS"
    FS_DEFAULT_FS: "file:///"
    DOLPHINSCHEDULER_OPTS: ""
    DATA_BASEDIR_PATH: "/tmp/dolphinscheduler"
    RESOURCE_UPLOAD_PATH: "/dolphinscheduler"
# resource storage type: HDFS, S3, OSS, GCS, ABS, NONE
    resource.storage.type: HDFS
4.2.4本地打开UI页面
#当 api.service.type=ClusterIP 时,你需要执行 port-forward 端口转发命令:
# kubectl port-forward --address 0.0.0.0 svc/dolphinscheduler-api 12345:12345
# kubectl port-forward --address 0.0.0.0 -n test svc/dolphinscheduler-api 12345:12345
nohup kubectl port-forward --address 0.0.0.0 -n test svc/dolphinscheduler-api 12345:12345 >/dev/null  2>&1 &

# 使用 test 命名空间
#提示: 如果出现 unable to do port forwarding: socat not found 错误, 需要先安装 socat
5.测试
访问前端页面: http://localhost:12345/dolphinscheduler/ui
默认的用户是admin,默认的密码是dolphinscheduler123文章来源:https://www.toymoban.com/news/detail-803630.html
localhost为配置 port-forward 端口的服务器文章来源地址https://www.toymoban.com/news/detail-803630.html
到了这里,关于Kubernetes(k8s)部署DolphinScheduler的文章就介绍完了。如果您还想了解更多内容,请在右上角搜索TOY模板网以前的文章或继续浏览下面的相关文章,希望大家以后多多支持TOY模板网!


