前言
之前两篇文章已经分别在云上和本地搭建了chatGLM3的API接口 和综合web_demo.py
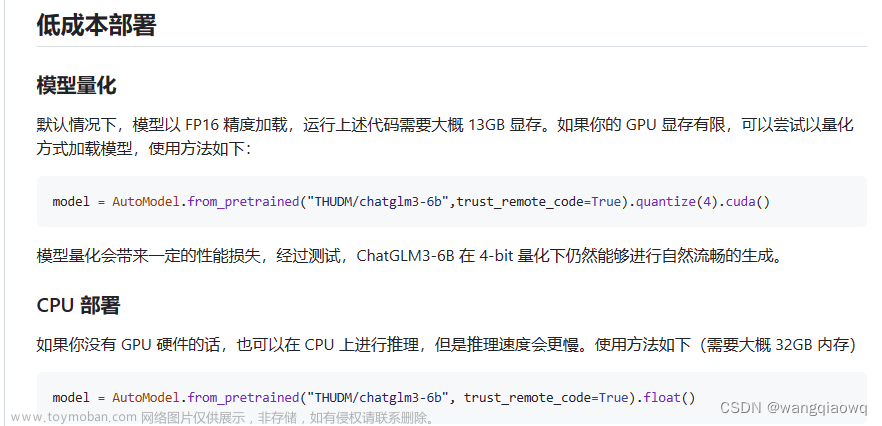
本篇文章记录如何仅使用CPU和内存在没有GPU(cuda)的情况下推理chatGLM3
1.下载源码
#使用conda隔离环境
conda create -n glm3cpp python=3.10
#切换环境
conda activate glm3cpp
#将 ChatGLM.cpp 存储库克隆到本地计算机中
git clone --recursive https://github.com/li-plus/chatglm.cpp.git
2.安装依赖
#安装加载和仿真Hugging Face模型所需的包:
pip install -U pip
pip install torch tabulate tqdm transformers accelerate sentencepiece
3.转换模型
#使用convert.py将ChatGLM-6B转换为量化的GGML格式。例如,将fp16模型原始转换为q4_0(量化int4)GGML模型
python chatglm_cpp/convert.py -i THUDM/chatglm-6b -t q4_0 -o chatglm-ggml.bin
参数解读
-i THUDM/chatglm-6b
ps:表示原始模型位置,如果本地没有模型会从hf联网下载
位于convert.py的512行修改默认模型位置
-t q4_0
此外还有
q4_0: 4-bit integer quantization with fp16 scales.
q4_1: 4-bit integer quantization with fp16 scales and minimum values.
q5_0: 5-bit integer quantization with fp16 scales.
q5_1: 5-bit integer quantization with fp16 scales and minimum values.
q8_0: 8-bit integer quantization with fp16 scales.
f16: half precision floating point weights without quantization.
f32: single precision floating point weights without quantization.
位于convert.py的529行修改默认里量化等级
PS:表示量化等级q4_0
-o chatglm-ggml.bin
PS:为输出文件名,及编译后的文件。默认和convert.py位于统计目录 可以修改default中输出的文件名字
4.本地转化
cd chatglm_cpp

python convert.py
部分日志截取
(glm3cpp) D:\AIGC\ChatGLM3\chatglm.cpp>cd chatglm_cpp

(glm3cpp) D:\AIGC\ChatGLM3\chatglm.cpp\chatglm_cpp>python convert.py
Loading checkpoint shards: 100%|█████████████████████████████████████████████████████████████████████████████████████████████████████████████████████████████████████████████████████████████████████████| 7/7 [00:14<00:00,  2.00s/it]
Processing model states: 100%|███████████████████████████████████████████████████████████████████████████████████████████████████████████████████████████████████████████████████████████████████████| 199/199 [01:14<00:00,  2.68it/s]
+---------------------------------------------------------------------+---------------------------+---------+
| name                                                                | shape                     | dtype   |
|---------------------------------------------------------------------+---------------------------+---------|
| transformer.embedding.word_embeddings.weight                        | torch.Size([65024, 4096]) | Q4_0    |
| transformer.encoder.layers.0.input_layernorm.weight                 | torch.Size([4096])        | F32     |
| transformer.encoder.layers.0.self_attention.query_key_value.weight  | torch.Size([4608, 4096])  | Q4_0    |
| transformer.encoder.layers.0.self_attention.query_key_value.bias    | torch.Size([4608])        | F32     |


| transformer.encoder.layers.27.mlp.dense_h_to_4h.weight              | torch.Size([27392, 4096]) | Q4_0    |
| transformer.encoder.layers.27.mlp.dense_4h_to_h.weight              | torch.Size([4096, 13696]) | Q4_0    |
| transformer.encoder.final_layernorm.weight                          | torch.Size([4096])        | F32     |
| transformer.output_layer.weight                                     | torch.Size([65024, 4096]) | Q4_0    |
+---------------------------------------------------------------------+---------------------------+---------+
GGML model saved to chatglm3-ggml.bin
转换后的模型
5.CMake构建项目
#安装依赖
pip install cmake

#依次执行命令
cmake -B build

cmake --build build -j --config Release
6. 推理验证
修改examples/chatglm3_demo.py第20行模型文件位置
MODEL_PATH = "D:\\AIGC\\ChatGLM3\\chatglm.cpp\\\chatglm_cpp\\chatglm3-ggml.bin"
项目启动
python -m streamlit run chatglm3_demo.py
日志截取
(glm3cpp) D:\AIGC\ChatGLM3\chatglm.cpp\examples>python -m streamlit run  chatglm3_demo.py

  You can now view your Streamlit app in your browser.

  Local URL: http://localhost:8501
  Network URL: http://10.0.1.97:8501
开启对话前


开启对话后

 文章来源:https://www.toymoban.com/news/detail-803926.html
总结
以上就是基于chatglm.cpp项目仅使用cpu推理的教程文章来源地址https://www.toymoban.com/news/detail-803926.html
到了这里,关于大模型笔记之-低成本部署CharGLM3|chatglm.cpp基于ggml 的纯 C++ 实现的文章就介绍完了。如果您还想了解更多内容,请在右上角搜索TOY模板网以前的文章或继续浏览下面的相关文章,希望大家以后多多支持TOY模板网!


