背景
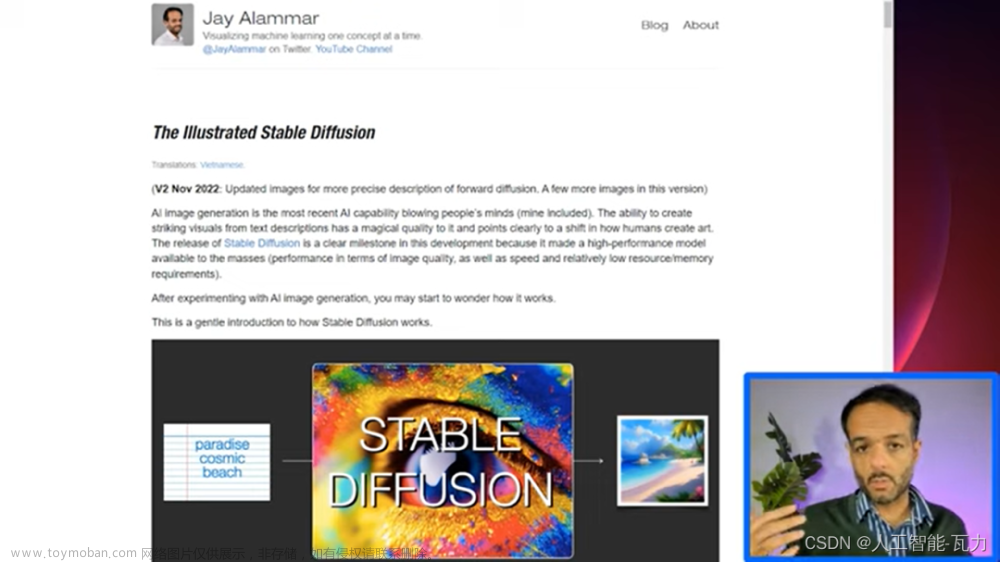
Stable diffusion是一个基于Latent Diffusion Models(LDMs)实现的的文图生成(text-to-image)模型。
2022年8月,游戏设计师Jason Allen凭借AI绘画作品《太空歌剧院(Théâtre D’opéra Spatial)》获得美国科罗拉多州博览会“数字艺术/数码摄影“竞赛单元一等奖,“AI绘画”引发全球热议。得力于Stability AI开源了Stable Diffusion,图像AIGC现在正在快速的发展迭代。
回顾

Stable Diffusion涉及的技术有Diffusion Model(DDPM),Attention,Autoencoder,
DDPM
扩散模型包括两个过程:前向过程(forward process)和反向过程(reverse process),其中前向过程又称为扩散过程(diffusion process)。无论是前向过程还是反向过程都是一个参数化的马尔可夫链(Markov chain),其中反向过程可用于生成数据样本(它的作用类似GAN中的生成器,只不过GAN生成器会有维度变化,而DDPM的反向过程没有维度变化)。
Diffusion Model: [超详细的扩散模型(Diffusion Models)原理+代码](蓝色仙女:超详细的扩散模型(Diffusion Models)原理+代码)
Attention
[Attention机制详解(二)——Self-Attention与Transformer](川陀学者:Attention机制详解(二)——Self-Attention与Transformer),论文:[《Attention Is All You Need》](https://arxiv.org/pdf/1706.03762.pdf)
Autoencoder
自动编码器由一个编码器Encoder和一个解码器Decoder组成,LDM中编码器把图像输入压缩到低维空间,待扩散结束后,用解码器将低维表达还原为原始图像维度。

Stable Diffusion
Stable diffusion是一个基于Latent Diffusion Models(LDMs)的以文生图模型的实现,因此掌握LDMs,就掌握了Stable Diffusion的原理,Latent Diffusion Models(LDMs)的论文是《High-Resolution Image Synthesis with Latent Diffusion Models》。本文内容是对该论文的详细解读。
LDM方法
为了降低训练扩散模型的算力,LDMs使用一个Autoencoder去学习能尽量表达原始image space的低维空间表达(latent embedding),这样可以大大减少需要的算力。

公式符号说明:
- 图像符号:在RGB空间: �∈��×�×3
- 编码器encoder: �,encoder将 � 压缩成低维表示 �=�(�)
- 解码器decoder: � ,decoder将低维表示 � 还原成原始图像空间。
- 用于生成控制的条件去噪自编码器: ��(��,�,�)
1. LDM核心要点
LDMs相比DDPM最大的两点改进如下:
1. 加入Autoencoder(上图中左侧红色部分),使得扩散过程在latent space下,提高图像生成的效率;
2. 加入条件机制,能够使用其他模态的数据控制图像的生成(上图中右侧灰色部分),其中条件生成控制通过Attention(上图中间部分QKV)机制实现。
2. Latent Diffusion Model
回顾DDPM:Diffusion Model(DDPM)训练过程就是训练UNet预测每一步的noise,从而逐步还原原始图像。原始图像空间的Diffusion Model目标函数如下:
���=��,�∼�(0,1),�[‖�−��(��,�)‖22]
LDM:LDM的Diffusion Model是作用在潜在空间(latent space): �=�(�)
那么在latent space的Diffusion Model目标函数如下:
����=��(�),�∼�(0,1),�[‖�−��(��,�)‖22]
共同点:这里函数 ��(�,�) 的参数使用神经网络UNet拟合,UNet在DDPM和LDM中的作用都是预测噪声。
区别:LDM公式中 �� 是从encoder � 获取到的 �� 的低维表达,LDM的UNet只需要预测低维空间噪声。
3. 条件图像生成器
DDPM回顾
DDPM的UNet可以根据当前采样的t预测noise,但没有引入其他额外条件。但是LDM实现了“以文生图”,“以图生图”等任务,就是因为LDM在预测noise的过程中加入了条件机制,即通过一个编码器(encoder)将条件和Unet连接起来。
条件控制生成原理
符号说明:
- � 为控制生成的条件,Stable Diffusion中代表文本
- � 为根据条件生成的向量
与其他类型的生成模型类似,扩散模型原则上能够对形式为 �(�|�) 的条件分布进行建模,这可以通过条件去噪自动编码器 ��(��,�,�) 来实现,这样就可以实现比如通过文本 � 来控制 � 的生成(text-to-image),同样的,如果 � 为图像,也可以实现image-to-image任务。LDM通过在UNet 模型中使用交叉注意机制(cross-attention),将Diffusion Models转变为更灵活的条件图像生成器。本来将使用text-to-image来举例。
这里引入一个新的encoder �� (这个是用于条件编码的encoder,和上面提到的用于降维的是不同的)来将条件 � 映射到 ��(�)∈��×�� ,然后 ��(�)∈��×�� 通过cross-attention layer 映射到UNet 的中间层。

图2. 控制条件的输入
cross-attention的公式如下,在理解cross-attention之前,需要对Attention原理进行学习:
Attention(�,�,�)=softmax(����)⋅�
�=��(�)⋅��(��),�=��(�)⋅��(�),�=��(�)⋅��(�)
这里, ��(��) 是UNet �� 的中间层表示, ��(�)∈��×��� , ��(�)∈��×��&��(�)∈��×�� 。
则条件控制下LDM的目标函数可以表示为:
����=��(�),�,�∼�(0,1),�[‖�−��(��,�,��(�))‖22]
编码器 ��(�) 和UNet �� 是通过上述公式联合训练的。
4. LDM整体架构
训练阶段每个模块之间的交互如图:

推理阶段每个模块之间的交互如图:

核心代码讲解(MindSpore版本Wukong-Huahua)
代码仓库地址:https://github.com/mindspore-lab/minddiffusion/tree/main/vision/wukong-huahua
LDM代码包含几个核心组件,从训练阶段的过程来逐步讲解代码
1. AutoEncoderKL 自编码器:将图像映射到 latent space
文件位置:stablediffusionv2/ldm/models/autoencoder.py
AutoEncoderKL 编码器已提前训练好,参数是固定的。训练阶段该模块负责将输入数据集映射到latent space,然后latent space的样本再继续进入扩散模型进行扩散。这一过程在Stable Diffusion代码中被称为 encode_first_stage
    def get_input(self, x, c):
        if len(x.shape) == 3:
            x = x[..., None]
        x = self.transpose(x, (0, 3, 1, 2))
        z = ops.stop_gradient(self.scale_factor * self.first_stage_model.encode(x))

        return z, c
上述代码中self.first_stage_model表示AutoEncoderKL
2. FrozenCLIPEmbedder:将控制条件编码为向量
文件位置:stablediffusionv2/ldm/modules/encoders/modules.py
其核心模块class TextEncoder(nn.Cell)构建函数如下:
    def construct(self, text):
        bsz, ctx_len = text.shape
        flatten_id = text.flatten()
        gather_result = self.gather(self.embedding_table, flatten_id, 0)
        x = self.reshape(gather_result, (bsz, ctx_len, -1))
        x = x + self.positional_embedding
        x = x.transpose(1, 0, 2)
        x = self.transformer_layer(x)
        x = x.transpose(1, 0, 2)
        x = self.ln_final(x)
        return x
从上述代码可以看出, TextEncoder先将文本转换为向量, FrozenCLIPEmbedder
3. UNet UNet的layers代码示例如下:
   layers.append(AttentionBlock(
                            ch,
                            use_checkpoint=use_checkpoint,
                            num_heads=num_heads,
                            num_head_channels=dim_head,
                            use_new_attention_order=use_new_attention_order,
                        ) if not use_spatial_transformer else SpatialTransformer(
                            ch, num_heads, dim_head, depth=transformer_depth, context_dim=context_dim,
                            use_checkpoint=use_checkpoint, dtype=self.dtype, dropout=self.dropout, use_linear=use_linear_in_transformer
                        )
                    )
self.input_blocks.append(layers)
从上述代码可以看出UNet的每个中间层都会拼接一次SpatialTransformer模块,该模块对应,使用 Attention 机制来更好的学习文本与图像的匹配关系。
    def construct(self, x, timesteps=None, context=None, y=None):
        """
        Apply the model to an input batch.
        :param x: an [N x C x ...] Tensor of inputs.
        :param timesteps: a 1-D batch of timesteps.
        :param context: conditioning plugged in via crossattn
        :param y: an [N] Tensor of labels, if class-conditional.
        :return: an [N x C x ...] Tensor of outputs.
        """

        assert (y is not None) == (
            self.num_classes is not None
        ), "must specify y if and only if the model is class-conditional"
        hs = []
        t_emb = timestep_embedding(timesteps, self.model_channels, repeat_only=False)
        emb = self.time_embed(t_emb)

        if self.num_classes is not None:
            assert y.shape == (x.shape[0],)
            emb = emb + self.label_emb(y)

        h = x
        for celllist in self.input_blocks:
            for cell in celllist:
                h = cell(h, emb, context)
            hs.append(h)

        for module in self.middle_block:
            h = module(h, emb, context)

        hs_index = -1
        for celllist in self.output_blocks:
            h = self.cat((h, hs[hs_index]))
            for cell in celllist:
                h = cell(h, emb, context)
            hs_index -= 1

        if self.predict_codebook_ids:
            return self.id_predictor(h)
        else:
            return self.out(h)
4. LDM:扩散模型,用于生成对应采样时间t的样本
LDM核心代码如下:
    def p_losses(self, x_start, cond, t, noise=None):
        noise = ms.numpy.randn(x_start.shape)
        x_noisy = self.q_sample(x_start=x_start, t=t, noise=noise) // time=t时加噪后的样本
        model_output = self.apply_model(x_noisy, t, cond) // UNet预测的噪声,cond表示FrozenCLIPEmbedder生成的条件

        if self.parameterization == "x0":
            target = x_start
        elif self.parameterization == "eps":
            target = noise
        else:
            raise NotImplementedError()

        loss_simple = self.get_loss(model_output, target, mean=False).mean([1, 2, 3]) //计算预测noise与真实noise的损失值

        logvar_t = self.logvar[t]
        loss = loss_simple / ops.exp(logvar_t) + logvar_t
        loss = self.l_simple_weight * loss.mean()

        loss_vlb = self.get_loss(model_output, target, mean=False).mean((1, 2, 3))
        loss_vlb = (self.lvlb_weights[t] * loss_vlb).mean()
        loss += (self.original_elbo_weight * loss_vlb)

        return loss
self.apply_model代码如下:
    def apply_model(self, x_noisy, t, cond, return_ids=False):
        x_noisy = ops.cast(x_noisy, self.dtype)
        cond = ops.cast(cond, self.dtype)

        if isinstance(cond, dict):
            # hybrid case, cond is expected to be a dict
            pass
        else:
            key = 'c_concat' if self.model.conditioning_key == 'concat' else 'c_crossattn'
            cond = {key: cond}

        x_recon = self.model(x_noisy, t, **cond) // self.model表示UNet模型

        if isinstance(x_recon, tuple) and not return_ids:
            return x_recon[0]
        else:
            return x_recon
LDM将损失函数反向传播来更新UNet模型的参数,AutoEncoderKL 和 FrozenCLIPEmbedder的参数在该反向传播中不会被更新。
从上述代码可以看出UNet的每个中间层都会拼接一次SpatialTransformer模块,该模块对应,使用 Attention 机制来更好的学习文本与图像的匹配关系。
 文章来源:https://www.toymoban.com/news/detail-803944.html
一文读懂Stable Diffusion 论文原理+代码超详细解读 - 知乎文章来源地址https://www.toymoban.com/news/detail-803944.html
到了这里,关于一文读懂Stable Diffusion 论文原理+代码超详细解读的文章就介绍完了。如果您还想了解更多内容,请在右上角搜索TOY模板网以前的文章或继续浏览下面的相关文章,希望大家以后多多支持TOY模板网!


