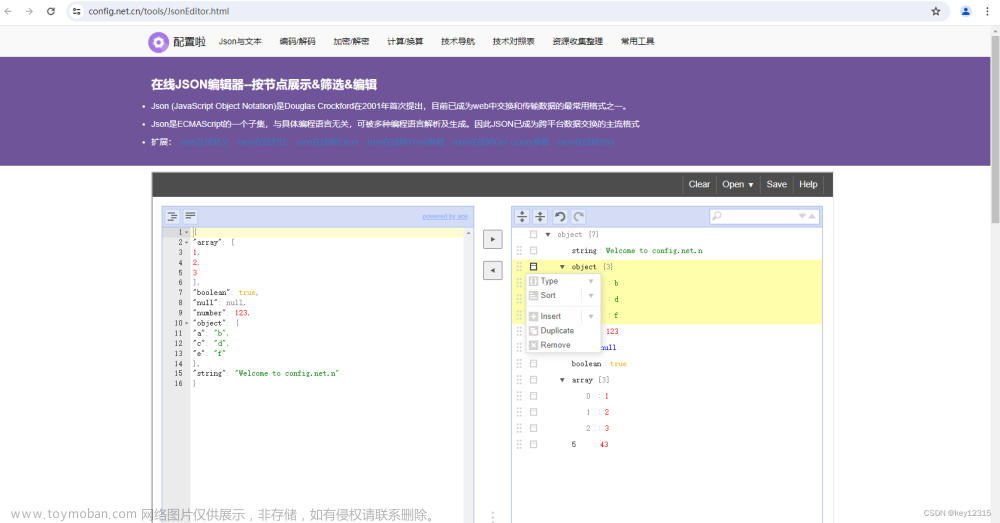
一、vue3中使用Json 编辑器
// 安装
npm install vue3-json-editor --save        npm install vue3-json-editor@latest --save
// 项目中使用(两种导入方式本质上一致,区别在于模块的默认导出方式不同)
import { Vue3JsonEditor } from 'vue3-json-editor/dist/vue3-json-editor.cjs.js' // 使用了ES6的解构赋值语法,从CommonJS规范导出的模块中,显式地导入了名称为Vue3JsonEditor的变量。这样的话,您需要在代码中显式地使用该变量来创建组件
import Vue3JsonEditor from 'vue3-json-editor' // 直接导入了默认导出的组件,可以直接使用Vue3JsonEditor变量来创建组件(已经配置了Webpack或Vite等构建工具使其能够识别.vue文件,并通过单文件组件的方式进行开发)
import { Vue3JsonEditor } from 'vue3-json-editor/dist/vue3-json-editor.cjs.js';
<Vue3JsonEditor
	v-model="debugInput"  // 双向绑定数据
	@json-change="jsonChange"   // 改变调用事件
	@json-save="onJsonSave"  // 保存调用事件
	@has-error="onError"
	key="1"
	:mode="'text'"   // 默认模式tree(tree,code,form,text,view)  text文本结构,比较好添加和编辑内容.树结构看数据比较直观,还可以添加你想要的类型的数据
	ref="editor"
	:showBtns="false"  // 是否展示保存按钮
	:expandedOnStart="true"  // 是否展开JSON编辑器模式
	v-if="form.method==2" c
	lass="command-issuing-script-json"
	@@blur="validate" 如果需要校验json是否正确,可以监测@blur事件,使用editor.validate()来校验json数据
/>

 const jsonChange = (val) => {
      state.debugInput = val
      state.hasJsonFlag = true
 }
  const onError = (err) => {
      state.hasJsonFlag = false
  }
	// 在组件中增加 exportJson 方法
    const exportJson = () => {
      const data = editor.value.getJSON()  // 在组件实例上获取
      const jsonDataStr = JSON.stringify(data, null, 2) // 拿到json字符串
      // 注意也可以直接拿动态绑定的字段
      const blob = new Blob([jsonDataStr], { type: 'application/json' })
      const url = URL.createObjectURL(blob)
      const link = document.createElement('a')
      link.href = url
      link.download = 'data.json'
      link.click()
      URL.revokeObjectURL(url)
    }

// 主要功能点
(1)支持双向绑定:您可以使用 v-model 指令将 Vue3JsonEditor 组件与父组件中的数据进行双向绑定。并自动格式化
二、react中使用(也可用在vue项目中)可用于java、js、json等
Monaco Editor 是一个浏览器端的代码编辑器,它是 VS Code 编辑器的核心部分,可以提供强大的代码编辑能力,它是 VSCode 的浏览器版本Monaco Editor 的特点包括:
(1)支持多种编程语言
(2)支持语法高亮、智能提示、自动补全等编辑器功能
(3)可以集成到 Web 应用程序中,支持在线代码编辑
https://zhuanlan.zhihu.com/p/88828576
// 安装
npm install monaco-editor --save
// 使用
import * as monaco from 'monaco-editor/esm/vs/editor/editor.api';
// 创建一个编辑器容器 div,并设置其大小和位置
const editorContainer = document.createElement('div');
editorContainer.style.width = '800px';
editorContainer.style.height = '600px';
document.body.appendChild(editorContainer);
// 初始化编辑器
const editor = monaco.editor.create(editorContainer, {
  value: 'console.log("Hello, world")',
  language: 'javascript'  // 是什么语言 'json'
  readOnly: readOnly || false, // 只读
});

// 导出(借助ioJSON包,IOJSON是一种扩展了JSON格式的数据交换协议,支持更多的数据类型并且允许通过URL引用数据以方便传输大量数据。iojson库提供了一系列API来解析和序列化IOJSON格式的数据,使得Javascript开发者可以方便地使用这种数据交换格式)
npm install iojson
import iojson from 'iojson';
const ioJsonData = '{"name": "Alice", "age": 25}';
const jsObject = iojson.parse(ioJsonData);
console.log(jsObject);
// Output: { name: 'Alice', age: 25 }
iojson.exportJSON(physicModel, `${physicModel.name}`)  // 导出.json文件
三、浏览器中使用eslint: vue3+codemirror6实现简易在线代码编辑器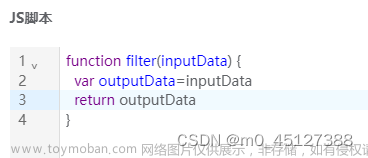
https://www.jb51.net/article/272037.htm文章来源:https://www.toymoban.com/news/detail-804491.html
// 项目中使用
npm install eslint-linter-browserify --save-dev(会在package及package-lock引入)
npm i vue-codemirror
npm i codemirror   // 在线编辑器
npm i @codemirror/lang-javascript
npm i @codemirror/lint
npm i @codemirror/autocomplete // 自动补全功能
npm i @codemirror/theme-one-dark  // 主题
// 实现弹框中js脚本
import { javascript, esLint } from '@codemirror/lang-javascript'
import { linter, lintGutter } from '@codemirror/lint';
import * as eslint from 'eslint-linter-browserify'
import { basicSetup, EditorView } from 'codemirror'
import { EditorState } from "@codemirror/state";

 <div class="codemirror-script" ref="scriptRef"></div>
 const state = reactive({
            code:
                `function filter(inputData) {
  					var outputData=inputData
 				 	return outputData
				  }`,
            config: {
                parserOptions: {
                    ecmaVersion: 6,
                    sourceType: "module",
                },
                env: {
                    browser: true,
                    node: true,
                },
                rules: ESLINT_RULES,  // 校验规则
            },
            editView: {}
	});
const scriptRef = ref(null)
const openDialog = (row: any) => {
                state.code = `function filter(inputData) {
  					var outputData=inputData
  					return outputData
				}`;
            setTimeout(() => {
                state.editView = new EditorView({
                    state: EditorState.create({
                        doc: state.code,
                        extensions: [
                            basicSetup,
                            javascript(),
                            lintGutter(),
                            linter(esLint(new eslint.Linter(), state.config))
                        ],
                    }),
                    parent: scriptRef.value as any,
                })
            }, 0)
        }

        const onConfirm = () => {
            refForm.value.validate(async (valid: boolean) => {
                if (valid) {
                    let param = { ...form.value }
                    param.script = state.editView.state.doc.text.join("\n") || ''   // 获取当前编辑器的内容字符串
                    // 验证js脚本  是否包含function filter
                    if (!param.script.includes('function filter')) {
                        ElMessage.warning('js脚本必须包含filter过滤函数')
                        return
                    }
                }
            })
        }
三、websocket连接
1、配url连接路径:
2、代码文章来源地址https://www.toymoban.com/news/detail-804491.html
		state.ws = new ReconnectingWebSocket({ url: state.row.sourceUrl }, (type: string, message: any) => {
						let newMessage = message;
						try {
							newMessage = JSON.parse(message);
						} catch (error) {
							console.log(error);
						}
						state.responseJSON = newMessage;
					});

// 以下是websocket类封装
interface Props {
	url: string;
	reconnectInterval: number; // 重连间隔时间
	heartBeatInterval: number; // 心跳间隔时间
	isOpenHeartbeatMonitore: boolean; // 是否开启心跳监测
	heartMeesage: string; // 心跳发送信息
	maxReconnectAttempts: number; // 最大重连次数
}

export default class ReconnectingWebSocket {
	url: string;
	reconnectInterval: number;
	heartBeatInterval: number;
	ws: any;
	heartMeesage: string;
	isOpenHeartbeatMonitore: boolean;
	data: any;
	maxReconnectAttempts: number;
	private reconnectAttempts: number;
	private isClosed: boolean;
	private heartBeatTimer: any;
	callback: Function;
	constructor(
		{ url, reconnectInterval, heartBeatInterval, heartMeesage, isOpenHeartbeatMonitore = true, maxReconnectAttempts = 3 }: Props,
		callback: Function
	) {
		this.url = url;
		this.reconnectInterval = reconnectInterval || 1000; // 重连间隔时间
		this.heartBeatInterval = heartBeatInterval || 30000; // 心跳间隔时间
		this.ws = null;
		this.isClosed = false;
		this.heartBeatTimer = null;
		this.heartMeesage = heartMeesage;
		this.isOpenHeartbeatMonitore = isOpenHeartbeatMonitore;
		this.maxReconnectAttempts = maxReconnectAttempts;
		this.reconnectAttempts = 0;
		this.connect();
		this.callback = callback;
	}

	connect() {
		if (this.ws) {
			this.ws.close();
			this.ws = null;
		}
		this.ws = new WebSocket(this.url);
		this.ws.onopen = () => {
			this.isOpenHeartbeatMonitore && this.startHeartBeat();
			this.callback('open', 'WebSocket连接成功');
		};
		this.ws.onmessage = (event: { data: string }) => {
			this.callback('message', event.data);
			this.data = event.data;
		};
		this.ws.onclose = () => {
			// 正常和异常关闭
			this.data = null;
			this.stopHeartBeat();
			if (!this.isClosed) {
				// 异常关闭 重连
				if (this.reconnectAttempts < this.maxReconnectAttempts) {
					setTimeout(() => {
						this.reconnectAttempts++;
						this.callback('close', `WebSocket第${this.reconnectAttempts}次重连`);
						this.connect();
					}, this.reconnectInterval);
				} else {
					this.callback('close', `已达到最大重连次数,停止重连`);
				}
			} else {
				this.callback('close', 'WebSocket连接关闭');
			}
		};
	}

	send(data: string) {
		if (this.ws.readyState === WebSocket.OPEN) {
			this.ws.send(data);
		}
	}

	startHeartBeat() {
		this.heartBeatTimer = setInterval(() => {
			this.send(this.heartMeesage); // 发送心跳消息
		}, this.heartBeatInterval);
	}

	stopHeartBeat() {
		this.isOpenHeartbeatMonitore && clearInterval(this.heartBeatTimer);
	}

	close() {
		this.isClosed = true;
		this.ws.close();
	}
}
到了这里,关于前端使用JSON编辑器、java编辑器、浏览器中使用eslint的文章就介绍完了。如果您还想了解更多内容,请在右上角搜索TOY模板网以前的文章或继续浏览下面的相关文章,希望大家以后多多支持TOY模板网!


