史上最全的前端axios和后端跨域配置处理
本小节内容需要对vue前端框架以及对后端的基础框架所有掌握哦!前后端项目分离中经常会涉及到请求跨域的问题,今天让我们一起来掌握它吧!!!
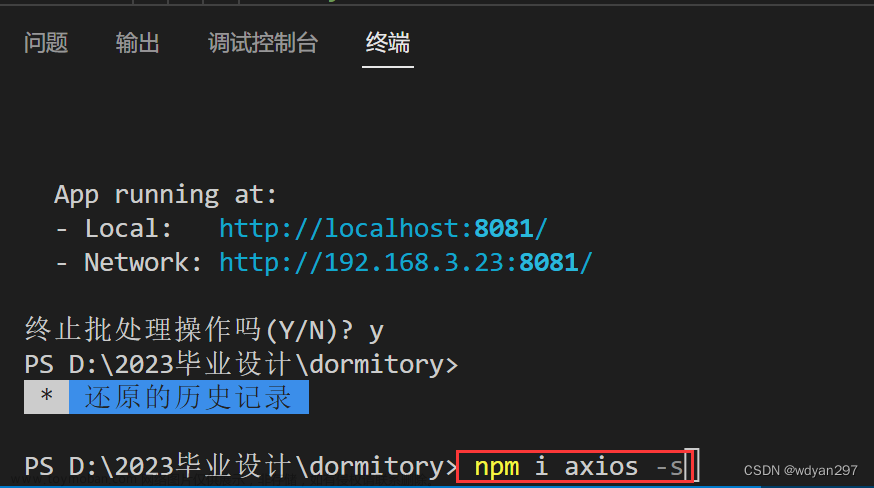
安装axios【https://www.axios-http.cn/】
npm install axios
封装一个基本的请求js
创建remote.ts或者其他文件名
import axios from "axios";
const server = 'http://localhost:8181'

/**
 * async 异步处理
 * await 等待处理完成
 */
async function getData(url,param){
    var ret = ''
    await axios.get(server+url, {params: param}).then(function (res) {
        ret = res.data
    })
    return ret
}

//post请求体传输数据
async function postData(url,param){
    var options = {  // 设置axios的参数
        url: server+url,
        data: param,
        method: 'post',
    }

    var ret = ''
    await axios(options).then(function (res) {
        ret = res
    })
    return ret
}

//post表单形式提交 请求头传输数据
async function postDataForm(url,param){
  var options = {  // 设置axios的参数
    url: server+url,
    data: param,
    method: 'post',
    headers: {'Content-Type':'application/x-www-form-urlencoded'}
  }

  var ret = ''
  await axios(options).then(function (res) {
    ret = res
  })
  return ret
}


async function uploadFile(url,param){
    var options = {  // 设置axios的参数
        url: server+url,
        data: param,
        method: 'post',
        headers: {
            'Content-Type': 'multipart/form-data'
        }
    }

    var ret = ''
    await axios(options).then(function (res) {
        ret = res.data
    })
    return ret
}

// export:导出变量、函数
export  {getData,postData,postDataForm,uploadFile}
使用
import {getData,postData,uploadFile} from '../common/remote'

getData('/user/list',{current:current}).then(function (res) {

})

postData('/user/delete',[id]).then(function (res) {

})

uploadFile(url,formData).then(function (res) {

})
Vite 解决跨域问题
Access-Control-Allow-Origin
- 在写代码的时候出现上述跨域问题
解决问题
在工程文件夹的根目录新建一个vite.config.js文件,写入代码:
import { defineConfig } from 'vite'
import vue from '@vitejs/plugin-vue'

// https://vitejs.dev/config/
export default defineConfig({
  plugins: [vue()],

  server:{
    proxy: {
      '/api': {
        target: 'http://localhost:8080/',  //你要跨域访问的网址
        changeOrigin: true,   // 允许跨域
        rewrite: (path) => path.replace(/^\/api/, '') // 重写路径把路径变成空字符
      }
    }
  }
})
然后在需要发送请求的文件中写,就可以跨域请求数据了:
var options = {  // 设置axios的参数
  url: '/api/login',
  data: {username:username.value,password:password.value},
  method: 'post',
  headers: {'Content-Type':'application/x-www-form-urlencoded'}
}

  axios(options).then((res: any)=>{
      console.log(res);
      if(res.data==='loginOK'){
          router.push('/');
      }else{
          alert('账号密码错误');
      }
  })
在vite.config.js文件中的’/api’ 可以改成任意你想要的名字,只要把它重写成空字符,就无所谓的,还是原来的网址。
后端SpringBoot 相关的跨域处理
一、为什么会出现跨域问题
出于浏览器的同源策略限制。同源策略(Sameoriginpolicy)是一种约定,它是浏览器最核心也最基本的安全功能,如果缺少了同源策略,则浏览器的正常功能可能都会受到影响。可以说Web是构建在同源策略基础之上的,浏览器只是针对同源策略的一种实现。
同源策略
同源策略会阻止一个域的javascript脚本和另外一个域的内容进行交互。所谓同源(即指在同一个域)就是两个页面具有相同的协议(protocol),主机(host)和端口号(port)
二、什么是跨域
举例说明:
当一个请求url的协议、域名、端口三者之间任意一个与当前页面url不同即为跨域

三、非同源限制
- 【1】无法读取非同源网页的 Cookie、LocalStorage 和 IndexedDB
- 【2】无法接触非同源网页的 DOM
- 【3】无法向非同源地址发送 AJAX 请求
四、java 后端 实现 CORS 跨域请求的方式
对于 CORS的跨域请求,主要有以下几种方式可供选择:
- 1.返回新的CorsFilter
- 2.重写 WebMvcConfigurer
- 3.使用注解 @CrossOrigin
- 4.手动设置响应头 (HttpServletResponse)
- 5.自定web filter 实现跨域
注意
- CorFilter / WebMvConfigurer / @CrossOrigin 需要 SpringMVC 4.2以上版本才支持,对应springBoot 1.3版本以上
- 上面前两种方式属于全局 CORS 配置,后两种属于局部 CORS配置。如果使用了局部跨域是会覆盖全局跨域的规则,所以可以通过 @CrossOrigin 注解来进行细粒度更高的跨域资源控制。
- 其实无论哪种方案,最终目的都是修改响应头,向响应头中添加浏览器所要求的数据,进而实现跨域
1.返回新的 CorsFilter(全局跨域)
在任意配置类,返回一个 新的 CorsFIlter Bean ,并添加映射路径和具体的CORS配置路径。
@Configuration
public class GlobalCorsConfig {
    @Bean
    public CorsFilter corsFilter() {
        //1. 添加 CORS配置信息
        CorsConfiguration config = new CorsConfiguration();
        //放行哪些原始域
        config.addAllowedOrigin("*");
        //是否发送 Cookie
        config.setAllowCredentials(true);
        //放行哪些请求方式
        config.addAllowedMethod("*");
        //放行哪些原始请求头部信息
        config.addAllowedHeader("*");
        //暴露哪些头部信息
        config.addExposedHeader("*");
        //2. 添加映射路径
        UrlBasedCorsConfigurationSource corsConfigurationSource = new UrlBasedCorsConfigurationSource();
        corsConfigurationSource.registerCorsConfiguration("/**",config);
        //3. 返回新的CorsFilter
        return new CorsFilter(corsConfigurationSource);
    }
}
2. 重写 WebMvcConfigurer(全局跨域)
@Configuration
public class CorsConfig implements WebMvcConfigurer {
    @Override
    public void addCorsMappings(CorsRegistry registry) {
        registry.addMapping("/**")
                //是否发送Cookie
                .allowCredentials(true)
                //放行哪些原始域
                .allowedOriginPatterns("*")
                .allowedMethods(new String[]{"GET", "POST", "PUT", "DELETE"})
                .allowedHeaders("*")
                .exposedHeaders("*");
    }
}
3.使用注解 (局部跨域)
在控制器(类上)上使用注解 @CrossOrigin:,表示该类的所有方法允许跨域。
@RestController
@CrossOrigin(origins = "*")
public class HelloController {
    @RequestMapping("/hello")
    public String hello() {
        return "hello world";
    }
}
在方法上使用注解 @CrossOrigin:
@RequestMapping("/hello")
    @CrossOrigin(origins = "*")
     //@CrossOrigin(value = "http://localhost:8081") //指定具体ip允许跨域
    public String hello() {
        return "hello world";
    }
4. 手动设置响应头(局部跨域)
使用 HttpServletResponse 对象添加响应头(Access-Control-Allow-Origin)来授权原始域,这里
Origin的值也可以设置为 “*”,表示全部放行。
@RequestMapping("/index")
public String index(HttpServletResponse response) {
    response.addHeader("Access-Allow-Control-Origin","*");
    return "index";
}
5. 使用自定义filter实现跨域
SSM用法首先编写一个过滤器,可以起名字为MyCorsFilter.java
package com.xuguoguo.aop;

import java.io.IOException;
import javax.servlet.Filter;
import javax.servlet.FilterChain;
import javax.servlet.FilterConfig;
import javax.servlet.ServletException;
import javax.servlet.ServletRequest;
import javax.servlet.ServletResponse;
import javax.servlet.http.HttpServletResponse;
import org.springframework.stereotype.Component;
@Component
public class MyCorsFilter implements Filter {
  public void doFilter(ServletRequest req, ServletResponse res, FilterChain chain) throws IOException, ServletException {
    HttpServletResponse response = (HttpServletResponse) res;
    response.setHeader("Access-Control-Allow-Origin", "*");
    response.setHeader("Access-Control-Allow-Methods", "POST, GET, OPTIONS, DELETE");
    response.setHeader("Access-Control-Max-Age", "3600");
    response.setHeader("Access-Control-Allow-Headers", "x-requested-with,content-type");
    chain.doFilter(req, res);
  }
  public void init(FilterConfig filterConfig) {}
  public void destroy() {}
}
在web.xml中配置这个过滤器,使其生效
<!-- 跨域访问 START-->
<filter>
 <filter-name>CorsFilter</filter-name>
 <filter-class>com.mesnac.aop.MyCorsFilter</filter-class>
</filter>
<filter-mapping>
 <filter-name>CorsFilter</filter-name>
 <url-pattern>/*</url-pattern>
</filter-mapping>
<!-- 跨域访问 END  -->
springboot可以简化
import org.springframework.context.annotation.Configuration;
import javax.servlet.*;
import javax.servlet.annotation.WebFilter;
import javax.servlet.http.HttpServletResponse;
import java.io.IOException;
@WebFilter(filterName = "CorsFilter ")
@Configuration
public class CorsFilter implements Filter {
    @Override
    public void doFilter(ServletRequest req, ServletResponse res, FilterChain chain) throws IOException, ServletException {
        HttpServletResponse response = (HttpServletResponse) res;
        response.setHeader("Access-Control-Allow-Origin","*");
        response.setHeader("Access-Control-Allow-Credentials", "true");
        response.setHeader("Access-Control-Allow-Methods", "POST, GET, PATCH, DELETE, PUT");
        response.setHeader("Access-Control-Max-Age", "3600");
        response.setHeader("Access-Control-Allow-Headers", "Origin, X-Requested-With, Content-Type, Accept");
        chain.doFilter(req, res);
    }
}
SpringBoot中使用
- DataGetRequestController
package com.xuguoguo.controller;

import com.xuguoguo.entity.User;
import org.springframework.web.bind.annotation.GetMapping;
import org.springframework.web.bind.annotation.RequestParam;
import org.springframework.web.bind.annotation.RestController;

import java.util.List;
import java.util.Map;

@RestController
public class DataGetRequestController {

    @GetMapping("/getInt")
    public int getInt(int id){
        return id;
    }

    @GetMapping(value = "/getBox")
    public String getBox(String name,Integer id){
        return "name = " + name + " id = " + id;
    }

    @GetMapping("/getRequestParam")
    public String getRequestParam(@RequestParam(value = "rp",required = false) Integer id){
        return "ID = " + id;
    }

    @GetMapping(value = "/getUser")
    public User getUser(User user){
        return user;
    }

    @GetMapping("/getIds")
    public List<Long> getIds(@RequestParam List<Long> ids){
        return ids;
    }

    @GetMapping(value = "/getMap")
    public Map<String,Object> getMap(@RequestParam Map<String,Object> map){
        return map;
    }

    @GetMapping(value = "/getObj")
    public Object getObj(@RequestParam(name = "ik",required = true,defaultValue = "500") Integer id){
        return id;
    }

    @GetMapping("/getArr")
    public String[] getArr(String[] arr){
        return arr;
    }

    @GetMapping(value = "/getList")
    public List<String> getList(@RequestParam List<String> names){
        return names;
    }

}
- DataPostRequestController
package com.xuguoguo.controller;

import com.xuguoguo.entity.User;
import org.springframework.web.bind.annotation.PostMapping;
import org.springframework.web.bind.annotation.RequestBody;
import org.springframework.web.bind.annotation.RestController;

import java.util.List;
import java.util.Map;

@RestController
public class DataPostRequestController {
    //表单形式接收
    @PostMapping("/postInt")
    public int postInt(int id){
        return id;
    }

    //表单形式接收
    @PostMapping("/postBox")
    public String postBox(String name,Integer id){
        return "name = " + name +" id = " + id;
    }

    /**
     * @RequestBody:
     * 要求请求参数必须是在body中的
     *
     * 如果不加@RequestBody:
     * 请求可以放在parameter、body中
     * 复杂对象也是可以传的
     * @param user
     * @return
     */
    @PostMapping("/postUser")
    public User postUser(@RequestBody User user){
        return user;
    }

    //表单形式接收
    @PostMapping("/postUserNoBody")
    public User postUserNoBody( User user){
        return user;
    }

    @PostMapping("/postIds")
    public List<Integer> postIds(@RequestBody List<Integer> ids){
        return ids;
    }

    @PostMapping("/postUsers")
    public List<User> postUsers(@RequestBody List<User> users){
        return users;
    }

    @PostMapping("/postMap")
    public Map<String,Object> postMap(@RequestBody Map<String,Object> map){
        return map;
    }

}
axios get请求
<script setup>

import {getData,postData,uploadFile} from './remote.ts'

getData('/getInt',{id:100}).then(function (res) {
  console.log('getInt--->'+res)
})

getData('/getBox',{id:100,name:'张三'}).then(function (res) {
  console.log('getBox--->'+res)
})

getData('/getRequestParam',{rp:100}).then(function (res) {
  console.log('getRequestParam--->'+res)
})

getData('/getUser',{id:100,userName:'张三',password:'123456'}).then(function (res) {
  console.log('getUser--->id:'+res.id+' userName:'+res.userName+' password:'+res.password)
})

getData('/getIds',{ids:'1,2,3,4,5'}).then(function (res) {
  console.log('getIds--->'+res)
  console.log('getIds--->'+res[3])
})

getData('/getMap',{id:100,userName:'张三',password:'123456'}).then(function (res) {
  console.log('getMap--->id:'+res.id+' userName:'+res.userName+' password:'+res.password)
})

getData('/getArr',{arr:'张三,李四,王五'}).then(function (res) {
  console.log('getArr--->'+res)
})

getData('/getList',{names:'张三,李四,王五'}).then(function (res) {
  console.log('getList--->'+res)
})

</script>

<template>

</template>
axios post请求
<script setup>

import {getData,postData,postDataForm,uploadFile} from './remote.ts'

postDataForm('/postInt',{id:100}).then(function (res) {
  console.log(res)
  console.log('postInt--->'+res.data)
})

postDataForm('/postBox',{id:100,name:'李四'}).then(function (res) {
  console.log(res)
  console.log('postBox--->'+res.data)
})

postData('/postUser',{id:100,userName:'李四',password:'123456'}).then(function (res) {
  console.log(res)
  console.log('postUser--->id:'+res.data.id+' userName:'+res.data.userName+' password:'+res.data.password)
})

postDataForm('/postUserNoBody',{id:100,userName:'李四',password:'123456'}).then(function (res) {
  console.log(res)
  console.log('postUserNoBody--->id:'+res.data.id+' userName:'+res.data.userName+' password:'+res.data.password)
})

postData('/postIds',[1,2,3,4,5]).then(function (res) {
  console.log(res)
  console.log('postIds--->'+res)
})

postData('/postUsers',[{id:100,userName:'李四',password:'123456'},{id:101,userName:'王五',password:'123456'}]).then(function (res) {
  console.log('----postUsers----')
  console.log(res)
  console.log('----postUsers----')
})

postData('/postMap',{id:100,userName:'李四',password:'123456'}).then(function (res) {
  console.log('----postMap----')
  console.log(res)
  console.log('----postMap----')
})
</script>

<template>

</template>
小结
提示:本小节主要写的是基于前后端分离项目中的跨域请求的不同处理处理方式,前端的处理以及后台的处理,学起来以防遇到此类问题的时候不知道如何解决哦!!!
**多学一招,偷偷的努力,然后惊艳所有人!!!卷就完了…… **
本小节完毕,敬请期待后续更新(可留言需要学习哪方面的内容哈)!如果需要源码或者工具的朋友们可关注微信公众号"锅锅编程生活"或者扫描二维码关注回复关键字/后台留言获取即可!文章来源:https://www.toymoban.com/news/detail-806032.html
 文章来源地址https://www.toymoban.com/news/detail-806032.html
到了这里,关于史上最全的前端axios和后端跨域配置处理-许锅锅啊的文章就介绍完了。如果您还想了解更多内容,请在右上角搜索TOY模板网以前的文章或继续浏览下面的相关文章,希望大家以后多多支持TOY模板网!


