1. 介绍
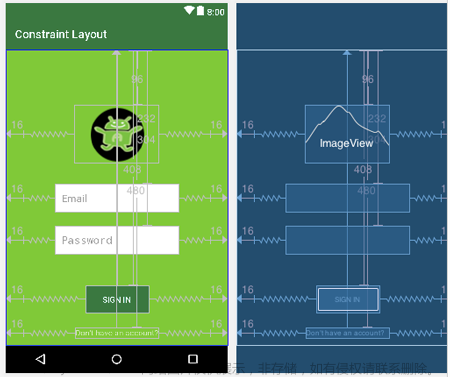
约束布局ConstraintLayout 是一个ViewGroup,可以在Api9以上的Android系统使用它,它的出现主要是为了解决布局嵌套过多的问题,以灵活的方式定位和调整小部件。从 Android Studio 2.3 起,官方的模板默认使用 ConstraintLayout。
官方文档:ConstraintLayout
2. 基本属性及其使用
要在 ConstraintLayout 中定义某个视图的位置,必须为该视图添加至少一个水平约束条件和一个垂直约束条件。每个约束条件均表示与其他视图、父布局或隐形引导线之间连接或对齐方式。每个约束条件均定义了视图在竖轴或者横轴上的位置;因此每个视图在每个轴上都必须至少有一个约束条件,但通常情况下会需要更多约束条件。
2.1 相对定位
2.1.1 属性
1. layout_constraintLeft_toLeftOf
   当前View的右侧和另一个View的右侧位置对齐
   与RelativeLayout的alignLeft属性相似
2. layout_constraintLeft_toRightOf
   当前view的左侧会在另一个View的右侧位置
   与RelativeLayout的toRightOf属性相似
3. layout_constraintRight_toLeftOf
   当前view的右侧会在另一个View的左侧位置
   与RelativeLayout的toLeftOf属性相似
4. layout_constraintRight_toRightOf
   当前View的右侧和另一个View的右侧位置对其
   与RelativeLayout的alignRight属性相似
5. layout_constraintTop_toTopOf
   头部对齐,与alignTop相似
6. layout_constraintTop_toBottomOf
   当前View在另一个View的下侧 与below相似
7. layout_constraintBottom_toTopOf
   当前View在另一个View的上方 与above相似
8. layout_constraintBottom_toBottomOf
   底部对齐,与alignBottom属性相似
9. layout_constraintBaseline_toBaselineOf
   文字底部对齐,与alignBaseLine属性相似
10. layout_constraintStart_toEndOf
   同left_toRightOf
11. layout_constraintStart_toStartOf
   同left_toLeftOf
12. layout_constraintEnd_toStartOf
   同right_toLeftOf
13. layout_constraintEnd_toEndOf
   同right_toRightOf
先来看一个简单的例子:(如果我们想实现下面这个布局
代码如下:
<?xml version="1.0" encoding="utf-8"?>
<androidx.constraintlayout.widget.ConstraintLayout xmlns:android="http://schemas.android.com/apk/res/android"
    xmlns:app="http://schemas.android.com/apk/res-auto"
    xmlns:tools="http://schemas.android.com/tools"
    android:layout_width="match_parent"
    android:layout_height="match_parent"
    tools:context=".MainActivity">
    <TextView
        android:id="@+id/textView1"
        android:layout_width="100dp"
        android:layout_height="60dp"
        android:background="#D6E1AA"
        android:gravity="center"
        android:text="textview1"
        android:textColor="@color/black"
        android:textSize="25sp"
        android:textStyle="bold"
        app:layout_constraintBottom_toBottomOf="parent"
        app:layout_constraintEnd_toEndOf="parent"
        app:layout_constraintStart_toStartOf="parent"
        app:layout_constraintTop_toTopOf="parent"
        tools:ignore="HardcodedText" />

    <TextView
        android:id="@+id/textView2"
        android:layout_width="138dp"
        android:layout_height="111dp"
        android:background="#E8C99B"
        android:gravity="center"
        android:text="textview2"
        android:textColor="@color/black"
        android:textSize="25sp"
        android:textStyle="bold"
        app:layout_constraintBottom_toBottomOf="@+id/textView1"
        app:layout_constraintEnd_toStartOf="@+id/textView1"
        tools:ignore="HardcodedText" />
</androidx.constraintlayout.widget.ConstraintLayout>
textview2里最重要的两行代码:
 app:layout_constraintBottom_toBottomOf="@+id/textView1"
 app:layout_constraintEnd_toStartOf="@+id/textView1"
我们让textview2的底部和textview1的底部对齐,让textview2的右边和textview1的左边对齐,就确定了textview2的位置。
有一个比较好玩的属性:layout_constraintBaseline_toBaselineOf
Baseline指的是文本基线,改变一下上面的xml代码,就可以实现。
    <TextView
        android:id="@+id/textView1"
        .../>
    <TextView
        android:id="@+id/textView2"
        ...
        app:layout_constraintLeft_toRightOf="@+id/textView1"
        app:layout_constraintBaseline_toBaselineOf="@+id/textView1"
        />

可以看到我们让textview1和textview2的文本基线对齐。
- ConstraintLayout相对定位的用法跟RelativeLayout还是比较相似的,下面用一个图来总结相对定位:

2.2 角度定位
可以以一定角度和距离约束一个小部件中心相对于另一个小部件中心。这允许您将一个小部件定位在一个圆圈上。
2.2.1 属性
layout_constraintCircle : 引用另一个小部件 id
layout_constraintCircleRadius : 到另一个小部件中心的距离
layout_constraintCircleAngle : 小部件应该在哪个角度(以度为单位,从 0 到
    <TextView
        android:id="@+id/textView1"
        .../>
    <TextView
        android:id="@+id/textView2"
        ...
        app:layout_constraintCircle="@+id/textView1"
        app:layout_constraintCircleAngle="120"
        app:layout_constraintCircleRadius="150dp"
        />

指的是TextView2的中心在TextView1的中心的120度,距离为150dp。
2.3 边距
2.3.1 属性
android:layout_marginStart //距离开始
android:layout_marginEnd //距离结束
android:layout_marginLeft //距离左边
android:layout_marginTop //距离上边
android:layout_marginRight //距离右边
android:layout_marginBottom //距离下边
android:layout_marginBaseline //距离基线
- 看起来跟别的布局没有什么差别,但实际上控件在ConstraintLayout里面要实现margin,必须先约束该控件在ConstraintLayout里的位置,举个例子:
<?xml version="1.0" encoding="utf-8"?>
<android.support.constraint.ConstraintLayout xmlns:android="http://schemas.android.com/apk/res/android"
    xmlns:tools="http://schemas.android.com/tools"
    android:layout_width="match_parent"
    android:layout_height="match_parent"
    xmlns:app="http://schemas.android.com/apk/res-auto">
    <TextView
        android:id="@+id/TextView1"
        android:layout_width="wrap_content"
        android:layout_height="wrap_content"
        android:background="#E8C99B"
        android:gravity="center"
        android:text="textview1"
        android:textColor="@color/black"
        android:textSize="25sp"
        android:textStyle="bold"
        android:layout_marginLeft="100dp"
        android:layout_marginTop="100dp"/>
</android.support.constraint.ConstraintLayout>

我们会发现textview并没有距离边框的左边和上面有一个100dp的边距,在ConstraintLayout里,是不生效的,因为没有约束textview在布局里的位置。
正确的写法如下:
<?xml version="1.0" encoding="utf-8"?>
<android.support.constraint.ConstraintLayout xmlns:android="http://schemas.android.com/apk/res/android"
    xmlns:tools="http://schemas.android.com/tools"
    android:layout_width="match_parent"
    android:layout_height="match_parent"
    xmlns:app="http://schemas.android.com/apk/res-auto">
    <TextView
        android:id="@+id/TextView1"
        android:layout_width="wrap_content"
        android:layout_height="wrap_content"
        android:background="#E8C99B"
        android:gravity="center"
        android:text="textview1"
        android:textColor="@color/black"
        android:textSize="25sp"
        android:textStyle="bold"
        android:layout_marginLeft="100dp"
        android:layout_marginTop="100dp"

        app:layout_constraintLeft_toLeftOf="parent"
        app:layout_constraintTop_toTopOf="parent"
        />
</android.support.constraint.ConstraintLayout>
把textview的左边和上边约束到parent的左边和上边,这样margin就会生效,效果如下:
在使用margin的时候要注意两点:
- 控件必须在布局里约束一个相对位置
- margin只能大于等于0
2.3.2 不可见性行为(goneMargin)
goneMargin主要用于约束的控件可见性被设置为gone的时候使用的margin值,属性如下:
layout_goneMarginStart //距离开始
layout_goneMarginEnd
layout_goneMarginLeft
layout_goneMarginTop
layout_goneMarginRight
layout_goneMarginBottom
<?xml version="1.0" encoding="utf-8"?>
<android.support.constraint.ConstraintLayout xmlns:android="http://schemas.android.com/apk/res/android"
    xmlns:tools="http://schemas.android.com/tools"
    android:layout_width="match_parent"
    android:layout_height="match_parent"
    xmlns:app="http://schemas.android.com/apk/res-auto">
    <TextView
        android:id="@+id/textview1"
        android:layout_width="wrap_content"
        android:layout_height="wrap_content"
        android:background="#E8C99B"
        android:gravity="center"
        android:text="textview1"
        android:textColor="@color/black"
        android:textSize="25sp"
        android:textStyle="bold"
        app:layout_constraintLeft_toLeftOf="parent"
        app:layout_constraintTop_toTopOf="parent"/>
    <TextView
        android:id="@+id/textView2"
        android:layout_width="138dp"
        android:layout_height="111dp"
        android:background="#D6E1AA"
        android:gravity="center"
        android:text="textview2"
        android:textColor="@color/black"
        android:textSize="25sp"
        android:textStyle="bold"
        app:layout_constraintTop_toTopOf="parent"
        app:layout_constraintLeft_toRightOf="@+id/textview1"
        />
</android.support.constraint.ConstraintLayout>
效果如下:
改变一下代码
- 给textview1添加:
android:visibility="gone"
- textview2的相应约束改为:
app:layout_constraintTop_toTopOf="parent"
app:layout_constraintLeft_toRightOf="@+id/textview1"
app:layout_goneMarginLeft="50dp"
这样将textview1设置为不可见后,textview2会距离左边50dp,效果如下:
2.4 居中和偏移
2.4.1 居中
在RelativeLayout中,把控件放在布局中间的方法是:
android:layout_centerInParent="true"
在Constraintlayout中的写法是:
app:layout_constraintBottom_toBottomOf="parent"
app:layout_constraintLeft_toLeftOf="parent"
app:layout_constraintRight_toRightOf="parent"
app:layout_constraintTop_toTopOf="parent"
意思是把控件的上下左右约束在布局的上下左右,这样就能把控件放在布局的中间了,效果如下。
2.4.2 偏移
layout_constraintHorizontal_bias //水平方向偏移
layout_constraintVertical_bias //垂直方向偏移
效果展示,在xml代码里再加一句话:
app:layout_constraintHorizontal_bias="0.3"
水平方向距父布局开始位置偏移百分之三十

这时我们就发现textvew1已经向水平方向上发生了偏移。
2.5 尺寸约束
2.5.1 约束方式
控件的尺寸可以通过四种不同方式指定:
- 使用指定的尺寸
- 使用wrap_content,让控件自己计算大小
当控件的高度或宽度为wrap_content时,可以使用下列属性来控制最大、最小的高度或宽度:
android:minWidth 最小的宽度
android:minHeight 最小的高度
android:maxWidth 最大的宽度
android:maxHeight 最大的高度
- 使用 0dp (MATCH_CONSTRAINT)
官方不推荐在ConstraintLayout中使用match_parent,可以设置 0dp (MATCH_CONSTRAINT) 配合约束代替match_parent,举个例子:
<TextView
        android:id="@+id/TextView1"
        android:layout_width="0dp"
        android:layout_height="wrap_content"
        android:layout_marginLeft="50dp"
        ......
        app:layout_constraintLeft_toLeftOf="parent"
        app:layout_constraintRight_toRightOf="parent"
        app:layout_constraintTop_toTopOf="parent" />
宽度设为0dp,左右两边约束parent的左右两边,并设置左边边距为50dp,效果如下:
- 宽高比
当宽或高至少有一个尺寸被设置为0dp时,可以通过属性layout_constraintDimensionRatio设置宽高比,举个例子:
<TextView
        android:id="@+id/TextView1"
        android:layout_width="0dp"
        android:layout_height="wrap_content"
        ......
        app:layout_constraintDimensionRatio="1:1"
        app:layout_constraintLeft_toLeftOf="parent"
        app:layout_constraintRight_toRightOf="parent"
        app:layout_constraintTop_toTopOf="parent"
        app:layout_constrainedWidth="true"
        app:layout_constrainedHeight="true"/>

除此之外,在设置宽高比的值的时候,还可以在前面加W或H,分别指定宽度或高度限制。 例如:
app:layout_constraintDimensionRatio="H,2:3"指的是 高:宽=2:3
app:layout_constraintDimensionRatio="W,2:3"指的是 宽:高=2:3
-
重要提示:
MATCH_PARENT不建议用于ConstraintLayout. 可以通过MATCH_CONSTRAINT将相应的左/右或上/下约束设置为来定义类似的行为"parent"。
WRAP_CONTENT (添加在 1 . 1中):强制约束
如果维度设置为WRAP_CONTENT,则在 1.1 之前的版本中,它们将被视为文字维度——也就是说,约束不会限制结果维度。您可能希望使用WRAP_CONTENT,但继续强制执行约束以限制结果维度。在这种情况下,可以添加相应的属性之一:
app:layout_constrainedWidth="true|false"
app:layout_constrainedHeight="true|false"
MATCH_CONSTRAINT维度(添加在 1 . 1中)
当维度设置为MATCH_CONSTRAINT时,默认行为是让结果大小占用所有可用空间。有几个额外的修饰符可用:
- layout_constraintWidth_min和layout_constraintHeight_min
将设置此维度的最小尺寸- layout_constraintWidth_max和layout_constraintHeight_max
将设置此维度的最大尺寸- layout_constraintWidth_percent和layout_constraintHeight_percent
将此维度的大小设置为父维度的百分比
2.6 链
如果两个或以上控件通过下图的方式约束在一起,就可以认为是他们是一条链(图为横向的链,纵向同理)。
简单使用,用代码表示为:
    <TextView
        android:id="@+id/TextView1"
        ......
        app:layout_constraintHorizontal_chainStyle="spread"
        app:layout_constraintTop_toTopOf="parent"
        app:layout_constraintLeft_toLeftOf="parent"
        app:layout_constraintRight_toLeftOf="@+id/TextView2" />

    <TextView
        android:id="@+id/TextView2"
        ......
        app:layout_constraintLeft_toRightOf="@+id/TextView1"
        app:layout_constraintRight_toLeftOf="@+id/TextView3"
        app:layout_constraintTop_toTopOf="parent"
        app:layout_constraintRight_toRightOf="parent" />

    <TextView
        android:id="@+id/TextView3"
        ......
        app:layout_constraintLeft_toRightOf="@+id/TextView2"
        app:layout_constraintTop_toTopOf="parent"
        app:layout_constraintRight_toRightOf="parent" />
三个textview相互约束,两端两textview分别与parent约束,构成一条链。
每一条链的第一个控件是这条链的链头,我们可以在链头中设置layout_constraintHorizontal_chainStyle属性改变整条链的样式。
chains提供了3种样式,分别是:
- spread 展开元素 (默认)
- spread_inside 展开元素,但链的两端贴近parent
- packet 链的元素将被打包在一起。
spread_inside
packet
上面的例子创建了一个样式链,除了样式链外,还可以创建一个权重链。
上面所用到的3个textview宽度都为wrap_content,如果我们把宽度都设为0dp,这个时候可以在每个texttiew中设置横向权重layout_constraintHorizontal_weight(constraintVertical为纵向)来创建一个权重链,xml代码如下:文章来源:https://www.toymoban.com/news/detail-806125.html
<TextView
        android:id="@+id/TextView1"
        android:layout_width="0dp"
        ......
        app:layout_constraintHorizontal_weight="2" />

    <TextView
        android:id="@+id/TextView2"
        android:layout_width="0dp"
        ......
        app:layout_constraintHorizontal_weight="3" />

    <TextView
        android:id="@+id/TextView3"
        android:layout_width="0dp"
         ......
        app:layout_constraintHorizontal_weight="2" />
 文章来源地址https://www.toymoban.com/news/detail-806125.html
到了这里,关于Android——ConstraintLayout(约束布局)的文章就介绍完了。如果您还想了解更多内容,请在右上角搜索TOY模板网以前的文章或继续浏览下面的相关文章,希望大家以后多多支持TOY模板网!


