1、安装
使用npm i identify --save 或者 yarn add identify --save
2、新建vue组件components/identify/identify.vue
<template>
<div class="s-canvas">
<canvas id="s-canvas" :width="contentWidth" :height="contentHeight"></canvas>
</div>
</template>
<script>
export default {
name: 'SIdentify',
props: {
identifyCode: {
type: String,
default: '1234'
},
fontSizeMin: {
type: Number,
default: 28
},
fontSizeMax: {
type: Number,
default: 40
},
backgroundColorMin: {
type: Number,
default: 180
},
backgroundColorMax: {
type: Number,
default: 240
},
colorMin: {
type: Number,
default: 50
},
colorMax: {
type: Number,
default: 160
},
lineColorMin: {
type: Number,
default: 40
},
lineColorMax: {
type: Number,
default: 180
},
dotColorMin: {
type: Number,
default: 0
},
dotColorMax: {
type: Number,
default: 255
},
contentWidth: {
type: Number,
default: 112
},
contentHeight: {
type: Number,
default: 40
}
},
methods: {
// 生成一个随机数
randomNum (min, max) {
return Math.floor(Math.random() * (max - min) + min)
},
// 生成一个随机的颜色
randomColor (min, max) {
var r = this.randomNum(min, max)
var g = this.randomNum(min, max)
var b = this.randomNum(min, max)
return 'rgb(' + r + ',' + g + ',' + b + ')'
},
drawPic () {
var canvas = document.getElementById('s-canvas')
var ctx = canvas.getContext('2d')
ctx.textBaseline = 'bottom'
// 绘制背景
ctx.fillStyle = this.randomColor(
this.backgroundColorMin,
this.backgroundColorMax
)
ctx.fillRect(0, 0, this.contentWidth, this.contentHeight)
// 绘制文字
for (let i = 0; i < this.identifyCode.length; i++) {
this.drawText(ctx, this.identifyCode[i], i)
}
this.drawLine(ctx)
this.drawDot(ctx)
},
drawText (ctx, txt, i) {
ctx.fillStyle = this.randomColor(this.colorMin, this.colorMax)
ctx.font =
this.randomNum(this.fontSizeMin, this.fontSizeMax) + 'px SimHei'
var x = (i + 1) * (this.contentWidth / (this.identifyCode.length + 1))
var y = this.randomNum(this.fontSizeMax, this.contentHeight - 5)
var deg = this.randomNum(-30, 30)
// 修改坐标原点和旋转角度
ctx.translate(x, y)
ctx.rotate(deg * Math.PI / 270)
ctx.fillText(txt, 0, 0)
// 恢复坐标原点和旋转角度
ctx.rotate(-deg * Math.PI / 270)
ctx.translate(-x, -y)
},
drawLine (ctx) {
// 绘制干扰线
for (let i = 0; i < 2; i++) {
ctx.strokeStyle = this.randomColor(
this.lineColorMin,
this.lineColorMax
)
ctx.beginPath()
ctx.moveTo(
this.randomNum(0, this.contentWidth),
this.randomNum(0, this.contentHeight)
)
ctx.lineTo(
this.randomNum(0, this.contentWidth),
this.randomNum(0, this.contentHeight)
)
ctx.stroke()
}
},
drawDot (ctx) {
// 绘制干扰点
for (let i = 0; i < 20; i++) {
ctx.fillStyle = this.randomColor(0, 255)
ctx.beginPath()
ctx.arc(
this.randomNum(0, this.contentWidth),
this.randomNum(0, this.contentHeight),
1,
0,
2 * Math.PI
)
ctx.fill()
}
}
},
watch: {
identifyCode () {
this.drawPic()
}
},
mounted () {
this.drawPic()
}
}
</script>
<style lang='less' scoped>
.s-canvas {
height: 38px;
cursor: pointer;
}
.s-canvas canvas{
margin-top: 1px;
margin-left: 8px;
}
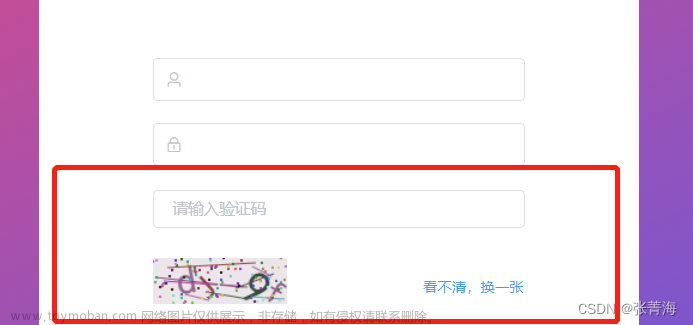
</style>3、一般是登录页面用到这个,在你的登录页面的from表单的相应位置加上填写验证码的html
 <el-form-item prop="verifycode">
                <el-input v-model="user.verifycode" placeholder="请输入验证码" class="identifyinput">
                </el-input>
                </el-form-item>
               <el-form-item>
              <div class="identifybox">
               <div @click="refreshCode">
              <s-identify :identifyCode="identifyCode"></s-identify>
               </div>
               <el-button @click="refreshCode" type='text' class="textbtn">看不清,换一张</el-button>
              </div>
</el-form-item>
4、在script下引入组件,并编写方法
<script>
// 引入图片验证码组件
import SIdentify from '@/components/identify'
export default {
 components: { SIdentify },
 data() {
    /* 自定义验证码规则 */
    const validateVerifycode = (rule, value, callback) => {
      if (value === '') {
        callback(new Error('请输入验证码'))
      } else if (value !== this.identifyCode) {
        callback(new Error('验证码不正确!'))
      } else {
        callback()
      }
    }

    return {
      identifyCodes: '1234567890abcdefghijklmnopqrstuvwxyz',
      identifyCode: '',
       rules: {
       	verifycode: [{
          required: true,
          trigger: 'blur',
          validator: validateVerifycode,}]
      }
    }
 },
  mounted(){
    this.identifyCode='';
    this.makeCode(this.identifyCodes,4);
    history.pushState(null, null, document.URL);
    if (window.history && window.history.pushState) {
      $(window).on('popstate', function (){
        window.history.pushState('forward', null, '');
        window.history.forward(1);
      });
      window.history.pushState('forward', null, ''); //在IE中必须得有这两行
      window.history.forward(1);
    }
 },
 methods: {
  randomNum(min, max) {
     return Math.floor(Math.random() * (max - min) + min)
  },
  // 切换验证码
  refreshCode() {
   this.identifyCode = ''
   this.makeCode(this.identifyCodes, 4)
  },
  // 生成随机验证码
  makeCode(o, l) {
    for (let i = 0; i < l; i++) {
      this.identifyCode += this.identifyCodes[
        Math.floor(Math.random() * (this.identifyCodes.length - 0) + 0)
      ]
    }
  },
 }
}
</script>
5、效果
 文章来源:https://www.toymoban.com/news/detail-807083.html
文章来源地址https://www.toymoban.com/news/detail-807083.html
到了这里,关于vue3+elementplus前端生成图片验证码的文章就介绍完了。如果您还想了解更多内容,请在右上角搜索TOY模板网以前的文章或继续浏览下面的相关文章,希望大家以后多多支持TOY模板网!