目录
前言
一、准备
二、解决问题
1.将svg跟img转为canvas的方法
2.将base64转换成file文件的方法
3.点击下载使用方法
1).对dom没有处理,需求只是将图片导出即可
2).涉及对dom的拖拽,流程图之类的(需复制dom,在复制的dom上进行处理)
三、效果图如下
前言
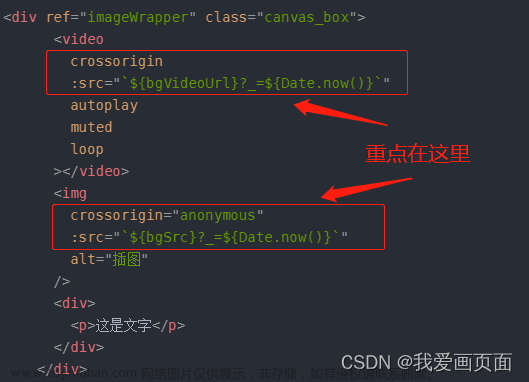
查阅很多相关的文章和文档,大多是解决svg导出不显示的问题,这个还是比较好处理的。但是对于我的需求而言,主要问题是,需要导出成图片的dom元素,中间既有img又有svg,导致我在导出时,img的元素并没有显示在导出的图片上。
一、准备
我使用的html2canvas版本是1.4.1 ,canvg版本是1.5.3
npm install --save html2canvas@1.4.1
npm install --save canvg@1.5.3
引入组件
import html2canvas from "html2canvas";
import canvg from "canvg";
二、解决问题
1.将svg跟img转为canvas的方法
changeToCanvas(element) {
    const svgElems = element.querySelectorAll('svg');
    const imgElems = element.querySelectorAll('img');
    //es6语法
    let elems = [...svgElems, ...imgElems]
    elems.forEach(node => {
        let parentNode = node.parentNode;
        let canvas = document.createElement("canvas");
        canvas.style.zIndex = 9
        //处理svg转换canvas需要使用canvg组件
        if (node.tagName == 'svg') {
            let svg = node.outerHTML.trim();
            canvg(canvas, svg);
            if (node.style.position) {
                canvas.style.position += node.style.position;
                canvas.style.left += node.style.left;
                canvas.style.top += node.style.top;
            }
        }
        //处理img转换canvas
        if (node.tagName == 'IMG') {
            canvas.width = node.width;
            canvas.height = node.height;
            canvas.getContext("2d").drawImage(node, 0, 0)
        }
        parentNode.removeChild(node);
        parentNode.appendChild(canvas);
    });
}
2.将base64转换成file文件的方法
base64ToFile(dataurl) {
    let arr = dataurl.split(',');
    let mime = arr[0].match(/:(.*?);/)[1];
    let bstr = atob(arr[1]);
    let n = bstr.length;
    let u8arr = new Uint8Array(n);
    while (n--) {
        u8arr[n] = bstr.charCodeAt(n);
    }
    return new Blob([u8arr], {
        type: mime
    });
},
3.点击下载使用方法
在downloadIMG()这个方法中,由于我是svg制作流程图,避免下载后导致无法拖拽svg,所以我这里的做法是先复制一个临时元素,在使用完后再清除掉,如果说你本身不对svg以及img做一些操作的话,可以不需要这几步。
scale属性可以解决解决生成的canvas模糊问题
1).对dom没有处理,需求只是将图片导出即可
downloadIMG() {
    //需要在id为flowWrap的div里面加上 ref="flowWrap"
    const flow = this.$refs.flowWrap
    flow.style.background = '#000'
    //调用changeToCanvas
    this.changeToCanvas(flow)
    html2canvas(flow, {
        taintTest: false,
        scale: window.devicePixelRatio < 2 ? 2 : window.devicePixelRatio, //scala属性解决生成的canvas模糊问题
    }).then((canvas) => {
        //调用base64ToFile
        let blob = this.base64ToFile(canvas.toDataURL('image/png'));
        let a = document.createElement('a');
        a.setAttribute('href', URL.createObjectURL(blob));
        a.setAttribute('download', new Date().getTime() + '.png');
        URL.revokeObjectURL(blob);
        a.click();
        a.remove();
        //element组件,你可以直接使用alert查看
        this.$message.success('生成成功')
    }).catch((error) => {
        //element组件,你可以直接使用alert查看
        this.$message.error('生成失败,请查看控制台错误')
    });
},
2).涉及对dom的拖拽,流程图之类的(需复制dom,在复制的dom上进行处理)
downloadIMG() {
    //找到元素dom并复制一个临时元素(需要在id为flowWrap的div里面加上 ref="flowWrap")
    //我这里id为flowWrap,你需要替换为你的id
    const flow = this.$refs.flowWrap
    //svg转换canvas会导致svg无法拖动,使用临时元素
    const tmpFlow = flow.cloneNode(1)
    tmpFlow.style.background = '#000'
    flow.appendChild(tmpFlow)
    //调用changeToCanvas
    this.changeToCanvas(tmpFlow)
    html2canvas(tmpFlow, {
        taintTest: false,
        scale: window.devicePixelRatio < 2 ? 2 : window.devicePixelRatio, //scala属性解决生成的canvas模糊问题
    }).then((canvas) => {
        //调用base64ToFile
        let blob = this.base64ToFile(canvas.toDataURL('image/png'));
        let a = document.createElement('a');
        a.setAttribute('href', URL.createObjectURL(blob));
        a.setAttribute('download', new Date().getTime() + '.png');
        URL.revokeObjectURL(blob);
        a.click();
        a.remove();
        flow.removeChild(tmpFlow) // 移除临时tmpFlow
        //element组件,你可以直接使用alert查看
        this.$message.success('生成成功')
    }).catch((error) => {
        flow.removeChild(tmpFlow) // 移除临时tmpFlow
        //element组件,你可以直接使用alert查看
        this.$message.error('生成失败,请查看控制台错误')
    });
},
三、效果图如下

 文章来源:https://www.toymoban.com/news/detail-809236.html
 文章来源地址https://www.toymoban.com/news/detail-809236.html
到了这里,关于使用html2canvas将整个元素导出为图片,其中包含svg和img,解决img跟svg导出时img或svg(canvg处理)不显示的问题,以及相关优化的文章就介绍完了。如果您还想了解更多内容,请在右上角搜索TOY模板网以前的文章或继续浏览下面的相关文章,希望大家以后多多支持TOY模板网!

