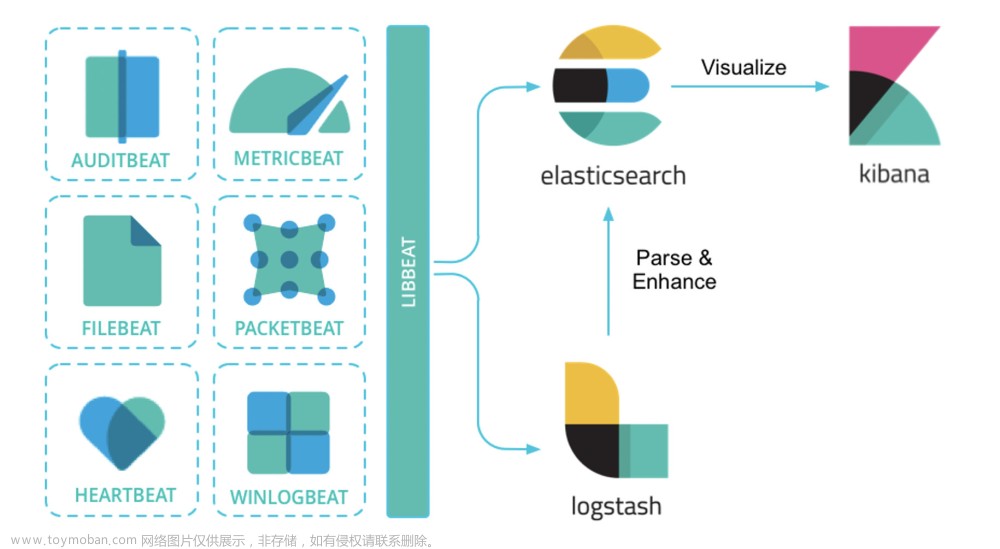
安装 Elasticsearch elasticsearch-8.11.1
下载
访问 Elasticsearch 下载页面
解压下载的压缩文件到你选择的目录。
运行
进入 Elasticsearch 目录,运行 bin/elasticsearch.bat 启动 Elasticsearch。
验证
elaasticsearch的默认访问路径是localhost:9200,我们打开浏览器直接访问即可。
如果访问不了也没关系,我们可以先修改配置文件之后再进行访问。
注意:8.4.3我测试的无法直接打开默认网址,需要先进行配置(原因是:ES8默认开启了ssl认证,导致无法访问9200端口,elasticsearch.yml配置文件添加【xpack.security.enabled: false】即可)(https://zhuanlan.zhihu.com/p/504694531)
Elasticsearch在Windows下开启了安全认证,虽然started成功,但访问http://localhost:9200/失败(https://blog.csdn.net/zhangphil/article/details/124476717)
received plaintext traffic on an encrypted channel, closing connection Netty4TcpChannel
修改 elasticsearch.yml
原来是这样:
# Enable security features
xpack.security.enabled: true

xpack.security.enrollment.enabled: true

# Enable encryption for HTTP API client connections, such as Kibana, Logstash, and Agents
xpack.security.http.ssl:
  enabled: true
  keystore.path: certs/http.p12

# Enable encryption and mutual authentication between cluster nodes
xpack.security.transport.ssl:
  enabled: true
  verification_mode: certificate
  keystore.path: certs/transport.p12
  truststore.path: certs/transport.p12
# Create a new cluster with the current node only
# Additional nodes can still join the cluster later
cluster.initial_master_nodes: ["PC-20230404XHIO"]

# Allow HTTP API connections from anywhere
# Connections are encrypted and require user authentication
http.host: 0.0.0.0
我们把几个安全的暂时都关闭掉。
# Enable security features
xpack.security.enabled: false

xpack.security.enrollment.enabled: false

# Enable encryption for HTTP API client connections, such as Kibana, Logstash, and Agents
xpack.security.http.ssl:
  enabled: false
  keystore.path: certs/http.p12

# Enable encryption and mutual authentication between cluster nodes
xpack.security.transport.ssl:
  enabled: false
  verification_mode: certificate
  keystore.path: certs/transport.p12
  truststore.path: certs/transport.p12
# Create a new cluster with the current node only
# Additional nodes can still join the cluster later
cluster.initial_master_nodes: ["PC-20230404XHIO"]

# Allow HTTP API connections from anywhere
# Connections are encrypted and require user authentication
http.host: 0.0.0.0
重新启动 es。当然这只是为了演示关闭的,实际应用还是要注意安全问题。
PS: 我这里在启动日志中没有找到密码,按理说是有一个初始化密码的。
验证成功
此时访问 http://localhost:9200/文章来源:https://www.toymoban.com/news/detail-810940.html
如下:文章来源地址https://www.toymoban.com/news/detail-810940.html
{
  "name" : "PC-20230404XHIO",
  "cluster_name" : "elasticsearch",
  "cluster_uuid" : "gROAdkClQka3fHkZukU60A",
  "version" : {
    "number" : "8.11.1",
    "build_flavor" : "default",
    "build_type" : "zip",
    "build_hash" : "6f9ff581fbcde658e6f69d6ce03050f060d1fd0c",
    "build_date" : "2023-11-11T10:05:59.421038163Z",
    "build_snapshot" : false,
    "lucene_version" : "9.8.0",
    "minimum_wire_compatibility_version" : "7.17.0",
    "minimum_index_compatibility_version" : "7.0.0"
  },
  "tagline" : "You Know, for Search"
}
到了这里,关于logstack 日志技术栈-05-windows10 安装 Elasticsearch elasticsearch-8.11.1 实战笔记的文章就介绍完了。如果您还想了解更多内容,请在右上角搜索TOY模板网以前的文章或继续浏览下面的相关文章,希望大家以后多多支持TOY模板网!


![搭建EFK(Elasticsearch+Filebeat+Kibana)日志收集系统[windows]](https://imgs.yssmx.com/Uploads/2024/02/475312-1.png)


