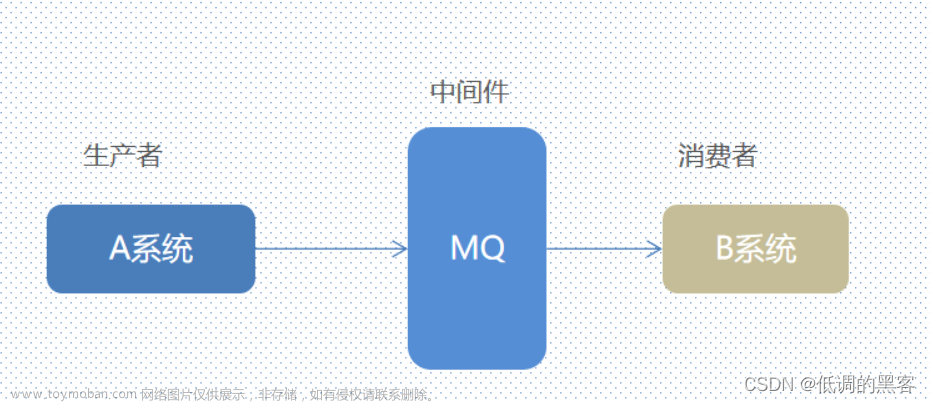
Spring整合RabbitMQ
spring-amqp是对AMQP的一些概念的一些抽象,spring-rabbit是对RabbitMQ操作的封装实现。
主要有几个核心类 RabbitAdmin 、 RabbitTemplate 、 SimpleMessageListenerContainer 等。
RabbitAdmin 类完成对Exchange,Queue,Binding的操作,在容器中管理了 RabbitAdmin 类的时候,可以对Exchange,Queue,Binding进行自动声明。
RabbitTemplate 类是发送和接收消息的工具类。
SimpleMessageListenerContainer 是消费消息的容器。
目前比较新的一些项目都会选择基于注解方式,而比较老的一些项目可能还是基于配置文件的。
基于配置文件的整合
-
创建maven项目文章来源:https://www.toymoban.com/news/detail-814761.html
-
配置pom.xml,添加rabbit的spring依赖文章来源地址https://www.toymoban.com/news/detail-814761.html
<dependencies>
  <dependency>
    <groupId>org.springframework.amqp</groupId>
    <artifactId>spring-rabbit</artifactId>
    <version>2.2.7.RELEASE</version>
  </dependency>
</dependencies>
- rabbit-context.xml
<?xml version="1.0" encoding="UTF-8"?>
<beans xmlns="http://www.springframework.org/schema/beans"
       xmlns:xsi="http://www.w3.org/2001/XMLSchema-instance"
       xmlns:rabbit="http://www.springframework.org/schema/rabbit"
       xsi:schemaLocation="http://www.springframework.org/schema/beans
       http://www.springframework.org/schema/beans/spring-beans.xsd
       http://www.springframework.org/schema/rabbit
       http://www.springframework.org/schema/rabbit/spring-rabbit.xsd">
    <rabbit:connection-factory
            id="connectionFactory"
            host="node1"
            virtual-host="/"
            username="root"
            password="123456"
            port="5672"/>
    <!--创建一个rabbit的 template对象 (org.springframework.amqp.rabbit.core.RabbitTemplate), 以便于访问broker-->
    <rabbit:template id="amqpTemplate" connection-factory="connectionFactory"/>
    <!-- 自动查找类型是Queue、Exchange、Binding的bean,并为用户向 RabbitMQ声明 -->
    <!-- 因此,我们不需要显式地在java中声明 -->
    <rabbit:admin id="rabbitAdmin" connection-factory="connectionFactory"/>
    <!-- 为消费者创建一个队列,如果broker中存在,则使用同名存在的队列,否则创 建一个新的。 -->
    <!-- 如果要发送消息,得使用交换器 --> <!-- 这里使用的是默认的交换器 -->
    <rabbit:queue name="myqueue"/>
    <rabbit:direct-exchange name="direct.biz.ex" auto-declare="true" auto-delete="false" durable="false">
    <rabbit:bindings>
        <!--exchange:其他绑定到该交换器的交换器名称-->
        <!--queue:绑定到该交换器的queue的bean名称-->
        <!--key:显式声明的路由key-->
        <rabbit:binding queue="myqueue" key="dir.ex">
        </rabbit:binding> </rabbit:bindings>
    </rabbit:direct-exchange> </beans>
- Application.java
package com.lagou.rabbitmq.demo;
import org.springframework.amqp.core.AmqpTemplate;
import org.springframework.context.ApplicationContext;
import org.springframework.context.support.AbstractApplicationContext;
import org.springframework.context.support.GenericXmlApplicationContext;

/**
* 使用spring xml配置的方式发送接接收消息
*/
public class App {
  public static void main(String[] args) {
    AbstractApplicationContext context = new GenericXmlApplicationContext("classpath:/rabbit-context.xml");
    AmqpTemplate template = context.getBean(AmqpTemplate.class);
    for (int i = 0; i < 1000; i++) {
      // 第一个参数是路由key,第二个参数是消息
      template.convertAndSend("dir.ex", "foo" + i);
    }
    // 主动从队列拉取消息
    String foo = (String) template.receiveAndConvert("myqueue");
    System.out.println(foo);
    context.close();
  }
}
启动RabbitMQ之后,直接运行即可。
基于注解的整合
-
创建maven项目
-
配置pom.xml,添加rabbit的spring依赖
<dependencies>
  <dependency>
    <groupId>org.springframework.amqp</groupId>
    <artifactId>spring-rabbit</artifactId>
    <version>2.2.7.RELEASE</version>
  </dependency>
</dependencies>
- 添加配置类RabbitConfiguration.java
package ai.flkj.material.server.util;

import org.springframework.amqp.core.AmqpAdmin;
import org.springframework.amqp.core.Queue;
import org.springframework.amqp.rabbit.connection.CachingConnectionFactory;
import org.springframework.amqp.rabbit.connection.ConnectionFactory;
import org.springframework.amqp.rabbit.core.RabbitAdmin;
import org.springframework.amqp.rabbit.core.RabbitTemplate;
import org.springframework.context.annotation.Bean;
import org.springframework.context.annotation.Configuration;


@Configuration
public class RabbitConfiguration {

    @Bean
    public com.rabbitmq.client.ConnectionFactory rabbitFactory() {
        com.rabbitmq.client.ConnectionFactory rabbitFactory = new com.rabbitmq.client.ConnectionFactory();
        rabbitFactory.setHost("node1");
        rabbitFactory.setVirtualHost("/");
        rabbitFactory.setUsername("root");
        rabbitFactory.setPassword("123456");
        rabbitFactory.setPort(5672);
        return rabbitFactory;
    }

    @Bean
    public ConnectionFactory connectionFactory(com.rabbitmq.client.ConnectionFactory rabbitFactory) {
        ConnectionFactory connectionFactory = new CachingConnectionFactory(rabbitFactory);
        return connectionFactory;
    }

    @Bean
    public AmqpAdmin amqpAdmin(ConnectionFactory factory) {
        AmqpAdmin amqpAdmin = new RabbitAdmin(factory);
        return amqpAdmin;
    }

    @Bean
    public RabbitTemplate rabbitTemplate(ConnectionFactory factory) {
        RabbitTemplate rabbitTemplate = new RabbitTemplate(factory);
        return rabbitTemplate;
    }

    @Bean
    public Queue queue() {
        Queue myqueue = new Queue("myqueue");
        return myqueue;
    }
}
- 主入口类App.java
import org.springframework.amqp.core.AmqpTemplate;
import org.springframework.context.annotation.AnnotationConfigApplicationContext;
import org.springframework.context.support.AbstractApplicationContext;

/*** 使用spring的注解方式发送和接收消息 */
public class SpringAnnotationDemo {
    public static void main(String[] args) {
        AbstractApplicationContext context = new AnnotationConfigApplicationContext(RabbitConfiguration.class);
        AmqpTemplate template = context.getBean(AmqpTemplate.class);
        template.convertAndSend("myqueue", "foo");
        String foo = (String) template.receiveAndConvert("myqueue");
        System.out.println(foo);
        context.close();
    }
}
SpringBoot整合RabbitMQ
- 添加starter依赖
<dependency>
    <groupId>org.springframework.boot</groupId>
    <artifactId>spring-boot-starter-amqp</artifactId>
</dependency>
- application.properties中添加连接信息
spring.application.name=springboot_rabbitmq
spring.rabbitmq.host=node1
spring.rabbitmq.virtual-host=/
spring.rabbitmq.username=root
spring.rabbitmq.password=123456
spring.rabbitmq.port=5672
- 主入口类
import org.springframework.boot.SpringApplication;
import org.springframework.boot.autoconfigure.SpringBootApplication;

@SpringBootApplication
public class RabbitqmDemo {
    public static void main(String[] args) {
        SpringApplication.run(RabbitqmDemo.class, args);
    }
}
- RabbitConfig类
import org.springframework.amqp.core.*;
import org.springframework.beans.factory.annotation.Autowired;
import org.springframework.context.annotation.Bean;
import org.springframework.context.annotation.Configuration;
import org.springframework.web.bind.annotation.PathVariable;
import org.springframework.web.bind.annotation.RequestMapping;
import org.springframework.web.bind.annotation.RestController;

@Configuration
public class RabbitConfig {

    /**
     * 声明队列
     * @return
     */
    @Bean
    public Queue myQueue() {
        return new Queue("myqueue");
    }

    /**
     * 声明交换机
     * @return
     */
    @Bean
    public Exchange myExchange() {
        // new Exchange()
        // return new TopicExchange("topic.biz.ex", false, false, null);
        // return new DirectExchange("direct.biz.ex", false, false, null);
        // return new FanoutExchange("fanout.biz.ex", false, false, null);
        // 交换器名称,交换器类型(),是否是持久化的,是否自动删除,交换器属性 Map集合
        // return new CustomExchange("custom.biz.ex", ExchangeTypes.DIRECT, false, false, null);
        return new DirectExchange("myex", false, false, null);
    }

    /**
     * 声明绑定
     * @return
     */
    @Bean
    public Binding myBinding() {
        // 绑定的目的地,绑定的类型:到交换器还是到队列,交换器名称,路由key, 绑定的属性
        // new Binding("", Binding.DestinationType.EXCHANGE, "", "", null);
        // 绑定的目的地,绑定的类型:到交换器还是到队列,交换器名称,路由key, 绑定的属性
        // new Binding("", Binding.DestinationType.QUEUE, "", "", null);
        // 绑定了交换器direct.biz.ex到队列myqueue,路由key是 direct.biz.ex
        return new Binding("myqueue", Binding.DestinationType.QUEUE, "myex", "direct.biz.ex", null);
    }
}
- 使用RestController发送消息
import org.springframework.amqp.core.AmqpTemplate;
import org.springframework.beans.factory.annotation.Autowired;
import org.springframework.web.bind.annotation.PathVariable;
import org.springframework.web.bind.annotation.RequestMapping;
import org.springframework.web.bind.annotation.RestController;

@RestController
public class HelloController {

    @Autowired
    private AmqpTemplate rabbitTemplate;

    @RequestMapping("/send/{message}")
    public String sendMessage(@PathVariable String message) {
        rabbitTemplate.convertAndSend("myex", "direct.biz.ex", message);
        return "ok";
    }
}
- 使用监听器,用于消费消息
import org.springframework.amqp.rabbit.annotation.RabbitListener;
import org.springframework.stereotype.Component;

@Component
public class HelloConsumer {
    @RabbitListener(queues = "myqueue")
    public void service(String message) {
        System.out.println("消息队列推送来的消息:" + message);
    }
}
到了这里,关于【RabbitMQ】4 Spring/SpringBoot整合RabbitMQ的文章就介绍完了。如果您还想了解更多内容,请在右上角搜索TOY模板网以前的文章或继续浏览下面的相关文章,希望大家以后多多支持TOY模板网!


