对于业务组件来说,其属性是有很多的,如果把所有属性都平铺在页面上,就会非常长,而且想要更改其中的某些属性,可能需要向下滚动很久才能找到,对于UI的交互不是很友好,需要对属性的不同特性进行分组。
改造前: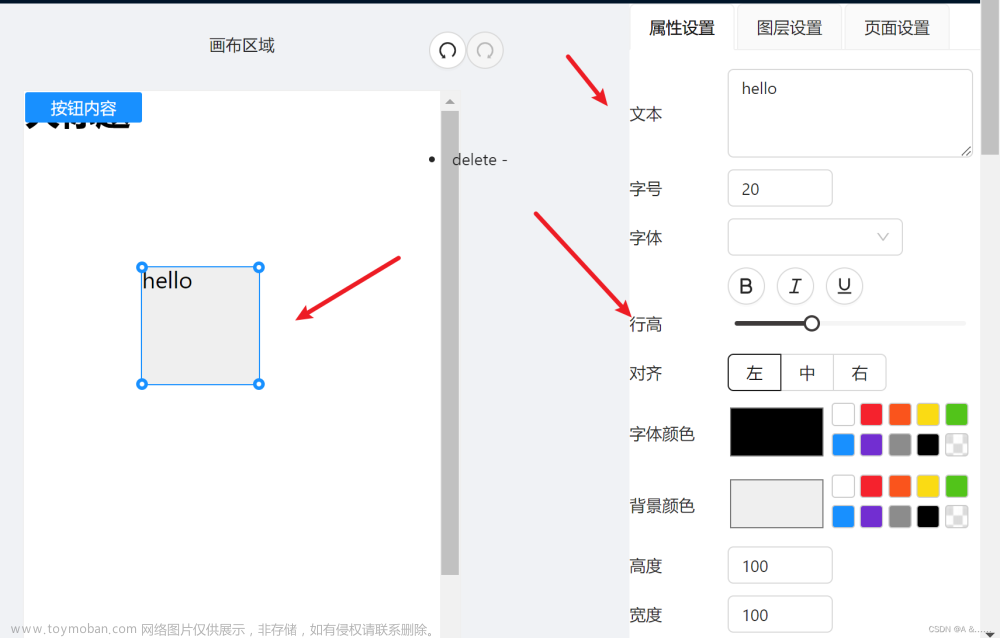
改造后:
先来看一下通用属性:
// defaultProps.ts
export interface CommonComponentProps {
  // actions
  actionType: string;
  url: string;
  // size
  height: string;
  width: string;
  paddingLeft: string;
  paddingRight: string;
  paddingTop: string;
  paddingBottom: string;
  // border type
  borderStyle: string;
  borderColor: string;
  borderWidth: string;
  borderRadius: string;
  // shadow and opacity
  boxShadow: string;
  opacity: string;
  // position and x,y
  position: string;
  left: string;
  top: string;
  right: string;
}
CommonComponentProps一开始就是按照不同的属性进行分类的,所以比较符合我们的一个需求。
首先,组件总属性分两大类:业务组件(独特属性),通用属性(CommonComponentProps)
// 文本组件
export interface TextComponentProps extends CommonComponentProps {
  text: string;
  fontSize: string;
  fontFamily: string;
  fontWeight: string;
  fontStyle: string;
  textDecoration: string;
  lineHeight: string;
  textAlign: string;
  color: string;
  backgroundColor: string;
}
// 图片组件
export interface ImageComponentProps extends CommonComponentProps {
  src: string;
}
将组件通用属性分类分多个小类: size,border type,shadow…
然后创建一个新的组件 EditGroup,<EditGroups :props="currentElement.props">
在EditGroup 中的目的就是 props 转换成数组的多项,每个数组对应一个选项卡:
[
  {
  	text: '基础属性',
  	// specialProps = Object.keys(props.props) - allNormalProps
    items: specialProps,
  },
  {
 	text: '尺寸',
    items: [...]
  }
]
通用属性这里是定死的,我们手动添加这样的关系即可。
[
  {
    text: '尺寸',
    items: ['height', 'width', 'paddingLeft', 'paddingRight', 'paddingTop', 'paddingBottom']
  },
  ...
]
数据的前期准备:
这里的属性需要使用默认属性完成一个混入,也就是将属性添加完整:文章来源:https://www.toymoban.com/news/detail-814922.html
// 完成数据的一个混入
// defaultProps.ts
const imageDefaultProps: ImageComponentProps = {
  src: 'test.url',
  ...commonDefaultProps
}
const textDefautlProps: TextComponentProps = {
  // basic props - font styles
  text: "正文内容",
  fontSize: "14px",
  fontFamily: "",
  fontWeight: "normal",
  fontStyle: "normal",
  textDecoration: "none",
  lineHeight: "1",
  textAlign: "left",
  color: "#000000",
  backgroundColor: "",
  ...commonDefaultProps,
}
// store.ts
export const testComponents: ComponentData[] = [
{ id: uuidv4(), name: 'l-text', layerName:'图层3', props: { ...textDefaultProps, text: 'hello3', fontSize: '15px', actionType: 'url', url: 'https://www.baidu.com', 'lineHeight': '3', textAlign: 'left', fontFamily: '' }},
{ id: uuidv4(), name: 'l-image', layerName:'图层4', props: { ...imageDefaultProps, src: 'http://vue-maker.oss-cn-hangzhou.aliyuncs.com/vue-marker/5f3e3a17c305b1070f455202.jpg', width: '100px' }},
]
propsMap 对应关系的继续添加,这里也要将对应关系添加完整。
业务组件 - 独特属性 需要经过计算
其实就是所有属性的数组(全集) 通用属性的数组(子集)求差集 的得出的结果:specialProps = Object.keys(props.props) - allNormalProps
然后将 specialProps 得出的内容,添加到数组的第一项去
最终循环数组得出对应的界面
代码实现:文章来源地址https://www.toymoban.com/news/detail-814922.html
- 将属性数据混入补充完整
export const testComponents: ComponentData[] = [
  { id: uuidv4(), name: 'l-text', layerName:'图层1', props: { ...textDefaultProps, text: 'hello', fontSize: '20px', color: '#000000', 'lineHeight': '1', textAlign: 'left', fontFamily: '' }},
  { id: uuidv4(), name: 'l-text', layerName:'图层2', props: { ...textDefaultProps, text: 'hello2', fontSize: '10px', fontWeight: 'bold', 'lineHeight': '2', textAlign: 'left', fontFamily: '' }},
  { id: uuidv4(), name: 'l-text', layerName:'图层3', props: { ...textDefaultProps, text: 'hello3', fontSize: '15px', actionType: 'url', url: 'https://www.baidu.com', 'lineHeight': '3', textAlign: 'left', fontFamily: '' }},
  { id: uuidv4(), name: 'l-image', layerName:'图层4', props: { ...imageDefaultProps, src: 'http://vue-maker.oss-cn-hangzhou.aliyuncs.com/vue-marker/5f3e3a17c305b1070f455202.jpg', width: '100px' }},
]
-
EditGroup.vue
<template>
  <div class="edit-groups">
    <div v-for="item in newGroups" :key="item.text">
      <h1>{{item.text}}</h1>
      <pre>{{item.items}}</pre>
    </div>
  </div>
</template>

<script lang="ts">
import { AllComponentProps } from 'lego-bricks-sea';
import { difference } from 'lodash'
import { defineComponent, PropType, computed } from 'vue';
export interface GroupProps {
  text: string;
  items: string[];
}
const defaultEditGroups: GroupProps[] = [
  {
    text: '尺寸',
    items: [
      'height',
      'width',
      'paddingLeft',
      'paddingRight',
      'paddingTop',
      'paddingBottom',
    ],
  },
  {
    text: '边框',
    items: ['borderStyle', 'borderColor', 'borderWidth', 'borderRadius'],
  },
  {
    text: '阴影与透明度',
    items: ['opacity', 'boxShadow'],
  },
  {
    text: '位置',
    items: ['left', 'top'],
  },
  {
    text: '事件功能',
    items: ['actionType', 'url'],
  },
];
export default defineComponent({
  props: {
    props: {
      type: Object as PropType<AllComponentProps>,
      required: true,
    },
    groups: {
      type: Array as PropType<GroupProps[]>,
      default: defaultEditGroups,
    },
  },
  setup(props) {
    const newGroups = computed(() => {
      const allNormalProps = props.groups.reduce((prev, current) => {
        return [...prev, ...current.items]
      }, [] as string[])
      const specialProps = difference(Object.keys(props.props), allNormalProps)
      return [
        {
          text: '基本属性',
          items: specialProps
        },
        ...props.groups
      ]
    })
    return {
      newGroups
    }
  },
});
</script>

<style></style>
到了这里,关于web架构师编辑器内容-完成属性设置的优化的文章就介绍完了。如果您还想了解更多内容,请在右上角搜索TOY模板网以前的文章或继续浏览下面的相关文章,希望大家以后多多支持TOY模板网!