需求
两个记账接口在同一时间大量处理同一账户账务时,锁表顺序不同导致死锁,在修改完代码后模拟生产记账流程进行测试,需要对两个接口进行并发测试。
在进行压测的时候,需要对流水号进行递增。
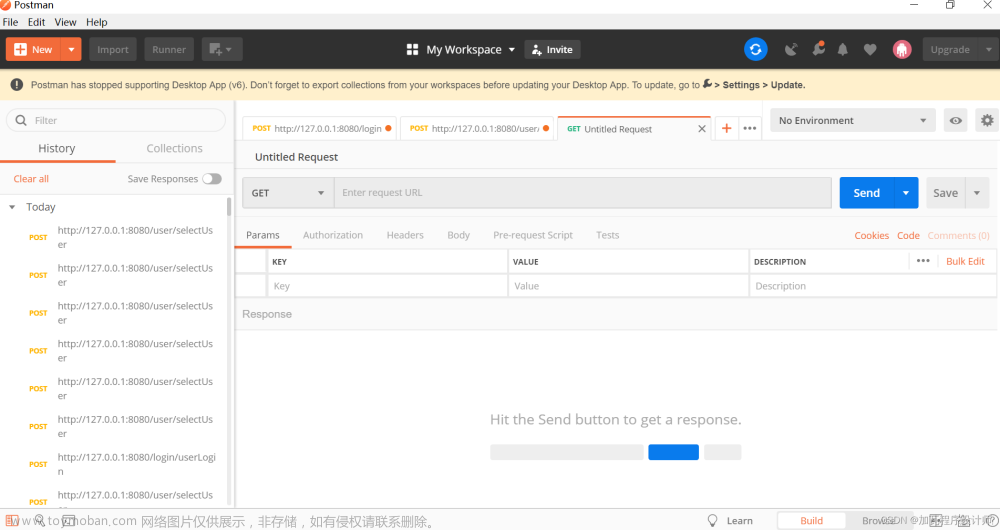
PostMan处理流程
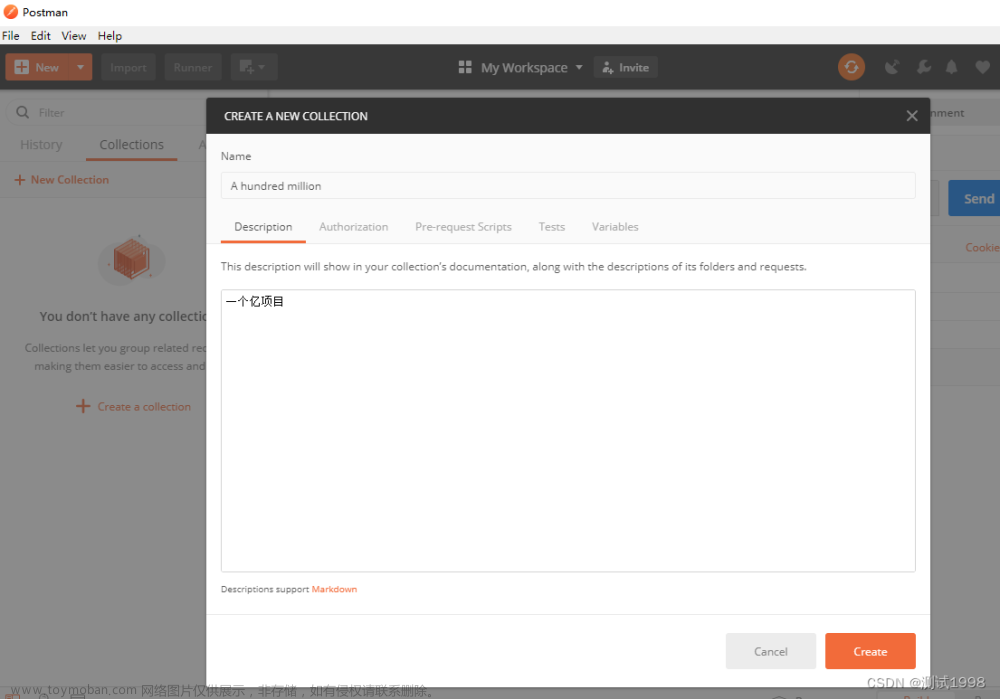
1. 新建Collections

2. 设置全局变量

3. 新建要测试的接口api


4. 在Pre-request Script中设置相关规则
使用JavaScript语言进行脚本编写

//postman.getGlobalVariable获取定义的全局变量
//postman.setGlobalVariable设置定义的全局变量


// 将流水号加1
var seqno = Number(postman.getGlobalVariable("Seq1240"));
seqno = seqno + 1

postman.setGlobalVariable("Seq1240",seqno);

// 使用日期+交易码+流水号的方式避免流水号重复
var golseqno = String(String(postman.getGlobalVariable("TranDate")) + seqno);
postman.setGlobalVariable("GolSeqNo",golseqno);
5. 处理请求报文

6. 使用Runner进行测试


点击POST链接 查看请求和返回的信息。
查询数据库查看测试结果
感觉PostMan的并发都是每组两个接口成功返回后再进行下一次迭代,不能满足测试需求,所以学一下如何使用LoadRunner进行测试。
以下陆续更新LoadRunner学习测试的过程。
LoadRunner处理流程
【性能测试工具完整版教学—LoadRunner篇】
https://www.bilibili.com/video/BV1fY4y1N7oG/?p=33&share_source=copy_web&vd_source=9aea609762c29c24f00ebffa4e482266
视频全长10个小时左右,二倍速观看加整理笔记和进行验证,需要20~30个小时吧
1. 安装本体

点击开始安装
选择解压目录
组件安装
组件安装完成后,选择安装目录,然后进行软甲安装
去掉勾选
安装完成后桌面多了三个快捷方式
2. 安装语言包
选择语言安装包
选择LoadRunner安装的路径
如图所示找到目录及对应的文件
双击安装文件
打开选择语言文件夹,选择要安装的语言。本处依次打开如下文件【Chinese-Simplified】→【LoadRunner】→【LR_03457】,点击【LR_03457】将进行安装


语言包安装完成
3. 使用VUGEN来编写脚本以及VUGEN软件的简介
首先我们需要知道loadrunner安装完成后,这三个图标分别的作用是什么
Virtual User Generator 是用来编写和管理测试脚本的。
Controller 是用来创建和控制运行性能测试的场景的。
Analysis 主要是用来对运行结果的分析的分析软件。
3.1 新建解决方案和脚本

脚本名称:1240
解决方案名称:1240yace
单协议:Web - HTTP/HTML
多协议及可选择多种协议,在编写脚本时可以使用多种协议
新建完毕后会有红框中对应的几个文件
其中vuser_init、Action、vuser_end文件都是以.c结尾,额外文件是头文件,包含了需要使用的.h文件,这也表示我们可以使用c语言的语法来编写脚本。
3.2 运行时设置设置

运行逻辑
运行逻辑中,随着迭代数的增加,Run 的运行次数会跟着迭代数一起增加(即会多次执行Action),而 vuser_init、vuser_end的运行次数不会增加,并且只会运行一次,我们也可以在Run中再加入Action1、Action2,Run运行多次的时候,对应的Action、Action1、Action2也会运行多次。
节奏
设置迭代之间的时间间隔,其中Fixed选项也可以选择Random,然后的秒数选择一个区间段,标志在这个区间段内随机触发。
日志
勾选 启用日志记录,默认为标准日志,如果脚本中带有参数等,建议使用扩展日志,将参数替换和服务器返回数据勾选,这样可以查询到更详细的信息。
思考时间
我在脚本里没有使用,暂略
其他属性
我在脚本里没有使用,暂略
其他
这里面的内容没有进行变更,使用默认设置进行测试即可。
浏览器仿真
用户代理选择即用户使用的浏览器标识。
速度模拟
默认使用最大带宽,如果有需要再进行调整。
首选项
启用图像和文本检查允许Vuser通过执行验证函数web_find或web_image_check来执行验证检查。仅适用于在基于HTML的模式下录制的步骤。启用此选项会增加您的脚本的内存占用。
内容检查、代理服务器、下载筛选器、链配置略。
3.3 参数列表


参数列表的名称要与代码中的参数名对应。
使用文件映射参数时,需要看一下列选择顺序个分隔符,以及选择下一行的模式。
设置完成后我们开始进行脚本的编写
3.4 编写脚本

编写脚本之前我们先来熟悉一下常用的函数
标C的函数
字符串操作函数
strcat、strncat 拼接
strcmp、strncmp 比较
strcpy、strncpy 拷贝
strlen 长度
strlwr、strupr 大小写转换
strset 填充
strstr 查找字符串出现的位置

缓冲区操作函数
memchr 搜索某个字符
memcmp 比较
memcpy 拷贝
memmove 移动
memset 初始化 一定要记住如果要把一个char a[20]清零,一定是 memset(a,0,20*sizeof(char));

过程控制函数
getenv 获取环境变量
putenv 设置环境变量
system 执行系统命令

内存分配函数
calloc
free
malloc
realloc

数学函数
标准输入输出函数
文件操作函数
日期时间函数
数据类型转换函数
LR的一些常见函数
命令行解析函数
lr_get_attrib_double
lr_get_attrib_long
lr_get_attrib_string

数据库操作函数
lr_db_connect
lr_db_disconnect
lr_db_executeSQLStatment
lr_db_dataset_action
lr_db_getvalue

信息函数
lr_end_timer Stops a timer.
lr_get_host_name Returns the name of the host executing the script.
lr_get_master_host_name Returns the name of the machine running the LoadRunner Controller .
lr_get_vuser_ip Returns the IP address of the current Vuser. Not applicable for products that do not run Vusers.
lr_start_timer Starts a timer.
lr_user_data_point Records a user-defined data sample.
lr_user_data_point_ex Records a user-defined data sample and enables logging option.
lr_user_data_point_instance Records a user-defined data sample and correlates it to a transaction instance.
lr_user_data_point_instance_ex Records a user-defined data sample and enables logging option.
lr_whoami

消息函数
lr_debug_message  Sends a debug message to the LoadRunner output window or Application Management agent log file.
lr_error_message  Sends an error message to the LoadRunner output window or Application Management agent log file.
lr_get_debug_message  Returns the current message logging settings.
lr_log_message  Sends a message to the Vuser log file.
lr_message  Sends a message to the log file and output window.
lr_output_message  Sends a Vuser message to the log file and output window with location information.
lr_remove_custom_error_message  Removes a custom text that was set by lr_set_custom_error_message.
lr_set_debug_message  Sets a message class for output messages.
lr_set_custom_error_message  Sets a custom text to be output after built-in error messages.
lr_vuser_status_message  Sends a message to the Vuser status area in the LoadRunner Controller.

字符串函数
lr_advance_param  Advances to the next available value in the parameter data file.
lr_checkpoint  Validates the value of a parameter against an expected value (checkpoint).
lr_convert_double_to_double  Formats the string representation of a double value using a printf-style format specifier.
lr_convert_double_to_integer  Converts the string representation of a double value to the string representation of an integer.
lr_convert_string_encoding  Converts a string to a different encoding.
lr_decrypt  Decrypts an encoded string.
lr_eval_string  Returns the string argument after evaluating embedded parameters.
lr_eval_string_ext  Creates a buffer and assigns it the input string after evaluating embedded parameters.
lr_eval_string_ext_free  Frees the buffer allocated by lr_eval_string_ext.
lr_free_parameter  Deletes a dynamic parameter at run-time and frees its buffer.
lr_next_row  Advances to the next row in the parameter data file.
lr_param_increment  Increments the value of a LoadRunner parameter.
lr_param_sprintf  Writes formatted output to a parameter.
lr_param_unique  Generates a unique string and assigns it to a parameter.
lr_paramarr_idx  Returns the value of the parameter at a specified location in a parameter array.
lr_paramarr_len  Returns the number of elements in a parameter array.
lr_paramarr_random  Returns the value of the parameter at a random location in a parameter array
lr_save_datetime  Saves the date and time into a parameter.
lr_save_param_regexp  Finds a string in a buffer using a regular expression and saves capture group matches to a parameter.
lr_save_int  Saves an integer to a parameter.
lr_save_searched_string  Searches for an occurrence of a string in a buffer and saves a portion of the buffer after that string to a parameter.
lr_save_string  Saves a null terminated string as a parameter.
lr_save_timestamp  Saves the current time in a parameter.
lr_save_var  Saves a variable length string as a parameter.
lr_unzip  Uncompresses the information in a parameter and stores the uncompressed information in another parameter.
lr_zip  Compresses the information in a parameter and stores the compressed information in another parameter.

事务函数
int lr_start_transaction( const char *transaction_name ); 事务开始
int lr_end_transaction( const char *transaction_name, int status) ; 事务结束
web的一些函数
int web_set_max_html_param_len( const char *length);

web_utl()
请求网页,HTTP的GET请求
查看函数时,点击函数名称按F1则会跳转到函数帮助页面
int web_url( const char *StepName, const char *url, <List of Attributes>, [EXTRARES, <List of Resource Attributes>,] LAST );
例子:
web_url("www.abc.com",
"URL=http://www.abc.com/",
"TargetFrame=",
"TargetBrowser=Mercury Technologies",
"Resource=0",
"RecContentType=text/html",
"Snapshot=t1.inf",
"Mode=HTML",
LAST );
LAST 参数列表结尾的标记

int web_custom_request( const char *RequestName, <List of Attributes>, [EXTRARES, <List of Resource Attributes>,] LAST);
In the following recorded script, the user began recording from http://lazarus/html/forms/file.html. When the user submitted his request, VuGen inserted a web_add_header function, followed by a web_custom_request function.
web_url("file.html", "URL=http://lazarus/html/forms/file.html","TargetFrame=_TOP", LAST );
例子:
web_add_header("Content–Type",
"multipart/form–data; boundary=–––––––––––––––––––––––––––292742461228954");
web_custom_request("post_query.exe", "Method=POST",
"URL=http://lazarus/cgi–bin/post_query.exe",
"Body=–––––––––––––––––––––––––––––292742461228954\r\nContent–Disp"
"osition: form–data; name=\"entry\"\r\n\r\nText\r\n––––––––––"
"–––––––––––––––––––292742461228954\r\nContent–Disposition: f"
"–––––––––––292742461228954––\r\n",
"TargetFrame=",
LAST );
vuser_init.c
char recv_data[3000];
char data1[40000];

vuser_init()
{
	return 0;
}
Action.c
/*****************************************************************
脚本编写信息描述:1240-一借一贷记账
项目名称:核心业务系统
版 本 号:V1.0
交易路径:LR -> 核心
编码语言:C
参数数据:
开发协议:HTTP/HTML
作    者:UntifA
时    间:2024年1月11日08:43:01
历史修改记录:

*****************************************************************/

#include "lr_replace_string.h"

Action()
{
	/*	定义char data[40000] 会报错 Too many local variables
		原因其实是因为Action能分配的内存不多,所以若要直接使用占用内存大的变量,则建议将其定义成全局变量,或者是在Action里面使用malloc函数来进行分配
	*/

	char *data = (char *)malloc(40000); // 报文内容
	char *recv_data = (char *)malloc(40000); // 相应报文内容
	char *recv_message = (char *)malloc(40000); // 返回信息

	char Trace_ID[50] = {0}; // 全局流水

	char prcscd[100]; // transcation_id

	// 字符集编码转码结果
	int rc = 0;


	/*
		lr_eval_string()
		函数的主要作用:返回脚本中的一个参数当前的值(从参数中取得对应的值,并且转换为一个字符串)。
		格式:lr_eval_string("{参数名}");
		例如:lr_eval_string("{parm}");
		返回值类型:char
		由于返回值类型是char类型,所以可以直接使用lr_output_message(lr_eval_string("{parm}"))函数输出到日志中。
		如:lr_output_message(lr_eval_string("{parm}"));

		lr_save_string
		函数主要是将程序中的常量或变量保存为lr中的参数
		char *tmp="hello";
		lr_save_string("192.168.10.35","ip"); //将常量保存为参数ip
		lr_save_string(tmp,"miao");     //将变量tmp保存为参数miao

	*/
	strcpy( Trace_ID,lr_eval_string("UntifA{date}{time}{rand}") );

	lr_output_message("查看一下流水号-----------> Trace_ID [%s]\n ", Trace_ID);

	lr_save_string(Trace_ID,"gloseqno");

	lr_output_message("查看一下流水号-----------> {gloseqno} [%s]\n ", lr_eval_string("{gloseqno}"));


	// 组装请求报文:
	strcpy(data,lr_eval_string("{																						"
		"\"Body\":{"
		"\"AppHead\":{"
		"\"jiaoyigy\":\"{jiaoyigy}\","
		"\"jiaoyirq\":\"{date}\","
		"\"jiaoyijg\":\"{jiaoyijg}\","
	"},"
        "\"zrzhhumc\": \"{zrzhhumc}\","
        "\"zczhhumc\": \"{zczhhumc}\""
	"},"
    "\"Head\":{"
		"\"ReqTm\":\"{time}\","
		"\"ReqSeqNo\":\"{gloseqno}\","
		"\"GloSeqNo\":\"{gloseqno}\","
		"\"ScnNo\":\"01\""
	"}"
"}"));

	lr_output_message("查看一下报文-----------> data [%s]\n ", data);

	lr_convert_string_encoding(data, LR_ENC_SYSTEM_LOCALE, LR_ENC_UTF8, "request_data");

	// 替换报文内容结尾的^@符号,即ASCII码中的0
	lr_replace_string("request_data","%x00","");

//	lr_save_string(data,"request_data");

	lr_output_message("查看一下报文-----------> request_data [%s]\n ", lr_eval_string("{request_data}"));

	// 报文进行转码
	//	rc = lr_convert_string_encoding(data, LR_ENC_SYSTEM_LOCALE, LR_ENC_UTF8, "stringInUnicode");
	//	if(rc < 0)
	//
	//	{
	//
	//	} else {
	//		lr_output_message("stringInUnicode ------> %s \n", lr_eval_string("{stringInUnicode}"));
	//	}


	//报文最大长度
    web_set_max_html_param_len("4096");

    // 组装报文头
	web_add_header("Content-Type","application/json");
	web_add_header("appKey","admin");
	web_add_header("appSecret","sunline");


	/*
		注册将与正则表达式匹配的动态数据保存到参数的请求。
		int web_reg_save_param_regexp(“ParamName= <输出参数名称>”,“RegExp = regular_expression”,[<属性列表>,] [<SEARCH FILTERS>,] LAST);
		参数说明:
		ParamName:要创建的参数的名称。
		RegExp:PERL兼容的正则表达式,包括一个用于从响应或响应中提取的带括号的子字符串。请参阅正则表达式。
		List of Attributes:有关每个属性的详细信息,请参阅保存参数注册函数的属性。
		属性值字符串(例如,“NotFound = warning”)不区分大小写。
		SEARCH FILTERS:搜索过滤器,指定缓冲区的部分以搜索字符串。请参阅搜索过滤器以保存参数注册函数。
		LAST:指示参数列表结束的标记。
	*/
//	web_reg_save_param_regexp(
//		"ParamName=recv_data",
//		"RegExp=",
//		"NotFound=warning",
//		"Group=0",
//		SEARCH_FILTERS,
//		"Scope=ALL",
//		"IgnoreRedirections=No",
//		LAST);

// 正则表达式没用成功,改用web_reg_save_param_ex函数功能
//	web_reg_save_param_regexp("ParamName=recv_data","RegExp=\\(*)\\","Group=0","Notfound=warning",LAST);
//	web_reg_save_param_regexp("ParamName=recv_message","RegExp=RspMsg\":\"","Group=0","Notfound=warning",LAST);
//	web_reg_save_param_regexp("ParamName=recv_code","RegExp=RspCd\":\"","Group=0","Notfound=warning",LAST);

	// 获取返回报文
	web_reg_save_param_ex(
		"ParamName=recv_data",
		"LB=",
		"RB=",
		SEARCH_FILTERS,
		LAST);


	// 获取返回信息
	web_reg_save_param_ex(
		"ParamName=recv_message",
		"LB=RspMsg\":\"",
		"RB=\"",
		SEARCH_FILTERS,
		LAST);

	// 获取响应码
	web_reg_save_param_ex(
		"ParamName=recv_code",
		"LB=RspCd\":\"",
		"RB=\"",
		SEARCH_FILTERS,
		LAST);

	// 设置集合点
	lr_rendezvous("1240yjyd_jihe");

	strcpy(prcscd, "1240_yjyd");
	// 开启事务
	lr_start_transaction(prcscd);

	web_custom_request("untifa",
	                   "URL=http://xxx.xxx.xxx.xxx:xxxx/1240",
	                   "Method=POST",
	                   "body={request_data}",
	                   LAST);


	strcpy( recv_data,lr_eval_string("{recv_data}") );
	strcpy( recv_message,lr_eval_string("{recv_message}") );
	lr_convert_string_encoding(recv_data, LR_ENC_UTF8,LR_ENC_SYSTEM_LOCALE, "recv_data_conv");
	lr_convert_string_encoding(recv_message, LR_ENC_UTF8,LR_ENC_SYSTEM_LOCALE, "recv_message_conv");

	lr_output_message("响应报文:\n %s", lr_eval_string("{recv_data_conv}"));

	if(strcmp(lr_eval_string("{recv_code}"),"CBS0000000000000")== 0){
		// 结束事务
		lr_end_transaction(prcscd,LR_PASS);
	} else {
		// 结束事务
		lr_end_transaction(prcscd,LR_FAIL);
		lr_error_message("返回的响应码:%s",lr_eval_string("{recv_code}"));
		lr_error_message("返回的错误信息是:%s",lr_eval_string("{recv_message_conv}"));
	}

	return 0;
}
*/
vuser_end
vuser_end()
{
	return 0;
}
globalsh.h
#ifndef _GLOBALS_H
#define _GLOBALS_H

//--------------------------------------------------------------------
// Include Files
#include "lrun.h"
#include "web_api.h"
#include "lrw_custom_body.h"

//--------------------------------------------------------------------
// Global Variables

#endif // _GLOBALS_H
lr_replace_string.h
// ----------------------------------------------------------------------------
//
// 方法描述:
//    在一个字符串中查找并替换一个字符串。
//
// 参数说明:
//    src - 源字符串
//    from - 源字符串中需要被替换的字符串
//    to - 用于替换的字符串
//
// 返回说明:
//		返回一个指向动态内存的包含被"to"替换成"from"后的字符串。
//
// 注释:
//		不要直接使用这个脚本,除非你是一个懂得C语言和字符串处理的高级用户。
//		如想使用,请使用下方的lr_replace_string行数即可。
//
// ----------------------------------------------------------------------------
char *replaceString(const char *src, const char *from, const char *to){
  char *value;
  char *dst;
  char *match;
  int size;
  int fromlen;
  int tolen;

  // 分别获取源字符串,需要被替换的字符串,用于替换的字符串的长度。
  size = strlen(src) + 1;
  fromlen = strlen(from);
  tolen = strlen(to);

  // 分配第一块足够大小的原始字符串空间。
  value = (char *)malloc(size);

  //由于需要返回"value",所以这里需要做一个副本。
  dst = value;

  // 开始之前,判断内存分配是否成功。
  if ( value != NULL ){
    // 一直循环直到没有找到匹配项。
    for ( ;; ){
      // 搜索from在src中第一次出现时的字符串。
      match = (char *) strstr(src, from);
      if ( match != NULL ){
        // 找出有多少个字符需要复制到'match'中。
        size_t count = match - src;

        // 由于需要重新分配内存,因此需要定义一个安全的临时变量。
        char *temp;

        // 计算被字符串被替换后总的字符串长度。
        size += tolen - fromlen;

        // 为新字符串重新分配内存。
        // temp = realloc(value, size);
        temp = (char *)realloc(value, size);

        if ( temp == NULL ){
          // 如果内存分配失败,那么就释放之前分配的内存并返回NULL。
          free(value);
          return NULL;
        }

        // 如果内存分配成功,但是我们最终会返回'value',因此需要将它指向
        // 现在内存地址。并且不要忘记指向正确的目的地地址。
        dst = temp + (dst - value);
        value = temp;

        // 从src拷贝count个字符到dest。
        memmove(dst, src, count);
        src += count;
        dst += count;

        // 从to拷贝tolen个字符到dst。
        memmove(dst, to, tolen);
        src += fromlen;
        dst += tolen;
      }else{	// 如果没有匹配的字符串
        strcpy(dst, src);		// 复制该字符串中剩余的部分(包括终止空字符)。
        break;
      }
    }
  }
  return value;
}

// ----------------------------------------------------------------------------
//
// 方法描述:
//		在一个LoadRunner字符串中查找并替换一个字符串。
//
// 参数说明:
//    lrparam    - LoadRunner源字符串参数名称
//    findstr    - LoadRunner源字符串中需要被替换的字符串
//    replacestr - LoadRunner用于替换的字符串
//
// 返回说明:
//		返回一个整数: 1表示成功,0表示失败。
//
// 示例说明:
//    lr_save_string( "welcome to china!", "LR_Parameter");
//    lr_replace_string( "LR_Parameter", "o", "-h-" );
//    lr_output_message( "%s", lr_eval_string("{LR_Parameter}") );
//
// ----------------------------------------------------------------------------
int lr_replace_string( const char *lrparam, char *findstr, char *replacestr ){
  int res = 0;
  char *result_str;
  char lrp[1024];

  // 格式化LoadRunner参数名称
  sprintf( lrp, "{%s}", lrparam);

  // 查找并替换字符串
  result_str = replaceString( lr_eval_string(lrp), findstr, replacestr );

  // 结果处理
  if (result_str != NULL ){
    lr_save_string( result_str, lrparam );
    free( result_str );
    res = 1;
  }
  return res;
}


// ----------------------------------------------------------------------------
//
//  LoadRunner中调用DEMO
//
//  #include "lr_replace_string.h"
//
//  Action()
//  {
// 		//FilterID是loarunner的参数化数据
//		lr_save_string(lr_eval_string("{FilterID}"),"Filter_ID");
// 		lr_replace_string("Filter_ID","#","%23");
//		lr_output_message("%s", lr_eval_string("{Filter_ID}"));
//
// 		return 0;
//	}
//
// ----------------------------------------------------------------------------
编译、执行查看测试结果,测试通过。
4. 使用Controller创建、控制运行性能测试
使用Controller时,需要了解的一些定义
手动场景,按照自定义配置进行测试。
面向目标场景,按照需要达到什么目标去配置进行测试。
LoadRunner 脚本,即使用VUGEN来编写的脚本
系统或单元测试 dll文件、jar包等可以用来执行的
Machines(Load Generators)
进行加压的机器
Vusers
虚拟用户
Scheduling
如何加载运行
Monitors
过程监控测试
Goal-oriented
目标场景
Manual
手动场景
工作流程、工作原理

新建场景

功能依次为:启动、虚拟用户、添加测试组、删除测试组、运行设置、详细信息、查看脚本、虚拟服务


计划方式根据场景和组不同,全局计划也跟着改变,可以自行测试一下,很好理解。
不同组可以设置不同的任务,实现不同脚本不同的并发数。
设置好Controller后,保存文件,文件的后缀为.lrs。
运行压测场景,由于流水号随机号设置了0~100 导致有重复的流水号,所以有失败事务,后续需要改成唯一值或者将随机数的范围扩大。
5. 使用Analysis进行运行结果分析
通常由Controller跳转进行Analysis软件的打开
这种方式打开不加载运行结果

勾选自动加载分析后,Controller运行完毕后会自动打开分析软件。
如果没有勾选,点击下图图标可以打开分析软件
打开软件,查看压测结果
 文章来源:https://www.toymoban.com/news/detail-815214.html
查看数据库压测结果,是否还有死锁交易 文章来源地址https://www.toymoban.com/news/detail-815214.html
到了这里,关于PostMan、LoadRunner进行并发压测流程的文章就介绍完了。如果您还想了解更多内容,请在右上角搜索TOY模板网以前的文章或继续浏览下面的相关文章,希望大家以后多多支持TOY模板网!


