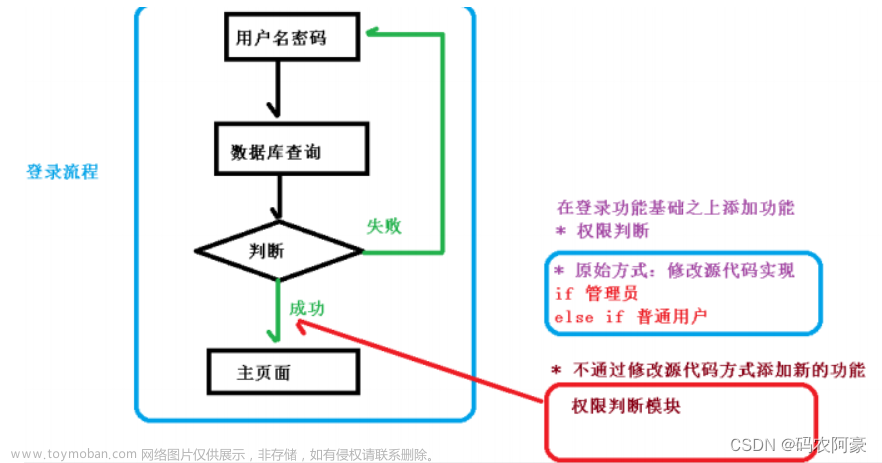
基于注解的AOP配置
1.创建工程

1.1.pom.xml
<?xml version="1.0" encoding="UTF-8"?>
<project xmlns="http://maven.apache.org/POM/4.0.0"
         xmlns:xsi="http://www.w3.org/2001/XMLSchema-instance"
         xsi:schemaLocation="http://maven.apache.org/POM/4.0.0 http://maven.apache.org/xsd/maven-4.0.0.xsd">
    <modelVersion>4.0.0</modelVersion>

    <groupId>com.wantong</groupId>
    <artifactId>Spring_AOP_Annotation</artifactId>
    <version>1.0-SNAPSHOT</version>

    <dependencies>
        <!-- Spring常用依赖 -->
        <dependency>
            <groupId>org.springframework</groupId>
            <artifactId>spring-context</artifactId>
            <version>5.1.8.RELEASE</version>
        </dependency>
        <dependency>
            <groupId>org.springframework</groupId>
            <artifactId>spring-aspects</artifactId>
            <version>5.1.8.RELEASE</version>
        </dependency>
    </dependencies>
</project>
1.2.dao
@Repository
public class UserDaoImpl implements UserDao {

    @Override
    public void addUser(){
        System.out.println("insert into tb_user......");
    }
}
1.3.service
@Service
public class UserServiceImpl implements UserService {

    @Autowired
    private UserDao userDao;

    public void addUser() {
        userDao.addUser();
    }
}
1.4.applicationContext.xml
<?xml version="1.0" encoding="UTF-8"?>
<beans xmlns="http://www.springframework.org/schema/beans"
       xmlns:xsi="http://www.w3.org/2001/XMLSchema-instance"
       xmlns:aop="http://www.springframework.org/schema/aop"
       xmlns:context="http://www.springframework.org/schema/context"
       xsi:schemaLocation="http://www.springframework.org/schema/beans
        		http://www.springframework.org/schema/beans/spring-beans.xsd
        		http://www.springframework.org/schema/aop
        		http://www.springframework.org/schema/aop/spring-aop.xsd
        		http://www.springframework.org/schema/context
        		http://www.springframework.org/schema/context/spring-context.xsd">

    <context:component-scan base-package="com.wantong"></context:component-scan>
</beans>
1.5.测试
/**
 * 模拟表现层
 */
public class Client {
    public static void main(String[] args) {
        ApplicationContext ac =
            new ClassPathXmlApplicationContext("applicationContext.xml");
        //使用对象
        UserService userService = ac.getBean("userServiceImpl",UserService.class);
        userService.addUser();
    }
}
2.增强
2.1.applicationContext.xml
<!-- 开启spring对注解AOP的支持 -->
<aop:aspectj-autoproxy/>
2.2.AOP配置
-
常用注解
- @Aspect:把当前类声明为切面类
- @Before:前置通知,可以指定切入点表达式
- @AfterReturning:后置【try】通知,可以指定切入点表达式
- @AfterThrowing:异常【catch】通知,可以指定切入点表达式
- @After:最终【finally】通知,可以指定切入点表达式
- @Around:环绕通知,可以指定切入点表达式
-
注解方式实现aop文章来源:https://www.toymoban.com/news/detail-815263.html
@Component
@Aspect
public class MyLogAdvice {

    //前置通知
    @Before("execution(* com.wantong.service.*.*(..))")
    public void before(){
        System.out.println("前置通知");
    }

    //后置通知【try】
    @AfterReturning("execution(* com.wantong.service.*.*(..))")
    public void afterReturning(){
        System.out.println("后置通知");
    }

    //异常通知【catch】
    @AfterThrowing("execution(* com.wantong.service.*.*(..))")
    public void afterThrowing(){
        System.out.println("异常通知");
    }

    //最终通知【finally】
    @After("execution(* com.wantong.service.*.*(..))")
    public void after(){
        System.out.println("最终通知");
    }

    //环绕通知
    @Around("execution(* com.wantong.service.*.*(..))")
    public void around(ProceedingJoinPoint joinPoint){
        try {
            System.out.println("方法执行前的环绕通知");
            joinPoint.proceed();
            System.out.println("方法执行后的环绕通知");
        } catch (Throwable throwable) {
            throwable.printStackTrace();
        }
    }
}
 文章来源地址https://www.toymoban.com/news/detail-815263.html
到了这里,关于Spring——基于注解的AOP配置的文章就介绍完了。如果您还想了解更多内容,请在右上角搜索TOY模板网以前的文章或继续浏览下面的相关文章,希望大家以后多多支持TOY模板网!


