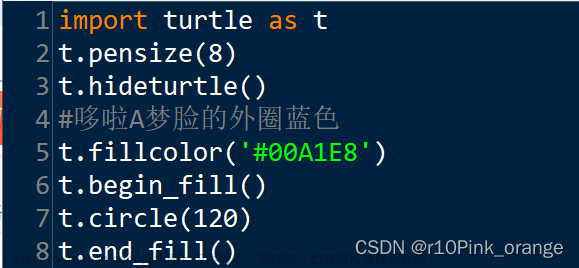
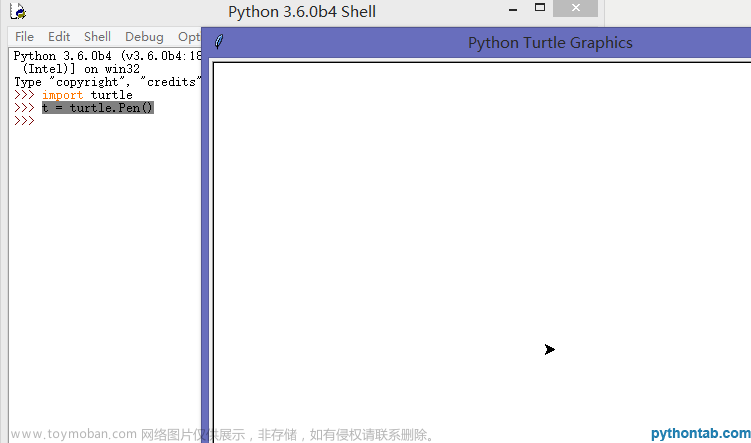
Turtle图形库
Turtle 库是 Python 内置的图形化模块,属于标准库之一,位于 Python 安装目录的 lib 文件夹下,常用函数有以下几种:
一.Turtle绘图的基础知识
画布是turtle用于绘图区域,我们可以设置它的大小和初始位置。
1.设置画布大小
turtle.screensize(canvwidth=None, canvheight=None, bg=None),参数分别对应画布的宽(单位像素), 高, 背景颜色。
turtle.screensize(1000,800, "blue")

turtle.screensize() #返回默认大小(500, 400)

turtle.setup(width=0.5, height=0.75, startx=None, starty=None)
width, height: 输入宽和高为整数时, 表示像素; 为小数时, 表示占据电脑屏幕的比例,(startx, starty): 这一坐标表示矩形窗口左上角顶点的位置, 如果为空,则窗口位于屏幕中心。
2.画笔的状态
在画布上,默认有一个坐标原点为画布中心的坐标轴,坐标原点上有一只面朝x轴正方向小乌龟。这里我们描述小乌龟时使用了两个词语:坐标原点(位置),面朝x轴正方向(方向), turtle绘图中,就是使用位置方向描述小乌龟(画笔)的状态。
turtle.pensize() # 设置画笔的宽度;

turtle.pencolor()# 没有参数传入,返回当前画笔颜色,传入参数设置画笔颜色,可以是字符串如"green", "red",也可以是RGB 3元组。

turtle.speed(speed)#设置画笔移动速度,画笔绘制的速度范围[0,10]整数,数字越大越快。
3.使用turtle绘图主要分为3种命令代码,分别为运动命令、画笔控制命令和全局控制命令。
画笔运动命令代码
turtle.forward(distance)—向当前画笔方向移动distance像素长度
turtle.backward(distance)—向当前画笔相反方向移动distance像素长度
turtle.right(degree)—顺时针移动degree° turtle.left(degree)—逆时针移动degree°
turtle.pendown()—移动时绘制图形,缺省时也为绘制 turtle.goto(x,y)—将画笔移动到坐标为x,y的位置
turtle.penup()—提起笔移动,不绘制图形,用于另起一个地方绘制
turtle.circle()—画圆,半径为正(负),表示圆心在画笔的左边(右边)画圆 setx( )—将当前x轴移动到指定位置
sety( )—将当前y轴移动到指定位置 setheading(angle)—设置当前朝向为angle角度
home()—设置当前画笔位置为原点,朝向东 dot®—绘制一个指定直径和颜色的圆点
画笔控制命令代码
turtle.fillcolor(colorstring)—绘制图形的填充颜色 turtle.color(color1,color2)—同时设置pencolor=color1, fillcolor=color2
turtle.filling()—返回当前是否在填充状态 turtle.begin_fill()—准备开始填充图形
turtle.end_fill()—填充完成 turtle.hideturtle()—隐藏画笔的turtle形状
turtle.showturtle()—显示画笔的turtle形状
全局控制命令代码
turtle.clear()—清空turtle窗口,但是turtle的位置和状态不会改变
turtle.reset()—清空窗口,重置turtle状态为起始状态 turtle.undo()—撤销上一个turtle动作
turtle.isvisible()—返回当前turtle是否可见 stamp()—复制当前图形
turtle.write(s[,font=(“fontname”,font_size,“font_type”)])—文本,s为文本内容,font是字体的参数,分别为字体名称,大小和类型;font为可选项,font参数也是可选项
二.具体实例
0.樱花树
from turtle import *
from random import *
from math import *
def tree(n, l):
    pd ()  # 下笔
    # 阴影效果
    t = cos ( radians ( heading () + 45 ) ) / 8 + 0.25
    pencolor ( t, t, t )
    pensize ( n / 3 )
    forward ( l )  # 画树枝

    if n > 0:
        b = random () * 15 + 10  # 右分支偏转角度
        c = random () * 15 + 10  # 左分支偏转角度
        d = l * (random () * 0.25 + 0.7)  # 下一个分支的长度
        # 右转一定角度,画右分支
        right ( b )
        tree ( n - 1, d )
        # 左转一定角度,画左分支
        left ( b + c )
        tree ( n - 1, d )
        # 转回来
        right ( c )
    else:
        # 画叶子
        right ( 90 )
        n = cos ( radians ( heading () - 45 ) ) / 4 + 0.5
        ran = random ()
        # 这里相比于原来随机添加了填充的圆圈,让樱花叶子看起来更多一点
        if (ran > 0.7):
            begin_fill ()
            circle ( 3 )
            fillcolor ( 'pink' )
        # 把原来随机生成的叶子换成了统一的粉色
        pencolor ( "pink" )
        circle ( 3 )
        if (ran > 0.7):
            end_fill ()
        left ( 90 )
        # 添加0.3倍的飘落叶子
        if (random () > 0.7):
            pu ()
            # 飘落
            t = heading ()
            an = -40 + random () * 40
            setheading ( an )
            dis = int ( 800 * random () * 0.5 + 400 * random () * 0.3 + 200 * random () * 0.2 )
            forward ( dis )
            setheading ( t )
            # 画叶子
            pd ()
            right ( 90 )
            n = cos ( radians ( heading () - 45 ) ) / 4 + 0.5
            pencolor ( n * 0.5 + 0.5, 0.4 + n * 0.4, 0.4 + n * 0.4 )
            circle ( 2 )
            left ( 90 )
            pu ()
            # 返回
            t = heading ()
            setheading ( an )
            backward ( dis )
            setheading ( t )
    pu ()
    backward ( l )  # 退回


bgcolor ( 0.956, 0.9255, 0.9882 )  # 设置背景色(把灰色换成淡紫色)
ht ()  # 隐藏turtle
speed ( 0 )  # 速度 1-10渐进,0 最快
tracer ( 0, 0 )
pu ()  # 抬笔
backward ( 50 )
left ( 90 )  # 左转90度
pu ()  # 抬笔
backward ( 300 )  # 后退300
tree ( 12, 100 )  # 递归7层
done ()
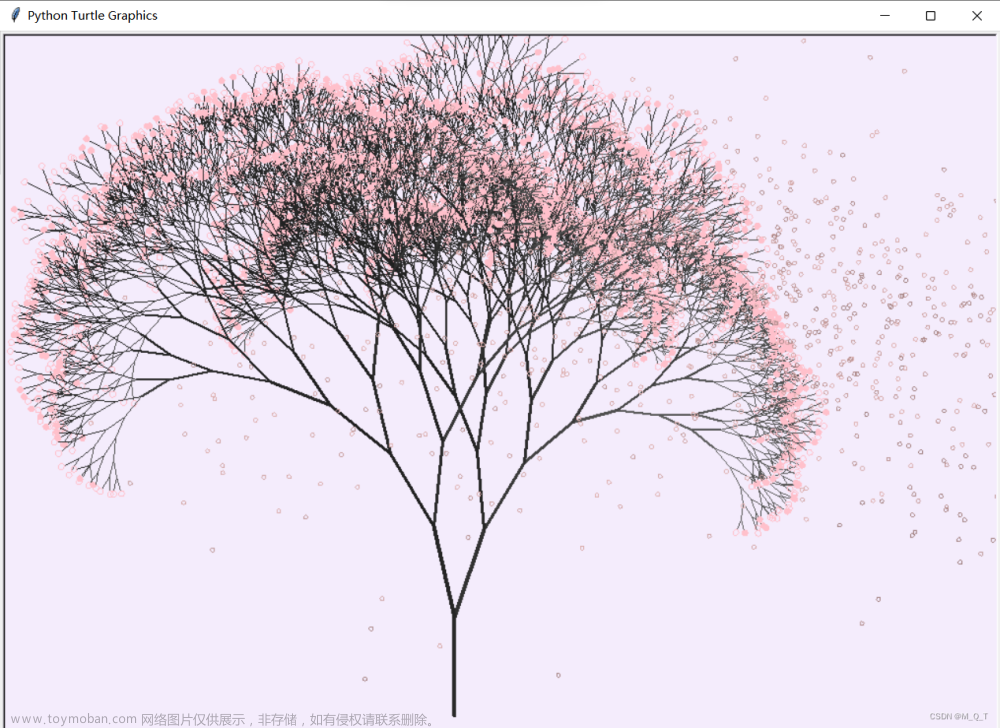
参考:http://t.csdn.cn/WHTgS
1.彩色螺旋线
from turtle import *
import turtle
t = Turtle()
t.pensize(2)
turtle.bgcolor("black")
colors = ["red", "yellow", 'purple', 'blue']
t._tracer(False)
for x in range(400):
    for y in range(200):
        t.forward(x * y)
        t.color(colors[x % 4])
        t.left(91)
t._tracer(True)
done()

2.小蟒蛇
import turtle
turtle.penup()
turtle.pencolor("blue")
turtle.forward(-200)
turtle.pendown()
turtle.pensize(10)
turtle.right(45)
for i in range(4):
    turtle.circle(40, 100)
    turtle.circle(-40, 60)
turtle.circle(40, 80 / 2)
turtle.fd(30)
turtle.circle(16, 150)
turtle.fd(100)
turtle.done()
3.画佩奇
import time
import turtle as t

t.pensize(4) # 设置画笔的大小
t.colormode(255) # 设置GBK颜色范围为0-255
t.color((255,155,192),"pink") # 设置画笔颜色和填充颜色(pink)
t.setup(840,500) # 设置主窗口的大小为840*500
t.speed(10) # 设置画笔速度为10
#鼻子
t.pu() # 提笔
t.goto(-100,100) # 画笔前往F坐标(-100,100)
t.pd() # 下笔
t.seth(-30) # 笔的角度为-30°
t.begin_fill() # 外形填充的开始标志
a=0.4
for i in range(120):
    if 0 <= i < 30 or 60 <= i < 90:
        a=a+0.08
        t.lt(3) #向左转3度
        t.fd(a) #向前走a的步长
    else:
        a=a-0.08
        t.lt(3)
        t.fd(a)
t.end_fill() # 依据轮廓填充
t.pu() # 提笔
t.seth(90) # 笔的角度为90度
t.fd(25) # 向前移动25
t.seth(0) # 转换画笔的角度为0
t.fd(10)
t.pd()
t.pencolor(255,155,192) # 设置画笔颜色
t.seth(10)
t.begin_fill()
t.circle(5) # 画一个半径为5的圆
t.color(160,82,45) # 设置画笔和填充颜色
t.end_fill()
t.pu()
t.seth(0)
t.fd(20)
t.pd()
t.pencolor(255,155,192)
t.seth(10)
t.begin_fill()
t.circle(5)
t.color(160,82,45)
t.end_fill()
#头
t.color((255,155,192),"pink")
t.pu()
t.seth(90)
t.fd(41)
t.seth(0)
t.fd(0)
t.pd()
t.begin_fill()
t.seth(180)
t.circle(300,-30) # 顺时针画一个半径为300,圆心角为30°的园
t.circle(100,-60)
t.circle(80,-100)
t.circle(150,-20)
t.circle(60,-95)
t.seth(161)
t.circle(-300,15)
t.pu()
t.goto(-100,100)
t.pd()
t.seth(-30)
a=0.4
for i in range(60):
    if 0<=i<30 or 60<=i<90:
        a=a+0.08
        t.lt(3) #向左转3度
        t.fd(a) #向前走a的步长
    else:
        a=a-0.08
        t.lt(3)
        t.fd(a)
        t.end_fill()
#耳朵
t.color((255,155,192),"pink")
t.pu()
t.seth(90)
t.fd(-7)
t.seth(0)
t.fd(70)
t.pd()
t.begin_fill()
t.seth(100)
t.circle(-50,50)
t.circle(-10,120)
t.circle(-50,54)
t.end_fill()
t.pu()
t.seth(90)
t.fd(-12)
t.seth(0)
t.fd(30)
t.pd()
t.begin_fill()
t.seth(100)
t.circle(-50,50)
t.circle(-10,120)
t.circle(-50,56)
t.end_fill()
#眼睛
t.color((255,155,192),"white")
t.pu()
t.seth(90)
t.fd(-20)
t.seth(0)
t.fd(-95)
t.pd()
t.begin_fill()
t.circle(15)
t.end_fill()
t.color("black")
t.pu()
t.seth(90)
t.fd(12)
t.seth(0)
t.fd(-3)
t.pd()
t.begin_fill()
t.circle(3)
t.end_fill()
t.color((255,155,192),"white")
t.pu()
t.seth(90)
t.fd(-25)
t.seth(0)
t.fd(40)
t.pd()
t.begin_fill()
t.circle(15)
t.end_fill()
t.color("black")
t.pu()
t.seth(90)
t.fd(12)
t.seth(0)
t.fd(-3)
t.pd()
t.begin_fill()
t.circle(3)
t.end_fill()
#腮
t.color((255,155,192))
t.pu()
t.seth(90)
t.fd(-95)
t.seth(0)
t.fd(65)
t.pd()
t.begin_fill()
t.circle(30)
t.end_fill()
#嘴
t.color(239,69,19)
t.pu()
t.seth(90)
t.fd(15)
t.seth(0)
t.fd(-100)
t.pd()
t.seth(-80)
t.circle(30,40)
t.circle(40,80)
#身体
t.color("red",(255,99,71))
t.pu()
t.seth(90)
t.fd(-20)
t.seth(0)
t.fd(-78)
t.pd()
t.begin_fill()
t.seth(-130)
t.circle(100,10)
t.circle(300,30)
t.seth(0)
t.fd(230)
t.seth(90)
t.circle(300,30)
t.circle(100,3)
t.color((255,155,192),(255,100,100))
t.seth(-135)
t.circle(-80,63)
t.circle(-150,24)
t.end_fill()
#手
t.color((255,155,192))
t.pu()
t.seth(90)
t.fd(-40)
t.seth(0)
t.fd(-27)
t.pd()
t.seth(-160)
t.circle(300,15)
t.pu()
t.seth(90)
t.fd(15)
t.seth(0)
t.fd(0)
t.pd()
t.seth(-10)
t.circle(-20,90)
t.pu()
t.seth(90)
t.fd(30)
t.seth(0)
t.fd(237)
t.pd()
t.seth(-20)
t.circle(-300,15)
t.pu()
t.seth(90)
t.fd(20)
t.seth(0)
t.fd(0)
t.pd()
t.seth(-170)
t.circle(20,90)
#脚
t.pensize(10)
t.color((240,128,128))
t.pu()
t.seth(90)
t.fd(-75)
t.seth(0)
t.fd(-180)
t.pd()
t.seth(-90)
t.fd(40)
t.seth(-180)
t.color("black")
t.pensize(15)
t.fd(20)
t.pensize(10)
t.color((240,128,128))
t.pu()
t.seth(90)
t.fd(40)
t.seth(0)
t.fd(90)
t.pd()
t.seth(-90)
t.fd(40)
t.seth(-180)
t.color("black")
t.pensize(15)
t.fd(20)
# 尾巴
t.pensize(4)
t.color((255,155,192))
t.pu()
t.seth(90)
t.fd(70)
t.seth(0)
t.fd(95)
t.pd()
t.seth(0)
t.circle(70,20)
t.circle(10,330)
t.circle(70,30)

参考:http://t.csdn.cn/fimSO
4.风和日丽图
# coding=utf-8
# code by me

# 引用海龟库以及随机库
import turtle as t
import random
import time

light = t.Turtle(visible=False)
wind = t.Turtle(visible=False)


def canvas(size_x=1200, size_y=900):  # 设置画布,有默认值
    t.setup(size_x, size_y)


# 设置线的颜色以及size
def pencil(size=5, color="black"):
    t.pensize(size)
    t.pencolor(color)


def sun():  # 绘制太阳
    light.pensize(5)
    light.pencolor("black")
    sec = int(time.time())
    t.penup()  # 画红色点
    t.goto(-530, 310)
    t.pendown()
    t.dot(100, "red")
    for i in range(1, 19):  # 阳光效果
        light.penup()
        light.goto(-530, 310)
        light.seth(i * 20)
        light.forward(55)
        light.pendown()
        if (i + sec) % 2 == 1:
            light.forward(15)
        else:
            light.forward(7)


def plant():  # 绘制天空以及大地
    t.penup()  # 每个绘制函数开头都写了这个,防止龟龟绘制另外的图像移动时留下痕迹
    length = 900 * 0.318  # 将画布的纵向黄金分割
    t.home()
    t.goto(600, -450)

    t.fillcolor("#DAA520")  # 分割填充大地
    t.begin_fill()
    t.left(90)
    t.forward(length)
    t.left(90)
    t.forward(1200)
    t.left(90)
    t.forward(length)
    t.left(90)
    t.forward(1200)
    t.end_fill()

    t.home()  # 填充天空
    t.goto(600, length - 450)
    t.fillcolor("#B0C4DE")
    t.begin_fill()
    t.left(90)
    t.forward(900 - length)
    t.left(90)
    t.forward(1200)
    t.left(90)
    t.forward(900 - length)
    t.left(90)
    t.forward(1200)
    t.end_fill()


def butterfly(pos_x=0, pos_y=0):  # 绘制蝴蝶,这里会随机生成位置以及蝴蝶大小、颜色
    light.penup()
    light.goto(pos_x, pos_y)
    light.pendown()
    light.pensize(2)
    light.seth(45)

    color = ["#FF00FF", "#87CEFA", "#0000EE", "#FF4500", "#00FF00", "#00E5EE", "#FFFAFA"]  # 一个颜色表,以及size表
    size = [6, 7, 8, 9, 10, 11, 12]
    tep_size = random.choice(size)
    light.fillcolor(random.choice(color))
    light.begin_fill()
    light.circle(tep_size, 270)  # 绘制翅膀
    light.right(135)

    light.pensize(3)
    light.forward(tep_size / 2)
    light.right(45)
    light.forward(tep_size / 2)
    light.back(tep_size / 2)
    light.left(70)
    light.forward(tep_size / 2)
    light.back(tep_size / 2)
    light.right(25)
    light.pensize(4)
    light.back(2.05 * tep_size)

    light.seth(-90)
    light.pensize(2)
    light.circle(tep_size, -180)
    light.pensize(4)
    light.left(90)
    light.forward(tep_size * 2)
    light.back(tep_size * 2.5)
    light.end_fill()


def botany(pos_x=0, pos_y=0, direction=0, flower=1, bend=10):  # 植物函数,绘制向日葵,向日葵会迎风倒,效果很到位
    light.pensize(3)
    light.pencolor("black")
    light.penup()
    light.goto(pos_x, pos_y)
    light.pendown()
    light.left(90)
    light.fillcolor("#00CD00")
    light.begin_fill()

    light.circle(50, 90)  # 绘制叶片
    light.left(90)
    light.circle(50, 90)

    light.penup()
    light.goto(pos_x, pos_y)
    light.pendown()

    light.seth(-90)
    light.pensize(6)
    light.forward(50)
    light.back(50)

    light.pensize(3)
    light.circle(50, -90)
    light.right(90)
    light.circle(50, -90)
    light.end_fill()
    if flower:  # 判断是否有花,这里默认有花
        light.penup()
        light.goto(pos_x, pos_y)
        light.pendown()
        light.pensize(4)
        if direction:
            light.seth(80)  # 绘制秆
            light.circle(130 - 5 * bend, 70 + 5 * bend, None)
        else:
            light.seth(-80)
            light.circle(130 - 5 * bend, -70 - 5 * bend, None)
            light.right(180)
        tep_x, tep_y = light.xcor(), light.ycor()
        light.forward(13)
        light.right(30)
        for i in range(6):  # 绘制花瓣
            light.fillcolor("#FFD700")
            light.begin_fill()
            light.circle(15, 300)
            light.left(120)
            light.end_fill()
        light.goto(tep_x, tep_y)
        light.dot(36, "#FFB90F")


def cloud(pos_x=0, pos_y=0, size=20):  # 绘制云
    pos = int(time.time())
    pos %= 50
    light.penup()  # 云没有要边框,所以没有pendown
    light.goto(pos*8+pos_x, pos_y)

    light.fillcolor("#E6E6FA")
    light.begin_fill()
    light.seth(-80)
    light.circle(size, 110)
    for i in range(1, 6):  # 绘制下半部分
        light.right(100)
        light.circle(size, 110)
    light.left(120)
    for i in range(1, 7):  # 绘制上半部分,上边进行了六次循环,但是之前就进行了一次绘制,这里有七次循环
        light.right(100)
        light.circle(size, 110)
    light.end_fill()


# def draw(x, y):                               # 这里是之前调试用的拖拽函数响应函数,不需使用
#     t.goto(x, y)
#     print(t.xcor(), t.ycor())


# def person(pos_x=0, pos_y=0):                 # 绘制人的函数,效果很拉跨,舍弃
#     t.penup()
#     t.goto(pos_x, pos_y)
#     t.pendown()
#
#     t.dot(44, "#FFDEAD")
#     t.right(90)
#     t.penup()
#     t.forward(25)
#     t.right(15)
#     t.pendown()
#     pencil(10)
#     t.forward(50)
#
#     t.right(35)
#     t.forward(50)
#     t.back(50)
#     t.left(90)
#     t.forward(27)
#     t.right(110)
#     t.forward(23)
#
#     t.penup()
#     t.goto(pos_x, pos_y)
#     t.seth(-90)
#     t.forward(25)
#     t.right(15)
#     t.forward(20)
#     t.right(60)
#     t.pendown()
#     t.forward(50)
#     tep_x1, tep_y1 = t.xcor(), t.ycor()
#     t.back(50)
#     t.right(160)
#     t.forward(30)
#     t.seth(90)
#     t.forward(20)
#
#     t.penup()
#     t.goto(tep_x1, tep_y1)
#     t.seth(-145)
#     pencil(6)
#     t.pendown()
#     t.forward(50)
#     t.right(90)
#     t.forward(20)
#     t.right(90)
#     t.forward(15)
#     t.right(90)
#     t.forward(20)
#     t.left(90)
#     t.forward(150)


def star(pos_x=0, pos_y=0, size=10):  # 绘制星星函数
    color = ["#FFFFE0", "#FFFF00"]
    light.penup()
    light.goto(pos_x, pos_y)
    angle = random.randint(0, 180)
    light.seth(angle)
    light.fillcolor(random.choice(color))
    light.begin_fill()
    for i in range(5):  # 这个144度是查的资料
        light.right(144)
        light.forward(size)
    light.end_fill()


def wind():  # 风函数,让图像看起来更有感觉,就是一条直线,加两个圆
    pos = int(time.time())
    pos %= 5
    color = ["#D3D3D3", "#CDCDB4"]
    tep_color = random.choice(color)
    light.penup()
    light.goto(pos*80-1000, 50)
    light.seth(0)
    light.pendown()
    light.pensize(5)
    light.pencolor(tep_color)
    light.forward(500)
    light.pensize(4)
    light.pencolor(tep_color)
    light.left(45)
    light.circle(50, 180)
    light.pensize(3)
    light.pencolor(tep_color)
    light.circle(30, 90)

    tep_color = random.choice(color)
    light.penup()  # 画圈圈
    light.goto(pos*140-1040, 80)
    light.seth(0)
    light.pendown()
    light.pensize(5)
    light.pencolor(tep_color)
    light.forward(400)
    light.pensize(4)
    light.pencolor(tep_color)
    light.left(45)
    light.circle(40, 180)
    light.pensize(3)
    light.pencolor(tep_color)
    light.circle(25, 90)


def lie():  # 这个函数是表达我对python的喜爱
    t.penup()
    t.goto(0, -360)
    pencil(0, "#FFA54F")
    t.write("节日快乐", align='center', font=('arial', 75, 'normal'))
    t.hideturtle()


def dynamic():
    light.clear()
    sun()
    star(200, 200)  # 右上角有星星注意观察 0.0
    star(260, 230, 15)
    star(180, 300)
    star(300, 100, 15)
    star(500, 290)
    star(420, 310, 15)
    star(300, 200)
    star(260, 230, 15)
    star(350, 352)
    star(500, 180, 15)
    star(560, 352)
    cloud(-530, 280, 20)
    cloud(300, 250, 30)
    wind()

    bend = int(time.time())
    bend %= 5
    bend += 14
    light.seth(-100-bend)  # 初始向日葵叶片角度
    for i in range(14):  # 生成向日葵

        if i % 2 == 0:
            botany(-520 + i * 50, -132, 0, 1, bend - i)
            botany(-340 + i * 50, -132, 0, 1, bend - i)
        else:
            botany(-430 + i * 50, -142, 0, 1, bend - i)
            botany(-230 + i * 50, -142, 0, 1, bend - i)
    pos_x = [45, -96, -100, 410, 300, 580, 230, -50, -400, -320, -212]
    pos_y = [45, -96, -100, 0, 20, 30, 29, -50, -20, -43, 10]
    for i in range(6):  # 生成蝴蝶,这里便于观察到结果,蝴蝶有点大
        butterfly(random.choice(pos_x), random.choice(pos_y))
    t.ontimer(dynamic, 1000)


def piant():  # 这里是将绘制全放在这个函数里,让main看起来简洁
    t.tracer(False)
    t.delay(0)
    canvas()
    pencil()
    plant()
    lie()
    dynamic()


if __name__ == "__main__":
    piant()
    # t.ondrag(draw, btn=1, add=None)
    t.mainloop()
 文章来源:https://www.toymoban.com/news/detail-824001.html
参考:http://t.csdn.cn/A9nfn文章来源地址https://www.toymoban.com/news/detail-824001.html
到了这里,关于Python海龟turtle基础知识大全与画图集合的文章就介绍完了。如果您还想了解更多内容,请在右上角搜索TOY模板网以前的文章或继续浏览下面的相关文章,希望大家以后多多支持TOY模板网!

