1、回顾纯函数


2、redux
2.1 redux的基本使用
pm install redux --save
- store
const { createStore } = require("redux");

// 1.state数据
const initialState = {
  name: "kiki",
  age: "18",
};

// 2.reducer纯函数
function reducer() {
  return initialState;
}

// 3.创建store
const store = createStore(reducer);

module.exports = store;

2.2 通过action修改store的数值

const { createStore } = require("redux");
const { ADD_NUMBER, CHANGE_NAME } = require("./constants");

// 1.state数据
const initialState = {
  name: "kiki",
  num: 18,
};

// 2.reducer纯函数

// 两个参数
// 参数1:store目前保存的state 设置默认参数
// 参数2:本次需要更新的action
// 返回值 他的返回值作为之后存储在store的数值 因为第一次调用没有数值 所以设置默认值
function reducer(state = initialState, action) {
  console.log(state, action); // { name: 'kiki', num: '18' } { type: '@@redux/INIT0.n.r.y.w.j' }

  switch (action.type) {
    case ADD_NUMBER:
      // 这里需要创建新的对象的返回 否则页面发现state没有发生变化不会更新界面
      return { ...state, num: state.num + action.num };

    case CHANGE_NAME:
      return { ...state, name: action.name };
    default:
      return state;
  }
}

// 3.创建store
const store = createStore(reducer);

module.exports = store;

2.3 订阅state的变化

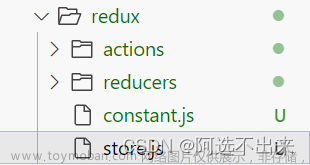
2.4 目录结构


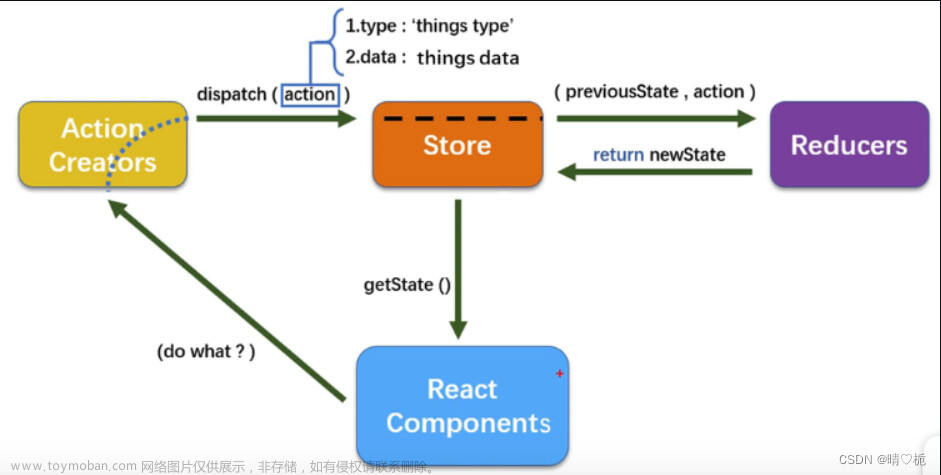
2.5 Redux的使用过程

2.6 redux的三大原则

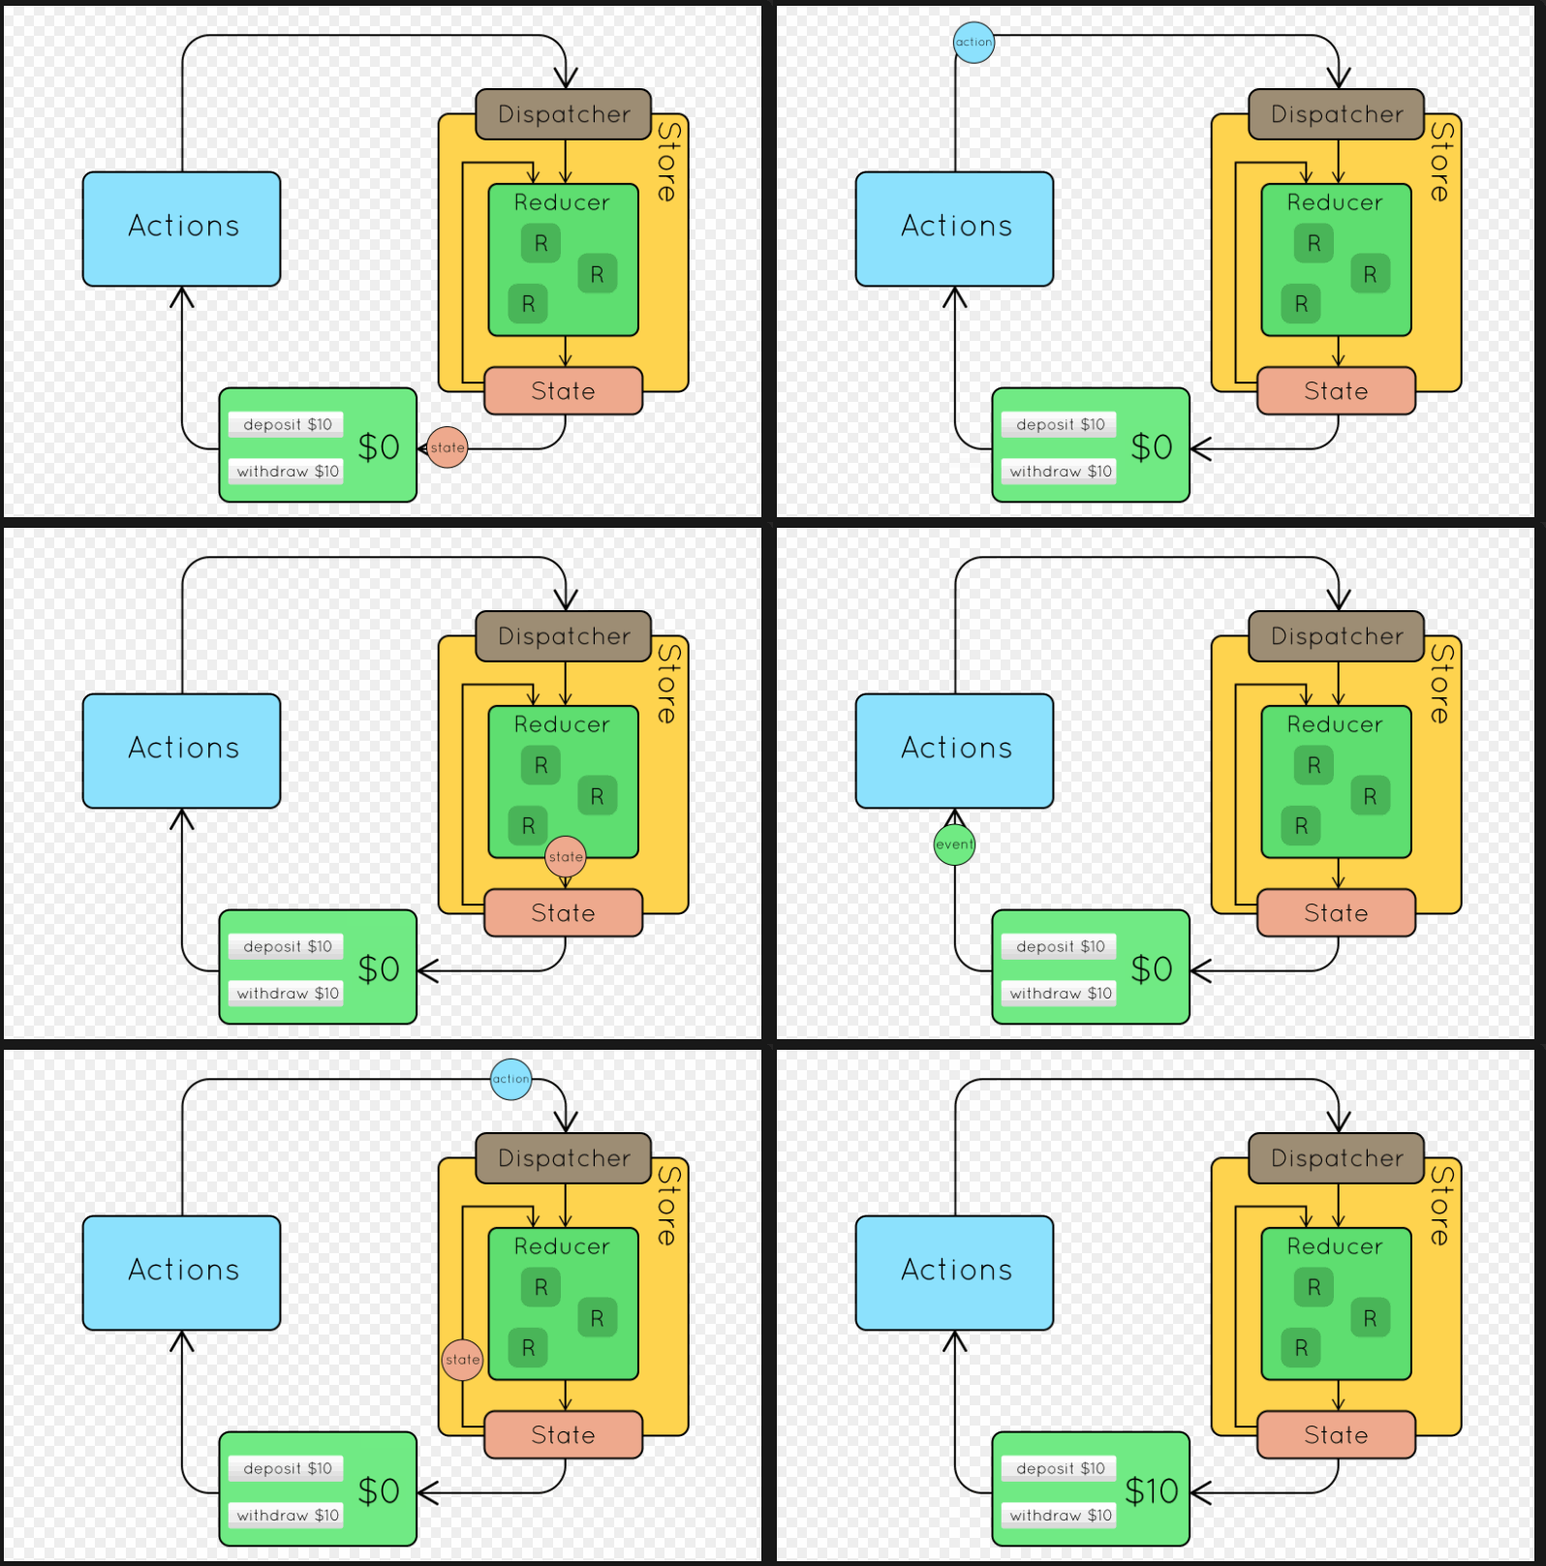
2.7 Redux官方图

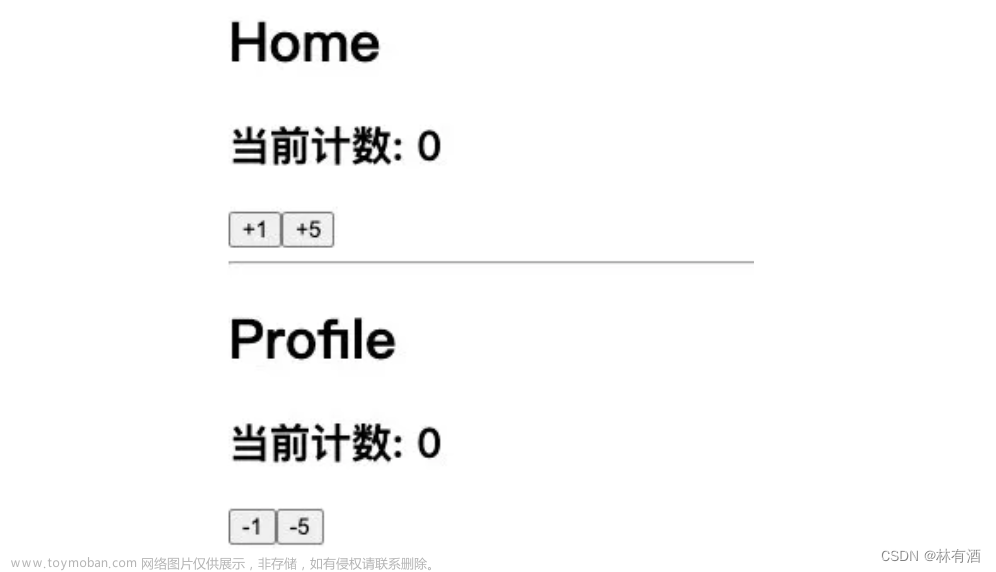
3、redux在React中的使用

4、react-redux使用
yarn add react-redux
4.1 react-redux的基本使用


import React, { PureComponent } from "react";
import { connect } from "react-redux";
// import store from "../store"
import { addNumberAction, subNumberAction } from "../store/actionCreators";

export class About extends PureComponent {
  calcNumber(num, isAdd) {
    if (isAdd) {
      console.log("加", num);
      this.props.addNumber(num);
    } else {
      console.log("减", num);
      this.props.subNumber(num);
    }
  }

  render() {
    const { counter, banners, recommends } = this.props;

    return (
      <div>
        <h2>About Page: {counter}</h2>
        <div>
          <button onClick={(e) => this.calcNumber(6, true)}>+6</button>
          <button onClick={(e) => this.calcNumber(88, true)}>+88</button>
          <button onClick={(e) => this.calcNumber(6, false)}>-6</button>
          <button onClick={(e) => this.calcNumber(88, false)}>-88</button>
        </div>
      </div>
    );
  }
}

// connect()返回值是一个高阶组件
// function mapStateToProps(state) {
//   return {
//     counter: state.counter
//   }
// }

// function fn2(dispatch) {
//   return {
//     addNumber(num) {
//       dispatch(addNumberAction(num))
//     },
//     subNumber(num) {
//       dispatch(subNumberAction(num))
//     }
//   }
// }

const mapStateToProps = (state) => ({
  counter: state.counter,
  banners: state.banners,
  recommends: state.recommends,
});

const mapDispatchToProps = (dispatch) => ({
  addNumber(num) {
    dispatch(addNumberAction(num));
  },
  subNumber(num) {
    dispatch(subNumberAction(num));
  },
});

// connect是高阶组件
export default connect(mapStateToProps, mapDispatchToProps)(About);
4.2 异步请求 redux-thunk
yarn add redux-thunk


4.3 对redux代码结构进行优化 和 redux-devtools
每个页面可能都会有自己的store为了方便维护,将store按照页面划分


import { createStore, applyMiddleware, compose, combineReducers } from "redux";
import thunk from "redux-thunk";

import counterReducer from "./counter";
import homeReducer from "./home";
import userReducer from "./user";

// 正常情况下 store.dispatch(object)
// 想要派发函数 store.dispatch(function)

// 将两个reducer合并在一起
const reducer = combineReducers({
  counter: counterReducer,
  home: homeReducer,
  user: userReducer,
});

// combineReducers实现原理(了解)
// function reducer(state = {}, action) {
//   // 返回一个对象, store的state
//   return {
//     counter: counterReducer(state.counter, action),
//     home: homeReducer(state.home, action),
//     user: userReducer(state.user, action)
//   }
// }

// redux-devtools
// trace的功能是可以追踪源码
const composeEnhancers =
  window.__REDUX_DEVTOOLS_EXTENSION_COMPOSE__({ trace: true }) || compose;

// thunk 是用来发送异步请求的增强写法
const store = createStore(reducer, composeEnhancers(applyMiddleware(thunk)));

export default store;


5、ReduxToolkit
5.1 基本使用
npm install @reduxjs/toolkit react-redux


- 需要在根组件传递store的值


import React, { PureComponent } from "react";
import { connect } from "react-redux";
import { changeNumber } from "../store/features/counter";

export class About extends PureComponent {
  changeNum(num) {
    this.props.changeNumber(num);
  }
  render() {
    const { counter } = this.props;
    return (
      <div>
        {counter}
        <button onClick={(e) => this.changeNum(5)}>+5</button>
      </div>
    );
  }
}

const mapStateToProps = (state) => ({
  counter: state.counter.counter,
});

const mapDispatchToProps = (dispatch) => ({
  changeNumber(num) {
    dispatch(changeNumber(num));
  },
});

export default connect(mapStateToProps, mapDispatchToProps)(About);
5.2 异步操作 写法1

import { createAsyncThunk } from "@reduxjs/toolkit";
import { createSlice } from "@reduxjs/toolkit";
import axios from "axios";

// toolkit已经集成了thunk所以可以直接使用
// 第一个参数是name可以根据自己的喜好取
// 可以把这个函数看成是promise 它跟promise十分相似
export const fetchHomeMultidataAction = createAsyncThunk(
  "fetch/homemultidata",

  // dispatch传递的参数是第一个 extraInfo
  async (extraInfo, { dispatch, getState }) => {
    console.log(extraInfo);
    const res = await axios.get("http://123.207.32.32:8000/home/multidata");

    // 不能直接返回res 没办法直接对其进行序列化
    return res.data;
  }
);

const homeSlice = createSlice({
  name: "home",
  initialState: {
    banner: [],
  },
  reducers: {
    changeBanner(state, { payload }) {
      state.banner = payload;
    },
  },

  // 这里是对异步操作进行操作的方法
  extraReducers: {
    [fetchHomeMultidataAction.pending](state, action) {
      console.log(action);
    },
    [fetchHomeMultidataAction.fulfilled](state, { payload, meta }) {
      // 异步操作返回的参数
      state.banner = payload.data.banner.list;
      // 在dispatch时传递的参数
      console.log(meta.arg);
    },
    [fetchHomeMultidataAction.rejected](state, action) {
      console.log("fetchHomeMultidataAction rejected");
    },
  },
});

export const { changeBanner } = homeSlice.actions;
export default homeSlice.reducer;

5.3 异步操作 写法2

import { createAsyncThunk } from "@reduxjs/toolkit";
import { createSlice } from "@reduxjs/toolkit";
import axios from "axios";

// toolkit已经集成了thunk所以可以直接使用
// 第一个参数是name可以根据自己的喜好取
// 可以把这个函数看成是promise 它跟promise十分相似
export const fetchHomeMultidataAction = createAsyncThunk(
  "fetch/homemultidata",

  // dispatch传递的参数是第一个 extraInfo
  async (extraInfo, { dispatch, getState }) => {
    console.log(extraInfo);
    const res = await axios.get("http://123.207.32.32:8000/home/multidata");

    // 不能直接返回res 没办法直接对其进行序列化
    return res.data;
  }
);

const homeSlice = createSlice({
  name: "home",
  initialState: {
    banner: [],
  },
  reducers: {
    changeBanner(state, { payload }) {
      state.banner = payload;
    },
  },

  // 这里是对异步操作进行操作的方法
  // extraReducers: {
  //   [fetchHomeMultidataAction.pending](state, action) {
  //     console.log(action);
  //   },
  //   [fetchHomeMultidataAction.fulfilled](state, { payload, meta }) {
  //     // 异步操作返回的参数
  //     state.banner = payload.data.banner.list;
  //     // 在dispatch时传递的参数
  //     console.log(meta.arg);
  //   },
  //   [fetchHomeMultidataAction.rejected](state, action) {
  //     console.log("fetchHomeMultidataAction rejected");
  //   },
  // },
  extraReducers: (builder) => {
    builder
      .addCase(fetchHomeMultidataAction.pending, (state, action) => {
        console.log("fetchHomeMultidataAction pending");
      })
      .addCase(fetchHomeMultidataAction.fulfilled, (state, { payload }) => {
        state.banners = payload.data.banner.list;
        state.recommends = payload.data.recommend.list;
      });
  },
});

export const { changeBanner } = homeSlice.actions;
export default homeSlice.reducer;
6、手写connext
// connect的参数:
// 参数一: 函数
// 参数二: 函数
// 返回值: 函数 => 高阶组件

import { PureComponent } from "react";
import { StoreContext } from "./StoreContext";
// import store from "../store"

//  实际上就是一个高阶函数里面嵌套一个高阶组件
export function connect(mapStateToProps, mapDispatchToProps, store) {
  // 高阶组件: 函数
  return function (WrapperComponent) {
    class NewComponent extends PureComponent {
      //  接收的第二个参数就是context
      constructor(props, context) {
        super(props);

        this.state = mapStateToProps(context.getState());
      }

      componentDidMount() {
        // 因为页面发生改变是connect自己内部实现的 我们自己手写的话 要手动调用
        this.unsubscribe = this.context.subscribe(() => {
          // 不能直接通过强制刷新 不然性能很低
          // this.forceUpdate()

          // 执行ToProps的方法 自己判断是否state发生了变化
          this.setState(mapStateToProps(this.context.getState()));
        });
      }

      componentWillUnmount() {
        this.unsubscribe();
      }

      render() {
        // 传递进来的两个方法进行调用 再把他们的数值传递给组件 实现了高阶组件的增强
        const stateObj = mapStateToProps(this.context.getState());
        const dispatchObj = mapDispatchToProps(this.context.dispatch);
        return (
          <WrapperComponent {...this.props} {...stateObj} {...dispatchObj} />
        );
      }
    }

    // 为了避免每次store都是需要传入进来 所以创建了一个context 在注册应用的时候就将他导入
    NewComponent.contextType = StoreContext;

    return NewComponent;
  };
}


7、合并中间件


 文章来源:https://www.toymoban.com/news/detail-827752.html
8、React中的state如何管理
 文章来源地址https://www.toymoban.com/news/detail-827752.html
到了这里,关于react【五】redux/reduxToolkit/手写connext的文章就介绍完了。如果您还想了解更多内容,请在右上角搜索TOY模板网以前的文章或继续浏览下面的相关文章,希望大家以后多多支持TOY模板网!


