一、后端fastapi
确保已安装好python3和fastapi
python -m pip install 'fastapi[all]'mail.py
from fastapi import FastAPI, File, UploadFile
from fastapi.responses import FileResponse
import os
app = FastAPI()
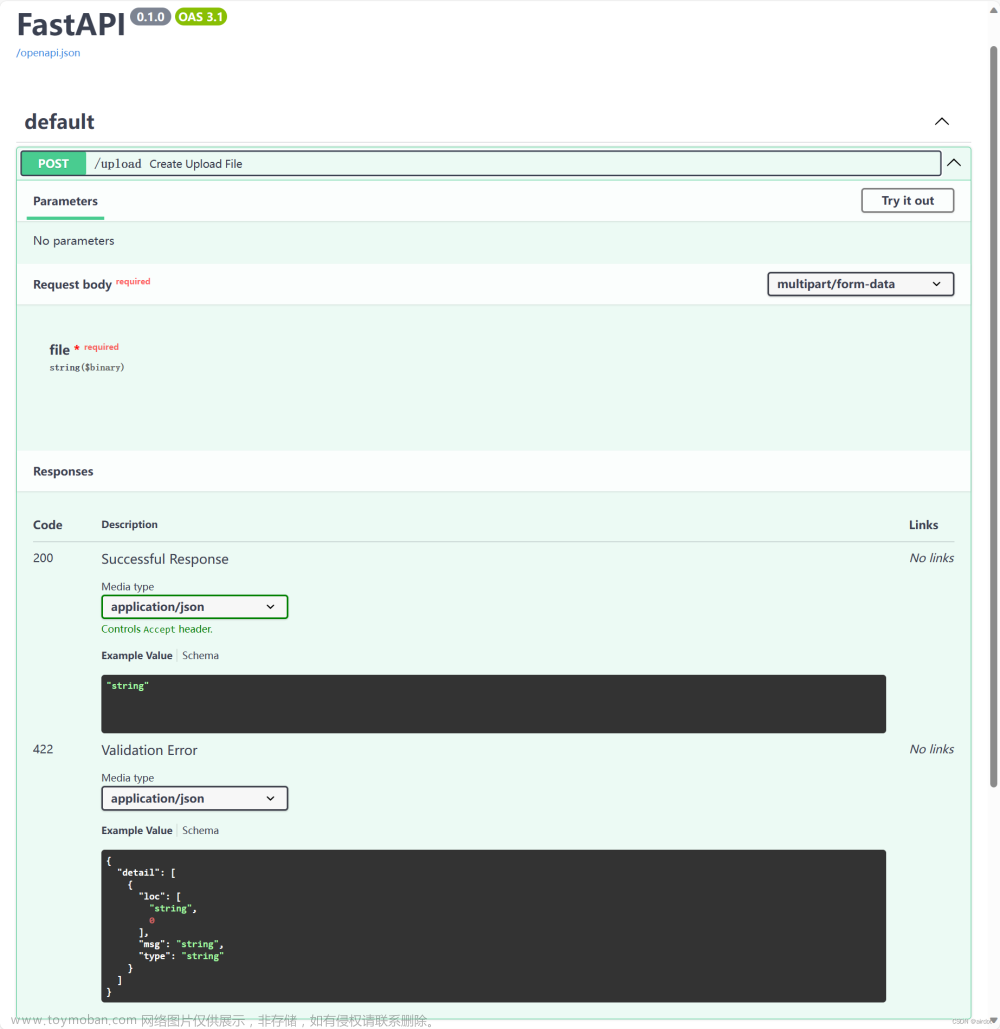
@app.post("/upload")
async def create_upload_file(file: UploadFile = File(...)):
dirs = 'uploads'
# 判断uploads目录是否存在,否则新建uploads目录
if not os.path.exists(dirs):
os.makedirs(dirs)
# 保存上传文件到uploads目录
file_location = f"{dirs}/{file.filename}"
with open(file_location, "wb") as file_object:
file_object.write(file.file.read())
return {"filename": file.filename}运行fastapi服务器
python -m uvicorn main:app --reload使用浏览器访问 http://127.0.0.1:8000/http://127.0.0.1:8000/docs
二、前端vue3
确保已安装node.js和yarn
npm install -g yarn使用vite初始化前端目录
PS C:\Users\airdot\source\repos\testweb> yarn create vite
yarn create v1.22.21
[1/4] Resolving packages...
[2/4] Fetching packages...
[3/4] Linking dependencies...
[4/4] Building fresh packages...
success Installed "create-vite@5.0.0" with binaries:
      - create-vite
      - cva
√ Project name: ... web
√ Select a framework: » Vue
√ Select a variant: » TypeScript

Scaffolding project in C:\Users\airdot\source\repos\testweb\web...

Done. Now run:

  cd web
  yarn
  yarn dev

Done in 5.55s.

PS C:\Users\airdot\source\repos\testweb>cd web
PS C:\Users\airdot\source\repos\testweb\web>yarn
安装element-plus
yarn add element-plusmain.ts中导入element-plus
import { createApp } from 'vue'
import ElementPlus from 'element-plus'
import 'element-plus/dist/index.css'
import App from './App.vue'

const app = createApp(App)

app.use(ElementPlus)
app.mount('#app')
修改vite.config.ts配置“CORS 跨域”
import { defineConfig } from 'vite'
import vue from '@vitejs/plugin-vue'
// https://vitejs.dev/config/
export default defineConfig({
plugins: [vue()],
server:{
host:"127.0.0.1",
port:7001,
open:true,
proxy:{
'/api':{
target:"http://localhost:8000/",
changeOrigin:true,
rewrite: (path) => path.replace(/^\/api/, '')
}
}
}
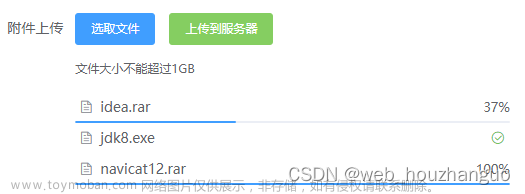
})修改App.vue
<template>
  <el-upload
    ref="upload"
    class="upload-demo"
    action="api/upload"
    :limit="1"
    :on-exceed="handleExceed"
    :auto-upload="false">
    <template #trigger>
      <el-button type="primary">select file</el-button>
    </template>
    <el-button class="ml-3" type="success" @click="submitUpload">
      upload to server
    </el-button>
    <template #tip>
      <div class="el-upload__tip text-red">
        limit 1 file, new file will cover the old file
      </div>
    </template>
  </el-upload>
</template>
<script lang="ts" setup>
import { ref } from 'vue'
import { genFileId } from 'element-plus'
import type { UploadInstance, UploadProps, UploadRawFile } from 'element-plus'

const upload = ref<UploadInstance>()

const handleExceed: UploadProps['onExceed'] = (files) => {
  upload.value!.clearFiles()
  const file = files[0] as UploadRawFile
  file.uid = genFileId()
  upload.value!.handleStart(file)
}

const submitUpload = () => {
  upload.value!.submit()
}
</script>
运行
yarn dev使用浏览器访问 http://127.0.0.1:7001/文章来源:https://www.toymoban.com/news/detail-834643.html
 文章来源地址https://www.toymoban.com/news/detail-834643.html
到了这里,关于后端“fastapi”+前端“vue3+ts+ElementPlus”上传文件到uploads目录的文章就介绍完了。如果您还想了解更多内容,请在右上角搜索TOY模板网以前的文章或继续浏览下面的相关文章,希望大家以后多多支持TOY模板网!