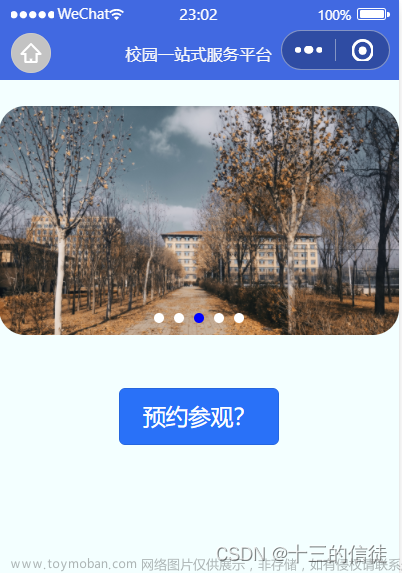
背景:点击图标,生成海报后,点击保存相册,可以保存
生成海报:插件wxa-plugin-canvas,此处使用页面异步生成组件方式,官网地址:wxa-plugin-canvas - npm
二维码:调用后端接口生成二维码
1.二维码按钮
          <!-- 二维码按钮 -->
          <view class="item" bindtap="onCreatePoster">
            <van-icon name="scan" size="20px" />
            <view class="icon-title">
              二维码
            </view>
          </view>
2.二维码海报显示图层
<!-- 二维码海报:注意布局要和其他元素独立 -->
<view bindtap="closePoster">
  <!-- 一定要设置元素的id="poster" -->
  <poster id="poster" config="{{posterConfig}}" bind:success="onPosterSuccess" bind:fail="onPosterFail"></poster>
  <view wx:if="{{posterShow}}" class="popup-mask"></view>
  <view wx:if="{{posterShow}}" class="posterImg-box">
    <image mode="widthFix" class="posterImg" src="{{posterImg}}"></image>
    <view class="btn-create" data-pic="{{basicInfo.pic}}" catchtap="savePosterPic">保存到相册</view>
  </view>
</view>
3.点击按钮后异步生成海报
需要调用获取图片信息接口wx.getImageInfo(),获取到图片的宽高以做整体宽高配置
  /**
     * 异步生成海报
     */
    async onCreatePoster() {
      console.log("异步生成海报");
      // 获取二维码信息(实质是后端生成的一张二维码图片)
      const qrRes = await createQRCode({id: this.data.basicInfo.id});
      console.log(qrRes,"qrRes");

      // 获取图片信息,图片获取成功后调用方法生成海报
      const pic = this.data.basicInfo.pic;
      wx.getImageInfo({
        src: pic,
        success:(res)=> {
          console.log(res.width)
          // console.log(res.height)
          const height = 490 * res.height / res.width
            // setData配置数据,数据配置完成后,生成海报
            this.createPosterDone(height, qrRes.data);
        }
      })
    },
  createPosterDone(picHeight,qrCode){
    const _this = this
    const _baseHeight = 74 + (picHeight + 120)
    this.setData({
      posterConfig: {
         // 海报总宽高
        width: 750,
        height: picHeight + 660,
        backgroundColor: '#fff',
        debug: false,
        // 图片所在容器起始位置,宽高等配置
        blocks: [{
          x: 76,
          y: 74,
          width: 604,
          height: picHeight + 120,
          borderWidth: 2,
          borderColor: '#c2aa85',
          borderRadius: 8
        }],
        // 图片配置
        images: [{
            x: 133,
            y: 133,
            url: _this.data.goodsInfoList.basicInfo.pic, // 商品图片
            width: 490,
            height: picHeight
          },
          {
            x: 76,
            y: _baseHeight + 199,
            url: qrCode, // 二维码
            width: 222,
            height: 222
          }
        ],
        // 文字信息:商品标题、价格、二维码处文字
        texts: [{
            x: 375,
            y: _baseHeight + 80,
            width: 650,
            lineNum: 2,
            text: _this.data.goodsInfoList.basicInfo.name,
            textAlign: 'center',
            fontSize: 40,
            color: '#333'
          },
          {
            x: 375,
            y: _baseHeight + 180,
            text: '¥' + _this.data.goodsInfoList.basicInfo.minPrice,
            textAlign: 'center',
            fontSize: 50,
            color: '#e64340'
          },
          {
            x: 352,
            y: _baseHeight + 320,
            text: '长按识别小程序码',
            fontSize: 28,
            color: '#999'
          }
        ],
      }
    }, () => {
      Poster.create(this.data.posterConfig, this);
    });
  },
4.海报生成成功后将海报数据(海报临时路径)和是否显示海报层,存放到data中
data:{
        // 二维码海报配置
    posterConfig:{},
    // poster显示标识
    posterShow: false,
    // 保存到相册的图片
    posterImg: ''
},

onPosterSuccess(e){
    console.log("二维码生成成功");
    this.setData({
      posterImg: e.detail,
      posterShow: true
    })
  },
5.点击海报任何位置,除了保存到相册按钮,隐藏海报层
closePoster方法绑定到最外层
保存按钮使用catchbind阻止冒泡,即可防止点击保存时也会关掉海报层文章来源:https://www.toymoban.com/news/detail-842182.html
<!-- 二维码海报:注意布局要和其他元素独立 -->
<view bindtap="closePoster">
  <!-- 一定要设置元素的id="poster" -->
  <poster id="poster" config="{{posterConfig}}" bind:success="onPosterSuccess" bind:fail="onPosterFail"></poster>
  <view wx:if="{{posterShow}}" class="popup-mask"></view>
  <view wx:if="{{posterShow}}" class="posterImg-box">
    <image mode="widthFix" class="posterImg" src="{{posterImg}}"></image>
    <view class="btn-create" data-pic="{{basicInfo.pic}}" catchtap="savePosterPic">保存到相册</view>
  </view>
</view>
// 关闭海报
closePoster(){
this.setData({
posterShow: false
})
},6.点击保存到相册按钮,调用wx.saveImageToPhotosAlbum()方法保存图片到本地
注意wx.saveImageToPhotosAlbum()方法的参数filePath不能是绝对路径或者网络图片,必须是临时图片。所以在生成海报成功后需要将图片保存到data的posterImg中,保存时用这个就可以了文章来源地址https://www.toymoban.com/news/detail-842182.html
// 保存海报到相册
  savePosterPic(e){
    console.log("保存到相册",e);
    console.log(this.data.posterImg);//http://tmp/xlHB02MBJ50H9887bf9a40b5b5dc24b904e4132afcb0.png
    wx.saveImageToPhotosAlbum({
      // 不能直接使用this.data.basicInfo.pic的图片
      // "saveImageToPhotosAlbum:fail https://file.winwebedu.com/mall/collage-01.jpg not absolute path"
      filePath: this.data.posterImg,
      success(res) {
        wx.showToast({
          title: '保存成功',
        })
      },
      fail(err){
        console.log(err);
        wx.showToast({
          title: '保存失败',
        })
      },
      // 无论成功与否关闭海报
      complete(){
        this.setData({
          posterShow: false
        });
      }
    })
  },
7.补充,如果要直接生成二维码不使用异步
<poster class="wxcode-box" id="poster" config="{{posterConfig}}" bind:success="onPosterSuccess" bind:fail="onPosterFail">
            </poster>
  onPosterSuccess(e){
    // console.log("二维码生成成功");
    const { detail } = e;
    console.log(detail);
    wx.previewImage({
        current: detail,
        urls: [detail]
    })
  },

  posterConfig配置:
  jdConfig: {
        width: 750,
        height: 1334,
        backgroundColor: '#fff',
        debug: false,
        pixelRatio: 1,
        blocks: [
            {
                width: 690,
                height: 808,
                x: 30,
                y: 183,
                borderWidth: 2,
                borderColor: '#f0c2a0',
                borderRadius: 20,
            },
            {
                width: 634,
                height: 74,
                x: 59,
                y: 770,
                backgroundColor: '#fff',
                opacity: 0.5,
                zIndex: 100,
            },
        ],
        texts: [
            {
                x: 113,
                y: 61,
                baseLine: 'middle',
                text: '伟仔',
                fontSize: 32,
                color: '#8d8d8d',
            },
            {
                x: 30,
                y: 113,
                baseLine: 'top',
                text: '发现一个好物,推荐给你呀',
                fontSize: 38,
                color: '#080808',
            },
            {
                x: 92,
                y: 810,
                fontSize: 38,
                baseLine: 'middle',
                text: '标题标题标题标题标题标题标题标题标题',
                width: 570,
                lineNum: 1,
                color: '#8d8d8d',
                zIndex: 200,
            },
            {
                x: 59,
                y: 895,
                baseLine: 'middle',
                text: [
                    {
                        text: '2人拼',
                        fontSize: 28,
                        color: '#ec1731',
                    },
                    {
                        text: '¥99',
                        fontSize: 36,
                        color: '#ec1731',
                        marginLeft: 30,
                    }
                ]
            },
            {
                x: 522,
                y: 895,
                baseLine: 'middle',
                text: '已拼2件',
                fontSize: 28,
                color: '#929292',
            },
            {
                x: 59,
                y: 945,
                baseLine: 'middle',
                text: [
                    {
                        text: '商家发货&售后',
                        fontSize: 28,
                        color: '#929292',
                    },
                    {
                        text: '七天退货',
                        fontSize: 28,
                        color: '#929292',
                        marginLeft: 50,
                    },
                    {
                        text: '运费险',
                        fontSize: 28,
                        color: '#929292',
                        marginLeft: 50,
                    },
                ]
            },
            {
                x: 360,
                y: 1065,
                baseLine: 'top',
                text: '长按识别小程序码',
                fontSize: 38,
                color: '#080808',
            },
            {
                x: 360,
                y: 1123,
                baseLine: 'top',
                text: '超值好货一起拼',
                fontSize: 28,
                color: '#929292',
            },
        ],
        images: [
            {
                width: 62,
                height: 62,
                x: 30,
                y: 30,
                borderRadius: 62,
                url: 'https://img.yzcdn.cn/vant/cat.jpeg',
            },
            {
                width: 634,
                height: 634,
                x: 59,
                y: 210,
                url: 'https://b.yzcdn.cn/vant/icon-demo-1126.png',
            },
            {
                width: 220,
                height: 220,
                x: 92,
                y: 1020,
                url: 'https://img.yzcdn.cn/vant/cat.jpeg',
            },
            {
                width: 750,
                height: 90,
                x: 0,
                y: 1244,
                url: 'https://b.yzcdn.cn/vant/icon-demo-1126.png',
            }
        ]

    },
到了这里,关于微信小程序生成二维码海报并分享的文章就介绍完了。如果您还想了解更多内容,请在右上角搜索TOY模板网以前的文章或继续浏览下面的相关文章,希望大家以后多多支持TOY模板网!


