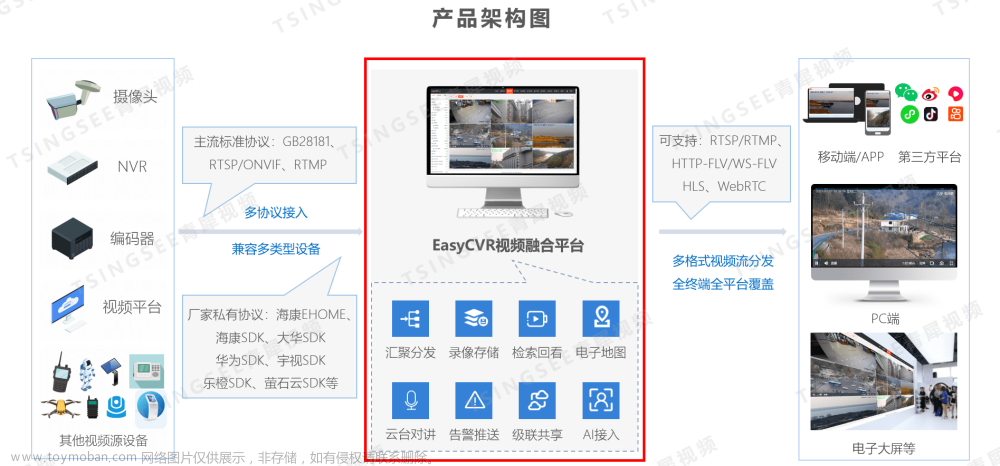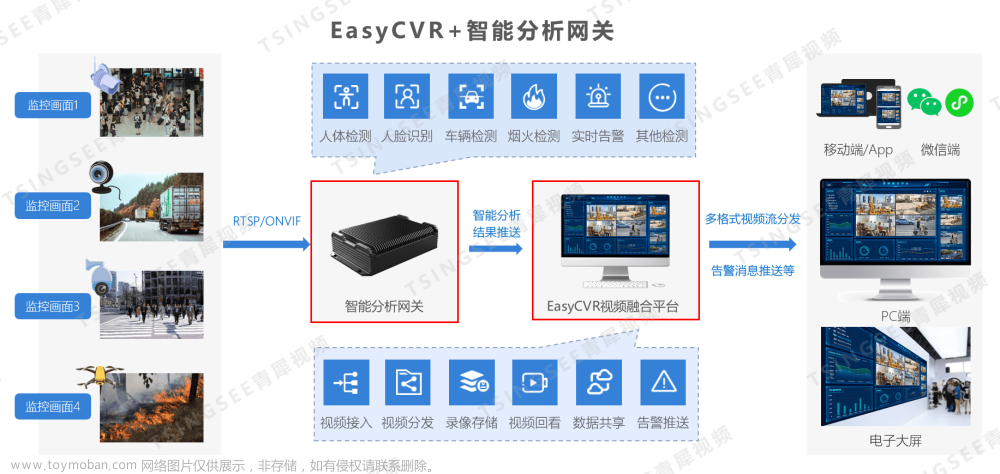
实现以上功能的播放,只需要传入一个流的地址即可,当然组件也只有简单的实时播放功能
下面直接上组件
里面的flvjs通过npm i flv.js直接下载
<template>
    <div class="player" style="position: relative;">
        <p style="position: absolute !important;top: 10px;left: 20px;">通道{{ title }}</p>
        <img src="@/assets/img/videostop.png" alt="" class="centeredVideo" v-show="url == ''">
        <video  v-show="url" ref="videoElement" class="centeredVideo" controls autoplay
            muted></video>
    </div>
</template>

<script>

import flvjs from "flv.js";  //引入flv
export default {
    props: {
        title: {
            type: String,
            default: ''
        },
        url: {
            type: String,
            default: ''
        },
    },
    data() {
        return {
            flvPlayer: null,
            // src: ["http://172.21.1.111/live?port=1935&app=myapp&stream=streamname"],
        };
    },
    mounted() {
        this.flv_load(this.url);
    },
    methods: {
        flv_load(url) {
            if (flvjs.isSupported()) {
                let videoElement = this.$refs.videoElement;
                this.flvPlayer = flvjs.createPlayer(
                    {
                        type: "flv", //媒体类型
                        url: url || '', //flv格式媒体URL
                        isLive: true, //数据源是否为直播流
                        hasAudio: false, //数据源是否包含有音频
                        hasVideo: true, //数据源是否包含有视频
                        enableStashBuffer: false, //是否启用缓存区
                    },
                    {
                        enableWorker: false, // 是否启用分离的线程进行转换
                        enableStashBuffer: false, //关闭IO隐藏缓冲区
                        autoCleanupSourceBuffer: true, //自动清除缓存
                    }
                );
                this.flvPlayer.attachMediaElement(videoElement); //将播放实例注册到节点
                this.flvPlayer.load(); //加载数据流
                this.flvPlayer.play(); //播放数据流
            }
        },
        //销毁断流方法
        destoryVideo() {
            if (this.flvPlayer) {
                this.flvPlayer.pause();
                this.flvPlayer.unload();
                this.flvPlayer.detachMediaElement();
                this.flvPlayer.destroy();
                this.flvPlayer = null;
            }
        },

    },
    //3.在销毁的声明周期中  必须要销毁掉播放器的容器!!!!血的教训
    beforeUnmount() {
        if (this.flvPlayer) {
            this.flvPlayer.pause();
            this.flvPlayer.unload();
            this.flvPlayer.detachMediaElement();
            this.flvPlayer.destroy();
            this.flvPlayer = null;
        }
    },
    watch: {
        url(val) {
            this.destoryVideo()
            this.flv_load(val, '变化后');
        }
    }


}
</script>

<style scoped lang="less">
.player {
    background-color: black;
    height: 100%;
    width: 100%;
    border: 1px solid white;
    color: white;
    text-align: center;
    display: flex;
    align-items: center;
}

/* .video-container {
  display: inline-block;
  margin-right: 10px;
  width: 32%;
  height: 45%;
} */
.centeredVideo {
    width: 100%;
    height: 98%;
}
</style>
这里我封装了两个组件 ,一个是单个的播放,另外一个是窗口切换的
这个是窗口切换的组件
<template>
    <div class="cell">
        <div class="cell-tool">
            <div class="bk-button-group">
                <el-radio-group v-model="cellCount" size="">
                    <el-radio-button @click="handleCount(1)" label="1" value="1" />
                    <el-radio-button @click="handleCount(4)" label="4" value="4" />
                    <el-radio-button @click="handleCount(6)" label="6" value="6" />
                </el-radio-group>
                <!-- <el-button @click="handleCount(1)" size="small">1</el-button>
                <el-button @click="handleCount(4)" size="small">4</el-button>
                <el-button @click="handleCount(6)" size="small">6</el-button> -->
                <!-- <el-button @click="handleCount(9)" size="small">9</el-button>
                <el-button @click="handleCount(16)" size="small">16</el-button> -->
            </div>
        </div>
        <div class="cell-player">
            <div :class="cellClass(item.i)" v-for="item, index in cellData" :key="index">
                <hw-cell-player :title="item.i + ''" v-if="cellCount != 6" :url="item.url"> </hw-cell-player>
                <hw-cell-player :title="item.i + ''" v-if="cellCount == 6 && item.i != 2 && item.i != 3"
                    :url="item.url"></hw-cell-player>
                <template v-if="cellCount == 6 && item.i == 2">
                    <div class="cell-player-6-2-cell">
                        <hw-cell-player :title="item.i + ''" :url="item.url"></hw-cell-player>
                        <hw-cell-player :title="(item.i + 1) + ''" :url="cellData[index + 1].url"></hw-cell-player>
                    </div>
                </template>
            </div>
        </div>
    </div>
</template>

<script setup lang="ts">
import HwCellPlayer from './HwCellPlayer.vue'
import { ref, reactive, computed } from 'vue'
const cellCount = ref<Number>(4)
const cellData2=ref<any>([])
const cellData = ref<any>([
    {
        url: '',
        i: 1
    },
    // {
    //     url: '',
    //     i: 2
    // },
    // {
    //     url: '',
    //     i: 3
    // },
    // {
    //     url: '',
    //     i: 4
    // }
])
const cellClass = computed(() => {
    return function (index) {
        switch (cellCount.value) {
            case 1:
                return ['cell-player-1']
            case 4:
                return ['cell-player-4']
            case 6:
                if (index == 1)
                    return ['cell-player-6-1']
                if (index == 2)
                    return ['cell-player-6-2']
                if (index == 3)
                    return ['cell-player-6-none']
                return ['cell-player-6']
            case 9:
                return ['cell-player-9']
            case 16:
                return ['cell-player-16']
            default:
                break;
        }
    }
})
const handleCount = (num: any) => {
    cellData.value = []
    cellCount.value = num
    if(cellData2.value.length>=6){
        cellData.value=cellData2.value.slice(0,num)
        return
    }
    for (let i = 1; i <= num; i++) {
        cellData.value.push({
            url: '',
            i: i
        })
    }
    console.log(cellData.value, 'this.cellData');
}
defineExpose({
    handleCount,
    cellCount,
    cellData,
    cellData2,
})
</script>

<style scoped>
.cell-tool {
    height: 40px;
    line-height: 30px;
    padding: 0 7px;
}

.cell-player {
    width: 100%;
    height: calc(100% - 40px);
    flex: 1;
    display: flex;
    flex-wrap: wrap;
    justify-content: space-between;
}

.cell-player-4 {
    width: 50%;
    height: 50% !important;
    box-sizing: border-box;
}

.cell-player-1 {
    width: 100%;
    height: 100%;
    box-sizing: border-box;
}

.cell-player-6-1 {
    width: 66.66%;
    height: 66.66% !important;
    box-sizing: border-box;
}

.cell-player-6-2 {
    width: 33.33%;
    height: 66.66% !important;
    box-sizing: border-box;
    display: flex;
    flex-direction: column;
}

.cell-player-6-none {
    display: none;
}

.cell-player-6-2-cell {
    width: 100%;
    height: 50% !important;
    box-sizing: border-box;
}

.cell-player-6 {
    width: 33.33%;
    height: 33.33% !important;
    box-sizing: border-box;
}

.cell-player-9 {
    width: 33.33%;
    height: 33.33% !important;
    box-sizing: border-box;
}

.cell-player-16 {
    width: 25%;
    height: 25% !important;
    box-sizing: border-box;
}

.cell {
    display: flex;
    flex-direction: column;
    height: 100%;
    width: 100%;
}
</style>
下面是实际使用方法
因为上面的组件暴露了,所以直接改组件里面的数据、直接播放了6路,下面两个arr是因为来回切换的数据需要
player.value.cellCount = 6;
player.value.cellData = arr;文章来源:https://www.toymoban.com/news/detail-844927.html
player.value.cellData2 = arr;文章来源地址https://www.toymoban.com/news/detail-844927.html
到了这里,关于vue3中播放flv流视频,以及组件封装超全的文章就介绍完了。如果您还想了解更多内容,请在右上角搜索TOY模板网以前的文章或继续浏览下面的相关文章,希望大家以后多多支持TOY模板网!


