Ubuntu 22.04 LTS AIGC GPU环境搭建(NVIDIA+CUDA+cuDNN)
一、服务器信息
1.1 硬件配置
| 服务器名称 | CPU(Intel® Xeon® W-2245) | 显卡(NVIDIA Quadro RTX 6000 24G) | 内存(G) | 硬盘(G) |
|---|---|---|---|---|
| AIGC-Precision | 8核16线程 | 24G × 2 | 64 | 2000 |
1.2 软件配置
- Nvidia显卡驱动:https://www.nvidia.cn/download/driverResults.aspx/223630/cn/
- Nvidia显卡驱动与CUDA驱动版本对应参考表:https://docs.nvidia.com/cuda/cuda-toolkit-release-notes/index.html
- CUDA Toolkit 12.4 Downloads:https://developer.nvidia.com/cuda-downloads?target_os=Linux&target_arch=x86_64&Distribution=Ubuntu&target_version=22.04&target_type=runfile_local
- cuDNN Downloads:https://developer.nvidia.com/cudnn-downloads?target_os=Linux&target_arch=x86_64&Distribution=Ubuntu&target_version=22.04&target_type=deb_local
- NVIDIA Container Toolkit:https://docs.nvidia.com/datacenter/cloud-native/container-toolkit/latest/install-guide.html
| 操作系统 | 显卡驱动 | CUDA驱动 | cuDNN驱动 | MiniConda | Docker |
|---|---|---|---|---|---|
| 22.04.4 LTS (Jammy Jellyfish) | https://cn.download.nvidia.com/XFree86/Linux-x86_64/550.67/NVIDIA-Linux-x86_64-550.67.run | https://developer.download.nvidia.com/compute/cuda/12.4.0/local_installers/cuda_12.4.0_550.54.14_linux.run | https://developer.download.nvidia.com/compute/cudnn/9.0.0/local_installers/cudnn-local-repo-ubuntu2204-9.0.0_1.0-1_amd64.deb | https://repo.anaconda.com/miniconda/Miniconda3-latest-Linux-x86_64.sh | 26.0.0 |
二、系统初始化
2.1 安装常用工具
# 更新系统、内核等
sudo apt-get -y update && sudo apt-get -y upgrade && apt list --upgradable && sudo apt autoremove
# 备份系统默认apt源
sudo cp sources.list sources.list.bak$(date '+%Y%m%d%H%M%S')
# 安装常用工具
sudo apt -y install lsb-release openssh-server vim jq net-tools \
  git expect dkms autoconf nmon ansible screen
# 查看系统版本号信息
uname -a && cat /proc/version && lsb_release -a && cat /etc/*release

# 临时关闭swap
swapoff -a
# 备份源文件
cp -p /etc/fstab /etc/fstab.bak$(date '+%Y%m%d%H%M%S')
# 永久关闭swap
sed -ri '/^[^#]*swap/s@^@#@' /etc/fstab
2.1.1 基本配置时间+用户+IP设置(推荐)
vi /etc/profile
#vi /etc/bashrc
#vi /etc/profile.d/env.sh
# 远程登录超时
TMOUT=300 # 60*5=300秒

# 基本配置时间+用户+ip设置
HISTFILESIZE=2000 # 默认保存命令条数
HISTSIZE=2000	   # 使用命令时输出的记录数
IP=`who -u am i 2>/dev/null| awk '{print $NF}'|sed -e 's/[()]//g'` #获取客户端IP
if [ -z $IP ] # IP长度为零时则赋值本机主机名
then
IP=`hostname`
fi
HISTTIMEFORMAT="%F %T $IP:`whoami` " # 设置history输出格式
export HISTTIMEFORMAT
source /etc/profile
history -r && sudo echo > ~/.bash_history
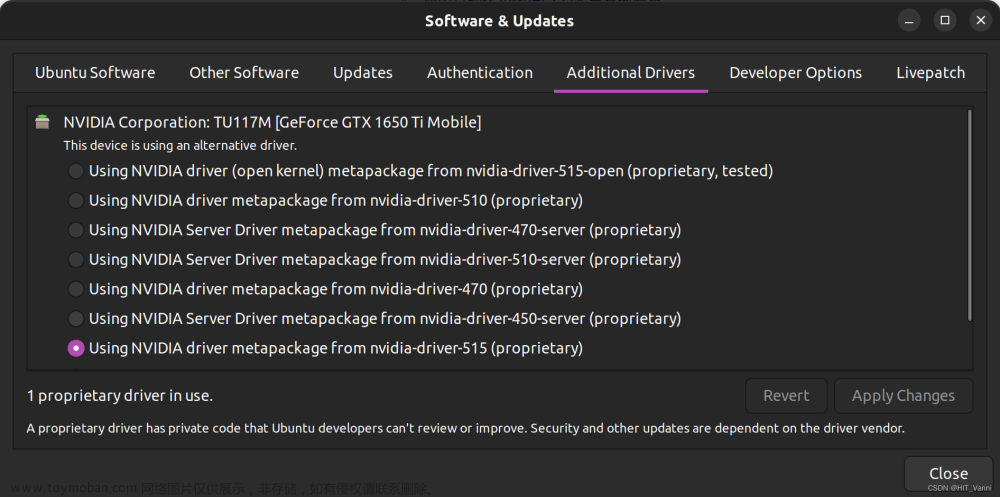
2.2 安装NVIDIA驱动
- 禁用自带的nouveau nvidia驱动
sudo vi /etc/modprobe.d/blacklist.conf
- blacklist.conf文件末尾添加以下内容
blacklist nouveau
options nouveau modeset=0
sudo update-initramfs -u && sudo reboot
- 查看是否将自带的驱动屏蔽
lsmod | grep nouveau
- 安装gcc-12、g+±12
我使用
gcc --version | grep -e 'gcc'观察到我的GCC版本是11,而推荐的版本是12。
apt install -y gcc-12 g++-12
# 现有的2个版本添加到 update-alternatives 组
sudo update-alternatives --install /usr/bin/gcc gcc /usr/bin/gcc-11 11 --slave /usr/bin/g++ g++ /usr/bin/g++-11 --slave /usr/bin/gcov gcov /usr/bin/gcov-11
sudo update-alternatives --install /usr/bin/gcc gcc /usr/bin/gcc-12 12 --slave /usr/bin/g++ g++ /usr/bin/g++-12 --slave /usr/bin/gcov gcov /usr/bin/gcov-12
#
sudo update-alternatives --config gcc
- 手动选择指定的gcc版本
There are 2 choices for the alternative gcc (providing /usr/bin/gcc).

  Selection    Path             Priority   Status
------------------------------------------------------------
* 0            /usr/bin/gcc-12   12        auto mode
  1            /usr/bin/gcc-11   11        manual mode
  2            /usr/bin/gcc-12   12        manual mode

Press <enter> to keep the current choice[*], or type selection number: 0
规避显卡安装过程中的报错:ERROR: Unable to find the development tool
ccin your path; please make sure that you have the package ‘gcc’ installed. If gcc is installed on your system, then please check thatccis in your PATH.
sudo ln -s /usr/bin/gcc /usr/bin/cc
# 如果您之后希望删除 cc 符号链接,可以使用以下命令:
sudo rm /usr/bin/cc
- 安装NVIDIA显卡驱动
- -no-x-check: 安装时关闭X服务;
- -no-nouveau-check: 安装时禁用nouveau;
- -no-opengl-files: 只安装驱动文件,不安装OpenGL文件。
chmod a+x *.run
sudo sh NVIDIA-Linux-x86_64-550.67.run -no-x-check -no-nouveau-check -no-opengl-files
- 验证Nvidia显卡驱动是否安装成功
nvidia-smi
Tue Mar 26 13:25:25 2024
+-----------------------------------------------------------------------------------------+
| NVIDIA-SMI 550.67                 Driver Version: 550.67         CUDA Version: 12.4     |
|-----------------------------------------+------------------------+----------------------+
| GPU  Name                 Persistence-M | Bus-Id          Disp.A | Volatile Uncorr. ECC |
| Fan  Temp   Perf          Pwr:Usage/Cap |           Memory-Usage | GPU-Util  Compute M. |
|                                         |                        |               MIG M. |
|=========================================+========================+======================|
|   0  Quadro RTX 6000                Off |   00000000:17:00.0 Off |                  Off |
| 33%   27C    P8             11W /  260W |       6MiB /  24576MiB |      0%      Default |
|                                         |                        |                  N/A |
+-----------------------------------------+------------------------+----------------------+
|   1  Quadro RTX 6000                Off |   00000000:65:00.0  On |                  Off |
| 34%   28C    P8             17W /  260W |      53MiB /  24576MiB |      0%      Default |
|                                         |                        |                  N/A |
+-----------------------------------------+------------------------+----------------------+

+-----------------------------------------------------------------------------------------+
| Processes:                                                                              |
|  GPU   GI   CI        PID   Type   Process name                              GPU Memory |
|        ID   ID                                                               Usage      |
|=========================================================================================|
|    0   N/A  N/A      2574      G   /usr/lib/xorg/Xorg                              4MiB |
|    1   N/A  N/A      2574      G   /usr/lib/xorg/Xorg                             51MiB |
+-----------------------------------------------------------------------------------------+
2.3 安装CUDA Toolkit
- 安装CUDA Toolkit
chmod a+x *.run
sudo sh cuda_11.3.1_465.19.01_linux.run
- 由于已安装过NVIDIA驱动,此处取消 Driver 安装勾选选项,反之可使NVIDIA与CUDA Toolkit一同安装
x CUDA Installer se Agreement                                                  x
x - [ ] Driver                                                                 x
x      [ ] 550.54.14                                                           x
x + [X] CUDA Toolkit 12.4                                                      x
x   [X] CUDA Demo Suite 12.4                                                   x
x   [X] CUDA Documentation 12.4                                                x
x - [ ] Kernel Objects                                                         x
x      [ ] nvidia-fs                                                           x
x   Options                                                                    x
x   Install                                                                    x
x                                                                              x
x   reface                                                                     x
x
x                                                                              x
x Up/Down: Move | Left/Right: Expand | 'Enter': Select | 'A': Advanced options x
- 安装成功后需配置CUDA环境变量
===========
= Summary =
===========

Driver:   Not Selected
Toolkit:  Installed in /usr/local/cuda-12.4/

Please make sure that
 -   PATH includes /usr/local/cuda-12.4/bin
 -   LD_LIBRARY_PATH includes /usr/local/cuda-12.4/lib64, or, add /usr/local/cuda-12.4/lib64 to /etc/ld.so.conf and run ldconfig as root

To uninstall the CUDA Toolkit, run cuda-uninstaller in /usr/local/cuda-12.4/bin
***WARNING: Incomplete installation! This installation did not install the CUDA Driver. A driver of version at least 550.00 is required for CUDA 12.4 functionality to work.
To install the driver using this installer, run the following command, replacing <CudaInstaller> with the name of this run file:
    sudo <CudaInstaller>.run --silent --driver

Logfile is /var/log/cuda-installer.log
- 编辑/etc/profile文件末尾添加以下内容
sudo vim /etc/profile
# CUDA
export PATH=/usr/local/cuda-12.4/bin${PATH:+:${PATH}}
export LD_LIBRARY_PATH=/usr/local/cuda-12.4/lib64${LD_LIBRARY_PATH:+:${LD_LIBRARY_PATH}}
export CUDA_HOME=/usr/local/cuda-12.4
sudo ldconfig && source /etc/profile
- 验证CUDA是否安装成功
nvcc -V
nvcc: NVIDIA (R) Cuda compiler driver
Copyright (c) 2005-2024 NVIDIA Corporation
Built on Tue_Feb_27_16:19:38_PST_2024
Cuda compilation tools, release 12.4, V12.4.99
Build cuda_12.4.r12.4/compiler.33961263_0
2.4 安装cuDNN
# wget https://developer.download.nvidia.com/compute/cudnn/9.0.0/local_installers/cudnn-local-repo-ubuntu2204-9.0.0_1.0-1_amd64.deb
sudo dpkg -i cudnn-local-repo-ubuntu2204-9.0.0_1.0-1_amd64.deb
sudo cp /var/cudnn-local-repo-ubuntu2204-9.0.0/cudnn-*-keyring.gpg /usr/share/keyrings/
sudo apt-get update
sudo apt-get -y install cudnn
- 默认安装最新版,也可指定版本安装cuDNN
sudo apt-get -y install cudnn-cuda-12
- 验证cuDNN是否安装并正常运行,请编译
mnistCUDNN位于/usr/src/cudnn_samples_v9Debian 文件目录中的示例
sudo apt-get -y install libcudnn9-samples libfreeimage-dev
cd $HOME/cudnn_samples_v9/mnistCUDNN
whereis mnistCUDNN
mnistCUDNN: /usr/src/cudnn_samples_v9/mnistCUDNN
cd /usr/src/cudnn_samples_v9/mnistCUDNN
sudo make clean && sudo make
./mnistCUDNN
Resulting weights from Softmax:
0.0000000 0.0000000 0.0000000 1.0000000 0.0000000 0.0000714 0.0000000 0.0000000 0.0000000 0.0000000
Loading image data/five_28x28.pgm
Performing forward propagation ...
Resulting weights from Softmax:
0.0000000 0.0000008 0.0000000 0.0000002 0.0000000 1.0000000 0.0000154 0.0000000 0.0000012 0.0000006

Result of classification: 1 3 5

Test passed!
2.5 安装Miniconda
sudo -s
mkdir -p /opt/miniconda3
wget https://repo.anaconda.com/miniconda/Miniconda3-latest-Linux-x86_64.sh -O /opt/miniconda3/miniconda.sh
bash /opt/miniconda3/miniconda.sh -b -u -p /opt/miniconda3
rm -rf /opt/miniconda3/miniconda.sh
# 初始化Miniconda
/opt/miniconda3/bin/conda init bash
/opt/miniconda3/bin/conda init zsh
- 验证miniconda是否安装成功
sudo conda --version
conda config --set auto_activate_base false # 设置非自动启动base环境
- 设置conda清华源
vim ~/.condarc
channels:
  - defaults
show_channel_urls: true
default_channels:
  - https://mirrors.tuna.tsinghua.edu.cn/anaconda/pkgs/main
  - https://mirrors.tuna.tsinghua.edu.cn/anaconda/pkgs/r
  - https://mirrors.tuna.tsinghua.edu.cn/anaconda/pkgs/msys2
custom_channels:
  conda-forge: https://mirrors.tuna.tsinghua.edu.cn/anaconda/cloud
  msys2: https://mirrors.tuna.tsinghua.edu.cn/anaconda/cloud
  bioconda: https://mirrors.tuna.tsinghua.edu.cn/anaconda/cloud
  menpo: https://mirrors.tuna.tsinghua.edu.cn/anaconda/cloud
  pytorch: https://mirrors.tuna.tsinghua.edu.cn/anaconda/cloud
  pytorch-lts: https://mirrors.tuna.tsinghua.edu.cn/anaconda/cloud
  simpleitk: https://mirrors.tuna.tsinghua.edu.cn/anaconda/cloud
  deepmodeling: https://mirrors.tuna.tsinghua.edu.cn/anaconda/cloud/
conda clean -i
- 安装conda命令补全
conda install -c conda-forge conda-bash-completion
exec bash
2.6 安装NGINX
# 安装必备工具
sudo apt install curl gnupg2 ca-certificates lsb-release ubuntu-keyring
# 导入官方 nginx 签名密钥,以便 apt 可以验证包的真实性。
curl https://nginx.org/keys/nginx_signing.key | gpg --dearmor \
| sudo tee /usr/share/keyrings/nginx-archive-keyring.gpg >/dev/null
# 验证下载的文件是否包含正确的密钥
gpg --dry-run --quiet --no-keyring --import --import-options import-show /usr/share/keyrings/nginx-archive-keyring.gpg
- 输出应包含完整指纹,
573BFD6B3D8FBC641079A6ABABF5BD827BD9BF62如下所示(如果指纹不同,请删除该文件):
pub   rsa2048 2011-08-19 [SC] [expires: 2024-06-14]
  573BFD6B3D8FBC641079A6ABABF5BD827BD9BF62
uid                      nginx signing key <signing-key@nginx.com>
- 设置
apt稳定 nginx 软件包的存储库,并安装nginx
echo "deb [arch=amd64 signed-by=/usr/share/keyrings/nginx-archive-keyring.gpg] \
http://nginx.org/packages/ubuntu `lsb_release -cs` nginx" \
    | sudo tee /etc/apt/sources.list.d/nginx.list

echo "# deb [arch=amd64 signed-by=/usr/share/keyrings/nginx-archive-keyring.gpg] \
http://nginx.org/packages/mainline/ubuntu `lsb_release -cs` nginx" \
    | sudo tee /etc/apt/sources.list.d/nginx.list

echo -e "Package: *\nPin: origin nginx.org\nPin: release o=nginx\nPin-Priority: 900\n" \
    | sudo tee /etc/apt/preferences.d/99nginx

sudo apt update && sudo apt install nginx -y && nginx -v
2.7 安装Terraform
sudo apt-get update && sudo apt-get install -y gnupg software-properties-common

wget -O- https://apt.releases.hashicorp.com/gpg | gpg --dearmor | \
    sudo tee /usr/share/keyrings/hashicorp-archive-keyring.gpg > /dev/null

gpg --no-default-keyring \
    --keyring /usr/share/keyrings/hashicorp-archive-keyring.gpg \
    --fingerprint
gpg --no-default-keyring \
    --keyring /usr/share/keyrings/hashicorp-archive-keyring.gpg \
    --fingerprint

echo "deb [signed-by=/usr/share/keyrings/hashicorp-archive-keyring.gpg] \
https://apt.releases.hashicorp.com $(lsb_release -cs) main" | \
sudo tee /etc/apt/sources.list.d/hashicorp.list
sudo apt update && sudo apt-get install terraform && terraform -v
- 安装Terraform命令补全
terraform -install-autocomplete
2.8 安装Docker与NVIDIA容器工具包(nvidia-container-toolkit)
- 卸载所有相互冲突的软件包
for pkg in docker.io docker-doc docker-compose docker-compose-v2 podman-docker containerd runc; do sudo apt-get remove $pkg; done
sudo apt-get remove docker docker-engine docker.io containerd runc
- 添加Docker官方源、密钥等
# Add Docker's official GPG key:
sudo apt-get update
sudo apt-get install ca-certificates curl
sudo install -m 0755 -d /etc/apt/keyrings
sudo curl -fsSL https://download.docker.com/linux/ubuntu/gpg -o /etc/apt/keyrings/docker.asc
sudo chmod a+r /etc/apt/keyrings/docker.asc

# Add Docker repository to Apt sources:
echo \
  "deb [arch=$(dpkg --print-architecture) signed-by=/etc/apt/keyrings/docker.asc] https://download.docker.com/linux/ubuntu \
  $(. /etc/os-release && echo "$VERSION_CODENAME") stable" | \
  sudo tee /etc/apt/sources.list.d/docker.list > /dev/null
# Add NVIDIA容器工具包 生产库Apt源
curl -fsSL https://nvidia.github.io/libnvidia-container/gpgkey | sudo gpg --dearmor -o /usr/share/keyrings/nvidia-container-toolkit-keyring.gpg \
  && curl -s -L https://nvidia.github.io/libnvidia-container/stable/deb/nvidia-container-toolkit.list | \
    sed 's#deb https://#deb [signed-by=/usr/share/keyrings/nvidia-container-toolkit-keyring.gpg] https://#g' | \
    sudo tee /etc/apt/sources.list.d/nvidia-container-toolkit.list

sudo apt-get update
- 安装Docker、NVIDIA容器工具包及命令补全工具
cat /proc/driver/nvidia/version

sudo apt-get install docker-ce docker-ce-cli containerd.io docker-buildx-plugin docker-compose-plugin nvidia-container-toolkit nvidia-docker2 bash-completion
三、Docker设置
3.1 推荐配置
- 镜像代理加速、并发限制、日志限制、NVIDIA容器工具包、开启2375远程访问等
sudo cat > /etc/docker/daemon.json <<EOF
{
    "iptables": true,
    "bip": "172.17.0.1/24",
    "data-root": "/var/lib/docker",
    "storage-driver": "overlay2",
    "insecure-registries":["http://Harbor_HostName:8082"],
    "exec-opts": ["native.cgroupdriver=systemd"],
    "registry-mirrors": [
        "https://docker.nju.edu.cn",
        "https://hub-mirror.c.163.com",
        "https://registry.cn-hangzhou.aliyuncs.com"
    ],
    "max-concurrent-downloads": 10,
    "max-concurrent-uploads": 20,
    "live-restore": true,
    "log-driver": "json-file",
    "log-opts": {
        "max-size": "500m",
        "max-file": "3"
    },
    "default-runtime": "nvidia",
    "runtimes": {
        "nvidia": {
            "path": "nvidia-container-runtime",
            "runtimeArgs": []
        }
    }
}
EOF
- 开启2375远程访问(可选)
sudo vim /usr/lib/systemd/system/docker.service
#ExecStart=/usr/bin/dockerd -H fd:// --containerd=/run/containerd/containerd.sock
ExecStart=/usr/bin/dockerd -H fd:// --containerd=/run/containerd/containerd.sock -H tcp://0.0.0.0:2375
3.2 可选配置
- 添加自己为docker、sudo组用户
sudo usermod -aG docker $USER && newgrp docker
- 添加其他用户到docker组
# 切换user用户
su - user
# 查看所有用户和组
sudo cat /etc/passwd && cat /etc/group
# 添加用户admin添加文件夹所有权限
sudo chown -R user /opt/docker-app
- 通过运行
hello-world映像来验证是否正确安装了Docker Engine
sudo docker run --rm hello-world
3.3 配置生效 & 开机自启
# 设置docker开机自启且启动docker(C-N)
sudo systemctl daemon-reload && sudo systemctl restart docker && sudo systemctl enable docker
3.4 命令自动补全
安装 bash-completion
sudo yum install -y bash-completion

安装完成之后重启系统或者重新登录 shell。如果安装成功。键入 docker p 后,再 Tab 键,系统显示如下:
pause   plugin  port    ps      pull    push
Docker 命令自动补全
sudo curl -L https://raw.githubusercontent.com/docker/cli/25.0.0/contrib/completion/bash/docker -o /etc/bash_completion.d/docker

source /etc/bash_completion.d/docker
Docker Composer 命令自动补全
sudo curl -L https://raw.githubusercontent.com/docker/compose/1.29.2/contrib/completion/bash/docker-compose -o /etc/bash_completion.d/docker-compose
source /etc/bash_completion.d/docker-compose
Containerd Ctr 命令自动补全
curl -L https://raw.githubusercontent.com/containerd/containerd/main/contrib/autocomplete/ctr -o /etc/bash_completion.d/ctr # ctr自动补全
K8s-Master节点 命令自动补全
source /usr/share/bash-completion/bash_completion
source <(kubectl completion bash)
echo "source <(kubectl completion bash)" >> ~/.bashrc
Helm 命令自动补全
helm completion bash > .helmrc && echo "source .helmrc" >> .bashrc
参考文档
NGINX安装文档:https://docs.nginx.com/nginx/admin-guide/installing-nginx/installing-nginx-open-source/#installing-prebuilt-ubuntu-packages
Terraform安装文档:https://developer.hashicorp.com/terraform/tutorials/aws-get-started/install-cli
Docker安装文档:https://docs.docker.com/engine/install/ubuntu/#install-using-the-repository
https://blog.csdn.net/qq_49323609/article/details/130310522
https://blog.csdn.net/qq_28356373/article/details/136746520
https://docs.nvidia.com/deeplearning/cudnn/installation/linux.html文章来源:https://www.toymoban.com/news/detail-845483.html
https://mirrors.tuna.tsinghua.edu.cn/help/anaconda/文章来源地址https://www.toymoban.com/news/detail-845483.html
到了这里,关于Ubuntu 22.04 LTS AIGC GPU环境搭建(NVIDIA 550.67+CUDA 12.4+cuDNN)的文章就介绍完了。如果您还想了解更多内容,请在右上角搜索TOY模板网以前的文章或继续浏览下面的相关文章,希望大家以后多多支持TOY模板网!