有两种安装 MariaDB 服务器的方法。您可以安装 CentOS 7 存储库中可用的默认版本,也可以通过手动添加 MariaDB 存储库来安装最新版本。
如果安装过MariaDB或MySQL,使用以下命令彻底删除它们:
yum remove mariadb*
yum remove mysql*
方法一: 使用 Yum安装 MariaDB
CentOS 存储库中 MariaDB 的默认版本是 MariaDB 5.5。虽然不是最新版本,但它非常稳定,强烈推荐。
要在 CentOS 7 上安装 MariaDB 5.5,请登录到您的服务器实例并使用 yum 包管理器。
1.1 安装 MariaDB
[root@ip-172-31-2-24 ~]# yum -y install mariadb
[root@ip-172-31-2-24 ~]# yum -y install mariadb-server
1.2 启动并配置MariaDB
[root@ip-172-31-2-24 ~]# systemctl start mariadb
[root@ip-172-31-2-24 ~]# systemctl status mariadb
[root@ip-172-31-2-24 ~]# systemctl enable mariadb
Created symlink from /etc/systemd/system/multi-user.target.wants/mariadb.service to /usr/lib/systemd/system/mariadb.service.

# 登录到MariaDB并设置root用户密码
[root@ip-172-31-2-24 ~]# /usr/bin/mysql_secure_installation
NOTE: RUNNING ALL PARTS OF THIS SCRIPT IS RECOMMENDED FOR ALL MariaDB
      SERVERS IN PRODUCTION USE!  PLEASE READ EACH STEP CAREFULLY!
In order to log into MariaDB to secure it, we'll need the current
password for the root user.  If you've just installed MariaDB, and
you haven't set the root password yet, the password will be blank,
so you should just press enter here.

Enter current password for root (enter for none):
OK, successfully used password, moving on...

Setting the root password ensures that nobody can log into the MariaDB
root user without the proper authorisation.

Set root password? [Y/n] Y
New password:
Re-enter new password:
Password updated successfully!
Reloading privilege tables..
 ... Success!

By default, a MariaDB installation has an anonymous user, allowing anyone
to log into MariaDB without having to have a user account created for
them.  This is intended only for testing, and to make the installation
go a bit smoother.  You should remove them before moving into a
production environment.

Remove anonymous users? [Y/n] Y
 ... Success!

Normally, root should only be allowed to connect from 'localhost'.  This
ensures that someone cannot guess at the root password from the network.

Disallow root login remotely? [Y/n] n
 ... skipping.

By default, MariaDB comes with a database named 'test' that anyone can
access.  This is also intended only for testing, and should be removed
before moving into a production environment.

Remove test database and access to it? [Y/n] Y
 - Dropping test database...
 ... Success!
 - Removing privileges on test database...
 ... Success!

Reloading the privilege tables will ensure that all changes made so far
will take effect immediately.

Reload privilege tables now? [Y/n] Y
 ... Success!

Cleaning up...

All done!  If you've completed all of the above steps, your MariaDB
installation should now be secure.

Thanks for using MariaDB!
1.3 检查 mariadb 状态
mysql -V
1.4 检查 MariaDB 版本
rpm -qi | grep mariadb
1.5 命令行查看 MariaDB 版本
mysql -u root -p
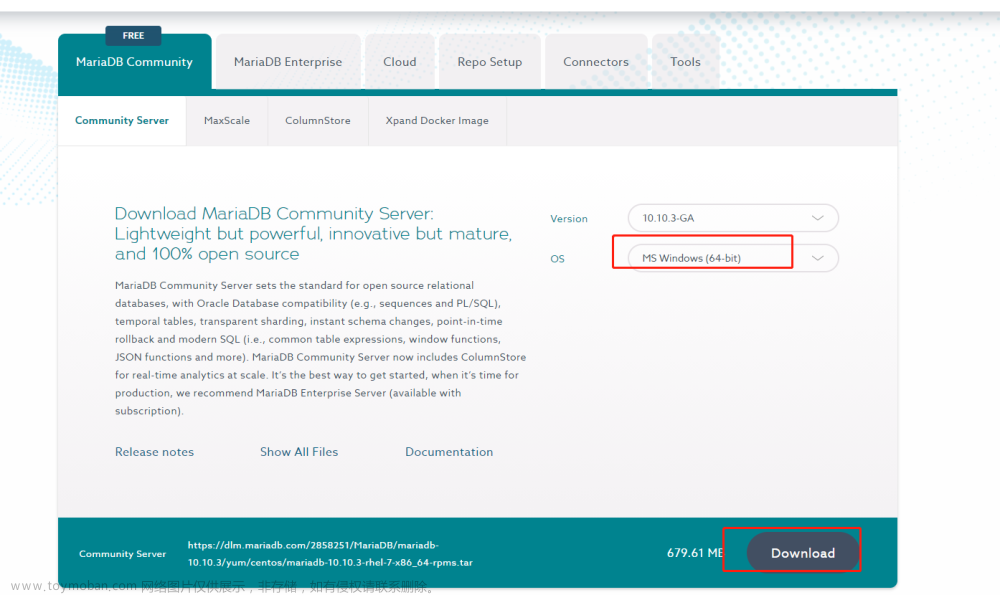
方法二: 从 Repo 安装 MariaDB
在编写本指南时,MariaDB 的最新版本是 MariaDB 10.4。
2.1 创建存储库文件
vi /etc/yum.repos.d/mariadb.repo粘贴以下内容:
[mariadb]
name = MariaDB baseurl = http://yum.mariadb.org/10.4/centos7-amd64 gpgkey=https://yum.mariadb.org/RPM-GPG-KEY-MariaDB gpgcheck=1
2.2 更新 yum 缓存索引
yum makecache fast2.3 安装 MariaDB 10.4:
yum install mariadb-server mariadb-client -y2.4 启动 MariaDB 数据库
systemctl start mariadb
systemctl enable mariadb
systemctl status mariadb

# 查看MariaDB 版本
rpm -qi MariaDB-server
2.5 命令行访问 MariaDB 数据库
要以 root 用户身份访问 MariaDB 数据库,请调用以下命令:
mysql -u root -p系统将提示您输入 sudo 密码,然后是 root 密码。

2.6 创建新用户并分配权限
# 只允许本地访问
MariaDB [(none)] >  create user 'linoxide'@'localhost' IDENTIFIED BY  'Password';
MariaDB [(none)] > GRANT ALL PRIVILEGES ON *.* TO 'linoxide'@'localhost';

# 允许远程访问
MariaDB [(none)] >  create user 'linoxide'@'%' IDENTIFIED BY  'Password';
MariaDB [(none)] > GRANT ALL PRIVILEGES ON *.* TO 'linoxide'@'%';

# 使用以下命令注销:
MariaDB [(none)] > quit;

# 使用新用户登录
mysql -u linoxide  -p
设置MariaDB字符集为utf-8
3.1 编辑/etc/my.cnf文件
在 [mysqld] 标签下添加
init_connect='SET collation_connection = utf8_unicode_ci'
init_connect='SET NAMES utf8'
character-set-server=utf8
collation-server=utf8_unicode_ci
skip-character-set-client-handshake
3.2 编辑/etc/my.cnf.d/client.cnf文件
在 [client] 标签下添加
default-character-set=utf83.3 编辑/etc/my.cnf.d/mysql-clients.cnf文件
在 [mysql] 标签下添加
default-character-set=utf83.4 重启服务
[root@mini ~]# systemctl restart mariadb3.5 进入mariadb查看字符集
未配置字符集前
 MariaDB [(none)]> show variables like "%character%";show variables like "%collation%";
+--------------------------+----------------------------+
| Variable_name            | Value                      |
+--------------------------+----------------------------+
| character_set_client     | utf8                       |
| character_set_connection | utf8                       |
| character_set_database   | latin1                     |
| character_set_filesystem | binary                     |
| character_set_results    | utf8                       |
| character_set_server     | latin1                     |
| character_set_system     | utf8                       |
| character_sets_dir       | /usr/share/mysql/charsets/ |
+--------------------------+----------------------------+
8 rows in set (0.01 sec)

+----------------------+-------------------+
| Variable_name        | Value             |
+----------------------+-------------------+
| collation_connection | utf8_general_ci   |
| collation_database   | latin1_swedish_ci |
| collation_server     | latin1_swedish_ci |
+----------------------+-------------------+
3 rows in set (0.00 sec)

MariaDB [(none)]>
配置字符集后
MariaDB [(none)]> show variables like "%character%";show variables like "%collation%";
+--------------------------+----------------------------+
| Variable_name            | Value                      |
+--------------------------+----------------------------+
| character_set_client     | utf8                       |
| character_set_connection | utf8                       |
| character_set_database   | utf8                       |
| character_set_filesystem | binary                     |
| character_set_results    | utf8                       |
| character_set_server     | utf8                       |
| character_set_system     | utf8                       |
| character_sets_dir       | /usr/share/mysql/charsets/ |
+--------------------------+----------------------------+
8 rows in set (0.00 sec)

+----------------------+-----------------+
| Variable_name        | Value           |
+----------------------+-----------------+
| collation_connection | utf8_unicode_ci |
| collation_database   | utf8_unicode_ci |
| collation_server     | utf8_unicode_ci |
+----------------------+-----------------+
3 rows in set (0.00 sec)

MariaDB [(none)]>
远程链接MariaDB数据库
mariadb默认是拒绝 root 远程登录的。这里用的是 navicat 软件连接数据库。
4.1 查看mysql数据库中user表
[root@mini ~]# mysql -u root -p  # 先通过本地链接进入数据库
MariaDB [(none)]> use mysql;
MariaDB [mysql]> select host, user from user;
+-----------+------+
| host      | user |
+-----------+------+
| 127.0.0.1 | root |
| ::1       | root |
| mini      | root |
+-----------+------+
3 rows in set (0.00 sec)
4.2 将与主机名相等的字段改为"%", 我的主机名为mini
MariaDB [mysql]> update user set host='%' where host='mini';
Query OK, 1 row affected (0.00 sec)
Rows matched: 1  Changed: 1  Warnings: 0

MariaDB [mysql]> select host, user from user;
+-----------+------+
| host      | user |
+-----------+------+
| %         | root |
| 127.0.0.1 | root |
| localhost | root |
+-----------+------+
3 rows in set (0.00 sec)
4.3 刷新权限表,或重启mariadb服务,一下二选一即可
MariaDB [mysql]> flush privileges;
Query OK, 0 rows affected (0.00 sec)
# or
[root@mini ~]# systemctl restart mariadb注意:刷新权限表是在数据库中,重启服务是在外部命令行中文章来源:https://www.toymoban.com/news/detail-847436.html
4.5 重新远程链接mariadb
 文章来源地址https://www.toymoban.com/news/detail-847436.html
五、从 CentOS 7 中删除 MariaDB
# 1. 停止 MariaDB 服务。
systemctl stop mariadb.service

# 2. 删除 MariaDB:
yum remove -y mariadb-server mariadb-client

# 3. 删除所有数据文件
$ sudo rm -rf /var/lib/mysql  /etc/my.cnf
到了这里,关于CentOS 7 部署 MariaDB 的 2 种方法的文章就介绍完了。如果您还想了解更多内容,请在右上角搜索TOY模板网以前的文章或继续浏览下面的相关文章,希望大家以后多多支持TOY模板网!