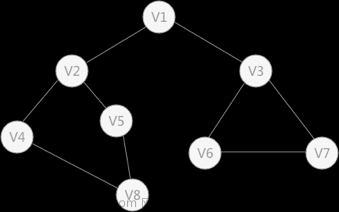
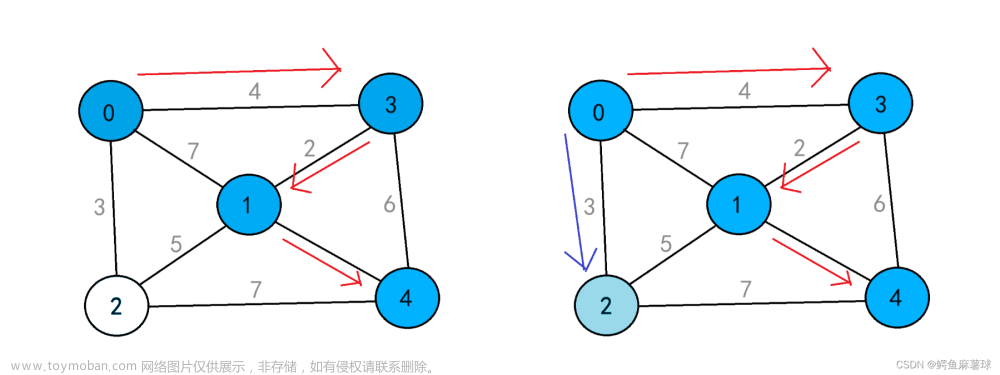
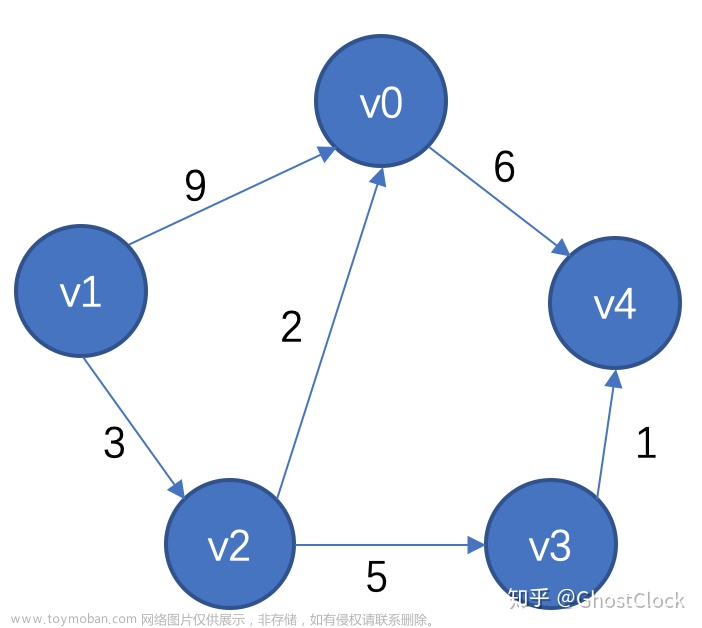
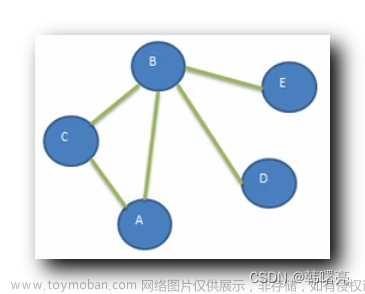
以图文的形式对深度搜索和广度搜索的理论进行讲解时,可能会对一些概念有些模糊,且不太清楚怎么把该理论用程序的方式进行复现并解决这一搜索问题(这说的就是本人)。所以后面我看完了一份实现这两种搜索方法的代码,在这做一个笔记,希望对大家有所帮助。
深度搜索和广度搜索的区别
两者本质的区别就是一个找下一个节点时是做的堆栈(先进后出),一个是做队列(先进先出)。我们用for循环和一个列表来简单说明理解一下。这里可能说的不好,如果给大家说模糊了可以不用看
li = []
for i in range(5):
    li.append(i)
print(li) # ==>结果[0,1,2,3,4]
1.1 深度优先搜索的堆栈
上面的for循环程序中,列表里面的0是第一个进去的,4是最后一个进去的,所以我们在选择下一个点时就会选择4。选择过程也是取列表的最后一位,并将其从列表中删除
state = li[-1] # 选择下一步的位置状态(当作是坐标和行动方向)
li = li[:-1] # 选中后的状态会进入程序运算,所以这从列表中删除选择后的点
print(li) # ==> [0,1,2,3]
1.2 广度优先搜索的队列
我们的队列,简单的说就是排队,谁先进入列表,那么在下一次选择动作节点时就优先被选中。
state = li[0] # 取列表的第一个节点状态(同坐标和行动方向)
li = li[-1] # 选取后进入程序运算,并从列表中删除该状态点
print(li) # ==> [1,2,3,4]
探索集
在程序搜索过程中保存我们已经探索过的所有节点坐标,在程序中会一直对这个集合进行判断,保证不会在子节点和父节点之间来回探索,创建形式如下代码。
explore = set() # 创建探索集合深度优先搜索
2.1 数据形式及处理
本文所采用的数据形式为txt文本,文本中内容如下:
 *****

 ** **
 **B**
 *  **
 * ***
A  ***
数据由A、B、*号和空格组成,其中*号表示不可通行的墙,A是我们的起始点,B是我们的目标点,空格表示可通行的点。
用代码实现数据处理并转换为坐标形式,如下所示:
class Maze():

    def __init__(self, filename):

        # Read file and set height and width of maze
        """
        初始化操作,找到文件中的起点a和终点b是否存在
        存在进行行列的遍历,找到A,B在文本中的坐标点
        :param filename:我们传入的txt文本,文本内容如上所示

        """
        with open(filename) as f:
            contents = f.read()

        # Validate start and goal 判断是否存在起始点和目标点位,不存在退出程序
        if contents.count("A") != 1:
            raise Exception("maze must have exactly one start point")
        if contents.count("B") != 1:
            raise Exception("maze must have exactly one goal")

        # Determine height and width of maze 找到文本的长宽,做循环起到记录坐标点的作用
        contents = contents.splitlines()
        self.height = len(contents)
        self.width = max(len(line) for line in contents)

        # Keep track of walls
        self.walls = []
        # 这里循环找到所有坐标,及A、B、*号和空格所在的坐标点并保存
        for i in range(self.height):
            row = []
            for j in range(self.width):
                try:
                    if contents[i][j] == "A":
                        self.start = (i, j)
                        row.append(False)
                    elif contents[i][j] == "B":
                        self.goal = (i, j)
                        row.append(False)
                    elif contents[i][j] == " ":
                        row.append(False)
                    else:
                        row.append(True)
                except IndexError:
                    row.append(False)
            self.walls.append(row)

        self.solution = None
代码解释(有编程经验的看上面代码即可 ):我们向Maze类里面传入我们的txt文本,打开并读取其中的内容。对内容进行判断(是否存在起始点和目标点)。获取内容的高度和宽度,本文所传入的高宽为 7*5 (最上面那个很多*号的就是)。循环高度和宽度,找到A点和B点的坐标,将空格和A、B点在row列表中保存为False,*号保存为True,最后将每一行的row列表保存到self.wall的列表当中。在后续找点时判断self.wall[i][j]及第 i 行第 j 列的布尔值是否为True,是则代表无法通行。
2.2节点保存、路径搜索及路径回溯
我们可以通过PIL库中的Image, ImageDraw,将以上处理结果转换为图片的形式,红色代表起始点,绿色代表目标点,白色为可以通过的节点。我们在后续过程都以下图为例。
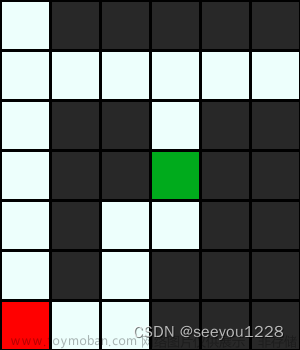
2.2.1 节点保存
我们使用class类的方式保存当前状态坐标、行动的方向和父节点(父节点也是这个类,也存着坐标、行动和父节点),代码如下:
class Node():
    def __init__(self, state, parent, action):
        self.state = state
        self.parent = parent
        self.action = action
我们每在后面while循环实例化该类时,都会在内存中有记录。可以看python类的基础知识
2.2.2 路径搜索
    def neighbors(self, state):
        """
        在调用这个函数的时候会传入当前状态的坐标点。也就是我们在程序中
        自己定义下一步优先走的方向,在candidates列表里面就是上下左右的
        顺序进行移动 以点(0,0)为例,得到的candidates列表就是
        [
        "up",(-1,0),
        "down",(1,0),
        "left",(0,-1),
        "right",(0,1)
        ]
        得到行动列表后开始进行循环判断,判断是否超出长和宽,以及self.wall[r][c]是否为True,
        如果都不满足就代表可以行动,添加到result列表
        """
        row, col = state
        candidates = [
            ("up", (row - 1, col)),
            ("down", (row + 1, col)),
            ("left", (row, col - 1)),
            ("right", (row, col + 1))
        ]

        result = []
        # 保存可以走的方向, 判断是否在边界以及是否有墙 self.wall列表中的是bool
        for action, (r, c) in candidates:
            if 0 <= r < self.height and 0 <= c < self.width and not self.walls[r][c]:
                result.append((action, (r, c)))
        return result


    def solve(self):
        """Finds a solution to maze, if one exists."""

        # Keep track of number of states explored
        self.num_explored = 0

        # Initialize frontier to just the starting position
        # 初始化起始点的节点,并将其保存到StackFrontier()类里面的frontier列表当中(保存的是一个对象)

        start = Node(state=self.start, parent=None, action=None)
        frontier = StackFrontier()
        frontier.add(start)

        # Initialize an empty explored set 初始化探索集
        self.explored = set()

        # Keep looping until solution found 循环查找路径
        while True:
            # If nothing left in frontier, then no path
            if frontier.empty():
                raise Exception("no solution")

            # Choose a node from the frontier

            # 获取并子节点(坐标和行动方向,以及父节点)并从边界列表中删除该节点(具体看StackFrontier类的remove函数),其过程与最开始的堆栈列表过程相同
            node = frontier.remove()
            self.num_explored += 1

            # If node is the goal, then we have a solution
            if node.state == self.goal:
                actions = []
                cells = []
                # while循环对路径进行回溯(过程在文中进行简绍)
                while node.parent is not None:
                    actions.append(node.action)
                    cells.append(node.state)
                    node = node.parent
                print(cells)
                actions.reverse()
                cells.reverse()
                self.solution = (actions, cells)
                return

            # Mark node as explored
            self.explored.add(node.state)

            # Add neighbors to frontier 返回的执行列表是 先上 后下
            for action, state in self.neighbors(node.state):
                if not frontier.contains_state(state) and state not in self.explored:
                    # state 和 action保存的是子节点的行动和状态,而parent保存了父节点的所有状态,比如从起始点到第二个点,parent保存的就是起始状态的所有状态
                    child = Node(state=state, parent=node, action=action)

                    frontier.add(child)
class StackFrontier():
    def  __init__(self):
        self.frontier = []
    def add(self, node):
        self.frontier.append(node)

    def contains_state(self, state):
        return any(node.state == state for node in self.frontier)

    def empty(self):
        return len(self.frontier) == 0

    def  remove(self):
        # 堆栈,先进后出 深度搜索
        if self.empty():
            raise Exception("empty frontier")
        else:
            # 取列表中最后一个对象,并将边界列表的最后一个删除,返回结果为对象(对象中有当前节点、运动方向和他的父节点)
            node = self.frontier[-1]
            self.frontier = self.frontier[:-1]
            return node
上述代码是存在于Maze类当中,函数neighbors是查找当前坐标点上下左右4个方向的坐标,并判断是否可以通过,如果可以就保存到result列表当中,并返回result列表。
solve函数是判断是否到达目标点的函数, 可以看程序中的注释进行了解。我们运行整体程序后得到一下结果的路径图,我们看图讲解一下过程。

本图为深度优化搜索得到的结果,如果了解了上面对程序的解释,那么我们看后面的内容应该会比较容易。
同理红色代表我们的起始点A,绿色代表我们的目标点B,蓝色是我们深度优化搜索算法得到的路径,白色为为探索的路径。 我们来讲一下程序在这图片中的路径搜索过程。
以起始点为例A(6,0),经过初始化节点的Node类保存起始点的坐标(起始点无父节点和行动方向),将A点传入以下程序中寻找可移动的方向和节点
    def neighbors(self, state):
        """
        在调用这个函数的时候会传入当前状态的坐标点。也就是我们在程序中
        自己定义下一步优先走的方向,在candidates列表里面就是上下左右的
        顺序进行移动 以点(0,0)为例,得到的candidates列表就是
        [
        "up",(-1,0),
        "down",(1,0),
        "left",(0,-1),
        "right",(0,1)
        ]
        得到行动列表后开始进行循环判断,判断是否超出长和宽,以及self.wall[r][c]是否为True,
        如果都不满足就代表可以行动,添加到result列表
        """
        row, col = state
        candidates = [
            ("up", (row - 1, col)),
            ("down", (row + 1, col)),
            ("left", (row, col - 1)),
            ("right", (row, col + 1))
        ]

        result = []
        # 保存可以走的方向, 判断是否在边界以及是否有墙 self.wall列表中的是bool
        for action, (r, c) in candidates:
            if 0 <= r < self.height and 0 <= c < self.width and not self.walls[r][c]:
                result.append((action, (r, c)))
        return result
得到列表结果为: [ ("up",(5,0)),( "down",(7,0)),("left",(6,-1)), ("right",(6,1)) ],
将得到的列表再经过for循环判断是否超出原文本的长宽,以及是否为墙,如果满足其中一项就表示该节点无法通过,比如节点 (“down”,(7,0))超出了我们整体的高度及超出了二维矩阵的索引(高度是从0开始到6结尾,整体高为7)这个节点就不会被保存进result列表中。
因此从A点开始可以通过的节点为 result = [("up",(5,0)),("right",(6,1))]。得到的结果返回到for循环中,如下程序:
             for action, state in self.neighbors(node.state):
                if not frontier.contains_state(state) and state not in self.explored:
                    # state 和 action保存的是子节点的行动和状态,而parent保存了父节点的所有状态,比如从起始点到第二个点,parent保存的就是起始状态的所有状态
                    child = Node(state=state, parent=node, action=action)

frontier.add(child)在本段程序中会将两个子节点保存到Node类中,并将child这个对象保存到边界列表中(边界列表在StackFrontier类中)。深度优先搜索会在下一次的while循环中去找StackFrontier类中边界列表中最后一个对象,并赋予变量node,然后重置边界列表(就是删除取出来的最后一位对象)。然后开始重复上方可行动节点的搜索,找到便保存到边界列表,没有就会在边界列表中已有的对象去查找可移动节点。
2.2.3 回溯
我们已经知道每找到一个节点在重新中都会对其做一次对象保存(保存在Node类里),其中保存的内容为该节点的坐标和父节点运动的该节点的方向,以及父节点的对象。我们看下方程序,就是在while循环判断是否存在父节点,存在的情况下找到当前节点的坐标,并将该节点的父节点重新赋值给到node变量,直到回溯到我们的起始点节点。
回溯程序
       # 判罚是否到达我们的目标点
       if node.state == self.goal:
                actions = []
                cells = []
                # 开是while循环判断回溯,判断我们类里面是否有父节点(在起始点的时候我们没有父节点的)
                while node.parent is not None:
                    # 将回溯节点进行保存
                    actions.append(node.action)
                    cells.append(node.state)
                    # 重新对变量node进行赋值,得到当前节点父节点
                    node = node.parent
起始点的节点
# 在循环查找路径前我们就已经将我们的起始点进行保存(parent代表我们的父节点,在这里是None,代表没有,起到while回溯退出的作用)
start = Node(state=self.start, parent=None, action=None)
看一看回溯过程
"""
    以起始点和他的一个子节点为例
"""

start = Node(state=(6,0),parent=None,action=None)

# parent保存的是节点对象
child = Node(state=(6,1),parent=start,action='right')

node = child

action = []
cells = []

while node.parent is not None:
    action.append(node.action)
    cells.append(node.state)
    node = node.parent  # node.parent = Node(state=(6,0),parent=None,action=None)
广度优先搜索
我们的广度优先搜索的处理过程和深度优先搜索相同,唯一不同的地方是在下方StackFrontier类的remove函数当中,需要更改为取列表的第一位,及索引0
class StackFrontier():
    def  __init__(self):
        self.frontier = []
    def add(self, node):
        self.frontier.append(node)

    def contains_state(self, state):
        return any(node.state == state for node in self.frontier)

    def empty(self):
        return len(self.frontier) == 0

    def  remove(self):
        # 堆栈,先进后出 深度搜索
        if self.empty():
            raise Exception("empty frontier")
        else:
            # 取列表中最后一个对象,并将边界列表的最后一个删除,返回结果为对象(对象中有当前节点、运动方向和他的父节点)
            node = self.frontier[-1]
            self.frontier = self.frontier[:-1]
            return node
函数更改,将上方remove函数改为以下代码:
    def remove(self):
        if self.empty():
            raise Exception("empty frontier")
        else:
            # 这里取了边界列表的第一位
            node = self.frontier[0]
            print(node)
            # 这里删除了边界列表的第一位
            self.frontier = self.frontier[1:]
            return node
在寻找节点的时候和深度搜索相同,只是按照所有节点进入边界列表的顺序来进行下一步的行动。
下图是广度优先搜索得出的结果图:

粉红色为探索过的路径
总结
写完感觉整篇文章的逻辑和内容有点混乱,本人对两者算法的理解也有限,可能存在理解错误的地方,如果导致您感到困惑地方还望理解。
完整代码如下文章来源:https://www.toymoban.com/news/detail-848881.html
##############################
#Maze.py
#Introdution:
#IDE:
#From
#By:qin,2023....
##############################

import sys
import matplotlib.pyplot as plt


#类:
class Node():
    def __init__(self, state, parent, action):
        self.state = state
        self.parent = parent
        self.action = action


class StackFrontier():
    def  __init__(self):
        self.frontier = []
    def add(self, node):
        self.frontier.append(node)

    def contains_state(self, state):
        return any(node.state == state for node in self.frontier)

    def empty(self):
        return len(self.frontier) == 0

    # def  remove(self):
    #     # 堆栈,先进后出 深度搜索
    #     if self.empty():
    #         raise Exception("empty frontier")
    #     else:
    #         node = self.frontier[-1]
    #         self.frontier = self.frontier[:-1]
    #         return node
    def remove(self):
        if self.empty():
            raise Exception("empty frontier")
        else:
            node = self.frontier[0]
            print(node)
            self.frontier = self.frontier[1:]
            return node


class QueueFrontier(StackFrontier):
    # 队列 先进先出,进行广度搜索
    def remove(self):
        if self.empty():
            raise Exception("empty frontier")
        else:
            node = self.frontier[0]
            print(node)
            self.frontier = self.frontier[1:]
            return node

class Maze():

    def __init__(self, filename):

        # Read file and set height and width of maze
        """
        初始化操作,找到文件中的起点a和终点b是否存在
        存在进行行列的遍历,找到A,B在文本中的坐标点
        :param filename:

        """
        with open(filename) as f:
            contents = f.read()

        # Validate start and goal
        if contents.count("A") != 1:
            raise Exception("maze must have exactly one start point")
        if contents.count("B") != 1:
            raise Exception("maze must have exactly one goal")

        # Determine height and width of maze
        contents = contents.splitlines()
        self.height = len(contents)
        self.width = max(len(line) for line in contents)

        # Keep track of walls
        self.walls = []
        for i in range(self.height):
            row = []
            for j in range(self.width):
                try:
                    if contents[i][j] == "A":
                        self.start = (i, j)
                        row.append(False)
                    elif contents[i][j] == "B":
                        self.goal = (i, j)
                        row.append(False)
                    elif contents[i][j] == " ":
                        row.append(False)
                    else:
                        row.append(True)
                except IndexError:
                    row.append(False)
            self.walls.append(row)

        self.solution = None


    def print(self):
        solution = self.solution[1] if self.solution is not None else None
        print()
        for i, row in enumerate(self.walls):
            for j, col in enumerate(row):
                if col:
                    print("█", end="")
                elif (i, j) == self.start:
                    print("A", end="")
                elif (i, j) == self.goal:
                    print("B", end="")
                elif solution is not None and (i, j) in solution:
                    print("*", end="")
                else:
                    print(" ", end="")
            print()
        print()


    def neighbors(self, state):
        row, col = state
        candidates = [
            ("up", (row - 1, col)),
            ("down", (row + 1, col)),
            ("left", (row, col - 1)),
            ("right", (row, col + 1))
        ]

        result = []
        # 保存可以走的方向, 判断是否在边界以及是否有墙 self.wall列表中的是bool
        for action, (r, c) in candidates:
            if 0 <= r < self.height and 0 <= c < self.width and not self.walls[r][c]:
                result.append((action, (r, c)))
        return result


    def solve(self):
        """Finds a solution to maze, if one exists."""

        # Keep track of number of states explored
        self.num_explored = 0

        # Initialize frontier to just the starting position
        start = Node(state=self.start, parent=None, action=None)
        print("起始点的坐标",start.state)
        frontier = StackFrontier()
        frontier.add(start)

        # Initialize an empty explored set
        self.explored = set()

        # Keep looping until solution found
        while True:
            # If nothing left in frontier, then no path
            if frontier.empty():
                raise Exception("no solution")

            # Choose a node from the frontier
            r = QueueFrontier()
            node = frontier.remove()
            self.num_explored += 1

            # If node is the goal, then we have a solution
            if node.state == self.goal:
                actions = []
                cells = []
                while node.parent is not None:
                    actions.append(node.action)
                    cells.append(node.state)
                    node = node.parent
                print(cells)
                actions.reverse()
                cells.reverse()
                self.solution = (actions, cells)
                return

            # Mark node as explored
            self.explored.add(node.state)

            # Add neighbors to frontier 返回的执行列表是 先上 后下
            for action, state in self.neighbors(node.state):
                if not frontier.contains_state(state) and state not in self.explored:
                    # state 和 action保存的是子节点的行动和状态,而parent保存了父节点的所有状态,比如从起始点到第二个点,parent保存的就是起始状态的所有状态
                    child = Node(state=state, parent=node, action=action)

                    frontier.add(child)


    def output_image(self, filename, show_solution=True, show_explored=False):
        from PIL import Image, ImageDraw
        cell_size = 50
        cell_border = 2
        # 创建图像画布,将start 、goal、wall和路径用不同的像素表示
        # Create a blank canvas
        img = Image.new(
            "RGBA",
            (self.width * cell_size, self.height * cell_size),
            "black"
        )
        draw = ImageDraw.Draw(img)

        solution = self.solution[1] if self.solution is not None else None
        for i, row in enumerate(self.walls):
            for j, col in enumerate(row):
                # plt.clf()

                # Walls
                if col:
                    fill = (40, 40, 40)

                # Start
                elif (i, j) == self.start:
                    fill = (255, 0, 0)
                    # plt.imshow(img)
                    # plt.pause(0.4)

                # Goal
                elif (i, j) == self.goal:
                    fill = (0, 171, 28)

                # Solution
                elif solution is not None and show_solution and (i, j) in solution:
                    fill = (120, 200, 252)
                    # plt.imshow(img)
                    # plt.pause(0.4)

                # Explored
                elif solution is not None and show_explored and (i, j) in self.explored:
                    fill = (255, 100, 120)

                # Empty cell
                else:
                    fill = (237, 255, 252)

                # Draw cell
                draw.rectangle(
                    ([(j * cell_size + cell_border, i * cell_size + cell_border),
                      ((j + 1) * cell_size - cell_border, (i + 1) * cell_size - cell_border)]),
                    fill=fill
                )
                # plt.imshow(img)
                # plt.pause(0.4)
        # plt.ioff()
        # plt.show()
        img.save(filename)

# for i in range(4):
#     sys.argv.append(f"./maze{i+1}.txt")
#
#
# if len(sys.argv) < 2:
#     sys.exit("Usage: python maze.py maze.txt1")
#
#
# print((sys.argv))


# path = sys.argv[j+1]
m = Maze('./maze1.txt')
print("Maze:")
m.print()
print("Solving...")
m.solve()
print("States Explored:", m.num_explored)
print("Solution:")
m.print()
m.output_image(f"maze.png", show_explored=True)
上述代码非本人编写,仅用于讲述与教学文章来源地址https://www.toymoban.com/news/detail-848881.html
到了这里,关于深度优先搜索(DFS)和广度优先搜索(BFS),用代码讲原理的文章就介绍完了。如果您还想了解更多内容,请在右上角搜索TOY模板网以前的文章或继续浏览下面的相关文章,希望大家以后多多支持TOY模板网!

