一、快速入门
1、介绍
Python Pygame 是一款专门为开发和设计 2D 电子游戏而生的软件包。
pygame官网
一个最简单的pygame生成的窗口。
代码
import sys
import pygame

# pygame setup
pygame.init()
# 主屏幕设置返回的是一个Surface对象
# 后面新建的各种对象都是在screen上画出来,
screen = pygame.display.set_mode((800, 600))
# 设置窗口标题
pygame.display.set_caption("窗口名称")
# 实例化一个Clock
clock = pygame.time.Clock()

while True:
    # 遍历事件
    for event in pygame.event.get():
        # pygame.QUIT 事件表示用户单击X关闭窗口
        if event.type == pygame.QUIT:
            # 退出pygame
            pygame.quit()
            # 退出整个程序
            sys.exit()
    # 用一种颜色填充屏幕
    screen.fill("purple")
    # 游戏代码写在这里
    # 将您的作品放在屏幕上的显示器  如果没有传递任何参数,它将更新所有内容
    pygame.display.update()
    # 设置刷新帧率
    clock.tick(60)
2、一个左右运动的矩形
- 通过改变矩形的x轴坐标,让矩形左右往返移动。

代码如下:
import sys
import pygame


pygame.init()
win = pygame.display.set_mode(size=(800, 600))
pygame.display.set_caption("左右摆动")
clock = pygame.time.Clock()
speed = 4  # 移动速度
rect = pygame.Rect(10, 10, 10, 100)  # 实例化一个矩形
print(rect.copy())
while True:
    win.fill(color=(200, 200, 200))
    for event in pygame.event.get():
        if event.type == pygame.QUIT:
            pygame.quit()
            sys.exit()
    x = rect.x  # 获取矩形x坐标  和 rect.left效果一样
    if x >= 100:
        speed = -4
    if x <= 10:
        speed = 4
    rect.move_ip(speed, 0)  # 相对移动矩形的坐标
    # 在窗口上绘制一个矩形
    pygame.draw.rect(win, color=(255, 0, 0), rect=rect)
    # 更新屏幕所有内容
    pygame.display.update()
    clock.tick(60)
二、pygame
pygame包代表供其他人使用的顶级包。
1、pygame.init
pygame.init( )
初始化所有导入的 Pygame 模块,这是pygame必须的,上基本模块中就有。
2、pygame.quit
pygame.quit( )
取消初始化所有 pygame 模块
三、pygame.image 图像类
1、介绍
用于图像转换的相关操作
图像模块包含用于加载和保存图片的功能,以及 将Surface转换为其他包可用的格式。
2、方法
2.1、pygame.image.load(file_name) 导入图像,返回一个Surface类
从文件载入一个新的图像,返回Surface对象,支持的图像类型包括PNG、JPG和GIF(非动画)。
#生成图像  代码放置在循环外
# 使用Surface.convert()在没有参数的情况下更改图像的像素格式,创建一个可以更快地在屏幕上绘制的副本。
sky_surf = pygame.image.load("sky.jpg").convert()

#绘制图像  代码放置在循环内,事件遍历之后
screen.blit(sky_surf, (0, 0)) # 这段代码在
2.2、 pygame.image.save
2、pygame.image.save(Surface,filename) 将Surface存储为一个文件
3、用多张图片实现动画效果
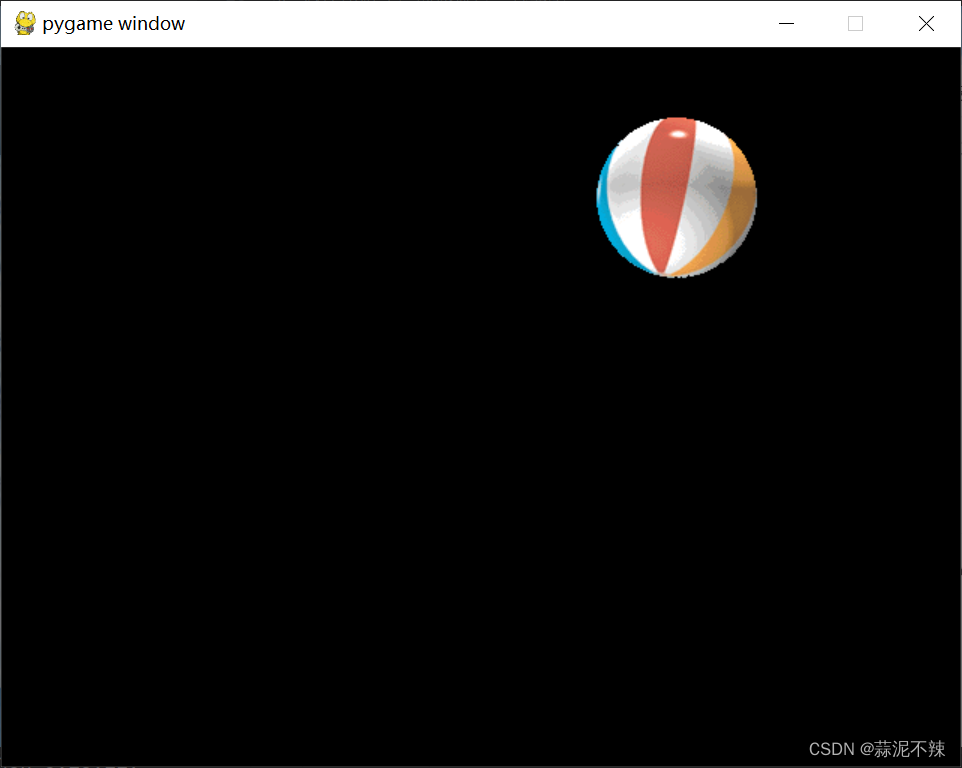
下面这个gif图片由6张图片组成,用pygame增实现下面的效果呢


代码效果如下:
import sys
import pygame

pygame.init()
win = pygame.display.set_mode(size=(800, 600))
pygame.display.set_caption("图片连播")
clock = pygame.time.Clock()

# 将所有图片文件地址放入列表
image_list = [
    "image/long_1.png",
    "image/long_2.png",
    "image/long_3.png",
    "image/long_4.png",
    "image/long_5.png",
    "image/long_6.png",
]
# 创建空列表用于存储每个Surface对象
frams_list = []
# 遍历图片文件列表,为每个图片生成Surfaced对象,并加入到frmas_list列表
for image in image_list:
    fram = pygame.image.load(image)
    frams_list.append(fram)
# 控制显示第几张图片
frams_index = 0

while True:
    win.fill(color=(200, 200, 200))
    for event in pygame.event.get():
        if event.type == pygame.QUIT:
            pygame.quit()
            sys.exit()
    frams_index += 0.1
    if frams_index > len(frams_list):frams_index = 0
    win.blit(frams_list[int(frams_index)],(20,20))
    # 更新屏幕所有内容
    pygame.display.update()
    clock.tick(60)
四、pygame.Surface 用于表现图像的一个类
1、介绍
Surface是一块矩形显示区域,用来显示任意图像,具有固定的宽、高、像素格式。粗略可以理解为画布,可以在上面绘制图像。此外还可以将一个Surface作为图像复制到另一个Surface上。
2、方法
2.1、构造方法
- Surface((width, height), flags=0, depth=0, masks=None) -> Surface
- Surface((width, height), flags=0, Surface) -> Surface
下面是其它方法创建Surface对象 - pygame.display.set_mode()函数创建display surface(该surface是一个特殊的surface对象)
- 通过pygame.image.load()返回的image surface创建surface对象
2.2、Surface.blit
Surface.blit(source:Surface, dest, area=None, special_flags = 0) -> Rect)
将一个图像绘制在另外一个图像上
2.3、pygame.Surface.blits
将许多图像绘制到另一个图像上
2.4、pygame.Surface.convert
2.5 、pygame.Surface.convert_alpha
2.6、pygame.Surface.copy
创建 Surface 的新副本
2.7、pygame.Surface.fill
为Surface填充颜色
2.9、pygame.Surface.scroll
2.10、pygame.Surface.set_colorkey
2.11、pygame.Surface.get_colorkey
2.12、pygame.Surface.set_alpha
2.13、pygame.Surface.get_alpha
2.14、pygame.Surface.get_rect
获取 Surface 的矩形区域
2.15、pygame.Surface.get_size
获取 Surface 的尺寸
2.16、pygame.Surface.get_height
获取 Surface 的高度
2.17、pygame.Surface.get_widht
获取 Surface 的宽度
五、pygame.Rect 用于存储矩形坐标的一个类
Pygame 使用 Rect 对象来存储和操作矩形区域。一个矩形 可以从左、上、宽和高值的组合创建。 也可以从已经是 Rect 或 Rect 的 Python 对象创建 Rect。
1、构造方法
- Rect(left, top, width, height) -> Rect
通过输入矩形 x、y坐标和矩形宽度和高度确定一个矩形。 - Rect((left, top), (width, height)) -> Rect
2、方法
2.1、pygame.Rect.copy
- 复制矩形,生成一个新的矩形
- pygame.Rect.copy()
2.2、pygame.Rect.move
- 移动矩形到绝对位置,返回一个新矩形
- pygame.Rect.move_ip(x: float, y: float)
2.3、pygame.Rect.move_ip
- 移动矩形相对原来位置
- pygame.Rect.move_ip (x: float, y: float)
- pygame.Rect.move_ip (move_by:(float, float))
2.4、pygame.Rect.inflate
- 增加或缩小矩形大小,返回一个新矩形
- pygame.Rect.inflate( x: float, y: float)
2.5、pygame.Rect.inflate_ip
2.6、pygame.Rect.scale_by
2.7、pygame.Rect.scale_by_ip
2.8、pygame.Rect.update
3、虚拟属性
3.1、返回一些位置坐标
- top, left, bottom, right 返回x或y坐标
- topleft, bottomleft, topright, bottomright, midtop, midleft, midbottom, midright, center, centerx, centery, 返回一个元组,包含x和y坐标y
3.2、size 返回长宽,是数组类型
3.3、width, height, w, h 单独返回长或宽的值
rect = pygame.Rect(10, 10, 10, 100)  # 实例化一个矩形
x = rect.x
width = rect.width
size = rect.size
3.4、虚拟属性赋值
赋值时注意属性所需要的数据类型
rect = pygame.Rect(10, 10, 10, 100)  # 实例化一个矩形
rect.x = 10
rect.width = 10
rect.size = (10,50)  #  长宽赋值
Rect 对象具有多个虚拟属性,可用于移动和 对齐矩形:
六、pygame.draw 用于绘制各种形状
1、pygame.draw.rect 绘制矩形
2、pygame.draw.polygon 绘制多边形
3、pygame.draw.circle 绘制圆形
4、pygame.draw.ellipse 绘制椭圆
5、pygame.draw.arc 绘制圆弧
8、pygame.draw.line 画线
9、pygame.draw.lines 画一系列连续的线
10、pygame.draw.aaline 画一条直线抗锯齿线
11、pygame.draw.aalines 绘制多个连续的直线抗锯齿线段
七、pygame.time 用于监控时间的模块,
pygame中的时间以毫秒(1/1000秒)表示。大多数平台的有限时间分辨率约为10毫秒。
1、pygame.time.Clock
创建一个对象以帮助跟踪时间文章来源:https://www.toymoban.com/news/detail-849808.html
控制游戏每秒的帧数,这是基本游戏代码必用的方法。文章来源地址https://www.toymoban.com/news/detail-849808.html
clock = pygame.time.Clock()
while True:
	clock.tick(60)
到了这里,关于pygame-快速入门的文章就介绍完了。如果您还想了解更多内容,请在右上角搜索TOY模板网以前的文章或继续浏览下面的相关文章,希望大家以后多多支持TOY模板网!


