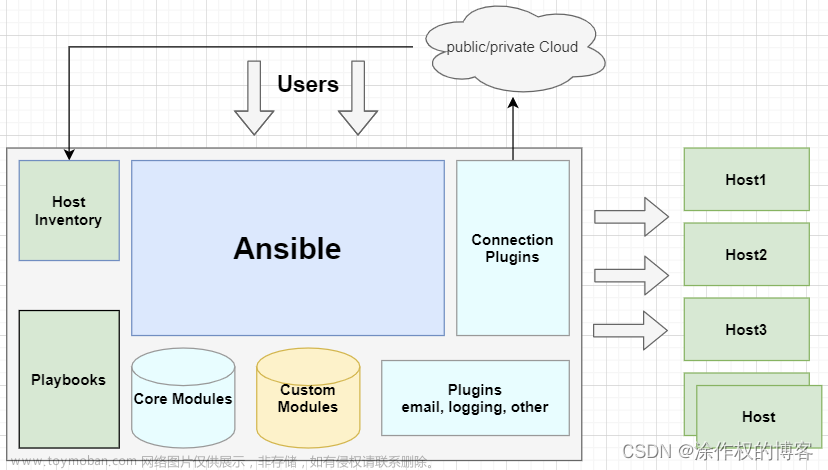
特别注意:不需要提前安装ansible,因为ansible tower中的setup.sh脚本会下载对应的ansible版本
ansible tower不支持Ubuntu系统,对cenos系统版本也有一定的限制,建议使用centos7.9。
准备一台全新的机器安装,因为ansible tower需要装许多其他的东西,如nginx、rabbitmq、supervisor等,容易发生冲突
安装过程
setenforce 0
systemctl stop firewalld
wget https://releases.ansible.com/ansible-tower/setup-bundle/ansible-tower-setup-bundle-3.6.2-1.el7.tar.gz
tar -xvf ansible-tower-setup-bundle-3.6.2-1.el7.tar.gz
mkdir /var/log/tower
yum install rsync -y
cd  ansible-tower-setup-bundle-3.6.2-1/
cat inventory
[tower]
localhost ansible_connection=local

[database]

[all:vars]
admin_password='123456'

pg_host=''
pg_port=''

pg_database='awx'
pg_username='awx'
pg_password='123456'
pg_sslmode='prefer'  # set to 'verify-full' for client-side enforced SSL

rabbitmq_username=tower
rabbitmq_password='123456'
rabbitmq_cookie=cookiemonster

./setup.sh  #开始安装
接下来的操作:不需要停止ansible-tower
[root@rabbitredis-2 ansible-tower-setup-bundle-3.6.2-1]# cd /var/lib/awx/venv/awx/lib/python3.6/site-packages/tower_license
[root@rabbitredis-2 tower_license]# ls
__init__.pyc  __pycache__
[root@rabbitredis-2 tower_license]# ll
总用量 8
-rw-r--r--. 1 root root 7764 12月 14 2019 __init__.pyc
drwxr-xr-x. 2 root root   37 4月   1 16:55 __pycache__

[root@rabbitredis-2 tower_license]# wget https://bootstrap.pypa.io/pip/2.7/get-pip.py
--2024-04-01 17:38:11--  https://bootstrap.pypa.io/pip/2.7/get-pip.py
正在解析主机 bootstrap.pypa.io (bootstrap.pypa.io)... 151.101.88.175, 2a04:4e42:15::175
正在连接 bootstrap.pypa.io (bootstrap.pypa.io)|151.101.88.175|:443... 已连接。
已发出 HTTP 请求,正在等待回应... 200 OK
长度:1908226 (1.8M) [text/x-python]
正在保存至: “get-pip.py.2”

100%[=============================================================================================================================================================================>] 1,908,226   2.08MB/s 用时 0.9s

2024-04-01 17:38:15 (2.08 MB/s) - 已保存 “get-pip.py.2” [1908226/1908226])


[root@rabbitredis-2 tower_license]# ls
get-pip.py  __init__.pyc  __pycache__
[root@rabbitredis-2 tower_license]# python get-pip.py
DEPRECATION: Python 2.7 reached the end of its life on January 1st, 2020. Please upgrade your Python as Python 2.7 is no longer maintained. pip 21.0 will drop support for Python 2.7 in January 2021. More details about Python 2 support in pip can be found at https://pip.pypa.io/en/latest/development/release-process/#python-2-support pip 21.0 will remove support for this functionality.
Collecting pip<21.0
  Downloading pip-20.3.4-py2.py3-none-any.whl (1.5 MB)
     |████████████████████████████████| 1.5 MB 703 kB/s
Collecting wheel
  Downloading wheel-0.37.1-py2.py3-none-any.whl (35 kB)
Installing collected packages: pip, wheel
Successfully installed pip-20.3.4 wheel-0.37.1


[root@rabbitredis-2 tower_license]# pip -V
pip 20.3.4 from /usr/lib/python2.7/site-packages/pip (python 2.7)

[root@rabbitredis-2 tower_license]# pip install uncompyle6
DEPRECATION: Python 2.7 reached the end of its life on January 1st, 2020. Please upgrade your Python as Python 2.7 is no longer maintained. pip 21.0 will drop support for Python 2.7 in January 2021. More details about Python 2 support in pip can be found at https://pip.pypa.io/en/latest/development/release-process/#python-2-support pip 21.0 will remove support for this functionality.
Collecting uncompyle6
  Downloading uncompyle6-3.9.1-py2-none-any.whl (363 kB)
     |████████████████████████████████| 363 kB 844 kB/s
Collecting xdis<6.2.0,>=6.0.8
  Downloading xdis-6.1.0-py2-none-any.whl (182 kB)
     |████████████████████████████████| 182 kB 12.1 MB/s
Collecting spark-parser<1.9.0,>=1.8.9
  Downloading spark_parser-1.8.9-py2-none-any.whl (17 kB)
Collecting click
  Downloading click-7.1.2-py2.py3-none-any.whl (82 kB)
     |████████████████████████████████| 82 kB 1.3 MB/s
Installing collected packages: xdis, click, spark-parser, uncompyle6
Successfully installed click-7.1.2 spark-parser-1.8.9 uncompyle6-3.9.1 xdis-6.1.0
[root@rabbitredis-2 tower_license]# uncompyle6 __init__.pyc >__init__.py
[root@rabbitredis-2 tower_license]# ls
get-pip.py  __init__.py  __init__.pyc  __pycache__
[root@rabbitredis-2 tower_license]# vim __init__.py

# 修改部分
#修改__init__.py文件
    def _check_cloudforms_subscription(self):
        return True    #添加这一行
        if os.path.exists('/var/lib/awx/i18n.db'):
            return True
        else:
            if os.path.isdir('/opt/rh/cfme-appliance'):
                if os.path.isdir('/opt/rh/cfme-gemset'):
                    pass
            try:
                has_rpms = subprocess.call(['rpm', '--quiet', '-q', 'cfme', 'cfme-appliance', 'cfme-gemset'])
                if has_rpms == 0:
                    return True
            except OSError:
                pass

            return False
....

#修改"license_date=253370764800L" 为 "license_date=253370764800"
    def _generate_cloudforms_subscription(self):
        self._attrs.update(dict(company_name='Red Hat CloudForms License', instance_count=MAX_INSTANCES,
          license_date=253370764800,  #修改
          license_key='xxxx',
          license_type='enterprise',
          subscription_name='Red Hat CloudForms License'))


[root@rabbitredis-2 tower_license]# python -m py_compile __init__.py
[root@rabbitredis-2 tower_license]# python -O -m py_compile __init__.py
[root@rabbitredis-2 tower_license]# ansible-tower-service restart
Restarting Tower
Redirecting to /bin/systemctl stop rh-postgresql10-postgresql.service
Redirecting to /bin/systemctl stop rabbitmq-server.service
Redirecting to /bin/systemctl stop nginx.service
Redirecting to /bin/systemctl stop supervisord.service
Redirecting to /bin/systemctl start rh-postgresql10-postgresql.service
Redirecting to /bin/systemctl start rabbitmq-server.service
Redirecting to /bin/systemctl start nginx.service
Redirecting to /bin/systemctl start supervisord.service
[root@rabbitredis-2 tower_license]#
 文章来源:https://www.toymoban.com/news/detail-852913.html
相当不错的参考文章:
https://www.cnblogs.com/joshua317/p/6899057.html
https://zhuanlan.zhihu.com/p/669971119文章来源地址https://www.toymoban.com/news/detail-852913.html
到了这里,关于ansible-tower安装的文章就介绍完了。如果您还想了解更多内容,请在右上角搜索TOY模板网以前的文章或继续浏览下面的相关文章,希望大家以后多多支持TOY模板网!


