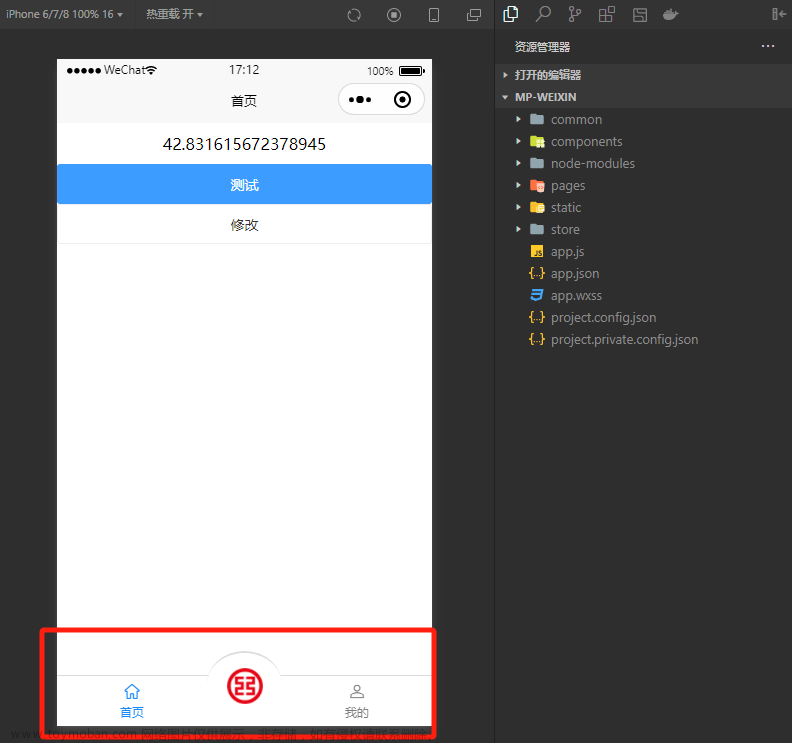
1.需求:
在H5 中需要封装一个自定义的tabbar 菜单跳转 通过nut-ui 进行二次封装
2. 注意点
H5 中原生的tabbar 在ios 中会出现问题 所以进行 封装tabbar
3. 代码操作
首先全部的代码
<template>
    <nut-tabbar v-model="selected" class="tabbar-container" size="18px" @tab-switch="handleClick">
        <nut-tabbar-item :tab-title="item.title" :value="item.value" v-for="(item, index) in tabList" :key="index">
            <template #icon="props" style="position: relative">
                <img v-if="props.active" :src="item.activeImg" />
                <img v-else :src="item.img" />
            </template>
        </nut-tabbar-item>
    </nut-tabbar>
</template>
<script setup lang="ts">
import { storeToRefs } from "pinia";
import { reactive, onMounted, watch } from "vue";
import { useTabbarStore, useUserStore } from "../../store";
import Taro, { eventCenter } from "@tarojs/taro";
const tabbarStore = useTabbarStore();
const userStore = useUserStore();
const { selected, bottomDistance } = storeToRefs(tabbarStore);
const router = Taro.useRouter();

type menu = {
    name: string;
    title: string;
    pagePath: string;
    img: any;
    activeImg: any;
    value: number;
};
watch(selected, (newValue) => {
    // Taro.setStorageSync("selectedTab", newValue);
    tabbarStore.setSelected(newValue)
});
onMounted(() => {
    tabbarStore.setSelected(Taro.getStorageSync("selectedTab") || 0)
    eventCenter.once(router.onReady, () => {
        getTabbarHeight();
    });
});
const getTabbarHeight = () => {
    const query = Taro.createSelectorQuery()
        .select(".tabbar-container")
        .boundingClientRect();
    query.selectViewport();
    query.exec(function (res) {
        if (res[0]) {
            console.log(res);

            const height = res[0].height;
            tabbarStore.setTabbarHeight(height);
        }
    });
};
const tabList = reactive<menu[]>([
    {
        name: "home",
        title: "购票",
        pagePath: "/pages/index/index",
        img: require("../../assets/tabbar/2/3.png"),
        activeImg: require("../../assets/tabbar/1/3.png"),
        value: 0,
    },
    // {
    //     name: "action",
    //     title: "订单",
    //     pagePath: "/pages/order/index",
    //     img: require("../../assets/tabbar/2/5.png"),
    //     activeImg: require("../../assets/tabbar/1/5.png"),
    //     value: 0,
    // },
    {
        name: "report",
        title: "我的",
        pagePath: "/pages/my/index",
        img: require("../../assets/tabbar/2/4.png"),
        activeImg: require("../../assets/tabbar/1/4.png"),
        value: 0,
    },

]);
const handleClick = (item, index: number) => {
    let url = tabList[index].pagePath;

    const pages = Taro.getCurrentPages()
    const currentPage = pages[pages.length - 1]
    if (currentPage.route !== url) {
        handleToPath(url);

    }


};
const handleToPath = (url) => {
    Taro.switchTab({
        url: url,
    });
};
</script>
<style lang="scss">
@import "./customTabBar.scss";
</style>
4.解析
tabList: 菜单的内容数组 根据自己菜单的数量 来决定
const tabList = reactive<menu[]>([
{
name: "home",
title: "购票",
pagePath: "/pages/index/index",
img: require("../../assets/tabbar/2/3.png"),
activeImg: require("../../assets/tabbar/1/3.png"),
value: 0,
},
// {
// name: "action",
// title: "订单",
// pagePath: "/pages/order/index",
// img: require("../../assets/tabbar/2/5.png"),
// activeImg: require("../../assets/tabbar/1/5.png"),
// value: 0,
// },
{
name: "report",
title: "我的",
pagePath: "/pages/my/index",
img: require("../../assets/tabbar/2/4.png"),
activeImg: require("../../assets/tabbar/1/4.png"),
value: 0,
},
]);、文章来源:https://www.toymoban.com/news/detail-854208.html
跳转逻辑文章来源地址https://www.toymoban.com/news/detail-854208.html
const handleClick = (item, index: number) => {

    let url = tabList[index].pagePath;


    const pages = Taro.getCurrentPages()

    const currentPage = pages[pages.length - 1]

    if (currentPage.route !== url) {

        handleToPath(url);


    }


};

const handleToPath = (url) => {

    Taro.switchTab({

        url: url,

    });

};

// const pages = Taro.getCurrentPages()

    const currentPage = pages[pages.length - 1]

    if (currentPage.route !== url) {

        handleToPath(url);


    } 当前页面如果是当前的菜单 那么判断一下 根据页面的Api 查找当前的页面路径 当页面不存在 才跳转 这是优化问题
到了这里,关于Taro + vue3 + js + nutUI 框架中自定义tabbar的组件封装以及页面跳转的逻辑的文章就介绍完了。如果您还想了解更多内容,请在右上角搜索TOY模板网以前的文章或继续浏览下面的相关文章,希望大家以后多多支持TOY模板网!


