1,集成firebase 基础
1>googleService文件

2>项目级gradle

3>app级gradle

4>setting

2,推送相关
重点:
源文档:设置 Firebase Cloud Messaging 客户端应用 (Android) (google.com)
/**
 * 监听推送的消息
 * 三种情况:
 * 1,通知时:
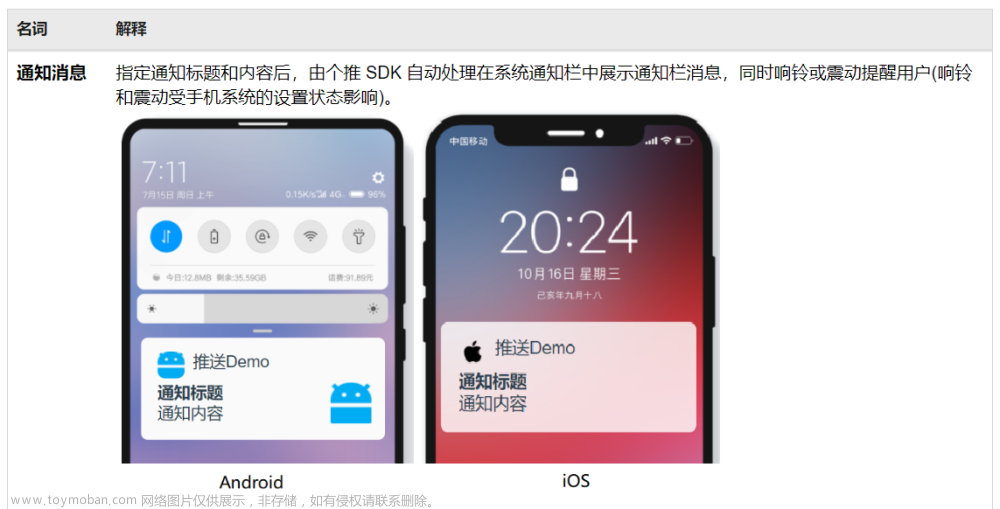
 * 当应用处于前台的时候,推送的消息会走onMessageReceived方法,处于后台时走系统托盘。
 * 2,数据时:
 * 当应用处于前、后台的时候,会走onMessageReceived方法。
 * 3,通知且携带数据:
 * 当应用处于前台的时候,推送的消息会走onMessageReceived方法,处于后台时,通知走系统托盘,数据走Intent 的 extra 中(点击通知栏后)。
 */
1>清单文件

2>MyFirebaseMessagingService类
/**
 * 推送数据对通知的影响
 * 1,如果我们推送的数据 notification 对应的数据 不为空,那么我们接收消息就需要分为两种情况,
 * 前台和后台,如果App当前状态为前台,那么 onMessageReceived 方法就会被调用,
 * 后续我们自己拿到对用的数据进行通知栏的显示,如果App当前状态为后台的话 那么我们无需自己写 sdk会自己弹出。
 *
 *,2,如果我们推送的数据 notification 对应的数据为空,把所有的数据放置到data 字段里面,
 * 那么sdk不会为我们弹出通知,这时候无论App在前台还是后台都会调用 onMessageReceived ,
 * 这时候我们自己需要处理通知栏的ui 显示。这种情况一般用于自定义通知栏ui 的时候。
 */

public class MyFirebaseMessagingService extends FirebaseMessagingService {

    /**
     * 监听推送的消息
     * 三种情况:
     * 1,通知时:
     * 当应用处于前台的时候,推送的消息会走onMessageReceived方法,处于后台时走系统托盘。
     * 2,数据时:
     * 当应用处于前、后台的时候,会走onMessageReceived方法。
     * 3,通知且携带数据:
     * 当应用处于前台的时候,推送的消息会走onMessageReceived方法,处于后台时,通知走系统托盘,数据走Intent 的 extra 中(点击通知栏后)。
     */
    @Override
    public void onMessageReceived(@NonNull RemoteMessage message) {

        String testDemo = "0";//测试数据,后端自定义消息/或控制台测试时输入键值,时传递来 “键”-“值” 中的 值
//        Map<String, String> remoteMessageMap = message.getData();
        if (message.getData() != null && !message.getData().isEmpty()) {//不自定义消息,getData为空
            if (message.getData().size() > 0) {
                testDemo = message.getData().get("testDemo");//“键”-“值” 中的 键

            }
        }

        if (message.getNotification() != null && !message.getNotification().getTitle().isEmpty() && !message.getNotification().getBody().isEmpty()) {
//            sendNotification(message.getNotification().getTitle(), message.getNotification().getBody(), testDemo);
            String click_action = message.getNotification().getClickAction();
            sendNotification(message.getNotification().getTitle(), message.getNotification().getBody(), testDemo, click_action);
        }


    }


    /**
     * 当有新的Firebase token 时的回调
     * 第一次安装app 获取到的 pushtoken
     */
    @Override
    public void onNewToken(@NonNull String token) {
        //token 传递给后端!!
        Log.e("测试", "onNewToken =" + token);
    }

    /**
     * 自定义通知
     *
     * @param messageBody
     */
    private void sendNotification(String messageTitle, String messageBody, String testDemo, String click_action) {
        Intent intent = prepareIntent(click_action);
//    private void sendNotification(String messageTitle, String messageBody, String testDemo) {
//        Intent intent = new Intent(this, MainActivity.class);

        String channelID = getResources().getString(R.string.default_notification_channel_id);//渠道ID
        String channelName = getResources().getString(R.string.default_notification_channel_name);//渠道名称

        intent.addFlags(Intent.FLAG_ACTIVITY_NEW_TASK | Intent.FLAG_ACTIVITY_SINGLE_TOP | Intent.FLAG_ACTIVITY_CLEAR_TOP);
        if (testDemo != null && !testDemo.isEmpty()) {
            intent.putExtra("testDemo", testDemo);

        }

        int uniqueInt = (int) (System.currentTimeMillis() & 0xff);
        PendingIntent pendingIntent = PendingIntent.getActivity(this, uniqueInt /* Request code */, intent, PendingIntent.FLAG_UPDATE_CURRENT);

        NotificationManager notificationManager = (NotificationManager) getSystemService(Context.NOTIFICATION_SERVICE);

        NotificationCompat.Builder notificationBuilder;
        //android 8 开始要 创建通知渠道,否则通知栏不弹出
        if (Build.VERSION.SDK_INT >= Build.VERSION_CODES.O) {
            notificationBuilder = new NotificationCompat.Builder(this, channelID);
            NotificationChannel channel = new NotificationChannel(channelID, channelName, NotificationManager.IMPORTANCE_HIGH);
            notificationManager.createNotificationChannel(channel);
        } else {
            notificationBuilder = new NotificationCompat.Builder(this);
        }

        //设置title
        if (messageTitle != null && !messageTitle.isEmpty()) {
            notificationBuilder.setContentTitle(messageTitle);
        } else {
            notificationBuilder.setContentTitle(getResources().getString(R.string.app_name));
        }

        //设置body
        if (messageBody != null && !messageBody.isEmpty()) {
            notificationBuilder.setContentText(messageBody);
        }
//        Uri defaultSoundUri = RingtoneManager.getDefaultUri(RingtoneManager.TYPE_NOTIFICATION);
        notificationBuilder
                .setSmallIcon(R.drawable.icon_return)//设置通知栏的小图标,必需设置,否则crash
                .setAutoCancel(true)//点击通知后,通知自动消失
                .setWhen(System.currentTimeMillis())// 设置通知时间,此事件用于通知栏排序
                .setPriority(NotificationCompat.PRIORITY_HIGH)// 设置优先级,低优先级可能被隐藏
//                .setSound(defaultSoundUri)
                .setContentIntent(pendingIntent);//设置通知栏被点击时的事件

        notificationManager.notify(uniqueInt /* ID of notification */, notificationBuilder.build());

    }

    public Intent prepareIntent(String clickAction) {
        Intent intent;
        boolean isAppInBackground;
        isAppInBackground = ProcessJudgmentHelper.isRunBackground(this);
        if (isAppInBackground) {
            intent = new Intent(this, MainActivity.class);
        } else {
            intent = new Intent(clickAction);
        }

        return intent;
    }

    /**
     * 1,如果未开启通知,则跳转到通知设置界面,点击之后就需要跳转到 APP的通知设置界面,
     * 对应的Action是:Settings.ACTION_APP_NOTIFICATION_SETTINGS, 这个Action是 API 26 后增加的。
     * 2,如果在部分手机中无法精确的跳转到APP对应的通知设置界面,我们就考虑直接跳转到APP信息界面,
     * 对应的Action是:Settings.ACTION_APPLICATION_DETAILS_SETTINGS。
     *
     */

}
4>主启动Activity(清单文件里设置 <action android:name="android.intent.action.MAIN" /> 的Activity)
/**
 * 1,清单文件里设置 <action android:name="android.intent.action.MAIN" /> 的Activity,一般是Splish 闪屏页。
 * 在onCreate() 方法里 获取用户PushToken,调用接口传给自己的后端,以防有变化。
 * 2,如果是自定义消息(当后端或者控制台设置响应的data 键值)在onResume() 方法里 使用intent 获取到对应的值,进行相关操作,
 * 例如:根据约定值 进行响应页面的跳转。
 *
 *
 */
public class MainActivity extends AppCompatActivity {

    @Override
    protected void onCreate(Bundle savedInstanceState) {
        super.onCreate(savedInstanceState);
        setContentView(R.layout.activity_main);

        requestPer();

        try {
            boolean goolgePlayServiceAvailable = FirebaseManager.getInstance().isGoolgePlayServiceAvailable(this);
            if (goolgePlayServiceAvailable) {
                uploadPushToken();
            } else {
                Log.e("测试", "谷歌服务不可用");
            }
        } catch (Exception e) {
            e.printStackTrace();
            Log.e("测试", "谷歌服务异常");

        }
    }


    @Override
    protected void onResume() {
        super.onResume();
        Intent intent = getIntent();
        //当后端或者控制台设置自定义消息后,点击通知时能获取到对应的值
        String testDemo = intent.getStringExtra("testDemo");

        if (testDemo != null && !testDemo.isEmpty()) {
            //如有特殊情形,要判断是否登录,没登录跳转登录页
//            if(){
//            }
            if (testDemo.equals("66")) {
                Intent intentSeconActivity = new Intent(this, SeconActivity.class);
                startActivity(intentSeconActivity);
                finish();
            }
        }

    }

    /**
     * 上传push token
     * 正常情况下每次启动 都会获取到!
     */
    private void uploadPushToken() {
        FirebaseMessaging.getInstance().getToken()
                .addOnCompleteListener(new OnCompleteListener<String>() {
                    @Override
                    public void onComplete(@NonNull Task<String> task) {
                        if (!task.isSuccessful()) {
                            Log.e("测试", "Fetching FCM registration token failed", task.getException());
                            return;
                        }

                        // Get new FCM registration token
                        String token = task.getResult();
                        Log.e("测试", "MainActivity token =" + token);

                    }
                });
    }

    /**
     * android 高版本请求推送权限
     */
    private void requestPer() {
        XXPermissions.with(this)
                // 申请单个权限
                .permission(Permission.POST_NOTIFICATIONS)
                .request(new OnPermissionCallback() {

                    @Override
                    public void onGranted(List<String> permissions, boolean all) {

                    }

                    @Override
                    public void onDenied(List<String> permissions, boolean never) {
                        if (never) {

                        } else {
                        }
                    }
                });
    }
}
==================结束===============文章来源:https://www.toymoban.com/news/detail-855229.html
工具方法:
文章来源地址https://www.toymoban.com/news/detail-855229.html
    /** 判断程序是否在后台运行 */
    public static boolean isRunBackground(Context context) {
        ActivityManager activityManager = (ActivityManager) context.getSystemService(Context.ACTIVITY_SERVICE);
        List<ActivityManager.RunningAppProcessInfo> appProcesses = activityManager.getRunningAppProcesses();
        for (ActivityManager.RunningAppProcessInfo appProcess : appProcesses) {
            if (appProcess.processName.equals(context.getPackageName())) {
                if (appProcess.importance == ActivityManager.RunningAppProcessInfo.IMPORTANCE_BACKGROUND) {
                    // 表明程序在后台运行
                    return true;
                } else {
                    return false;
                }
            }
        }
        return false;
    }
到了这里,关于Android 集成firebase 推送(FCM)的文章就介绍完了。如果您还想了解更多内容,请在右上角搜索TOY模板网以前的文章或继续浏览下面的相关文章,希望大家以后多多支持TOY模板网!


