🍅文章末尾有获取完整项目源码方式🍅
目录
前言
一、任务介绍
1.1 背景
1.2目的和意义
二、 实现介绍
视频演示
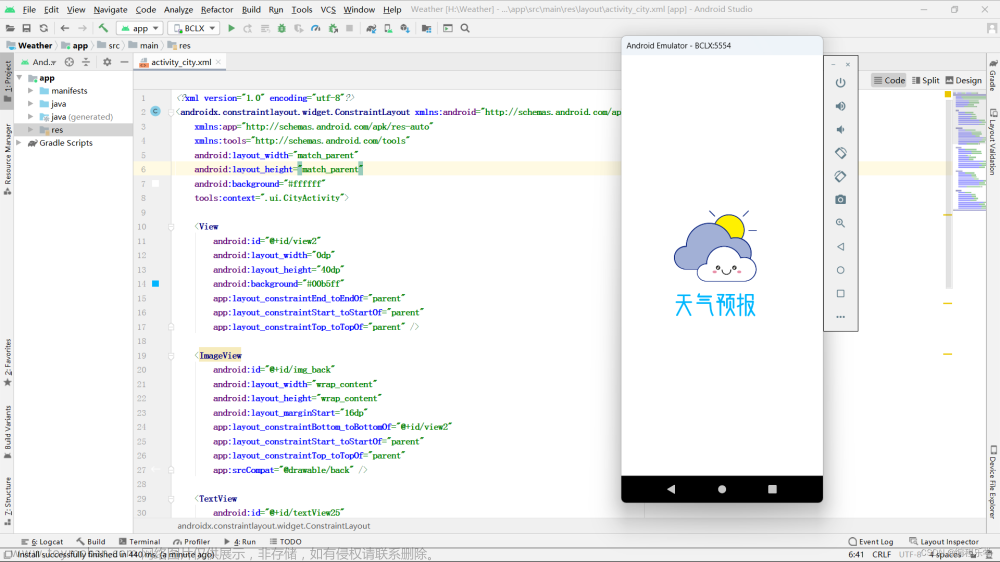
2.1 启动页实现
2.2注册页面实现
2.3 登陆页面实现
2.4 首页实现
2.5 城市管理列表页面实现
三、获取源码
前言
在使用Android Studio开发天气预报应用程序时,首先需要考虑提供给用户的功能和用户体验。这包括设计直观友好的用户界面,与实时天气数据的交互以及用户权限管理。本文将带领读者使用Java语言和Android Studio创建一个天气预报应用程序的初步框架,并介绍如何获取实时天气数据以及在应用程序中展现这些数据的方法。通过本文,读者将学习如何创建一个功能完善的天气预报应用程序,并为用户提供实时准确的天气信息。
一、任务介绍
1.1 背景
随着移动应用程序的普及,天气预报应用程序成为人们日常生活中不可或缺的一部分。无论是旅行、户外活动还是日常通勤,准确的天气信息对人们的生活有着重要影响。因此,开发一款用户友好、功能完善的天气预报应用程序具有重要意义。
1.2目的和意义
本文旨在指导读者使用Android Studio和Java语言开发一款天气预报应用程序,从而使用户能够方便获取实时的天气信息。该应用程序将帮助用户做出更为准确的出行决策,提高日常生活中对天气变化的应对能力。另外,通过学习本文所介绍的应用程序开发过程,读者能够掌握与API的交互、数据处理和用户界面设计等关键技能,为未来的移动应用开发奠定坚实的基础。
二、 实现介绍
视频演示
Android studio期末设计大作业~天气预报App
2.1 启动页实现

<?xml version="1.0" encoding="utf-8"?>
<androidx.constraintlayout.widget.ConstraintLayout xmlns:android="http://schemas.android.com/apk/res/android"
    xmlns:app="http://schemas.android.com/apk/res-auto"
    xmlns:tools="http://schemas.android.com/tools"
    android:layout_width="match_parent"
    android:layout_height="match_parent"
    android:background="#ffffff"
    tools:context=".ui.StartActivity">

    <ImageView
        android:id="@+id/imageView"
        android:layout_width="0dp"
        android:layout_height="wrap_content"
        app:layout_constraintBottom_toBottomOf="parent"
        app:layout_constraintEnd_toEndOf="parent"
        app:layout_constraintStart_toStartOf="parent"
        app:layout_constraintTop_toTopOf="parent"
        app:srcCompat="@drawable/logo" />
</androidx.constraintlayout.widget.ConstraintLayout>
2.2注册页面实现

<?xml version="1.0" encoding="utf-8"?>
<androidx.constraintlayout.widget.ConstraintLayout xmlns:android="http://schemas.android.com/apk/res/android"
    xmlns:app="http://schemas.android.com/apk/res-auto"
    xmlns:tools="http://schemas.android.com/tools"
    android:layout_width="match_parent"
    android:layout_height="match_parent"
    android:background="#ffffff"
    tools:context=".ui.RegisterActivity">

    <ImageView
        android:id="@+id/imageView5"
        android:layout_width="0dp"
        android:layout_height="230dp"
        app:layout_constraintEnd_toEndOf="parent"
        app:layout_constraintStart_toStartOf="parent"
        app:layout_constraintTop_toTopOf="parent"
        app:srcCompat="@drawable/logo" />

    <TextView
        android:id="@+id/tv_login"
        android:layout_width="wrap_content"
        android:layout_height="wrap_content"
        android:layout_marginTop="24dp"
        android:text="已有帐号,立即登陆!"
        android:textColor="#00b5ff"
        android:textStyle="bold"
        app:layout_constraintEnd_toEndOf="@+id/register_button"
        app:layout_constraintHorizontal_bias="0.429"
        app:layout_constraintStart_toStartOf="@+id/register_button"
        app:layout_constraintTop_toBottomOf="@+id/register_button" />

    <Button
        android:id="@+id/register_button"
        android:layout_width="0dp"
        android:layout_height="40dp"
        android:layout_marginTop="32dp"
        android:background="@drawable/login"
        android:text="立 即 注 册 "
        android:textColor="#fff"
        android:textSize="16sp"
        app:layout_constraintEnd_toEndOf="@+id/linearLayout"
        app:layout_constraintHorizontal_bias="0.0"
        app:layout_constraintStart_toStartOf="@+id/linearLayout"
        app:layout_constraintTop_toBottomOf="@+id/linearLayout" />

    <LinearLayout
        android:id="@+id/linearLayout"
        android:layout_width="0dp"
        android:layout_height="wrap_content"
        android:layout_marginStart="24dp"
        android:layout_marginTop="8dp"
        android:layout_marginEnd="24dp"
        android:orientation="vertical"
        app:layout_constraintEnd_toEndOf="parent"
        app:layout_constraintStart_toStartOf="parent"
        app:layout_constraintTop_toBottomOf="@+id/imageView5">

        <TextView
            android:id="@+id/textView2"
            android:layout_width="match_parent"
            android:layout_height="wrap_content"
            android:text="用户名"
            android:textColor="#000000"
            android:textSize="14sp"
            android:textStyle="bold" />

        <EditText
            android:id="@+id/username_edittext"
            android:layout_width="match_parent"
            android:layout_height="wrap_content"
            android:layout_marginTop="10dp"
            android:ems="10"
            android:hint="请输入用户名"
            android:inputType="textPersonName" />

        <TextView
            android:id="@+id/textView3"
            android:layout_width="match_parent"
            android:layout_height="wrap_content"
            android:layout_marginTop="20dp"
            android:text="密码"
            android:textColor="#000000"
            android:textSize="14sp"
            android:textStyle="bold" />

        <EditText
            android:id="@+id/password_edittext"
            android:layout_width="match_parent"
            android:layout_height="wrap_content"
            android:layout_marginTop="10dp"
            android:ems="10"
            android:hint="请输入用户密码"
            android:inputType="textPassword" />

        <TextView
            android:id="@+id/textView4"
            android:layout_width="match_parent"
            android:layout_height="wrap_content"
            android:layout_marginTop="20dp"
            android:text="重复密码"
            android:textColor="#000000"
            android:textSize="14sp"
            android:textStyle="bold" />

        <EditText
            android:id="@+id/repassword"
            android:layout_width="match_parent"
            android:layout_height="wrap_content"
            android:layout_marginTop="10dp"
            android:ems="10"
            android:hint="请再次输入用户密码"
            android:inputType="textPassword" />
    </LinearLayout>

</androidx.constraintlayout.widget.ConstraintLayout>
在 onCreate 方法中,它初始化了一些控件,并设置了点击事件监听器。当用户点击注册按钮时,它会获取用户输入的用户名和密码,并与重复密码进行比较,然后根据注册结果显示相应的消息,并在注册成功时跳转到 LoginActivity 页面。
另外,它还提供了点击事件监听器,用于在用户点击"已有账号,去登录"时跳转到登录页。
package com.example.weather.ui;

import android.content.Intent;
import android.os.Bundle;
import android.view.View;
import android.widget.Button;
import android.widget.EditText;
import android.widget.TextView;
import android.widget.Toast;

import androidx.appcompat.app.AppCompatActivity;

import com.example.weather.Data.DatabaseHelper;
import com.example.weather.R;

public class RegisterActivity extends AppCompatActivity {
    private EditText mUserNameEditText;
    private EditText mPasswordEditText,mRePasswordEditText;
    private Button registerButton;
    private TextView loginTv;

    @Override
    protected void onCreate(Bundle savedInstanceState) {
        super.onCreate(savedInstanceState);
        setContentView(R.layout.activity_register);

        // 获取控件
        mUserNameEditText = findViewById(R.id.username_edittext);
        mPasswordEditText = findViewById(R.id.password_edittext);
        mRePasswordEditText = findViewById(R.id.repassword);
        registerButton = findViewById(R.id.register_button);
        loginTv = findViewById(R.id.tv_login);


        // 点击跳转登录页
        loginTv.setOnClickListener(new View.OnClickListener() {
            @Override
            public void onClick(View v) {
                Intent intent = new Intent(RegisterActivity.this, LoginActivity.class);
                startActivity(intent);
            }
        });
        // 注册成功后跳转登录页
        registerButton.setOnClickListener(new View.OnClickListener() {
            @Override
            public void onClick(View v) {
                // 获取用户输入的内容
                String username = mUserNameEditText.getText().toString().trim();
                String password = mPasswordEditText.getText().toString().trim();
                String repassword = mRePasswordEditText.getText().toString().trim();

                if (username.isEmpty() || password.isEmpty()|| repassword.isEmpty()) {
                    Toast.makeText(getApplicationContext(), "请输入账号或密码或重复密码", Toast.LENGTH_SHORT).show();
                    return;
                }

                if (result) {
                    Toast.makeText(getApplicationContext(), "注册成功", Toast.LENGTH_SHORT).show();
                    Intent intent = new Intent(RegisterActivity.this, LoginActivity.class);
                    startActivity(intent);
                    finish();
                } else {
                    Toast.makeText(getApplicationContext(), "注册失败", Toast.LENGTH_SHORT).show();
                }
            }
        });
    }
}
2.3 登陆页面实现

<?xml version="1.0" encoding="utf-8"?>
<androidx.constraintlayout.widget.ConstraintLayout xmlns:android="http://schemas.android.com/apk/res/android"
    xmlns:app="http://schemas.android.com/apk/res-auto"
    xmlns:tools="http://schemas.android.com/tools"
    android:layout_width="match_parent"
    android:layout_height="match_parent"
    android:background="#ffffff"
    tools:context=".ui.LoginActivity">

    <ImageView
        android:id="@+id/imageView3"
        android:layout_width="0dp"
        android:layout_height="230dp"
        app:layout_constraintEnd_toEndOf="parent"
        app:layout_constraintStart_toStartOf="parent"
        app:layout_constraintTop_toTopOf="parent"
        app:srcCompat="@drawable/logo" />

    <LinearLayout
        android:id="@+id/linearLayout2"
        android:layout_width="0dp"
        android:layout_height="wrap_content"
        android:layout_marginStart="24dp"
        android:layout_marginTop="8dp"
        android:layout_marginEnd="24dp"
        android:orientation="vertical"
        app:layout_constraintEnd_toEndOf="parent"
        app:layout_constraintStart_toStartOf="parent"
        app:layout_constraintTop_toBottomOf="@+id/imageView3">

        <TextView
            android:id="@+id/textView"
            android:layout_width="match_parent"
            android:layout_height="wrap_content"
            android:text="用户名"
            android:textColor="#000000"
            android:textSize="14sp"
            android:textStyle="bold" />

        <EditText
            android:id="@+id/user"
            android:layout_width="match_parent"
            android:layout_height="wrap_content"
            android:layout_marginTop="10dp"
            android:ems="10"
            android:hint="请输入用户名"
            android:inputType="textPersonName"/>


        <TextView
            android:id="@+id/textView5"
            android:layout_width="match_parent"
            android:layout_height="wrap_content"
            android:layout_marginTop="20dp"
            android:text="密码"
            android:textColor="#000000"
            android:textSize="14sp"
            android:textStyle="bold" />

        <EditText
            android:id="@+id/pass"
            android:layout_width="match_parent"
            android:layout_height="wrap_content"
            android:layout_marginTop="10dp"
            android:ems="10"
            android:hint="请输入用户密码"
            android:inputType="textPassword" />
    </LinearLayout>

    <Button
        android:id="@+id/login_button"
        android:layout_width="0dp"
        android:layout_height="40dp"
        android:layout_marginStart="32dp"
        android:layout_marginTop="32dp"
        android:layout_marginEnd="32dp"
        android:background="@drawable/login"
        android:text="立 即 登 录 "
        android:textColor="#fff"
        android:textSize="16sp"
        app:layout_constraintEnd_toEndOf="parent"
        app:layout_constraintHorizontal_bias="0.0"
        app:layout_constraintStart_toStartOf="parent"
        app:layout_constraintTop_toBottomOf="@+id/linearLayout2" />

    <TextView
        android:id="@+id/login_register"
        android:layout_width="wrap_content"
        android:layout_height="wrap_content"
        android:layout_marginTop="8dp"
        android:text="新用户,立即注册!"
        android:textColor="#00b5ff"
        android:textStyle="bold"
        app:layout_constraintEnd_toEndOf="@+id/login_button"
        app:layout_constraintStart_toStartOf="@+id/login_button"
        app:layout_constraintTop_toBottomOf="@+id/login_button" />

</androidx.constraintlayout.widget.ConstraintLayout>
在 onCreate 方法中,它设置了一个延迟执行的 runnable 和一个计时器。计时器用于在一段时间后移除延迟执行的 runnable,以防止页面跳转后仍然执行跳转逻辑。
在 tomainActive 方法中,它启动了一个跳转到 LoginActivity 的 Intent,并在跳转完成后调用了 finish 方法注销当前页面。
package com.example.weather.ui;

import android.content.Intent;
import android.os.Bundle;
import android.view.View;
import android.widget.Button;
import android.widget.EditText;
import android.widget.TextView;
import android.widget.Toast;

import androidx.appcompat.app.AppCompatActivity;

import com.example.weather.Data.DatabaseHelper;
import com.example.weather.R;

public class LoginActivity extends AppCompatActivity {
    private TextView loginRegister;
    private EditText user;
    private EditText pass;
    private Button mLoginButton;

    @Override
    protected void onCreate(Bundle savedInstanceState) {
        super.onCreate(savedInstanceState);
        setContentView(R.layout.activity_login);
        initView();
        register();
        home();
    }

    // 登陆成功后跳转首页
    private void home() {
        mLoginButton.setOnClickListener(new View.OnClickListener() {
            @Override
            public void onClick(View v) {
                // 获取用户输入的内容
                String username = user.getText().toString().trim();
                String password = pass.getText().toString().trim();

                if (username.isEmpty() || password.isEmpty()) {
                    Toast.makeText(getApplicationContext(), "请输入账号或密码", Toast.LENGTH_SHORT).show();
                    return;
                }
                boolean result = mDatabaseHelper.checkUser(username, password);
                if (result) {
                    Toast.makeText(getApplicationContext(), "登陆成功", Toast.LENGTH_SHORT).show();
                    Intent intent = new Intent(LoginActivity.this, MainActivity.class);
                    startActivity(intent);
                } else {
                    Toast.makeText(getApplicationContext(), "账号或密码错误", Toast.LENGTH_SHORT).show();
                }
            }
        });
    }

    // 点击跳转注册页
    private void register() {
        loginRegister.setOnClickListener(new View.OnClickListener() {
            @Override
            public void onClick(View v) {
                Intent intent = new Intent(LoginActivity.this, RegisterActivity.class);
                startActivity(intent);
            }
        });
    }

    // 获取控件
    private void initView() {
        user = findViewById(R.id.user);
        pass = findViewById(R.id.pass);
        mLoginButton = findViewById(R.id.login_button);
        loginRegister = findViewById(R.id.login_register);
    }
}
2.4 首页实现
首页主要实现当前城市的天气情况,24小时和未来7天还有生活指数的显示

初始化控件:通过findViewById()方法获取布局文件中的各个控件。
check()方法:用于查询城市信息,根据传递过来的城市信息设置默认城市,并将城市信息显示在TextView中。
addCity()方法:用于添加城市,当点击添加按钮时,跳转到城市选择界面。
nowWeather()方法:用于获取当天实时天气信息。首先获取城市名称,然后通过Volley库发送网络请求,获取JSON数据。解析JSON数据,将实时天气信息设置给对应的TextView,并根据天气切换对应的图标。还处理了RecyclerView的数据源,并将数据显示在RecyclerView中。最后,设置生活指数信息,将指数信息显示在页面中。
futureWeather()方法:用于获取未来七天天气信息。发送网络请求获取JSON数据,解析JSON数据,将天气信息封装到FutureBean对象中,并设置到RecyclerView中显示。
initView()方法:用于初始化控件,通过findViewById()方法获取各个控件的引用。
package com.example.weather.ui;

import android.content.Intent;
import android.os.Bundle;
import android.view.View;
import android.widget.ImageView;
import android.widget.TextView;

import androidx.appcompat.app.AppCompatActivity;
import androidx.recyclerview.widget.LinearLayoutManager;
import androidx.recyclerview.widget.RecyclerView;

import com.android.volley.Request;
import com.android.volley.RequestQueue;
import com.android.volley.Response;
import com.android.volley.VolleyError;
import com.android.volley.toolbox.JsonObjectRequest;
import com.android.volley.toolbox.Volley;
import com.example.weather.Adapter.FutureAdapter;
import com.example.weather.Adapter.NowAdapter;
import com.example.weather.Bean.FutureBean;
import com.example.weather.Bean.NowBean;
import com.example.weather.R;

import org.json.JSONArray;
import org.json.JSONException;
import org.json.JSONObject;

import java.util.ArrayList;
import java.util.List;

public class MainActivity extends AppCompatActivity {

    // 声明控件
    private TextView cityTextView;
    private TextView tem;
    private ImageView weaImg;
    private TextView wea;
    private TextView humidity;
    private TextView win;
    private TextView winSpeed;
    private RecyclerView rvNow;
    private ImageView imgAdd;
    private RecyclerView futuer;
    private TextView chuanyi;
    private TextView daisan;
    private TextView ganmao;
    private TextView chenlian;
    private TextView ziwaixian;
    private TextView liangshai;
    private TextView xiche;
    private TextView lvyou;
    private TextView diaoyu;
    private TextView kouzhaoTextView;
    private TextView yundongTextView;
    private TextView jinghuaqiTextView;
    private String city;

    @Override
    protected void onCreate(Bundle savedInstanceState) {
        super.onCreate(savedInstanceState);
        setContentView(R.layout.activity_main);
        initView(); // 初始化控件
        check();
        addCity();//添加城市
        nowWeather(); // 获取当天实时天气
        futureWeather();//获取未来7天天气
    }

    // 查询城市
    private void check() {
        // 获取传递过来的城市信息
        String selectedCity = getIntent().getStringExtra("selected_city");

        // 判断选中城市信息是否存在,并去掉结尾的"市"或"区"
        if (selectedCity != null && (selectedCity.endsWith("市") || selectedCity.endsWith("区"))) {
            selectedCity = selectedCity.substring(0, selectedCity.length() - 1);
        } else if (city != null && (city.endsWith("市") || city.endsWith("区"))) {
            city = city.substring(0, city.length() - 1);
        }

        // 在activity中的逻辑中进行判断并设置默认城市
        if (selectedCity == null) {
            selectedCity = "西安"; // 设置默认城市为西安
        }

        // 将城市信息显示在TextView中
        cityTextView.setText(selectedCity);
    }

    // 修改添加城市
    private void addCity() {
        imgAdd.setOnClickListener(new View.OnClickListener() {
            @Override
            public void onClick(View v) {
                Intent intent = new Intent(MainActivity.this, CityActivity.class);
                startActivity(intent);
            }
        });
    }

    // 获取当天实时天气
    private void nowWeather() {

    }

    // 未来七天天气
    private void futureWeather() {

    }

    // 初始化控件
    private void initView() {
        cityTextView = findViewById(R.id.cityTextView);
        tem = findViewById(R.id.tem);
        weaImg = findViewById(R.id.wea_img);
        wea = findViewById(R.id.wea);
        humidity = findViewById(R.id.humidity);
        win = findViewById(R.id.win);
        winSpeed = findViewById(R.id.win_speed);
        rvNow = findViewById(R.id.rv_now);
        imgAdd = findViewById(R.id.img_add);
        futuer = findViewById(R.id.futuer);
        chuanyi = findViewById(R.id.chuanyi);
        daisan = findViewById(R.id.daisan);
        ganmao = findViewById(R.id.ganmao);
        chenlian = findViewById(R.id.chenlian);
        ziwaixian = findViewById(R.id.ziwaixian);
        liangshai = findViewById(R.id.liangshai);
        xiche = findViewById(R.id.xiche);
        lvyou = findViewById(R.id.lvyou);
        diaoyu = findViewById(R.id.diaoyu);
        kouzhaoTextView = findViewById(R.id.kouzhao);
        yundongTextView = findViewById(R.id.yundong);
        jinghuaqiTextView = findViewById(R.id.jinghuaqi);
    }
}
2.5 城市管理列表页面实现

<?xml version="1.0" encoding="utf-8"?>
<androidx.constraintlayout.widget.ConstraintLayout xmlns:android="http://schemas.android.com/apk/res/android"
    xmlns:app="http://schemas.android.com/apk/res-auto"
    xmlns:tools="http://schemas.android.com/tools"
    android:layout_width="match_parent"
    android:layout_height="match_parent"
    android:background="#ffffff"
    tools:context=".ui.CityActivity">

    <View
        android:id="@+id/view2"
        android:layout_width="0dp"
        android:layout_height="40dp"
        android:background="#00b5ff"
        app:layout_constraintEnd_toEndOf="parent"
        app:layout_constraintStart_toStartOf="parent"
        app:layout_constraintTop_toTopOf="parent" />

    <ImageView
        android:id="@+id/img_back"
        android:layout_width="wrap_content"
        android:layout_height="wrap_content"
        android:layout_marginStart="16dp"
        app:layout_constraintBottom_toBottomOf="@+id/view2"
        app:layout_constraintStart_toStartOf="parent"
        app:layout_constraintTop_toTopOf="parent"
        app:srcCompat="@drawable/back" />

    <TextView
        android:id="@+id/textView25"
        android:layout_width="wrap_content"
        android:layout_height="wrap_content"
        android:text="城市管理"
        android:textColor="#ffffff"
        android:textSize="20sp"
        app:layout_constraintBottom_toBottomOf="@+id/view2"
        app:layout_constraintEnd_toEndOf="@+id/view2"
        app:layout_constraintStart_toStartOf="parent"
        app:layout_constraintTop_toTopOf="parent" />

    <ImageView
        android:id="@+id/img_add"
        android:layout_width="20dp"
        android:layout_height="20dp"
        android:layout_marginEnd="16dp"
        app:layout_constraintBottom_toBottomOf="@+id/view2"
        app:layout_constraintEnd_toEndOf="parent"
        app:layout_constraintTop_toTopOf="@+id/view2"
        app:srcCompat="@drawable/add_city" />

    <ListView
        android:id="@+id/lv"
        android:layout_width="0dp"
        android:layout_height="0dp"
        android:layout_marginTop="8dp"
        android:background="#ffffff"
        app:layout_constraintBottom_toBottomOf="parent"
        app:layout_constraintEnd_toEndOf="parent"
        app:layout_constraintStart_toStartOf="parent"
        app:layout_constraintTop_toBottomOf="@+id/view2" />
</androidx.constraintlayout.widget.ConstraintLayout>
在refreshListView方法中,通过适配器清空数据,然后从数据库中获取全部数据,并将它们添加到适配器中显示。如果适配器中没有数据,则显示提示信息。最后调用适配器的notifyDataSetChanged方法刷新列表视图。
在add方法中,点击添加按钮时,会弹出一个对话框,用户可以在对话框中输入城市名称。点击确定按钮后,会判断输入的城市是否为空和是否已存在于数据库中,如果都满足,则将城市添加到数据库中,并清空输入框的内容。最后关闭对话框并刷新列表视图。
在delete方法中,长按列表项会弹出一个对话框,询问用户是否确认删除选中的城市。如果确认删除,则将选中的城市从数据库中删除,并显示删除成功的提示信息。最后刷新列表视图。
在toDetails方法中,点击城市名称会跳转到天气页面。将选中的城市信息通过Intent传递给MainActivity,并启动MainActivity。同时,结束当前的CityActivity。
在back方法中,点击返回按钮会结束当前的CityActivity,返回上一个页面。
在initView方法中,获取布局中的各个控件,并进行必要的初始化操作。其中,通过CityAdapter创建一个适配器,并将其设置为ListView的适配器。然后调用refreshListView方法来显示数据库中的数据。
package com.example.weather.ui;

import android.app.Dialog;
import android.content.DialogInterface;
import android.content.Intent;
import android.database.Cursor;
import android.graphics.Color;
import android.graphics.drawable.ColorDrawable;
import android.os.Bundle;
import android.view.View;
import android.widget.AdapterView;
import android.widget.ArrayAdapter;
import android.widget.Button;
import android.widget.EditText;
import android.widget.ImageView;
import android.widget.ListView;
import android.widget.TextView;
import android.widget.Toast;

import androidx.appcompat.app.AlertDialog;
import androidx.appcompat.app.AppCompatActivity;

import com.example.weather.Adapter.CityAdapter;
import com.example.weather.Data.CityHelper;
import com.example.weather.R;

import java.util.ArrayList;

public class CityActivity extends AppCompatActivity {

    private View view2;
    private ImageView imgBack;
    private TextView textView25;
    private ListView lv;
    private ImageView imgAdd;
    private CityHelper cityHelper;
    private ArrayAdapter<String> adapter;

    @Override
    protected void onCreate(Bundle savedInstanceState) {
        super.onCreate(savedInstanceState);
        setContentView(R.layout.activity_city);
        initView();
        back();
        add();
        delete();
        toDetails();
    }

    // 刷新适配器
    private void refreshListView() {
        // 清空适配器中的数据
        adapter.clear();

    }

    // 添加城市
    private void add() {
        imgAdd.setOnClickListener(new View.OnClickListener() {
            @Override
            public void onClick(View v) {

                // 显示对话框
                dialog.show();
            }
        });
    }

    // 长按列表项进行城市删除
    private void delete() {
        lv.setOnItemLongClickListener(new AdapterView.OnItemLongClickListener() {
            @Override
            public boolean onItemLongClick(AdapterView<?> parent, View view, int position, long id) {
                final String selectedCity = adapter.getItem(position);


            }
        });
    }

    // 点击城市名称跳转天气页面
    private void toDetails() {
        lv.setOnItemClickListener(new AdapterView.OnItemClickListener() {
            @Override
            public void onItemClick(AdapterView<?> parent, View view, int position, long id) {
                String selectedCity = adapter.getItem(position);
                // 创建Intent来跳转到MainActivity
                Intent intent = new Intent(CityActivity.this, MainActivity.class);
                // 使用putExtra方法将选中的城市信息传递给MainActivity
                intent.putExtra("selected_city", selectedCity);
                startActivity(intent);
                finish();
            }
        });

    }

    //返回主页
    private void back() {
        imgBack.setOnClickListener(new View.OnClickListener() {
            @Override
            public void onClick(View v) {
                finish();
            }
        });
    }

    // 获取控件
    private void initView() {
        view2 = findViewById(R.id.view2);
        imgBack = findViewById(R.id.img_back);
        textView25 = findViewById(R.id.textView25);
        lv = findViewById(R.id.lv);
        imgAdd = findViewById(R.id.img_add);
        cityHelper = new CityHelper(this);

    }
}
到此为止,我们的项目就已经完成了!
三、获取源码
关注公众号《编程乐学》
后台回复:24011501文章来源:https://www.toymoban.com/news/detail-856863.html
👇👇👇快捷获取方式👇👇👇文章来源地址https://www.toymoban.com/news/detail-856863.html
到了这里,关于Android Studio 实现天气预报App (简单方便展示内容超多)的文章就介绍完了。如果您还想了解更多内容,请在右上角搜索TOY模板网以前的文章或继续浏览下面的相关文章,希望大家以后多多支持TOY模板网!


